My neighbor, an older woman named Clara who keeps to herself most days, watched me wrestling with a stubborn pumpkin one chilly October afternoon. I was determined to make something from scratch, but that thing was putting up a fight. She didn’t say anything at first. Then she shuffled back inside her house and reappeared a few minutes later holding a slightly crumpled index card, the edges soft and worn.
“This is my secret,” she said, handing it over. “It’s not about the pumpkin. It’s about the butter.” I laughed, thinking she was being a little dramatic. But let me tell you, she was absolutely right. That card held the key to the best quick bread I have ever made, and I’ve tweaked it just enough over the years to call it my own. Honestly, I still feel a little guilty changing a thing, but Clara gave her blessing the last time I brought her a loaf.
The first time I made this Best Brown Butter Pumpkin Bread with Maple Glaze for a dinner party, I was nervous. I mean, you know that feeling when you bring a dessert to a gathering and hope it doesn’t get ignored? Well, that didn’t happen here. The loaf disappeared before the main course was even cleared. People were asking for the recipe, and I just smiled, thinking about Clara’s crumpled index card. This bread is that good. It’s the kind of recipe that makes you look like a hero in the kitchen without spending all day there.
Why You’ll Love This Recipe
This isn’t just another pumpkin bread recipe floating around the internet. This is the one you’ll come back to year after year, and here is why it stands out from the crowd.
- Unbelievably Rich Flavor: The brown butter adds a nutty, toasty depth that plain melted butter just can’t touch. It transforms the entire loaf into something that tastes incredibly complex.
- Perfect for Hosting: This bread is a showstopper at any fall gathering, from a casual potluck to a fancy Friendsgiving dinner. It slices beautifully and looks gorgeous on a cake stand.
- Simple Ingredients: You probably have most of these in your pantry right now. No need for a special trip to a gourmet store for this one.
- Make-Ahead Magic: You can bake this a day or two before your party. In fact, the flavors get even better after a day on the counter. Less stress for you!
- Crowd-Pleaser: I have yet to meet someone who doesn’t love this bread. Kids go for the sweetness, and adults appreciate the sophisticated brown butter note. It’s a total win-win.
This recipe is my absolute best version because of one simple technique: browning the butter. It sounds fancy, but it takes less than ten minutes and adds a world of flavor. The maple glaze on top is the perfect finishing touch—it’s not too sweet, just enough to complement the warm spices. This is comfort food that feels special enough for company, but easy enough for a Tuesday night.
What Ingredients You Will Need
This recipe relies on simple, pantry-friendly ingredients that come together to create something truly memorable. The star of the show is the brown butter, and each component plays a key role in the final texture and flavor.
For the Pumpkin Bread
- Unsalted butter, 1 cup (2 sticks or 226g): This is the heart of the recipe. Browning it deepens the flavor. I recommend using a good quality butter like Kerrygold for the best results, but any unsalted butter works.
- Granulated sugar, 1 cup (200g): Adds sweetness and helps create a tender crumb.
- Light brown sugar, packed, 1/2 cup (100g): Adds moisture and a hint of molasses flavor that pairs beautifully with the pumpkin and spices.
- Large eggs, 2: Bring the batter together and provide structure. Make sure they are at room temperature for the best emulsion.
- Vanilla extract, 1 teaspoon: Enhances all the other flavors. Use pure vanilla extract if you have it.
- Pumpkin purée, 1 can (15 oz or 425g): Not pumpkin pie filling! Make sure you grab 100% pure pumpkin purée. Libby’s is my go-to brand because it has a consistent, not-too-wet texture.
- All-purpose flour, 1 3/4 cups (220g): The foundation of the bread. Spoon and level it into your measuring cup for accuracy.
- Baking soda, 1 teaspoon: Helps the bread rise and become fluffy.
- Baking powder, 1/2 teaspoon: Gives an extra little lift.
- Salt, 1/2 teaspoon: Balances the sweetness and enhances all the flavors. I prefer fine sea salt for baking.
- Ground cinnamon, 2 teaspoons: The classic warm spice for pumpkin bread.
- Ground ginger, 1/2 teaspoon: Adds a little warmth and zing.
- Ground nutmeg, 1/4 teaspoon: A touch of earthy sweetness. Freshly grated is amazing if you have it.
- Ground cloves, 1/8 teaspoon: A tiny pinch goes a long way to add complexity.
For the Maple Glaze
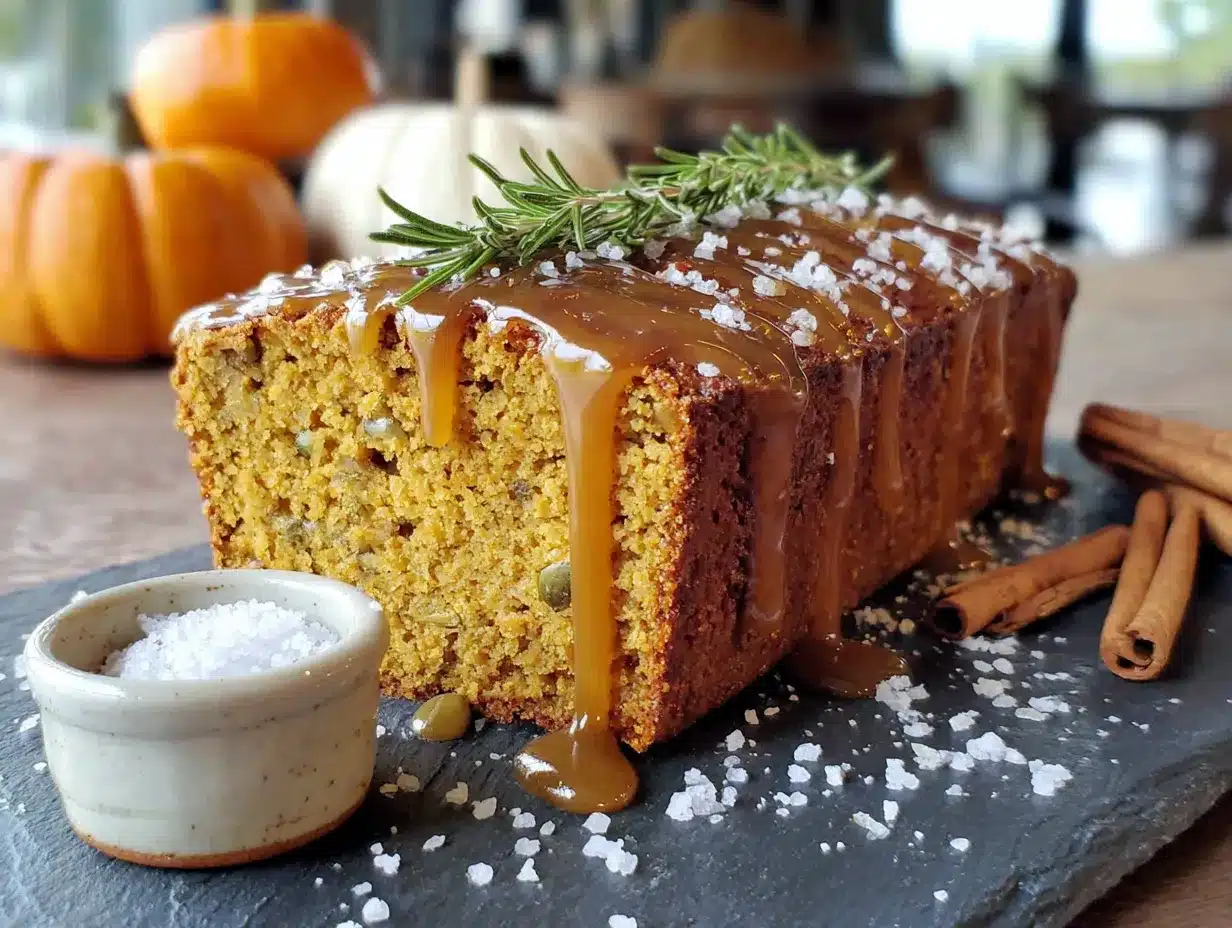
- Powdered sugar, 1 cup (120g): Sifted for a smooth glaze.
- Pure maple syrup, 2 tablespoons: Please don’t use pancake syrup here! The real stuff makes a huge difference in flavor. Grade A dark amber is lovely.
- Milk or heavy cream, 1-2 tablespoons: To thin the glaze to your desired consistency. Heavy cream makes it extra rich and luxurious.
Equipment Needed
You don’t need a lot of fancy gadgets to make this bread. Here is what you will need to get started.
- 9×5-inch Loaf Pan: This is the standard size for this recipe. A metal pan works great and gives you a nice golden crust. If you use a glass or ceramic pan, your baking time might be a little longer.
- Light-Colored Skillet or Saucepan: A light-colored pan is essential for browning butter because it lets you see the milk solids turn that perfect golden-brown color. A stainless steel or light-colored nonstick pan is perfect.
- Large Mixing Bowls: You will need one for the wet ingredients and one for the dry ingredients.
- Whisk: For combining your dry ingredients and for mixing the batter.
- Rubber Spatula: For scraping down the sides of the bowl and folding the batter together.
- Parchment Paper: Lining your loaf pan with parchment paper makes lifting the bread out a breeze and ensures clean slices.
- Cooling Rack: Essential for letting the bread cool evenly so the glaze doesn’t just melt off.
If you don’t have a light-colored pan for browning butter, just keep a close eye on it in a dark pan. The milk solids can burn quickly. A good budget-friendly option is a basic stainless steel skillet from any kitchen store.
Preparation Method
Now for the fun part! Follow these steps carefully, and you will be rewarded with the most incredible pumpkin bread you have ever tasted. Don’t rush the brown butter—it’s the secret weapon here.
- Brown the Butter: Place your 1 cup of unsalted butter in your light-colored skillet or saucepan over medium heat. Let it melt completely, stirring occasionally with a rubber spatula. Once melted, it will start to foam and sputter. Keep stirring. After a few minutes, the foam will subside, and you will see little brown specks forming at the bottom of the pan. The butter will smell nutty and amazing. This whole process takes about 5-8 minutes. As soon as it turns a deep golden amber and smells like toasted nuts, pull it off the heat immediately. Pour it into a large heatproof mixing bowl to stop it from cooking further. Let it cool for about 10 minutes.
- Preheat and Prep: While the butter cools, preheat your oven to 350°F (175°C). Grease your 9×5-inch loaf pan and line it with a strip of parchment paper, leaving some overhang on the long sides. This is your handle for lifting the bread out later.
- Mix the Wet Ingredients: To the bowl with your slightly cooled brown butter, add the 1 cup of granulated sugar and 1/2 cup of packed light brown sugar. Whisk them together until the mixture looks smooth and combined. It will look a little grainy, and that’s totally fine. Next, add the 2 large eggs, one at a time, whisking well after each one until the batter is glossy. Stir in the 1 teaspoon of vanilla extract. Finally, add the entire 15-ounce can of pumpkin purée and whisk until everything is completely smooth and uniform.
- Combine the Dry Ingredients: In a separate medium bowl, whisk together the 1 3/4 cups of all-purpose flour, 1 teaspoon of baking soda, 1/2 teaspoon of baking powder, 1/2 teaspoon of salt, 2 teaspoons of cinnamon, 1/2 teaspoon of ginger, 1/4 teaspoon of nutmeg, and 1/8 teaspoon of cloves. Whisking ensures the baking soda, baking powder, and spices are evenly distributed throughout the flour.
- Fold the Batter Together: Pour the dry ingredients into the bowl with the wet ingredients. Use your rubber spatula to gently fold everything together. You want to mix just until you no longer see streaks of flour. A few small lumps are perfectly fine. Over-mixing will make your bread tough, so be gentle here. The batter will be thick and smell incredible.
- Bake the Bread: Scrape the batter into your prepared loaf pan and spread it into an even layer. Give the pan a little tap on the counter to release any air bubbles. Bake for 55-65 minutes, or until a toothpick inserted into the center comes out clean or with just a few moist crumbs attached. If the top is browning too quickly after 40 minutes, tent the pan loosely with a piece of aluminum foil.
- Cool Completely: Let the bread cool in the pan for about 15 minutes. Then, using the parchment paper sling, lift the bread out and transfer it to a wire cooling rack. Let it cool completely before adding the glaze. This is very important—if the bread is even a little warm, the glaze will just slide right off and soak in, and you won’t get those pretty white ribbons on top.
- Make the Glaze: While the bread is cooling, make the maple glaze. In a small bowl, whisk together the 1 cup of sifted powdered sugar and 2 tablespoons of pure maple syrup. Add milk or heavy cream, 1 tablespoon at a time, until you reach a thick but pourable consistency. You want it to be thick enough to hold its shape on the bread but thin enough to drizzle.
- Glaze and Serve: Once the bread is completely cool, drizzle the maple glaze over the top. Let it set for about 10 minutes before slicing. This gives the glaze a chance to firm up just a little, making for cleaner slices.
Cooking Tips & Techniques
Over the years, I have made this bread more times than I can count, and I have learned a few things the hard way. Here are my best tips to make sure yours turns out perfect every single time.
- Don’t Walk Away from the Butter: Browning butter is a quick process, and it can go from perfect to burnt in a matter of seconds. I once got distracted by a phone call and ended up with black, bitter butter. Trust me, it is not a good look. Stay close, keep stirring, and watch for that amber color and nutty aroma.
- Room Temperature Eggs Matter: Cold eggs can seize up your brown butter and create a lumpy batter. Just place your eggs in a bowl of warm water for 5-10 minutes before you start, and you are good to go.
- Measure Your Flour Correctly: This is probably the most common baking mistake. Don’t scoop your measuring cup into the flour bag. Instead, fluff the flour with a spoon, then spoon it into your measuring cup and level it off with a knife. This prevents you from packing in too much flour, which leads to a dry, dense loaf.
- Use the Toothpick Test: Ovens vary, so the baking time is a guideline. Start checking your bread at the 55-minute mark. If the toothpick comes out with wet batter, give it more time. If it comes out with a few moist crumbs, it is done.
- Patience with Cooling: I know it is tempting to slice into that warm, fragrant loaf immediately. But the texture will be gummy if it is too hot. And the glaze needs a completely cool surface to stick to. Let it cool, I promise it is worth the wait.
Variations & Adaptations
This recipe is fantastic as written, but it is also a wonderful base for getting creative. Here are some of my favorite ways to switch it up.
- Add Mix-Ins: Fold in 1 cup of chopped pecans or walnuts along with the flour for a lovely crunch. For a sweeter touch, toss in 1/2 cup of chocolate chips or butterscotch chips. I once added a cup of dried cranberries and some white chocolate chips, and it was a huge hit at a holiday party.
- Make it Gluten-Free: You can substitute the all-purpose flour with a good quality 1-to-1 gluten-free baking flour blend. I have had great results with the Cup4Cup brand. Just make sure your blend contains xanthan gum for structure. The texture will be slightly more tender, but it is still delicious.
- Try a Different Glaze: The maple glaze is a classic, but a simple cream cheese glaze is also incredible. Just whisk together 4 ounces of softened cream cheese, 1/2 cup of powdered sugar, and a splash of milk until smooth. A dusting of powdered sugar is the easiest option if you want to keep it simple.
- Spice It Up: If you love a really spiced bread, feel free to increase the cinnamon to a full tablespoon and add a pinch of cardamom. It gives the bread a warm, almost chai-like flavor that is perfect for fall.
- Make Muffins Instead: This batter makes about 18 standard-sized muffins. Just fill your lined muffin tins about 3/4 full and bake at 350°F (175°C) for 18-22 minutes. They are perfect for a grab-and-go breakfast or for packing in lunchboxes.
Serving & Storage Suggestions
This bread is a star on its own, but here is how to make it shine even brighter when you are hosting.
Serving: Serve the bread at room temperature. It is beautiful just sliced and arranged on a wooden board or a cake stand. For a more decadent dessert, warm a slice in the microwave for about 10-15 seconds and top it with a scoop of vanilla bean ice cream or a dollop of lightly sweetened whipped cream. A drizzle of extra maple syrup on top never hurts either.
This bread pairs wonderfully with a hot cup of coffee, a spicy chai latte, or a glass of cold apple cider. If you are serving it at a brunch, it goes beautifully alongside a frittata or a fresh fruit salad.
Storage: Store any leftover bread in an airtight container at room temperature for up to 4 days. The glaze will soften slightly, but the bread will stay incredibly moist. In fact, I think it tastes even better on day two!
Freezing: This bread freezes like a dream. You can freeze the whole loaf or individual slices. If freezing the whole loaf, wrap it tightly in two layers of plastic wrap and then a layer of aluminum foil. It will keep for up to 3 months. When you are ready to enjoy it, let it thaw overnight in the refrigerator or on the counter for a few hours. I recommend glazing the bread after it has thawed for the best presentation.
Nutritional Information & Benefits
While this is definitely a treat, it does have some redeeming qualities. Pumpkin is packed with Vitamin A and fiber, which is great for your immune system and digestion. The brown butter, while indulgent, adds a richness that means a small slice is incredibly satisfying.
Here is an approximate nutritional breakdown for one slice (based on 12 slices per loaf):
- Calories: 340
- Fat: 17g
- Carbohydrates: 46g
- Protein: 4g
- Fiber: 2g
- Sugar: 30g
Dietary Considerations: This recipe contains dairy (butter, cream) and gluten (flour). It can be made gluten-free with a 1-to-1 flour blend. It is nut-free as written, but be mindful if you add nuts as a variation.
From my perspective, this is a recipe for balance. It is a homemade, real-food treat that brings people together. I feel much better serving a slice of this to my guests than something from a box, and the joy it brings is absolutely worth it.
Conclusion
This Best Brown Butter Pumpkin Bread with Maple Glaze is more than just a recipe—it is a little piece of autumn magic that you can share with the people you love. It is the bread that will make your house smell like a cozy bakery and your guests feel truly welcomed. The brown butter adds a layer of sophistication that surprises everyone, and the maple glaze is the perfect sweet finish.
I really hope you give this recipe a try. Don’t be afraid to make it your own—add your favorite nuts, swap the glaze, or bake it into muffins. The most important thing is to have fun in the kitchen and share the results with the people around your table.
If you make this bread, I would love to hear about it! Leave a comment below and let me know how it turned out, or tag me in your photos on social media. Your feedback and adaptations are what keep this community of home bakers so wonderful. Happy baking, friends!
Frequently Asked Questions
Can I use salted butter for browning?
You can, but I recommend using unsalted so you have full control over the salt level in the final bread. If you only have salted butter, just reduce the added salt in the recipe to 1/4 teaspoon.
Why did my brown butter burn?
Burned brown butter usually happens when the heat is too high or you step away from the pan. Keep the heat on medium and stir constantly. As soon as you see golden-brown specks and smell that nutty aroma, pull it off the heat immediately.
Can I use fresh pumpkin purée?
Absolutely! Just make sure to strain it well. Fresh pumpkin can be much more watery than canned. Place your fresh purée in a cheesecloth-lined sieve over a bowl for about an hour to drain off the excess liquid. Otherwise, your bread might turn out too wet.
My bread is still raw in the middle. What went wrong?
This usually happens if the oven temperature is too low or the pan is too full. Make sure your oven is properly preheated to 350°F (175°C). If the top is browning too quickly, tent it with foil and continue baking until a toothpick comes out clean.
Can I make this bread vegan?
Yes, with a few swaps. Use a high-quality vegan butter for browning (like Miyoko’s) and replace the eggs with flax eggs (2 tablespoons ground flaxseed mixed with 6 tablespoons water). For the glaze, use a plant-based milk like oat or almond milk. The texture will be slightly denser, but it is still delicious.
Pin This Recipe!
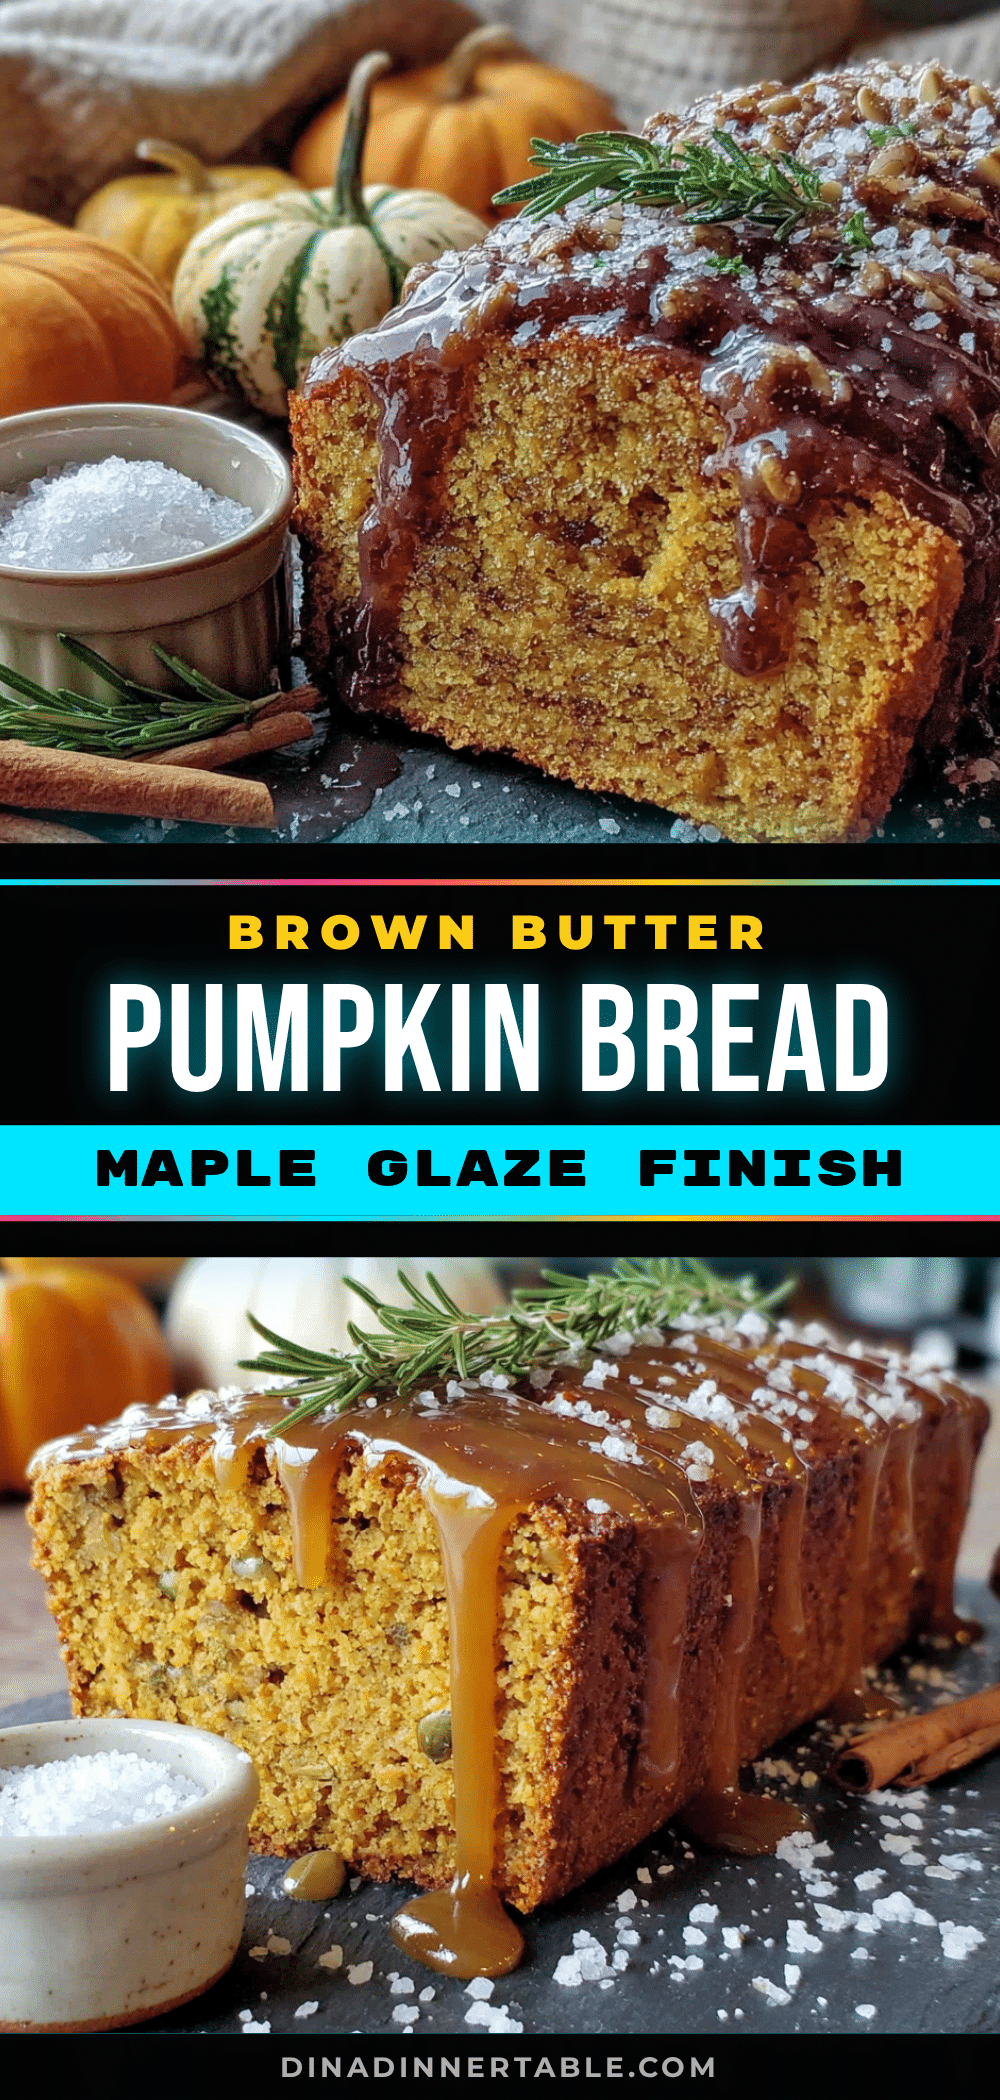
Best Brown Butter Pumpkin Bread Recipe with Maple Glaze
This is the best brown butter pumpkin bread with a maple glaze. The brown butter adds a nutty, toasty depth that transforms the loaf into something incredibly complex, and the maple glaze is the perfect sweet finish.
- Prep Time: 15 minutes
- Cook Time: 55-65 minutes
- Total Time: 1 hour 20 minutes
- Yield: 12 servings 1x
- Category: Dessert
- Cuisine: American
Ingredients
- 1 cup (2 sticks or 226g) unsalted butter
- 1 cup (200g) granulated sugar
- 1/2 cup (100g) packed light brown sugar
- 2 large eggs, at room temperature
- 1 teaspoon vanilla extract
- 1 can (15 oz or 425g) pumpkin purée (not pumpkin pie filling)
- 1 3/4 cups (220g) all-purpose flour
- 1 teaspoon baking soda
- 1/2 teaspoon baking powder
- 1/2 teaspoon salt
- 2 teaspoons ground cinnamon
- 1/2 teaspoon ground ginger
- 1/4 teaspoon ground nutmeg
- 1/8 teaspoon ground cloves
- 1 cup (120g) powdered sugar, sifted
- 2 tablespoons pure maple syrup
- 1–2 tablespoons milk or heavy cream
Instructions
- Brown the Butter: Place 1 cup unsalted butter in a light-colored skillet or saucepan over medium heat. Melt completely, stirring occasionally. Continue stirring until the butter foams, then subsides, and brown specks form at the bottom. This takes about 5-8 minutes. When it turns deep golden amber and smells nutty, remove from heat immediately. Pour into a large heatproof mixing bowl and let cool for about 10 minutes.
- Preheat and Prep: Preheat oven to 350°F (175°C). Grease a 9×5-inch loaf pan and line with parchment paper, leaving overhang on the long sides.
- Mix the Wet Ingredients: To the bowl with cooled brown butter, add 1 cup granulated sugar and 1/2 cup packed light brown sugar. Whisk until smooth and combined. Add 2 large eggs, one at a time, whisking well after each. Stir in 1 teaspoon vanilla extract. Add the entire 15-ounce can of pumpkin purée and whisk until smooth.
- Combine the Dry Ingredients: In a separate medium bowl, whisk together 1 3/4 cups all-purpose flour, 1 teaspoon baking soda, 1/2 teaspoon baking powder, 1/2 teaspoon salt, 2 teaspoons cinnamon, 1/2 teaspoon ginger, 1/4 teaspoon nutmeg, and 1/8 teaspoon cloves.
- Fold the Batter Together: Pour the dry ingredients into the wet ingredients. Use a rubber spatula to gently fold until just combined and no streaks of flour remain. Do not over-mix.
- Bake the Bread: Scrape batter into the prepared loaf pan and spread evenly. Tap the pan on the counter to release air bubbles. Bake for 55-65 minutes, or until a toothpick inserted into the center comes out clean or with a few moist crumbs. If the top browns too quickly after 40 minutes, tent loosely with foil.
- Cool Completely: Let the bread cool in the pan for 15 minutes. Then lift out using the parchment sling and transfer to a wire cooling rack. Cool completely before glazing.
- Make the Glaze: In a small bowl, whisk together 1 cup sifted powdered sugar and 2 tablespoons pure maple syrup. Add milk or heavy cream, 1 tablespoon at a time, until thick but pourable.
- Glaze and Serve: Once the bread is completely cool, drizzle the maple glaze over the top. Let set for about 10 minutes before slicing.
Notes
Don’t walk away from the butter while browning; it can burn quickly. Use room temperature eggs for best emulsion. Measure flour correctly by spooning and leveling. Cool bread completely before glazing to prevent the glaze from sliding off. Store in an airtight container at room temperature for up to 4 days. Freezes well for up to 3 months.
Nutrition
- Serving Size: 1 slice
- Calories: 340
- Sugar: 30
- Sodium: 280
- Fat: 17
- Saturated Fat: 10
- Carbohydrates: 46
- Fiber: 2
- Protein: 4
Keywords: brown butter, pumpkin bread, maple glaze, fall recipe, quick bread, pumpkin, maple