My sister had claimed to hate pumpkin desserts for as long as I could remember. Years. Then last Thanksgiving, I caught her scraping the last bit of filling from the pan of these no-bake pumpkin cheesecake bars with ginger crust when she thought nobody was looking. She had a smear of cream cheese on her chin and this look on her face like a kid caught stealing cookies. I didn’t say a word. I just handed her a napkin and smiled.
Look, I get it. Pumpkin can be a tough sell. It’s one of those ingredients people have strong opinions about—either you’re all in on the pumpkin spice life or you’d rather eat pretty much anything else. My sister was firmly in the second camp. But these bars? They’re different. The filling is light and creamy, not heavy like some baked pumpkin desserts. And that ginger crust? Honestly, it’s the secret weapon. The snap of the ginger cookies against the smooth, spiced cheesecake filling creates something that even the most stubborn pumpkin skeptic can’t resist.
I stumbled onto this recipe by accident, honestly. I was trying to make a traditional pumpkin cheesecake for a potluck, but my oven decided to quit on me that morning. Typical, right? I stood there staring at the cold oven, already picturing showing up empty-handed. Then I remembered a no-bake cheesecake I’d made years ago and thought, why not try it with pumpkin? Maybe you’ve been there—when a kitchen disaster turns into something surprisingly wonderful. That day, these bars saved me. And now I make them on purpose, even when the oven is working just fine.
Why You’ll Love This Recipe
These no-bake pumpkin cheesecake bars with ginger crust have become my go-to for family gatherings, and for good reason. They’re the kind of dessert that makes people close their eyes after the first bite.
- No oven required: This is a game-changer when your oven is occupied with the main dish or when it’s just too hot to turn it on. The filling sets up beautifully in the refrigerator with zero baking time.
- Budget-friendly ingredients: You probably already have most of what you need in your pantry. No fancy cream cheese or imported spices required. This fits right into a sensible grocery budget.
- Picky eater approved: My sister is living proof. The ginger crust adds a familiar cookie flavor that even pumpkin-skeptical kids will enjoy. The filling is mild and creamy, not overwhelmingly pumpkin-y.
- Make-ahead magic: These bars actually taste better after sitting overnight in the fridge. The flavors meld together and the texture firms up perfectly. Perfect for busy families who want dessert ready when they need it.
- Crowd-pleaser every time: I’ve brought these to potlucks, holiday dinners, and casual get-togethers. The pan always comes back empty. People ask for the recipe constantly.
What makes these different from other pumpkin cheesecake recipes is the crust. Most recipes use graham crackers, but ginger cookies add a spicy warmth that complements the pumpkin filling so much better. Plus, the no-bake method means the filling stays light and airy instead of dense and heavy. It’s comfort food that feels a little bit fancy but requires almost no effort.
What Ingredients You Will Need
This recipe uses simple, wholesome ingredients to deliver bold flavor and satisfying texture without the fuss. Most of these are pantry staples you might already have on hand.
For the Ginger Crust
- 2 cups ginger snap cookies, crushed (about 200g or 7 ounces — I recommend Anna’s Ginger Thins or Trader Joe’s Triple Ginger Snaps for the best flavor)
- 6 tablespoons unsalted butter, melted (85g — use salted butter if that’s what you have, just reduce any added salt)
- 2 tablespoons granulated sugar (25g — optional, but helps the crust hold together better)
- Pinch of salt (only if using unsalted butter)
For the Pumpkin Cheesecake Filling
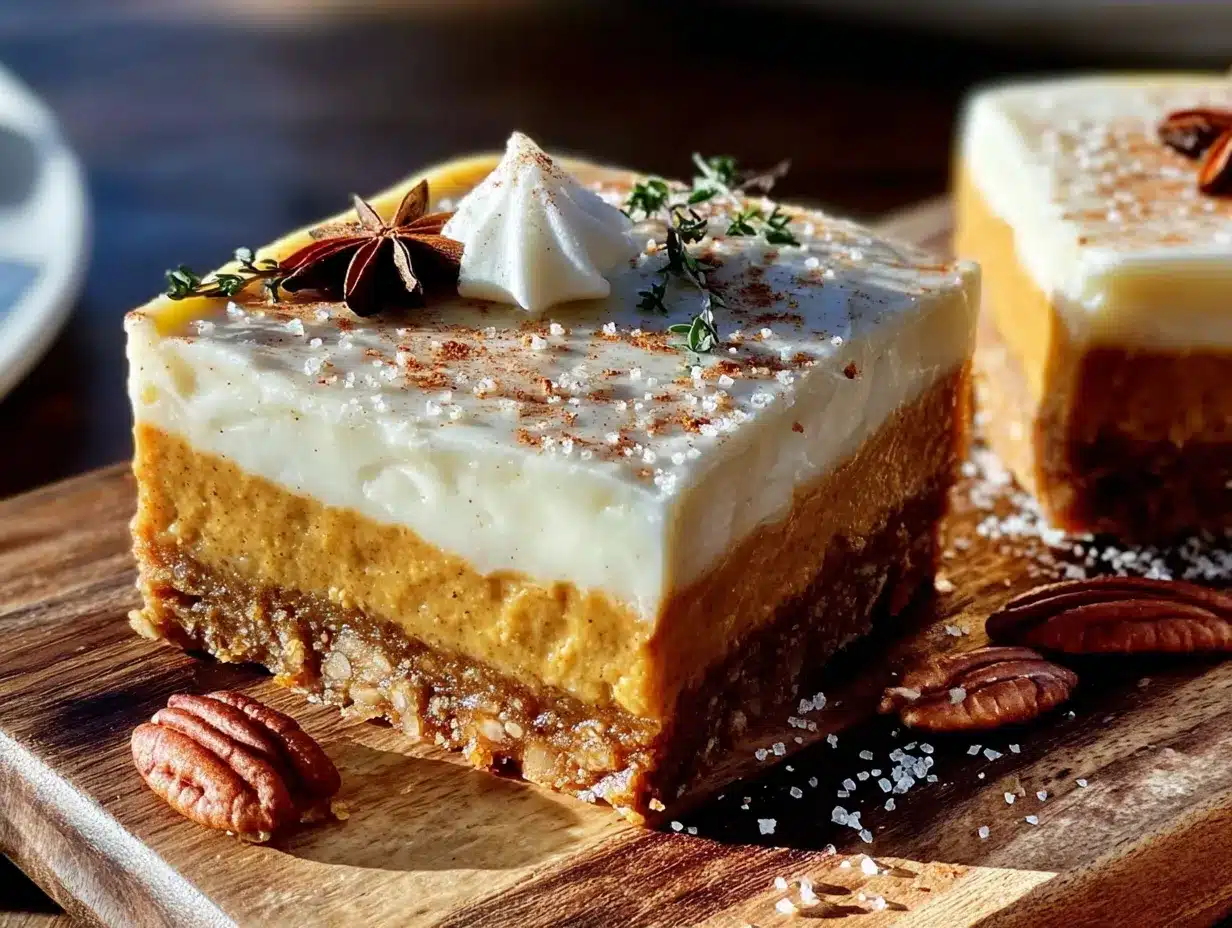
- 16 ounces cream cheese, softened to room temperature (450g — two standard blocks, full-fat works best for creamy texture)
- 1 cup pumpkin puree (240g — not pumpkin pie filling, make sure it’s 100% pure pumpkin)
- 3/4 cup powdered sugar (90g — gives the filling a silky smooth texture without graininess)
- 1/2 cup granulated sugar (100g)
- 1 teaspoon vanilla extract (5ml)
- 1 teaspoon pumpkin pie spice (2g — or make your own with cinnamon, nutmeg, ginger, and cloves)
- 1/2 teaspoon ground cinnamon (1g)
- 1/4 teaspoon salt (1g)
- 1 cup heavy whipping cream (240ml — cold, for whipping into stiff peaks)
For the Topping (Optional but Recommended)
- 1/2 cup heavy whipping cream (120ml)
- 2 tablespoons powdered sugar (15g)
- 1/4 teaspoon vanilla extract (1ml)
- Ground cinnamon or pumpkin pie spice for dusting
When choosing cream cheese, go for the block style, not the spreadable kind in a tub. The blocks have a higher fat content and less water, which means your filling will set up properly. For the pumpkin puree, Libby’s is my go-to brand because it’s consistently thick and not watery. If you’re using a store brand, just make sure to blot any excess moisture with a paper towel before mixing.
You can substitute the heavy cream with coconut cream for a dairy-free option, though the texture will be slightly less firm. For a lower sugar version, use a sugar substitute like Swerve in place of both sugars, but know that the texture might be slightly different.
Equipment Needed
You don’t need a fancy kitchen to make these bars. Here’s what you’ll need:
- 9×9 inch square baking pan (23×23 cm — an 8×8 works too, your bars will just be thicker)
- Parchment paper (for lining the pan — makes lifting the bars out so much easier)
- Mixing bowls (one large, one medium)
- Electric hand mixer or stand mixer (you can do this by hand with a whisk, but your arm will thank you for using a mixer)
- Food processor or zip-top bag and rolling pin (for crushing the ginger snaps)
- Rubber spatula (for scraping every last bit of filling)
- Measuring cups and spoons
- Plastic wrap (for covering the pan while it chills)
If you don’t have a food processor, don’t worry. Just put the cookies in a sturdy zip-top bag, seal it, and go to town with a rolling pin or even a heavy skillet. It’s a great way to work out any frustration! I’ve done it many times and it works just as well.
For the pan, glass or metal both work fine. Just make sure to line it well with parchment paper, leaving some overhang on two sides. Those parchment handles are lifesavers when it’s time to lift the whole block of bars out for cutting.
Preparation Method
Let me walk you through this step by step. It’s easier than you think.
- Prepare your pan. Cut a piece of parchment paper to fit the bottom of your 9×9 pan, leaving about 2 inches of overhang on two opposite sides. Press it in so it lays flat. This will be your handle later.
- Make the ginger crust. Crush your ginger snap cookies into fine crumbs. You want them uniform—no big chunks. If using a food processor, pulse about 20 times until they look like sand. If using the bag method, crush until you can’t see any large pieces. You should have about 2 cups of crumbs.
- Mix the crust ingredients. In a medium bowl, combine the cookie crumbs, melted butter, sugar, and salt if using. Stir with a fork until every crumb is coated and the mixture looks like wet sand. It should hold together when you squeeze a handful.
- Press the crust into the pan. Dump the crumb mixture into your prepared pan. Use the bottom of a measuring cup or a flat glass to press it down firmly and evenly. Don’t skip this step—a firmly packed crust won’t crumble when you cut the bars. Pop the pan in the refrigerator while you make the filling.
- Soften the cream cheese. This is important. Your cream cheese needs to be at room temperature, or you’ll end up with lumpy filling. Take it out of the fridge about 30 minutes before you start. If you forgot, you can microwave it in 10-second bursts, but be careful not to melt it.
- Beat the cream cheese. In a large bowl, beat the softened cream cheese with an electric mixer on medium speed until smooth and fluffy, about 2 minutes. Scrape down the sides of the bowl with your spatula.
- Add the sugars and spices. Add the powdered sugar, granulated sugar, vanilla extract, pumpkin pie spice, cinnamon, and salt. Beat on medium speed until everything is well combined and smooth, about 1 minute. Scrape the bowl again.
- Add the pumpkin puree. Add the pumpkin puree and beat on low speed until just combined. Don’t overmix here—you don’t want to incorporate too much air. The mixture should be a uniform orange color and smell amazing.
- Whip the cream. In a separate medium bowl, pour in the cold heavy cream. Using clean beaters, whip the cream on medium-high speed until stiff peaks form. This takes about 3-4 minutes. You’ll know it’s ready when you lift the beaters and the cream stands up in peaks that don’t droop. Be careful not to over-whip or you’ll end up with butter.
- Fold the cream into the pumpkin mixture. This is the most important step. Add about one-third of the whipped cream to the pumpkin mixture and gently fold it in with your rubber spatula. Use a cutting motion through the center, then scrape along the bottom and fold over. Add the remaining whipped cream in two more additions, folding gently each time until no white streaks remain. The mixture should be light, airy, and uniform in color.
- Spread the filling over the crust. Remove the pan from the refrigerator. Spoon the filling onto the chilled crust and spread it evenly with your spatula. Give the pan a few gentle taps on the counter to release any air bubbles.
- Chill the bars. Cover the pan with plastic wrap and refrigerate for at least 6 hours, but overnight is best. The filling needs time to set up properly. I know it’s tempting to rush, but trust me—patience pays off here.
- Make the whipped topping. Just before serving, whip the remaining cream with powdered sugar and vanilla until soft peaks form. Spread or pipe it over the chilled bars.
- Cut and serve. Use the parchment handles to lift the entire block of bars out of the pan. Place it on a cutting board and use a sharp knife to cut into squares. Wipe the knife clean between cuts for neat edges. Dust with cinnamon or pumpkin pie spice before serving.
Cooking Tips & Techniques
I’ve made these bars more times than I can count, and I’ve learned a few things along the way. Here are my best tips:
Don’t skip the chilling time. I know, I know—six hours feels like forever when you’re craving pumpkin cheesecake. But the filling needs that time to set properly. If you cut into it too soon, you’ll end up with a soupy mess. Overnight chilling gives you perfect, clean slices every time.
Room temperature ingredients matter. Cold cream cheese creates lumps that are nearly impossible to get out. Let it sit on the counter for at least 30 minutes. Same goes for the pumpkin puree—it should be at room temperature too. Your filling will be silky smooth instead of bumpy.
Press that crust firmly. I learned this lesson the hard way. My first batch had a crust that fell apart into crumbs the moment I tried to lift a bar. Now I use the bottom of a flat measuring cup and really lean into it. You want the crust to be compact and solid.
Fold, don’t stir. When you’re adding the whipped cream to the pumpkin mixture, use a gentle folding motion. Stirring vigorously will deflate all that air you just whipped into the cream, and your filling won’t be light and fluffy. Be patient and gentle.
Use a hot knife for clean cuts. Run your knife under hot water, dry it off, then make your cut. The heat helps the knife glide through the cold cheesecake without dragging or sticking. Wipe the blade clean between each cut for the prettiest bars.
One mistake I made: I once tried to speed things up by putting the pan in the freezer instead of the fridge. The edges froze while the center stayed soft. Not my finest moment. Stick with the refrigerator—it’s worth the wait.
Variations & Adaptations
One of the best things about this recipe is how flexible it is. Here are some variations I’ve tried and loved:
Gluten-free version: Use gluten-free ginger snap cookies for the crust. There are several good brands available now, and the texture comes out just as crunchy and delicious. The filling is naturally gluten-free, so this is an easy swap.
Dairy-free option: Substitute the cream cheese with a good dairy-free alternative like Kite Hill or Miyoko’s. Use coconut cream instead of heavy whipping cream. The texture will be slightly softer, but the flavor is still fantastic. I’ve made this for a friend with dairy allergies and she couldn’t tell the difference.
Chocolate ginger twist: Add 1/4 cup of melted dark chocolate to the filling before folding in the whipped cream. The chocolate pairs beautifully with the pumpkin and ginger flavors. Drizzle extra melted chocolate over the top before serving for a fancy finish.
Maple pecan version: Replace the granulated sugar in the filling with maple syrup (reduce the amount slightly since maple syrup is sweeter). Top the finished bars with chopped toasted pecans and a drizzle of maple syrup. This is my favorite fall variation.
Individual servings: Instead of using a 9×9 pan, press the crust into the bottom of small mason jars or individual serving cups. Spoon the filling on top and chill. These make adorable gifts or party desserts. Just make sure to leave room for the whipped topping.
Spice it up: If you love a strong ginger flavor, add 1/2 teaspoon of ground ginger to the crust mixture. You can also add a pinch of cayenne pepper to the filling for a subtle heat that catches you by surprise. My brother-in-law loves this version.
Serving & Storage Suggestions
These bars are best served cold, straight from the refrigerator. The filling is firm but creamy, and the crust has a satisfying snap. Here’s how to make them shine:
Serving temperature: Take the bars out of the fridge about 10 minutes before serving. This takes the chill off just enough to let the flavors bloom without making the filling too soft. If you’re adding the whipped topping, do it right before serving so it stays fresh and fluffy.
Presentation ideas: Arrange the bars on a platter and dust with cinnamon or pumpkin pie spice. Add a few whole ginger snap cookies around the edges for decoration. For a holiday touch, top each bar with a small dollop of whipped cream and a sprinkle of candied ginger.
What to serve with them: A cup of hot coffee or spiced chai tea is perfect alongside these bars. For a dessert spread, they pair beautifully with apple crisp or a simple vanilla pound cake. If you’re feeling indulgent, drizzle warm caramel sauce over each bar before serving.
Storage instructions: Store leftover bars in an airtight container in the refrigerator for up to 5 days. Place a layer of parchment paper between stacked bars to prevent them from sticking together. The crust will soften slightly over time, but the flavor actually improves after a day or two.
Freezing instructions: These bars freeze beautifully. Cut them into individual squares, place them on a baking sheet lined with parchment, and freeze until solid. Then transfer to a freezer-safe container or zip-top bag. They’ll keep for up to 3 months. Thaw in the refrigerator overnight before serving. Don’t add the whipped topping until after thawing.
Leftover ideas: Crumble leftover bars over vanilla ice cream for an instant sundae. Or spread a layer on toast for a decadent breakfast treat—don’t judge me, it’s delicious.
Nutritional Information & Benefits
Here’s the nutritional breakdown for one bar (based on 16 servings):
| Nutrient | Amount per Serving |
|---|---|
| Calories | 285 |
| Total Fat | 19g |
| Saturated Fat | 11g |
| Cholesterol | 55mg |
| Sodium | 210mg |
| Total Carbohydrates | 26g |
| Dietary Fiber | 1g |
| Sugars | 18g |
| Protein | 4g |
| Vitamin A | 45% DV |
| Calcium | 4% DV |
| Iron | 6% DV |
Pumpkin is packed with vitamin A, which is great for eye health and immune function. The ginger in the crust has anti-inflammatory properties and can help with digestion. Cream cheese provides calcium and protein, though it’s also higher in fat, so enjoy these bars in moderation as part of a balanced diet.
These bars are not gluten-free unless you use gluten-free cookies, and they contain dairy. For a lower sugar option, you can reduce the granulated sugar to 1/4 cup, though the texture will be slightly less firm. The recipe is vegetarian-friendly.
Conclusion
These no-bake pumpkin cheesecake bars with ginger crust have earned a permanent spot in my recipe collection. They’re the dessert I turn to when I need something impressive without spending hours in the kitchen. The creamy pumpkin filling, the spicy ginger crunch, the way they come together in minutes—it’s a winning combination that never fails.
I love that this recipe proves you don’t need an oven to make something special. It’s perfect for holiday gatherings when the oven is full, for hot summer days when you can’t stand turning on the heat, or for any day when you just want a little taste of fall without the fuss.
What I love most, though, is watching people take that first bite. The way their eyes widen a little. The way they go back for seconds. Even my sister, the pumpkin hater, now asks me to bring these to every family dinner. She still won’t admit she was wrong, but I see her sneaking that second bar. And honestly? That’s all the validation I need.
I’d love to hear how these turn out for you! Drop a comment below and let me know if you tried any variations or if your family loved them as much as mine does. Happy no-baking, friends!
Frequently Asked Questions
Can I use pumpkin pie filling instead of pumpkin puree?
No, I wouldn’t recommend it. Pumpkin pie filling already has sugar and spices added, which will make your bars too sweet and throw off the spice balance. Stick with 100% pure pumpkin puree for the best results.
How long do these bars need to chill?
At least 6 hours, but overnight is ideal. The filling needs time to firm up so you can cut clean slices. If you’re in a rush, 4 hours might work, but the bars will be softer and harder to cut neatly.
Can I make these bars vegan?
Yes, with some adjustments. Use dairy-free cream cheese, coconut cream instead of heavy cream, and vegan butter. Make sure your ginger snap cookies are vegan too—most are, but check the label. The texture will be slightly softer but still delicious.
Why is my filling lumpy?
Lumpy filling usually means your cream cheese was too cold when you started. Let it come to room temperature fully before beating. If you still get lumps, try beating the mixture for an extra minute or two, or strain it through a fine-mesh sieve before adding the whipped cream.
Can I double this recipe?
Absolutely! Double all the ingredients and use a 9×13 inch pan instead of a 9×9. The chilling time will be about the same, though you might need an extra hour or two since the filling is thicker. Just make sure your mixing bowl is big enough to hold everything.
Pin This Recipe!
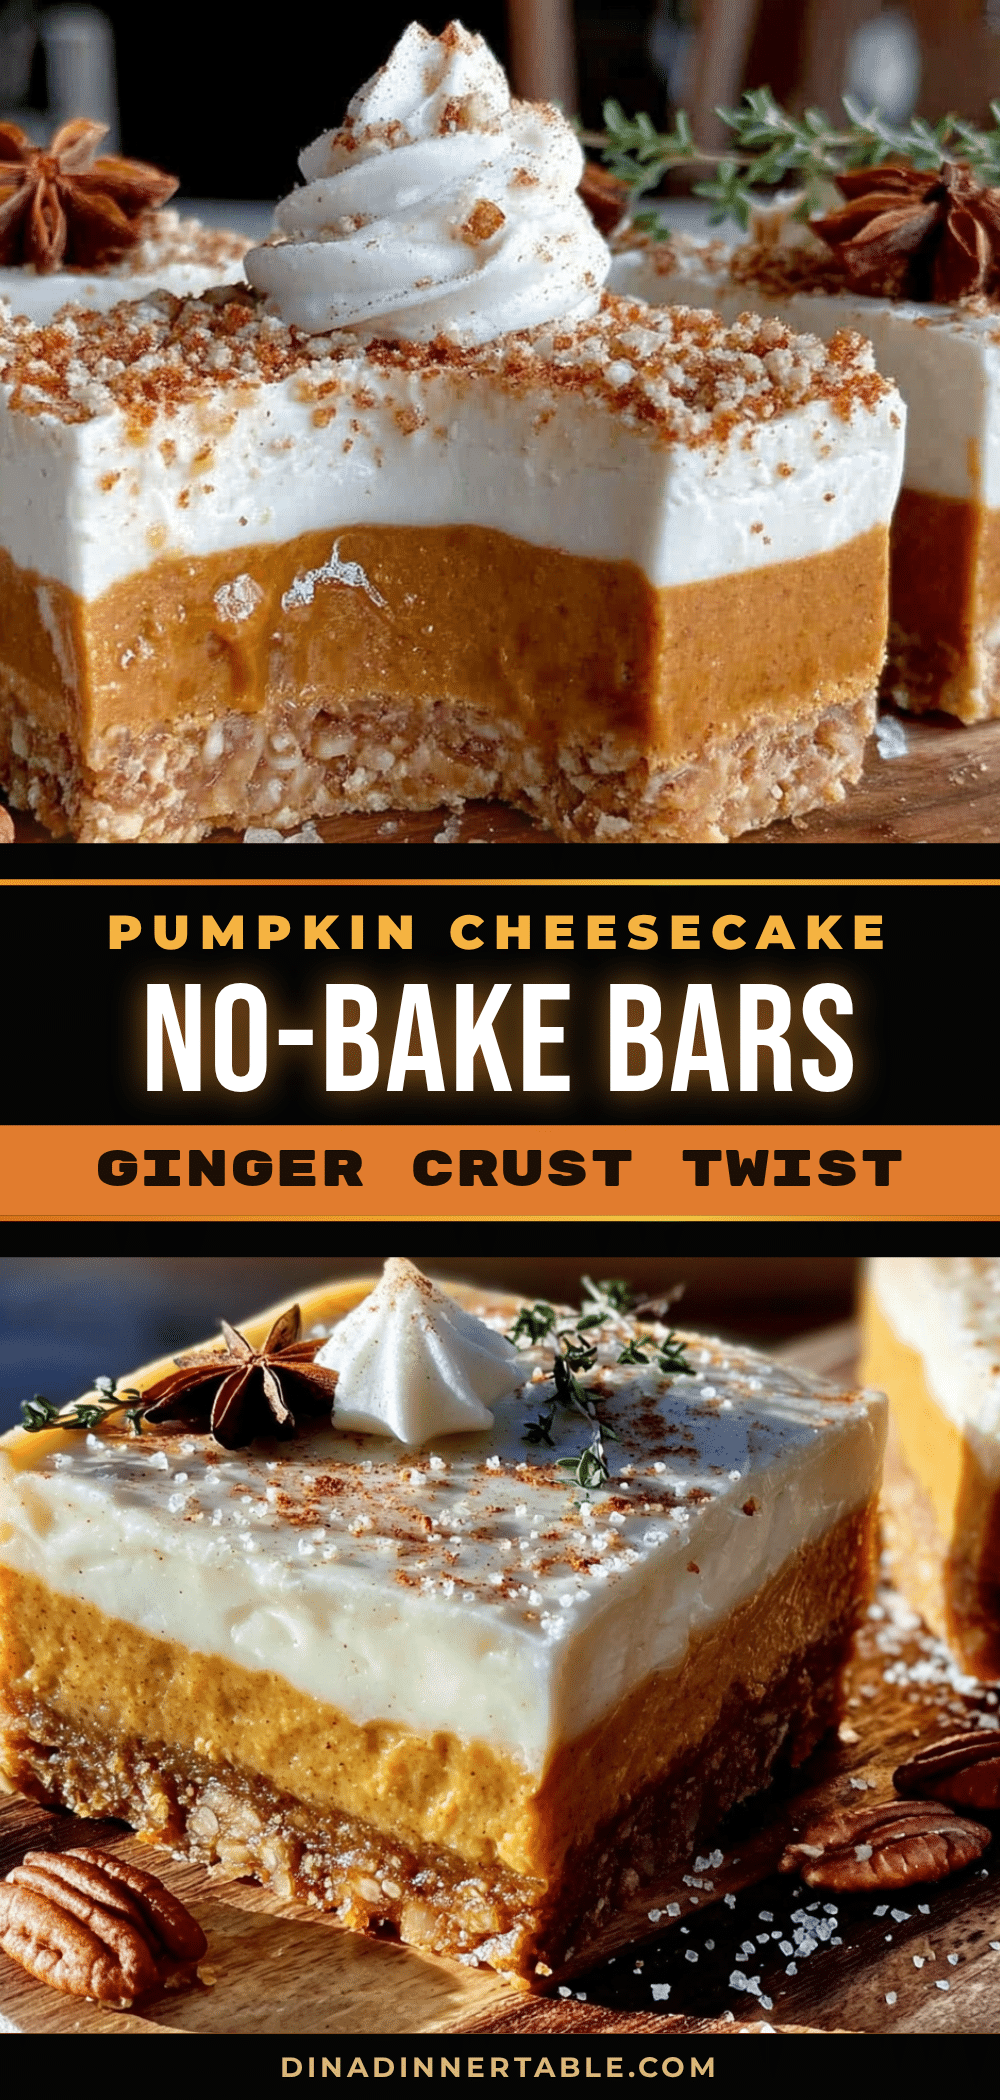
Easy No-Bake Pumpkin Cheesecake Bars with Ginger Crust
These no-bake pumpkin cheesecake bars with a ginger snap crust are a creamy, spiced dessert that requires no oven. Perfect for fall gatherings, they feature a light and airy pumpkin filling over a crunchy ginger cookie crust, and are a crowd-pleaser even for pumpkin skeptics.
- Prep Time: 30 minutes
- Cook Time: 0 minutes
- Total Time: 6 hours 30 minutes (includes chilling)
- Yield: 16 servings 1x
- Category: Dessert
- Cuisine: American
Ingredients
- 2 cups ginger snap cookies, crushed (about 200g or 7 ounces)
- 6 tablespoons unsalted butter, melted (85g)
- 2 tablespoons granulated sugar (25g)
- Pinch of salt (only if using unsalted butter)
- 16 ounces cream cheese, softened to room temperature (450g)
- 1 cup pumpkin puree (240g, not pumpkin pie filling)
- 3/4 cup powdered sugar (90g)
- 1/2 cup granulated sugar (100g)
- 1 teaspoon vanilla extract (5ml)
- 1 teaspoon pumpkin pie spice (2g)
- 1/2 teaspoon ground cinnamon (1g)
- 1/4 teaspoon salt (1g)
- 1 cup heavy whipping cream (240ml, cold)
- 1/2 cup heavy whipping cream (120ml, for topping)
- 2 tablespoons powdered sugar (15g, for topping)
- 1/4 teaspoon vanilla extract (1ml, for topping)
- Ground cinnamon or pumpkin pie spice for dusting
Instructions
- Prepare your pan: Line a 9×9 inch square baking pan with parchment paper, leaving about 2 inches of overhang on two opposite sides.
- Make the ginger crust: Crush ginger snap cookies into fine crumbs (about 2 cups). In a medium bowl, combine cookie crumbs, melted butter, sugar, and salt (if using). Stir until every crumb is coated and the mixture looks like wet sand.
- Press the crust into the pan: Dump the crumb mixture into the prepared pan. Use the bottom of a measuring cup or a flat glass to press it down firmly and evenly. Refrigerate while making the filling.
- Soften the cream cheese: Ensure cream cheese is at room temperature (take out of fridge 30 minutes before starting).
- Beat the cream cheese: In a large bowl, beat softened cream cheese with an electric mixer on medium speed until smooth and fluffy, about 2 minutes. Scrape down the sides.
- Add the sugars and spices: Add powdered sugar, granulated sugar, vanilla extract, pumpkin pie spice, cinnamon, and salt. Beat on medium speed until well combined and smooth, about 1 minute. Scrape the bowl again.
- Add the pumpkin puree: Add pumpkin puree and beat on low speed until just combined. Do not overmix.
- Whip the cream: In a separate medium bowl, pour in cold heavy cream. Using clean beaters, whip on medium-high speed until stiff peaks form, about 3-4 minutes.
- Fold the cream into the pumpkin mixture: Add one-third of the whipped cream to the pumpkin mixture and gently fold with a rubber spatula. Add remaining whipped cream in two more additions, folding gently until no white streaks remain.
- Spread the filling over the crust: Remove pan from refrigerator. Spoon filling onto chilled crust and spread evenly. Tap pan gently on counter to release air bubbles.
- Chill the bars: Cover pan with plastic wrap and refrigerate for at least 6 hours, preferably overnight.
- Make the whipped topping: Just before serving, whip remaining cream with powdered sugar and vanilla until soft peaks form. Spread or pipe over chilled bars.
- Cut and serve: Use parchment handles to lift the block of bars out of the pan. Place on a cutting board and cut into squares with a sharp knife. Dust with cinnamon or pumpkin pie spice before serving.
Notes
For best results, chill overnight. Ensure cream cheese is at room temperature to avoid lumps. Press crust firmly to prevent crumbling. Fold whipped cream gently to keep filling light. Use a hot knife for clean cuts. Store in refrigerator for up to 5 days or freeze for up to 3 months.
Nutrition
- Serving Size: 1 bar
- Calories: 285
- Sugar: 18
- Sodium: 210
- Fat: 19
- Saturated Fat: 11
- Carbohydrates: 26
- Fiber: 1
- Protein: 4
Keywords: no-bake pumpkin cheesecake bars, ginger crust, pumpkin dessert, no-bake dessert, fall dessert, cheesecake bars