My neighbor Marco asked why I couldn’t just throw everything in the food processor and skip the separate bowls. I started to explain why that wouldn’t work—then stopped. He had a point.
It was a Tuesday night, and I was prepping for a weekend trip. The kitchen was a disaster, and I had three bowls on the counter. Marco, who bakes about once a year, was watching me with this look that said, “You’re making this harder than it needs to be.” Honestly? He was right.
I handed him the food processor lid and said, “Fine. You do it.” He dumped everything in—pumpkin puree, oats, eggs, the works—and pulsed it a few times. I was bracing for a gluey mess. But the batter looked perfect. No, better than perfect. It was smooth, thick, and evenly mixed in about 45 seconds.
I felt a little sheepish, I’ll admit. Here I was, someone who writes about food for a living, getting schooled by a neighbor who bakes by instinct. We baked the muffins, and they came out tender, perfectly spiced, and not at all dense like I’d worried. Marco just shrugged and said, “Less dishes, same muffins.”
That moment changed how I make these Quick Freezer-Friendly Pumpkin Oat Muffins. I stopped overcomplicating it. You know that feeling when you realize you’ve been doing something the hard way for years? This was that moment for me. Now I make these muffins all the time—not because they’re fancy, but because they’re the kind of recipe that actually works with your life. And honestly, I keep making them because they remind me that sometimes the simplest method is the best one.
Why You’ll Love This Recipe
Let me tell you why these muffins have earned a permanent spot in my freezer. I’ve tested this recipe more times than I can count, and every single batch has confirmed one thing: this is the easiest, most forgiving muffin recipe I’ve ever made.
- Quick & Easy: From start to finish, you’re looking at about 30 minutes. Mix everything in one bowl (or a food processor, thanks Marco), scoop, and bake. No creaming butter, no sifting dry ingredients.
- Simple Ingredients: You probably have most of these in your pantry right now. Canned pumpkin, oats, eggs, a few spices. No weird health food store finds or expensive specialty flours.
- Perfect for Busy Mornings: Grab one from the freezer, microwave for 20 seconds, and you’ve got breakfast. It’s that simple. These have saved me on countless rushed weekday mornings.
- Crowd-Pleaser: I’ve brought these to work breakfasts and neighborhood gatherings. People always ask for the recipe. Kids love them, adults love them, and nobody believes they’re made with oats.
- Unbelievably Delicious: The texture is what gets me every time. They’re tender and moist without being greasy, with just enough sweetness and a warm spice blend that makes your kitchen smell amazing.
What sets this recipe apart is the method. By using the food processor to grind the oats first, you get a flour-like texture that makes these muffins light instead of dense. No rubbery oat muffins here. And because it’s all mixed in one machine, cleanup takes maybe two minutes. That’s the kind of efficiency I can get behind on a Tuesday night.
This recipe isn’t just good—it’s the kind that makes you close your eyes after the first bite. It’s comfort food reimagined for real life: faster, simpler, but with the same soul-soothing satisfaction. Perfect for impressing guests without stress, or turning a simple weekday breakfast into something you actually look forward to.
What Ingredients You Will Need
This recipe uses simple, wholesome ingredients to deliver bold flavor and satisfying texture without the fuss. Most of these are pantry staples, which is exactly what you want on a busy weeknight when you’re thinking ahead to tomorrow’s breakfast.
For the Muffins
- Rolled oats, 2 cups (180g) – Use old-fashioned rolled oats, not quick-cooking. They grind up into a better texture. I prefer Bob’s Red Mill for consistent results.
- Canned pumpkin puree, 1 cup (245g) – Make sure you’re buying 100% pumpkin puree, not pumpkin pie filling. Libby’s is my go-to brand.
- Large eggs, 2 – Room temperature if you remember, but honestly, cold works fine here too.
- Milk, ½ cup (120ml) – Any milk works. I usually use whole milk, but I’ve made these with almond milk and oat milk too.
- Brown sugar, ½ cup (100g), packed – Light or dark brown sugar both work. Dark gives a deeper molasses flavor.
- Melted coconut oil or vegetable oil, ¼ cup (60ml) – Coconut oil adds a subtle flavor that pairs nicely with pumpkin. Vegetable oil works great too.
- Vanilla extract, 1 teaspoon – Pure vanilla is best, but imitation works in a pinch.
For the Spice Blend
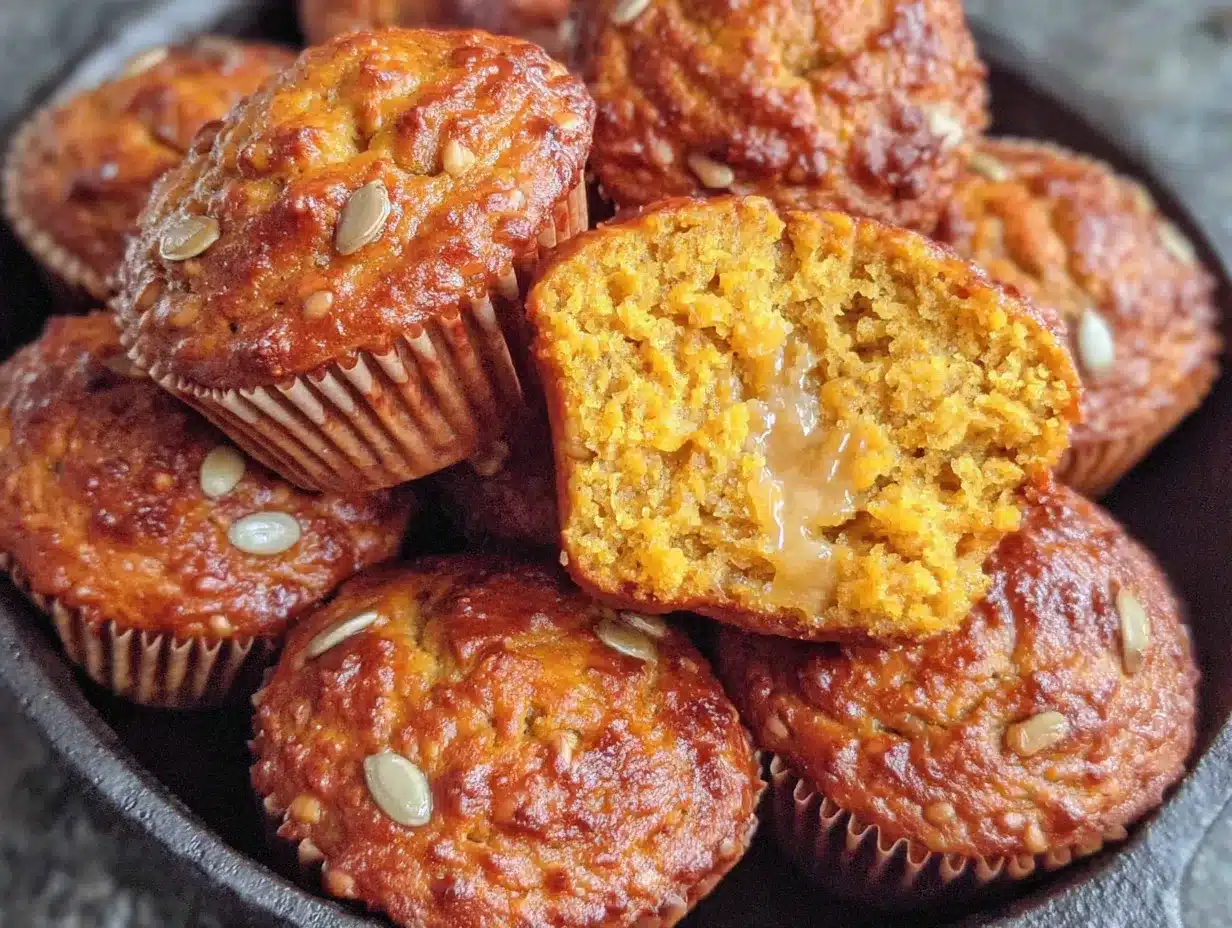
- Ground cinnamon, 1½ teaspoons – The backbone of the flavor.
- Ground ginger, ½ teaspoon – Adds warmth without being overpowering.
- Ground nutmeg, ¼ teaspoon – Freshly grated if you have it, but pre-ground is fine.
- Ground cloves, ¼ teaspoon – A little goes a long way.
- Salt, ½ teaspoon – Don’t skip this. It balances the sweetness and brings out the pumpkin flavor.
- Baking soda, 1 teaspoon – For lift.
- Baking powder, ½ teaspoon – Works with the baking soda for the right rise.
Optional Add-Ins
- Chocolate chips, ½ cup (90g) – Semi-sweet or dark. My personal favorite addition.
- Chopped pecans or walnuts, ½ cup (60g) – Adds nice crunch.
- Dried cranberries, ¼ cup (35g) – For a tart pop of flavor.
Substitution Guidance: For a dairy-free version, use almond milk and coconut oil. To make these gluten-free, use certified gluten-free rolled oats. If you’re out of brown sugar, you can substitute ½ cup white sugar mixed with 1 tablespoon molasses. For a lower-sugar option, reduce the brown sugar to ¼ cup and add 2 tablespoons of maple syrup instead.
Equipment Needed
You don’t need a fancy kitchen to make these muffins. Here’s what you’ll actually use:
- Food processor – This is the key piece. You’ll grind the oats into flour first. A high-speed blender works too, but a food processor gives you more control over the texture.
- Muffin tin – Standard 12-cup muffin tin. I’ve had my Nordic Ware one for years and it still works perfectly.
- Paper liners or cooking spray – I prefer liners for easy cleanup, but spray works fine if you’re out.
- Mixing bowl – Just one. That’s the beauty of this recipe.
- Measuring cups and spoons – Standard set. Nothing fancy.
- Cooling rack – Helps the muffins cool evenly and prevents soggy bottoms.
- Freezer-safe bags or containers – For storing your muffin stash.
If you don’t have a food processor, you can buy oat flour pre-made. Just use 2 cups of oat flour instead of whole oats. It’s a little more expensive, but it saves you a step. And honestly, my first few batches were made with a $20 food processor from a garage sale. It worked fine.
Preparation Method
Let me walk you through this step by step. I’ve made this recipe dozens of times, and these are the exact steps I follow every time.
- Preheat your oven to 375°F (190°C). Line your muffin tin with paper liners or spray generously with cooking spray. Do this first so the oven is ready when you are.
- Grind the oats. In your food processor, add the 2 cups of rolled oats. Pulse for about 30 seconds until you have a fine flour. It should look like whole wheat flour. Don’t over-process or it’ll get gummy. You want it fine but not dusty.
- Add the dry ingredients. To the oat flour in the food processor, add the cinnamon, ginger, nutmeg, cloves, salt, baking soda, and baking powder. Pulse 3-4 times to combine. This evenly distributes the spices without having to whisk them separately.
- Add the wet ingredients. Add the pumpkin puree, eggs, milk, brown sugar, melted oil, and vanilla extract to the food processor. Process for about 20 seconds until the batter is smooth and fully combined. Scrape down the sides once if needed. The batter will be thick but scoopable—think thick cake batter consistency.
- Fold in any add-ins. If you’re using chocolate chips, nuts, or dried cranberries, transfer the batter to a bowl and fold them in by hand. This prevents them from getting chopped up by the food processor. If you’re not using add-ins, you can scoop directly from the food processor.
- Scoop the batter. Divide the batter evenly among the 12 muffin cups. I use a ¼ cup measuring cup or a cookie scoop for even portions. Fill each cup about ¾ full. These muffins rise nicely but not dramatically, so don’t worry about overflow.
- Bake for 18-22 minutes. The muffins are done when a toothpick inserted into the center comes out clean or with a few moist crumbs. The tops should be golden and spring back when lightly touched. My oven runs hot, so I always check at 18 minutes.
- Cool in the pan for 5 minutes. This is important. Let them rest in the muffin tin so they set properly. Then transfer to a cooling rack to cool completely.
- Cool completely before freezing. This is non-negotiable. If you freeze warm muffins, you’ll get ice crystals and soggy muffins when you thaw them. Let them sit on the cooling rack for at least 30 minutes.
Pro tip from my kitchen: If your batter seems too thick after processing, add a tablespoon of milk at a time until it loosens up. Pumpkin puree can vary in moisture content depending on the brand. I’ve had to add up to 3 extra tablespoons with some cans.
Cooking Tips & Techniques
I’ve made every mistake you can imagine with these muffins. Let me save you some trouble.
Don’t overmix the batter. This is the number one mistake I made early on. When you process the batter in the food processor, it’s easy to go too long. Stop as soon as everything is combined. Over-processing develops the gluten in the oats and makes the muffins tough. You want tender, not tough.
Check your pumpkin puree. Not all canned pumpkin is created equal. Some brands are thicker than others. If your batter looks dry after processing, add milk a tablespoon at a time. If it looks too wet, add an extra tablespoon of oat flour. I learned this the hard way when I switched brands mid-batch.
Let the batter rest. If you have 5 extra minutes, let the batter sit in the muffin tin for 5 minutes before baking. This gives the oats time to absorb some moisture, which results in a more tender muffin. I started doing this after a friend mentioned it, and honestly, it makes a difference.
Use a cookie scoop for even muffins. I use a ¼ cup cookie scoop, and it gives me perfectly even muffins every time. This matters for baking time—if some muffins are bigger than others, some will be overdone while others are underdone.
Double the batch. Since you’re already dirtying the food processor, make a double batch. The batter keeps in the fridge for up to 3 days, so you can bake fresh muffins throughout the week. Or bake them all and freeze the extras.
My biggest failure: I once forgot the baking soda. The muffins came out like hockey pucks. Flat, dense, and completely unappetizing. I tried to salvage them with butter, but there was no saving that batch. So double-check your leavening agents before you start.
Variations & Adaptations
One of the things I love about this recipe is how flexible it is. Here are some variations I’ve tried and loved.
Chocolate Chip Pumpkin Oat Muffins
Add ½ cup of semi-sweet chocolate chips to the batter after processing. The chocolate melts into little pockets of goodness. This is my husband’s favorite version, and honestly, it’s mine too.
Vegan Pumpkin Oat Muffins
Replace the eggs with two flax eggs (2 tablespoons ground flaxseed mixed with 6 tablespoons water, let sit for 5 minutes). Use plant-based milk and coconut oil. The texture is slightly denser but still delicious. My vegan friend Sarah requests these every time she visits.
Gluten-Free Pumpkin Oat Muffins
Use certified gluten-free rolled oats. That’s it. Since the recipe is already oat-based, no other substitutions needed. This is one of the easiest recipes to make gluten-free.
Lower-Sugar Version
Reduce the brown sugar to ¼ cup and add 2 tablespoons of maple syrup or honey. The muffins will be less sweet but still flavorful. I make this version when I’m meal-prepping for a busy week and want something lighter.
Pumpkin Apple Oat Muffins
Fold in ½ cup of finely diced apple (about 1 small apple) after processing. The apple adds little bursts of moisture and sweetness. Granny Smith works great because the tartness balances the pumpkin.
I’ve also tried adding a streusel topping—mix 2 tablespoons each of oat flour, brown sugar, and melted butter, then sprinkle on top before baking. It adds a nice crunch but honestly, these muffins are good enough without it.
Serving & Storage Suggestions
These muffins are at their best when you need breakfast fast. Here’s how to serve and store them.
Serving: Serve the muffins at room temperature or warmed. To warm, microwave for 20-30 seconds. The aroma alone is worth it. I like mine with a pat of butter and a drizzle of honey, but they’re perfectly good on their own. They pair beautifully with a hot cup of coffee or a glass of cold milk.
Complementary dishes: These muffins are great alongside a simple scrambled egg or Greek yogurt for a more filling breakfast. For a fall-themed brunch, serve them with a warm apple cider or a pumpkin spice latte.
Room temperature storage: Store in an airtight container at room temperature for up to 3 days. Place a paper towel in the container to absorb excess moisture. Change the paper towel daily if you’re keeping them longer.
Refrigerator storage: They’ll keep in the fridge for up to a week. The texture stays moist, but the oats can get slightly denser. A quick reheat in the microwave fixes that.
Freezer storage (this is where they shine): Once the muffins are completely cool, place them in a single layer in a freezer-safe bag or container. Squeeze out as much air as possible. They’ll keep for up to 3 months. To thaw, microwave one muffin for 20-30 seconds, or let it sit at room temperature for about 30 minutes. You can also thaw them overnight in the fridge.
Make-ahead tip: I often make a double batch on Sunday, freeze them, and grab one each morning. It’s saved me from skipping breakfast more times than I can count. The flavors actually develop and get better after a day or two in the freezer.
Nutritional Information & Benefits
Here’s the estimated nutritional breakdown for one muffin (without add-ins):
| Nutrient | Amount |
|---|---|
| Calories | 185 |
| Total Fat | 7g |
| Saturated Fat | 4g |
| Cholesterol | 31mg |
| Sodium | 210mg |
| Total Carbohydrates | 28g |
| Dietary Fiber | 3g |
| Sugars | 12g |
| Protein | 5g |
| Vitamin A | 80% DV |
These muffins pack some serious nutritional benefits. Pumpkin is loaded with vitamin A, which supports eye health and immune function. Oats provide soluble fiber that helps lower cholesterol and keeps you full longer. The eggs add high-quality protein, and the whole recipe is surprisingly low in added sugar compared to store-bought muffins.
From a wellness perspective, I love that these muffins feel like a treat but actually provide real nutrition. They’re not health food—they’re muffins, after all—but they’re a much better choice than most breakfast pastries. The fiber from the oats helps stabilize blood sugar, so you won’t crash an hour after eating.
Dietary considerations: This recipe is naturally dairy-free if you use plant-based milk and coconut oil. It’s easily gluten-free with certified oats. It contains eggs, so it’s not vegan as written. The main allergen to note is oats, which some people with celiac disease react to even if labeled gluten-free.
Frequently Asked Questions
Can I use quick-cooking oats instead of rolled oats?
You can, but the texture will be different. Quick oats are more finely processed and will absorb liquid faster, making the muffins denser. Rolled oats give you a better, more tender crumb. If you only have quick oats, reduce the milk by 2 tablespoons.
Can I make these muffins without a food processor?
Yes. Use 2 cups of store-bought oat flour instead of whole oats. Then mix everything in a bowl by hand. The texture will be slightly different—a bit more rustic—but still delicious. You can also grind the oats in a blender if you have one.
How do I know when the muffins are done baking?
Insert a toothpick into the center of a muffin. If it comes out clean or with a few moist crumbs, they’re done. The tops should be golden and spring back when you gently press them. If the toothpick has wet batter on it, bake for 2-3 more minutes and check again.
Can I use fresh pumpkin instead of canned?
You can, but you’ll need to adjust the moisture. Fresh pumpkin puree has more water than canned. After roasting and pureeing the pumpkin, let it drain in a fine-mesh strainer or cheesecloth for about 30 minutes to remove excess liquid. Then use it as you would canned.
How long do these muffins last in the freezer?
Properly stored in an airtight freezer bag with all the air squeezed out, they’ll stay fresh for up to 3 months. After that, they’re still safe to eat but may start to develop freezer burn or lose moisture. I label my bags with the date so I know when I made them.
Conclusion
Listen, I get it. You’re busy, and adding “bake muffins” to your to-do list feels like one more thing you don’t have time for. But these Quick Freezer-Friendly Pumpkin Oat Muffins are different. They come together in one bowl (or one food processor), bake in under 25 minutes, and stock your freezer with breakfasts for weeks.
I make these every fall, and they’ve become my secret weapon for busy mornings. When I’m running late and my stomach is growling, I grab one, microwave it, and I’m out the door. No drive-through, no skipping breakfast, no regret. Just a warm, spiced muffin that tastes like I put way more effort into it than I actually did.
Try this recipe and make it your own. Add chocolate chips if that’s your thing. Use less sugar if you’re watching your intake. Double the batch so you always have some on hand. And if you come up with a variation I haven’t tried, drop it in the comments. I’m always looking for new ideas.
These muffins have saved my mornings more times than I can count. I hope they save yours too. Happy baking, friends!
Pin This Recipe!
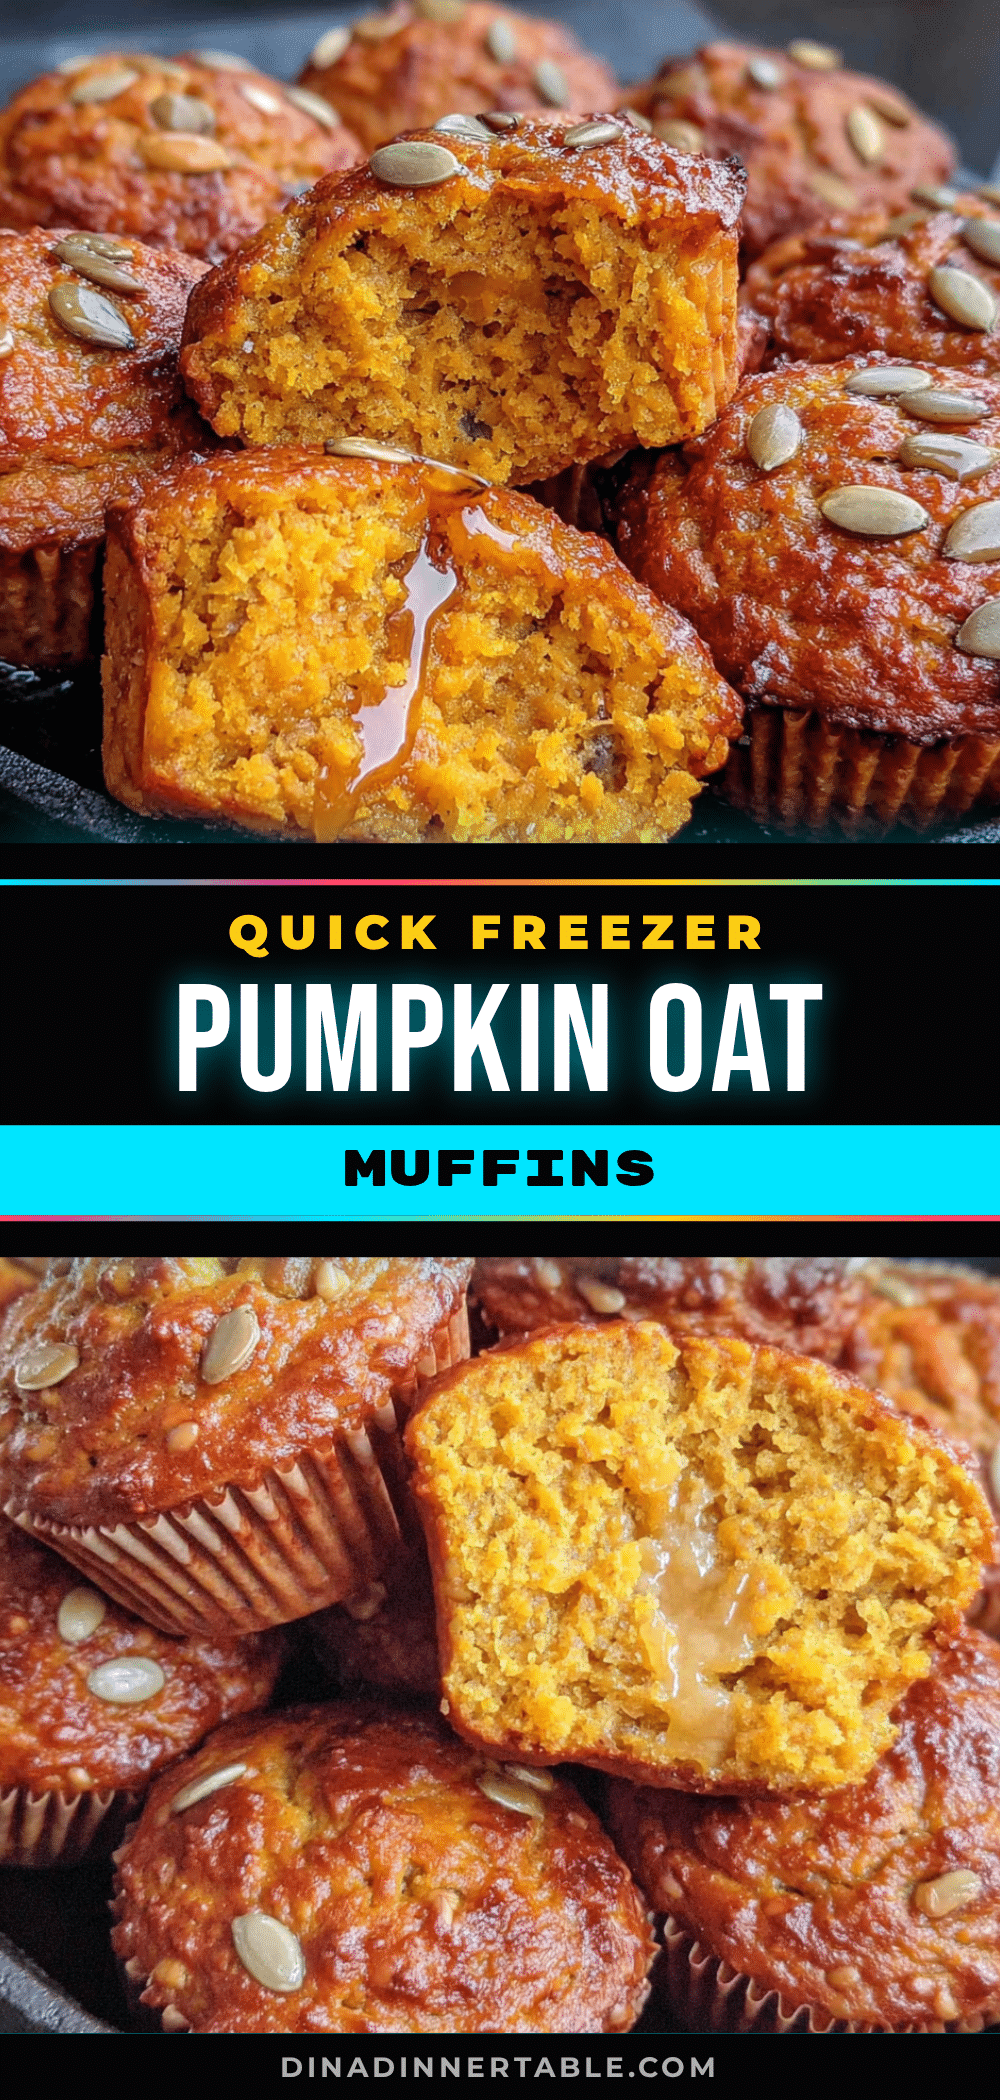
Quick Freezer-Friendly Pumpkin Oat Muffins

These Quick Freezer-Friendly Pumpkin Oat Muffins are tender, perfectly spiced, and made in one bowl (or food processor) in about 30 minutes. They’re perfect for busy mornings—grab one from the freezer, microwave for 20 seconds, and enjoy a warm, wholesome breakfast.
- Prep Time: 10 minutes
- Cook Time: 20 minutes
- Total Time: 30 minutes
- Yield: 12 muffins 1x
- Category: Breakfast
- Cuisine: American
Ingredients
- 2 cups (180g) rolled oats
- 1 cup (245g) canned pumpkin puree
- 2 large eggs
- ½ cup (120ml) milk (any kind)
- ½ cup (100g) packed brown sugar
- ¼ cup (60ml) melted coconut oil or vegetable oil
- 1 teaspoon vanilla extract
- 1½ teaspoons ground cinnamon
- ½ teaspoon ground ginger
- ¼ teaspoon ground nutmeg
- ¼ teaspoon ground cloves
- ½ teaspoon salt
- 1 teaspoon baking soda
- ½ teaspoon baking powder
- ½ cup (90g) chocolate chips (optional)
- ½ cup (60g) chopped pecans or walnuts (optional)
- ¼ cup (35g) dried cranberries (optional)
Instructions
- Preheat your oven to 375°F (190°C). Line a 12-cup muffin tin with paper liners or spray generously with cooking spray.
- In a food processor, add the rolled oats and pulse for about 30 seconds until you have a fine flour.
- Add the cinnamon, ginger, nutmeg, cloves, salt, baking soda, and baking powder to the oat flour. Pulse 3-4 times to combine.
- Add the pumpkin puree, eggs, milk, brown sugar, melted oil, and vanilla extract. Process for about 20 seconds until the batter is smooth and fully combined. Scrape down the sides once if needed.
- If using add-ins (chocolate chips, nuts, or dried cranberries), transfer the batter to a bowl and fold them in by hand.
- Divide the batter evenly among the 12 muffin cups, filling each about ¾ full.
- Bake for 18-22 minutes, until a toothpick inserted into the center comes out clean or with a few moist crumbs.
- Cool in the pan for 5 minutes, then transfer to a cooling rack to cool completely.
- Cool completely before freezing. Store in an airtight container at room temperature for up to 3 days, in the fridge for up to a week, or freeze for up to 3 months.
Notes
For dairy-free, use almond milk and coconut oil. For gluten-free, use certified gluten-free rolled oats. If batter seems too thick, add milk 1 tablespoon at a time. Let batter rest 5 minutes before baking for more tender muffins. Double-check leavening agents to avoid flat muffins.
Nutrition
- Serving Size: 1 muffin
- Calories: 185
- Sugar: 12
- Sodium: 210
- Fat: 7
- Saturated Fat: 4
- Carbohydrates: 28
- Fiber: 3
- Protein: 5
Keywords: pumpkin muffins, oat muffins, freezer-friendly muffins, easy breakfast, pumpkin oat muffins, healthy muffins