My husband had refused to engage with Halloween-themed food for our entire marriage. Seven years. He’d watch me pin spooky spiderweb dips and ghost-shaped pizzas with this polite, pained expression that said “I love you, but I’m not eating a hot dog wrapped to look like a tombstone.” Then last October, I caught him. I was testing a batch of these little guys for a neighborhood party, just minding my own business at the kitchen counter, when I heard a crinkle behind me. He was standing there, holding a crescent roll wrapper he’d fished out of the trash, looking like a kid caught with his hand in the cookie jar. “These smell… weirdly good,” he muttered, already reaching for a cooling rack. Let me tell you, that moment was sweeter than any candy corn I’ve ever had.
I had a specific vision for these mummy bites. Not the dry, dough-heavy versions you sometimes get at potlucks where the hot dog gets lost in a sea of bland bread. I wanted something genuinely good—a buttery, flaky exterior with that satisfying snap when you bite into a quality frank. The kind of thing you’d actually want to eat, not just arrange on a platter for the aesthetic. I tested three different dough options before landing on the perfect combo. Honestly, my kitchen looked like a flour bomb went off that week, but my neighbors were very happy with the “failed” batches.
Maybe you’ve been there too—wanting to make something fun for Halloween but dreading the usual Pinterest fails. The recipes that look amazing in photos but taste like cardboard. Or the ones that take three hours and seventeen specialty ingredients. These mummy hot dog bites are my answer to all of that. They’re genuinely delicious, surprisingly easy, and they have this weird power to convert even the most stubborn Halloween-food skeptics. I keep making them because they work every single time, and honestly, watching someone take that first skeptical bite and then reach for another one never gets old.
Why You’ll Love This Recipe
After testing these mummy bites more times than I care to admit, I can tell you exactly why they’ve become my most-requested Halloween recipe. They hit that sweet spot between fun and functional—you get the adorable presentation without sacrificing flavor.
- Quick & Easy: From fridge to table in under 25 minutes. Perfect for those chaotic Halloween evenings when you’re juggling costumes, trick-or-treaters, and hungry little monsters.
- Simple Ingredients: You only need four ingredients, and three of them are probably in your kitchen right now. No special trips to fancy grocery stores required.
- Perfect for Halloween Parties: Whether it’s a classroom celebration, a neighborhood get-together, or just a cozy night in watching scary movies, these fit right in.
- Crowd-Pleaser: Kids go wild for them, but I’ve watched grown adults sneak three or four when they think no one’s looking. The savory, buttery combo is universally appealing.
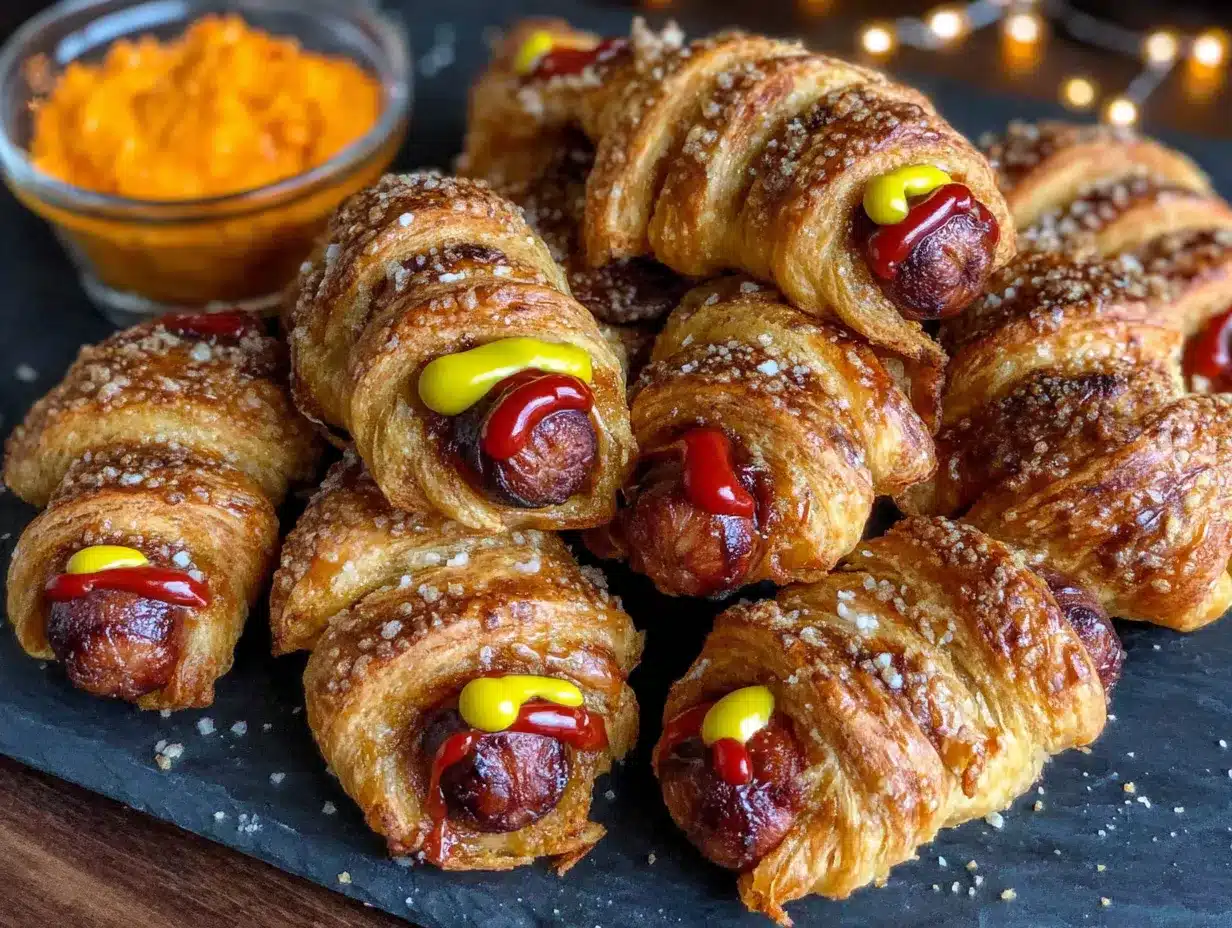
- Unbelievably Delicious: The flaky, golden crescent dough wrapped around a juicy hot dog, with those cute little mustard eyes—it’s comfort food at its finest.
What makes these different from every other mummy dog recipe out there? It’s the technique. I brush the dough with an egg wash before baking, which gives it that gorgeous golden-brown color and a shatteringly flaky texture. Most recipes skip this step, and you can really tell the difference. Plus, I’ve figured out the perfect dough-to-dog ratio so you get a balanced bite every time—not too bready, not too meaty.
This recipe isn’t just good—it’s the kind that makes you close your eyes after the first bite. It’s Halloween comfort food at its best: fun enough for the kids, satisfying enough for the adults, and easy enough that you can actually enjoy the party instead of stressing in the kitchen.
What Ingredients You Will Need
This recipe uses simple, pantry-friendly ingredients to create something that feels way more special than it should. Here’s what you’ll need to bring these little mummies to life.
For the Mummy Bites
- 1 can (8 oz) refrigerated crescent roll dough (I prefer Pillsbury for consistent results, but store brands work fine too—just make sure it’s the sheet-style dough, not the perforated triangles)
- 8 beef hot dogs (I recommend Hebrew National or Nathan’s for that satisfying snap; Oscar Mayer works well too. For a budget option, store-brand beef franks are perfectly fine)
- 1 large egg (for the egg wash—this is non-negotiable if you want that beautiful golden crust)
- 1 tablespoon water (to thin the egg wash slightly so it brushes on evenly)
- Mustard for eyes (yellow mustard works best for that classic mummy look, but Dijon gives a more sophisticated flavor if that’s your thing)
Optional Additions
- Sesame seeds or poppy seeds (sprinkle on top before baking for extra texture and visual interest)
- Garlic powder or everything bagel seasoning (adds a savory kick that adults especially love)
- Shredded mozzarella or string cheese (cut into thin strips and wrap alongside the dough for a “cheesy mummy” version)
A few ingredient notes from my testing kitchen: Look for hot dogs that are uniform in size so they cook evenly. If you’re using jumbo dogs, you’ll need to adjust your dough strips accordingly. For the crescent dough, the sheet-style (sometimes labeled “crescent roll dough sheet”) is ideal because it doesn’t have those pre-cut perforations that make wrapping tricky. But honestly, the regular perforated triangles work perfectly fine—you just press the seams together before cutting.
For a gluten-free version, use gluten-free crescent dough (it exists! I’ve found it at Whole Foods and some larger grocery chains) and check your hot dog labels for gluten content. For a dairy-free option, skip the egg wash or use a plant-based milk wash instead, and make sure your crescent dough is dairy-free (most are, but always check the label).
Equipment Needed
You don’t need a fancy kitchen to pull these off. Here’s what you’ll actually use:
- Baking sheet (a standard half-sheet pan works perfectly; line it with parchment paper for easy cleanup)
- Parchment paper or silicone baking mat (prevents sticking and makes cleanup a breeze—I’ve ruined a few pans before I learned this lesson)
- Sharp knife or pizza cutter (a pizza cutter makes cutting the dough strips so much easier and more precise)
- Small bowl for egg wash (any small dish works; I use a ramekin)
- Pastry brush (for applying the egg wash; a silicone brush is my favorite because it doesn’t shed bristles)
- Toothpicks (for dotting the mustard eyes—though a squeeze bottle works too)
- Cooling rack (optional but recommended for keeping the bottoms crispy)
If you don’t have a pastry brush, don’t stress. I’ve used a clean paper towel folded into a square, and it worked just fine. For the mustard eyes, you can also use a plastic sandwich bag with the tiniest corner snipped off—works like a piping bag. And if you’re making a huge batch for a party, having two baking sheets will speed things up considerably.
Preparation Method
Let me walk you through this step by step. I’ve made these more times than I can count, so I’ve got all the little tricks to share.
- Preheat your oven to 375°F (190°C). Line a baking sheet with parchment paper or a silicone mat. Getting the oven hot before you start assembling is key—you want that immediate heat to create flaky layers.
- Prepare your hot dogs. Pat each hot dog dry with a paper towel. This step matters more than you’d think—excess moisture can make the dough soggy. If you’re using jumbo dogs, you might want to cut them in half crosswise to make them more bite-sized.
- Open the crescent dough. Unroll it onto a clean cutting board. If you’re using the perforated triangle sheets, press the seams together firmly with your fingers to create one solid rectangle. For the sheet-style dough, you’re good to go.
- Cut the dough into strips. Using a sharp knife or pizza cutter, slice the dough lengthwise into 8-10 thin strips, about 1/2 inch (1.3 cm) wide. Don’t worry if they’re not perfectly uniform—that rustic look actually adds to the mummy effect. I’ve found that slightly uneven strips make the mummies look more “wrapped” and authentic.
- Start wrapping. Take one hot dog and wrap a dough strip around it, starting at one end and working your way to the other. Leave a small gap at the top for the face—about 1/2 inch (1.3 cm) should do it. Overlap the dough slightly as you go, like you’re wrapping a real mummy. Leave the ends of the hot dog slightly exposed so they can peek out.
- Place on baking sheet. Arrange the wrapped mummies on your prepared baking sheet, leaving about 1 inch (2.5 cm) between each one. They’ll puff up a bit as they bake, so give them room to breathe.
- Make the egg wash. In a small bowl, whisk together the egg and 1 tablespoon of water until well combined. This creates that beautiful golden sheen and helps the dough crisp up perfectly.
- Brush the mummies. Using your pastry brush, lightly coat each wrapped mummy with the egg wash. Don’t soak them—a thin, even layer is all you need. If you’re adding sesame seeds or seasonings, sprinkle them on now.
- Bake for 12-15 minutes. Keep an eye on them around the 12-minute mark. You’re looking for a deep golden brown color—that’s when you know the dough is fully cooked and flaky. The hot dogs should be heated through and starting to plump up slightly.
- Cool slightly. Let them rest on the baking sheet for 2-3 minutes before transferring to a cooling rack. This gives the dough time to set so it doesn’t fall apart when you move them.
- Add the eyes. Once they’re cool enough to handle (but still warm), use a toothpick or squeeze bottle to dot two small eyes of mustard on each mummy’s exposed face area. Don’t skip this step—the eyes are what makes them read as mummies instead of just weird wrapped hot dogs.
- Serve warm. These are best enjoyed within 15-20 minutes of coming out of the oven, when the dough is still flaky and the hot dog is juicy. Arrange them on a platter and watch them disappear.
A few troubleshooting notes from my personal experience: If your dough tears while wrapping, just press it back together—it’ll seal during baking. If the mummies look a little sparse in places, you can add a second strip of dough. And if you’re making these ahead for a party, bake them fully but hold the mustard eyes until just before serving, otherwise the mustard can get absorbed into the dough and look messy.
Cooking Tips & Techniques
After making these mummy bites for Halloween parties, classroom celebrations, and even just random Tuesday dinners, I’ve collected a few tricks that make a real difference.
The biggest mistake I see people make is over-wrapping the hot dogs. I did it myself the first time—used way too much dough, and the mummies came out looking like doughy blobs with hot dog centers. You want the dough to be thin enough that you can still see the shape of the hot dog underneath. Think “gauze wrap,” not “winter coat.” About 1/2 inch (1.3 cm) wide strips with a slight overlap is the sweet spot.
Temperature matters more than you’d think. Cold dough is easier to work with—it’s less sticky and holds its shape better. If your kitchen is warm, pop the wrapped mummies in the fridge for 5-10 minutes before baking. This firms up the butter in the dough, which creates more steam during baking and gives you flakier layers. I learned this the hard way when I made a batch in July and the dough turned into a sticky mess on my counter.
Here’s a timing strategy that saves me every time. I prep the hot dogs and cut the dough strips in advance, then store them separately in the fridge. When it’s time to bake, I just wrap and go. This is especially helpful if you’re making multiple batches for a party. I’ve also found that wrapping the mummies while the dough is still cold from the fridge gives you the cleanest, most professional-looking results.
One thing I wish I’d known sooner: If you’re using a silicone baking mat instead of parchment, you might need to add a minute or two to the baking time. Silicone doesn’t conduct heat as efficiently as parchment, so the bottoms take slightly longer to crisp up. Just keep an eye on them and look for that deep golden color.
My personal failure that taught me a lesson: I once tried to microwave leftover mummy bites. Don’t do it. The dough turns into a sad, chewy mess. If you have leftovers (which is rare in my house), reheat them in a 350°F (175°C) oven for about 5 minutes. They come back to life beautifully.
Variations & Adaptations
One of the best things about this recipe is how flexible it is. Here are some variations I’ve tried and loved.
Cheesy Mummy Bites: Before wrapping the hot dog, cut a piece of string cheese or mozzarella stick into thin strips and lay them along the hot dog. Wrap the dough over the cheese. When it bakes, the cheese gets all melty and oozes out slightly—it’s incredible. I tested this version for a game night and it was the first thing to disappear.
Spicy Mummy Bites: Brush the hot dogs with sriracha or your favorite hot sauce before wrapping. Or use spicy jalapeño cheddar sausages instead of regular hot dogs. My husband, the former Halloween-food skeptic, now requests this version specifically. We make them for football Sundays too, not just Halloween.
Veggie Mummy Bites: For a meatless version, use vegetarian or vegan hot dogs. I’ve tested this with Lightlife and Field Roast brands, and both work well. Just note that some veggie dogs are more delicate, so handle them gently during wrapping. You can also use carrot “hot dogs” if you’re feeling adventurous—marinate peeled carrots in a smoky, savory brine for 24 hours, then wrap and bake as usual.
Breakfast Mummy Bites: Swap the hot dogs for breakfast sausages or even cooked sausage links. Serve them with maple syrup for dipping. I made these for a Halloween morning breakfast and the kids lost their minds. It’s a fun twist that works surprisingly well.
Pizza Mummy Bites: Before wrapping, brush the hot dogs with pizza sauce and sprinkle with shredded mozzarella. Use Italian seasoning in the egg wash. Serve with warm marinara for dipping. This version tastes like a pizza wrapped around a hot dog—what’s not to love?
Sweet Mummy Bites: For a dessert version, use pre-cooked chicken or turkey sausages (the sweet apple variety works great) and brush with a mixture of melted butter and cinnamon sugar before baking. Drizzle with icing after baking. It sounds weird, but trust me—it’s amazing.
Serving & Storage Suggestions
These mummy bites are best served warm, right out of the oven, when the dough is still flaky and the hot dog is juicy. I like to arrange them on a large platter with a bowl of dipping sauce in the center. For Halloween parties, I sometimes add some “spooky” garnishes—a few plastic spiders, some fake cobwebs around the platter edge, or a sign that says “Mummy’s Kitchen.”
Dipping sauce ideas that I’ve tested and loved:
- Classic ketchup and mustard (always a hit with kids)
- Honey mustard (my personal favorite—the sweetness pairs perfectly with the savory dough)
- Ranch dressing (great for the pizza variation)
- Spicy sriracha mayo (for the adults who want a kick)
- Cheese sauce (because everything is better with cheese sauce)
- BBQ sauce (especially good with the spicy version)
For storage: If you somehow have leftovers, store them in an airtight container in the refrigerator for up to 3 days. The dough will soften slightly, but they’re still tasty. To reheat, place them on a baking sheet in a 350°F (175°C) oven for 5-7 minutes, or until heated through and the dough crisps up again. I don’t recommend microwaving—it makes the dough chewy and sad.
For freezing: You can freeze the unbaked mummy bites! Assemble them completely, place them on a parchment-lined baking sheet, and freeze until solid. Then transfer to a freezer bag or container. When you’re ready to bake, place them frozen on a baking sheet, brush with egg wash, and bake at 375°F (190°C) for 15-18 minutes, or until golden brown. No need to thaw first. This is a lifesaver for busy Halloween nights.
Flavor development note: These are really best fresh. Unlike some recipes that taste better the next day, the magic of these mummy bites is in that freshly baked flakiness. So make only what you’ll eat in one sitting, or freeze the extras unbaked for later.
Nutritional Information & Benefits
Let’s be real—these are a treat, not a health food. But here’s what you should know if you’re keeping track.
Per serving (2 mummy bites):
- Calories: approximately 280-320
- Protein: 10-12 grams
- Carbohydrates: 18-22 grams
- Fat: 18-22 grams
- Sodium: 700-800 mg (this varies based on hot dog brand)
Dietary considerations: This recipe contains gluten (from the crescent dough) and dairy (in the dough, though amounts are small). For a gluten-free version, use gluten-free crescent dough and check your hot dog labels. For dairy-free, use a plant-based milk wash instead of egg wash and verify your dough is dairy-free. Most hot dogs are dairy-free, but always check the label.
Health benefits: Hot dogs do provide protein and some B vitamins, particularly B12. The egg wash adds a small amount of protein too. If you use beef hot dogs, you’re also getting some iron and zinc. That said, these are definitely a sometimes-food, not an everyday-food. They’re perfect for a fun Halloween celebration, but I wouldn’t recommend making them a weekly staple.
My personal perspective: I believe in balance. I serve these alongside a veggie platter and some fruit at parties so there’s something for everyone. The kids can fill up on mummy bites, and the adults can balance them out with healthier options. Food should be fun, especially on holidays, and these definitely deliver on that front.
Conclusion
These mummy hot dog bites are everything I want in a Halloween recipe—fun, delicious, and genuinely easy to make. They’ve converted my Halloween-food-skeptic husband, won over picky eaters at parties, and become a tradition in our house that I look forward to every October.
The best part? You can make them your own. Whether you stick with the classic version or try one of the variations I shared, these little mummies are endlessly customizable. Add cheese, spice them up, or turn them into a breakfast treat—the possibilities are endless.
I’d love to hear how yours turn out! Drop a comment below and let me know what variations you tried, or tag me in your photos if you share them online. Did your kids go wild for them? Did you convert a skeptic of your own? Tell me all about it—I read every single comment and honestly, your stories make my day.
Now go make some mummies. Your Halloween table is waiting.
Frequently Asked Questions
Can I make these mummy hot dog bites ahead of time?
Absolutely! You can assemble them completely, then refrigerate for up to 24 hours before baking. Just cover them loosely with plastic wrap so the dough doesn’t dry out. When you’re ready to bake, add the egg wash and pop them in the oven straight from the fridge—you might need to add 2-3 minutes to the baking time.
What’s the best way to get the mustard eyes to look right?
I use a toothpick for precision. Dip the tip into yellow mustard, then dot two small eyes onto the exposed hot dog face. If the mustard is too thick, thin it with a drop of water. For a cleaner look, use a squeeze bottle with a fine tip. And remember—the eyes should be small! You want cute mummy faces, not surprised mummy faces.
Can I use puff pastry instead of crescent rolls?
Yes, you can! Thaw a sheet of puff pastry, cut it into strips, and wrap as directed. The texture will be even flakier and more buttery. Just note that puff pastry takes slightly longer to bake—start checking at 15 minutes and add time as needed. I’ve done this when I ran out of crescent dough and it was delicious, though slightly more indulgent.
How do I keep the dough from unwrapping during baking?
Make sure you’re overlapping the dough slightly as you wrap, and tuck the end of the strip under the mummy when you place it on the baking sheet. The egg wash also helps seal the dough. If you’re really worried, you can secure the end with a toothpick—just remember to remove it before serving!
Can I use different types of sausages for this recipe?
Definitely! Smoked sausages, bratwurst, kielbasa, or even chicken sausages all work beautifully. Just make sure they’re fully cooked before wrapping, since the baking time is designed to heat through and crisp the dough, not cook raw meat. For raw sausages, pre-cook them before wrapping. My personal favorite variation uses spicy andouille sausage for a Cajun twist.
Pin This Recipe!

Best Easy Mummy Hot Dog Bites Perfect for Halloween

These mummy hot dog bites are a fun, delicious, and easy Halloween treat made with crescent dough wrapped around hot dogs, baked until golden, and finished with mustard eyes. They’re perfect for parties and convert even the biggest Halloween-food skeptics.
- Prep Time: 10 minutes
- Cook Time: 15 minutes
- Total Time: 25 minutes
- Yield: 8 servings 1x
- Category: Appetizer
- Cuisine: American
Ingredients
- 1 can (8 oz) refrigerated crescent roll dough
- 8 beef hot dogs
- 1 large egg
- 1 tablespoon water
- Mustard for eyes (yellow or Dijon)
- Optional: sesame seeds, poppy seeds, garlic powder, everything bagel seasoning, shredded mozzarella or string cheese
Instructions
- Preheat your oven to 375°F (190°C). Line a baking sheet with parchment paper or a silicone mat.
- Pat each hot dog dry with a paper towel.
- Unroll the crescent dough onto a clean cutting board. If using perforated triangle sheets, press the seams together to create one solid rectangle.
- Using a sharp knife or pizza cutter, slice the dough lengthwise into 8-10 thin strips, about 1/2 inch (1.3 cm) wide.
- Take one hot dog and wrap a dough strip around it, starting at one end and working your way to the other. Leave a small gap at the top for the face—about 1/2 inch (1.3 cm). Overlap the dough slightly as you go.
- Place the wrapped mummies on the prepared baking sheet, leaving about 1 inch (2.5 cm) between each one.
- In a small bowl, whisk together the egg and 1 tablespoon of water until well combined.
- Using a pastry brush, lightly coat each wrapped mummy with the egg wash. If adding sesame seeds or seasonings, sprinkle them on now.
- Bake for 12-15 minutes, until deep golden brown.
- Let them rest on the baking sheet for 2-3 minutes before transferring to a cooling rack.
- Once cool enough to handle but still warm, use a toothpick or squeeze bottle to dot two small eyes of mustard on each mummy’s exposed face area.
- Serve warm.
Notes
For best results, use cold dough and pat hot dogs dry. If dough tears, press it back together—it will seal during baking. Add mustard eyes just before serving to prevent absorption. For freezing, assemble unbaked, freeze solid, then bake from frozen at 375°F for 15-18 minutes.
Nutrition
- Serving Size: 2 mummy bites
- Calories: 300
- Sugar: 4
- Sodium: 750
- Fat: 20
- Saturated Fat: 7
- Carbohydrates: 20
- Protein: 11
Keywords: mummy hot dog bites, Halloween appetizer, crescent roll hot dogs, easy Halloween recipe, kid-friendly Halloween food


