My neighbor’s kid asked why I couldn’t just melt white chocolate and throw candy corn on top. I started to explain why that wouldn’t work—then stopped. I mean, honestly, why couldn’t I? I’d been planning some elaborate layered bark with drizzles and swirls and all the fuss. But this kid, maybe eight years old, just looked at me like I was making things way harder than they needed to be. And she was right.
So I tried it. Melted the white chocolate, spread it thin, and tossed on handfuls of candy corn and sprinkles. No tempering, no double boiler drama, no complicated technique. And you know what? It worked perfectly. The chocolate set up smooth and creamy, the candy corn stayed bright and crunchy, and the whole thing came together in less time than it takes to find a Halloween-themed playlist. I felt a little sheepish, honestly, standing there with a spatula in my hand, realizing I’d been overthinking this for years.
That first batch disappeared at a Halloween party before I even got to try a piece myself. Someone grabbed the last corner and said, “Wait, you made this?” like it was some kind of bakery secret. Nope. Just white chocolate, candy corn, and a kid who knew better than I did. Now I make this bark every October, and I still think about that moment every single time. Maybe you’ve been there too—stuck on a recipe that feels like it needs to be complicated when the simplest version is actually the best one.
Why You’ll Love This Recipe
Let me tell you why this candy corn white chocolate bark has become my go-to Halloween treat. I’ve tested it about a dozen times now, tweaking temperatures and ratios, and this version is the one that works every single time. No fuss, no stress, just pure Halloween fun in minutes.
- Quick & Easy: Five minutes of active work. That’s it. From start to finish, you’re looking at about 10 minutes total including setting time in the fridge. Perfect for those evenings when you realize you need something for tomorrow’s classroom party or office potluck.
- Simple Ingredients: Three ingredients, maybe four if you want sprinkles. White chocolate chips, candy corn, and a tiny bit of coconut oil or shortening to help the chocolate melt smoothly. You probably have most of this in your pantry right now.
- Perfect for Halloween: This bark screams Halloween without screaming “I spent three hours on this.” It’s festive, colorful, and kids absolutely lose their minds over it. Adults too, honestly.
- Crowd-Pleaser: I’ve brought this to Halloween parties, trunk-or-treat events, and family gatherings. It always gets devoured. People can’t believe it’s homemade, let alone this easy.
- Unbelievably Delicious: The combination of creamy white chocolate and crunchy, chewy candy corn is weirdly perfect. Sweet, but not cloying. Satisfying, but not heavy. It’s the kind of treat where you grab one piece, then suddenly you’ve eaten half the pan.
What makes this recipe different from the hundreds of other Halloween bark recipes out there? It’s the ratio. Most recipes use way too much candy corn, which makes the bark hard to cut and overly sweet. My tested version uses just enough candy corn to give you a pop of color and texture in every bite without overwhelming the chocolate. Plus, the trick with the coconut oil keeps the white chocolate from seizing up, which is the number one mistake people make. This isn’t just another version—it’s the version that actually works for busy weeknights and last-minute Halloween emergencies.
This recipe is the kind that makes you close your eyes after the first bite. It’s Halloween comfort food reimagined—faster, simpler, but with the same nostalgic satisfaction. Perfect for impressing guests without stress, or turning a regular Tuesday night into something a little bit magical.
What Ingredients You Will Need
This recipe uses simple, everyday ingredients to deliver big Halloween flavor without any fuss. Here’s what you’ll need and why each one matters.
- White chocolate chips, 12 ounces (340 grams): The base of our bark. I recommend Ghirardelli or Guittard white chocolate chips for the creamiest melt and best flavor. Avoid white chocolate morsels from some generic brands—they sometimes contain stabilizers that prevent smooth melting. Look for real cocoa butter on the ingredient list, not palm oil.
- Candy corn, 1 cup (about 200 grams): The star of the show. Classic candy corn works best here, but you can also use autumn mix or harvest blend for variety. Fresh candy corn is softer and easier to bite into—if your bag is rock hard, it might be old. I prefer Brach’s for consistency, but store brands work fine too.
- Coconut oil or vegetable shortening, 1 teaspoon (5 ml): This tiny addition is the secret to smooth, glossy white chocolate that doesn’t seize up. White chocolate is finicky—it hates heat and moisture. A little fat helps stabilize the melt. Refined coconut oil has no coconut flavor, so it won’t affect the taste. If you don’t have either, you can skip it, but the texture won’t be as silky.
- Halloween sprinkles, optional, 2 tablespoons: For extra color and crunch. Orange, black, and purple jimmies or nonpareils add a festive touch. I like Wilton brand sprinkles because they don’t bleed color into the chocolate.
- Flaky sea salt, optional, 1/4 teaspoon: A light sprinkle on top balances the sweetness and makes the flavors pop. Maldon or any flaky salt works beautifully. This is optional but highly recommended if you like sweet-salty combinations.
That’s it. No heavy cream, no butter, no corn syrup, no complicated ingredients. Everything is available at any grocery store, and you probably already have most of it in your pantry. For best results, use fresh candy corn—stale candy corn gets hard and unpleasant to bite into. And if you’re dairy-free, look for vegan white chocolate chips made with cocoa butter alternatives. The coconut oil trick works even better with vegan white chocolate, actually.
Equipment Needed
You don’t need fancy kitchen equipment for this recipe. Here’s what you’ll actually use:
- Microwave-safe bowl: A medium glass or ceramic bowl works perfectly. I use a Pyrex measuring cup because the pour spout makes spreading easier. Avoid metal bowls in the microwave.
- Rubber spatula: For stirring and spreading. A silicone spatula is ideal because it won’t scratch your pan and it scrapes every last bit of chocolate.
- Baking sheet or small rimmed baking pan: A quarter sheet pan (9×13 inches) is the perfect size for this amount of bark. Line it with parchment paper for easy removal. If you don’t have a quarter sheet, an 8×8 or 9×9 square pan works too—your bark will just be thicker.
- Parchment paper: Non-negotiable. Wax paper will melt, and foil will stick. Parchment paper ensures your bark releases cleanly.
- Measuring cups and spoons: For the candy corn and coconut oil. Eyeballing works for the candy corn, but measure the coconut oil for consistent results.
- Knife for cutting: A sharp chef’s knife works best for clean breaks. A serrated knife can also work, but it might crumble the edges.
That’s genuinely everything. No double boiler, no candy thermometer, no stand mixer. If you have a microwave and a baking sheet, you’re set. I’ve made this in vacation rentals with minimal kitchen equipment and it still turned out perfectly.
Preparation Method
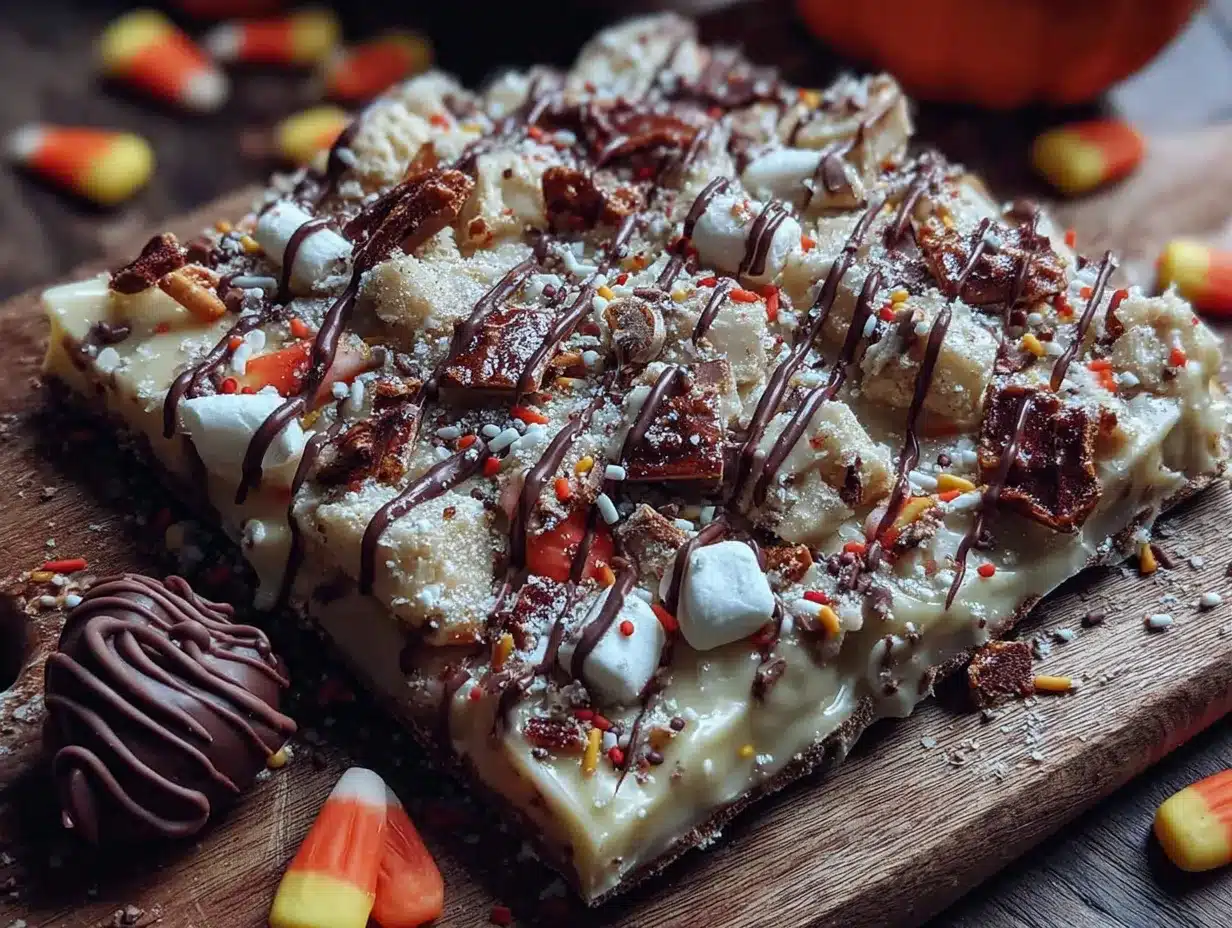
- Line your baking sheet with parchment paper. Make sure the paper extends slightly over the edges—this gives you handles to lift the bark out later. If your parchment keeps curling up, crumple it first, then smooth it out. It’ll lay flat.
- Pour the white chocolate chips into your microwave-safe bowl. Add the teaspoon of coconut oil or shortening on top. Don’t stir yet—just let it sit. This helps the oil melt evenly with the chocolate.
- Microwave in 30-second bursts on 50% power. This is crucial. Full power will scorch white chocolate in seconds. After each 30-second interval, remove the bowl and stir vigorously with your rubber spatula. The residual heat will continue melting the chips. Repeat this process 2-3 times until about 75% of the chips are melted and the mixture is mostly smooth with a few small lumps.
- Stir continuously until completely smooth. Keep stirring even after you take it out of the microwave. The remaining lumps will melt from the heat of the bowl and the liquid chocolate. If you have stubborn lumps after 30 seconds of stirring, microwave for just 10 more seconds at 50% power. White chocolate should be warm, not hot—if it feels hot to the touch, you’ve overheated it.
- Pour the melted white chocolate onto your prepared baking sheet. Use your spatula to spread it into an even layer, about 1/4 inch thick. Don’t worry about making it perfectly rectangular—rustic edges look more homemade and charming. Work quickly because white chocolate starts setting fast.
- Sprinkle the candy corn evenly over the melted chocolate. Press each piece gently into the chocolate so it sticks. Don’t just drop them on top—give them a little nudge with your fingertip. Space them out so every piece of bark gets at least one or two pieces of candy corn.
- Add sprinkles and flaky salt if using. Sprinkle them over the top while the chocolate is still wet. The salt goes a long way, so use a light hand. You can always add more later, but you can’t take it away.
- Refrigerate for 10-15 minutes until completely set. The bark should be firm to the touch and no longer sticky. If you’re in a hurry, 10 minutes in the freezer works too—just check it after 5 minutes so it doesn’t get too cold and brittle.
- Lift the parchment paper out of the baking sheet. Place the bark on a cutting board. Use a sharp knife to cut or break it into irregular pieces. I like rustic, uneven shards—they look more artisanal. If the bark cracks instead of cutting cleanly, let it sit at room temperature for 2-3 minutes to soften slightly.
- Serve immediately or store for later. The bark is best within 24 hours, but it keeps well for several days if stored properly.
Pro tip: If your white chocolate seizes up (becomes grainy and stiff), don’t panic. Stir in another teaspoon of coconut oil or a tablespoon of warm cream (if you’re not dairy-free) and whisk vigorously. Sometimes you can rescue it. But honestly, if it seizes, it’s usually better to start over with fresh chocolate—it’s only a few dollars worth of ingredients, and the frustration isn’t worth it.
Cooking Tips & Techniques
I’ve made this bark more times than I care to admit, and I’ve learned a few things the hard way. Let me save you the trouble.
Don’t overheat the white chocolate. This is the number one mistake. White chocolate burns at a much lower temperature than milk or dark chocolate. It can go from perfectly melted to grainy, scorched mess in about 15 seconds. Always use 50% power and stir between intervals. If you see any brown specks, you’ve burned it—start over. I learned this lesson when I was rushing to make a batch for my daughter’s class party and ended up with a bowl of sad, lumpy disaster. Not my finest moment.
Room temperature ingredients matter. Cold candy corn straight from the fridge can cause the warm chocolate to seize around each piece. Let your candy corn sit at room temperature for about 10 minutes before you start. Same goes for your baking sheet—if it’s cold, the chocolate will set too quickly and you won’t have time to spread it evenly.
Work in a warm kitchen. White chocolate sets fast, especially if your kitchen is cool or drafty. If you’re making this in a cold kitchen, warm your baking sheet slightly by running it under hot water and drying it thoroughly before lining with parchment. The residual warmth gives you an extra minute of working time.
Press, don’t sprinkle. When you add the candy corn, press each piece gently into the chocolate. Sprinkling from height means half the candy corn bounces off and ends up on your counter. I speak from experience—I once found candy corn behind my refrigerator three months after Halloween. Just press them in.
Cut at room temperature. Bark straight from the fridge is brittle and will shatter when you try to cut it. Let it sit at room temperature for 2-3 minutes before cutting. The knife should glide through cleanly. If you hear cracking sounds, wait another minute.
Multitask smartly. While the bark is setting in the fridge, clean your bowl and spatula immediately. Melted white chocolate that hardens is a pain to wash—hot water and dish soap works best. Don’t let it sit overnight or you’ll be scrubbing for ages.
Variations & Adaptations
This recipe is endlessly adaptable. Here are some of my favorite variations:
Dark Chocolate Version: Swap the white chocolate for dark chocolate chips (60-70% cacao). The bitter chocolate balances the sweet candy corn beautifully. Use the same melting method—dark chocolate is more forgiving than white, so you can microwave at full power in 30-second bursts. This version is my personal favorite for adults-only gatherings.
Peanut Butter Swirl: After spreading the white chocolate, drop spoonfuls of melted peanut butter (microwave 1/4 cup peanut butter with 1 teaspoon coconut oil for 20 seconds) on top and swirl with a knife. Add candy corn and sprinkles. The salty peanut butter cuts the sweetness and adds protein. My neighbor who originally suggested the simple method tried this version and said it was even better than the original.
Vegan/Dairy-Free Adaptation: Use vegan white chocolate chips (Enjoy Life brand works great) and refined coconut oil. Everything else is naturally vegan. The texture is slightly different—vegan white chocolate sets a bit softer—but the taste is just as good. I’ve served this to dairy-free friends and they couldn’t tell the difference.
Spiced Halloween Bark: Add 1/2 teaspoon pumpkin pie spice or cinnamon to the melted white chocolate before spreading. Stir it in thoroughly. The warm spices complement the candy corn’s honey flavor and make the bark taste even more autumnal. This version is amazing for Thanksgiving leftovers, honestly.
Crunchy Add-Ins: Mix in 1/4 cup crushed pretzels or toasted pecans along with the candy corn. The salty crunch adds texture and prevents the bark from being one-note sweet. I tried this with salted pretzel sticks crushed into small pieces, and it was a game-changer for my annual Halloween movie night.
M&M’s Bark: Replace half the candy corn with Halloween-themed M&M’s. The chocolate coating adds another layer of flavor and the colors are even more festive. This version is especially popular with kids who find candy corn too sweet on its own.
Serving & Storage Suggestions
This bark is best served at room temperature. The chocolate is creamy, the candy corn is chewy, and everything hits perfect texture harmony. If you serve it straight from the fridge, the chocolate is too hard and the candy corn feels like little rocks. Give it 5-10 minutes at room temperature before serving.
Presentation ideas: Arrange the bark pieces on a Halloween-themed platter or in a glass jar with a ribbon tied around it. For party favors, place pieces in clear cellophane bags tied with orange and black twine. I once made a batch for a trunk-or-treat event and packaged them in small treat bags with “Witch’s Bark” labels—they were the first thing to go.
What to serve with it: This bark pairs beautifully with a hot cup of apple cider or a pumpkin spice latte. For a dessert board, arrange it alongside caramel apples, popcorn balls, and chocolate-dipped pretzels. It also makes a great topping for vanilla ice cream—just crumble it over the top.
Storage instructions: Store in an airtight container at room temperature for up to 5 days. Do not refrigerate long-term—the condensation can make the white chocolate bloom (develop white streaks) and the candy corn can become sticky. If you live in a warm climate, store in a cool, dark pantry. For longer storage, freeze in a freezer-safe bag for up to 2 months. Thaw at room temperature for 15 minutes before serving.
How flavors develop: The bark is best within the first 24 hours, when the candy corn is still chewy and the chocolate is fresh. After day two, the candy corn starts to absorb moisture from the chocolate and becomes slightly softer. It’s still delicious, just different. I actually prefer it on day two—the flavors meld together more, and the texture becomes more uniform.
Nutritional Information & Benefits
Let’s be real—this is a treat, not a health food. But here’s the nutritional breakdown for one serving (about 1/8 of the recipe):
- Calories: Approximately 280-320 calories per serving
- Total Fat: 14-16 grams (mostly from white chocolate)
- Carbohydrates: 38-42 grams
- Sugar: 32-36 grams
- Protein: 3-4 grams
- Sodium: 60-80 milligrams (more if using flaky salt)
Dietary considerations: This recipe contains dairy (white chocolate) and may contain soy lecithin. It’s not gluten-free unless you verify your white chocolate brand (some contain wheat-based additives). Candy corn is typically gluten-free, but always check labels. For nut-free versions, avoid any white chocolate made in facilities that process tree nuts.
Health perspective: White chocolate contains cocoa butter, which has some antioxidants, but let’s not pretend this is a health food. I make this because it brings joy and nostalgia, not because it’s nutrient-dense. That said, making treats from scratch means you control the quality of ingredients. No preservatives, no artificial flavors, just real chocolate and candy. In a world full of processed Halloween candy, there’s something nice about knowing exactly what’s in your treat.
Portion control tip: This bark is rich, so a small piece goes a long way. I like to break it into small, bite-sized shards rather than large bars. You still get the satisfaction of a sweet treat without overdoing it.
Conclusion
This candy corn white chocolate bark has become my secret weapon for Halloween. It’s the recipe I bring when I need something fast, festive, and guaranteed to impress. Every time I make it, I think about that moment in my kitchen when an eight-year-old showed me that simpler is almost always better. Sometimes the best recipes aren’t the ones with complicated techniques or fancy ingredients—they’re the ones that let the simple joy of good food shine through.
I hope you give this recipe a try, and I hope you make it your own. Add your favorite sprinkles, swap the chocolate, throw in some pretzels—whatever makes you happy. That’s the beauty of a recipe this simple. It’s a canvas, not a cage.
If you make this bark, I’d love to hear about it. Drop a comment below and let me know how it turned out, what variations you tried, or if your kids had any brilliant suggestions of their own. Share a photo on social media and tag me—I love seeing your creations. And if you’re looking for more quick and easy Halloween treats, check out my spider web cupcakes and pumpkin dip recipe for more last-minute party ideas.
Happy Halloween, and happy snacking!
Frequently Asked Questions
Can I use white chocolate bars instead of chips?
Absolutely! Chopped white chocolate bars actually melt more evenly than chips because they don’t have as many stabilizers. Just chop them into small, even pieces before melting. Use the same weight—12 ounces—and follow the same melting instructions.
Why did my white chocolate seize up?
White chocolate seizes when it gets too hot or comes into contact with even a tiny amount of water. Make sure your bowl and spatula are completely dry. Use 50% power on your microwave and stir frequently. If it seizes, try stirring in a teaspoon of coconut oil or shortening—sometimes you can save it.
Can I make this bark without a microwave?
Yes! Use a double boiler instead. Fill a small saucepan with an inch of water, bring it to a simmer, then place a heatproof bowl on top (make sure the bottom doesn’t touch the water). Add the white chocolate and coconut oil, and stir until melted. This method takes a few minutes longer but gives you more control over the temperature.
How far in advance can I make this bark?
You can make it up to 5 days ahead and store it at room temperature in an airtight container. For best texture and flavor, I recommend making it within 2 days of serving. You can also freeze it for up to 2 months—just thaw at room temperature before serving.
Can I use other Halloween candies instead of candy corn?
Definitely! Try candy pumpkins, autumn mix, chopped Reese’s cups, or Halloween M&M’s. Just keep the total amount around 1 cup. If using softer candies like caramel or peanut butter cups, add them after the chocolate has cooled for 2-3 minutes so they don’t melt into puddles.
Pin This Recipe!
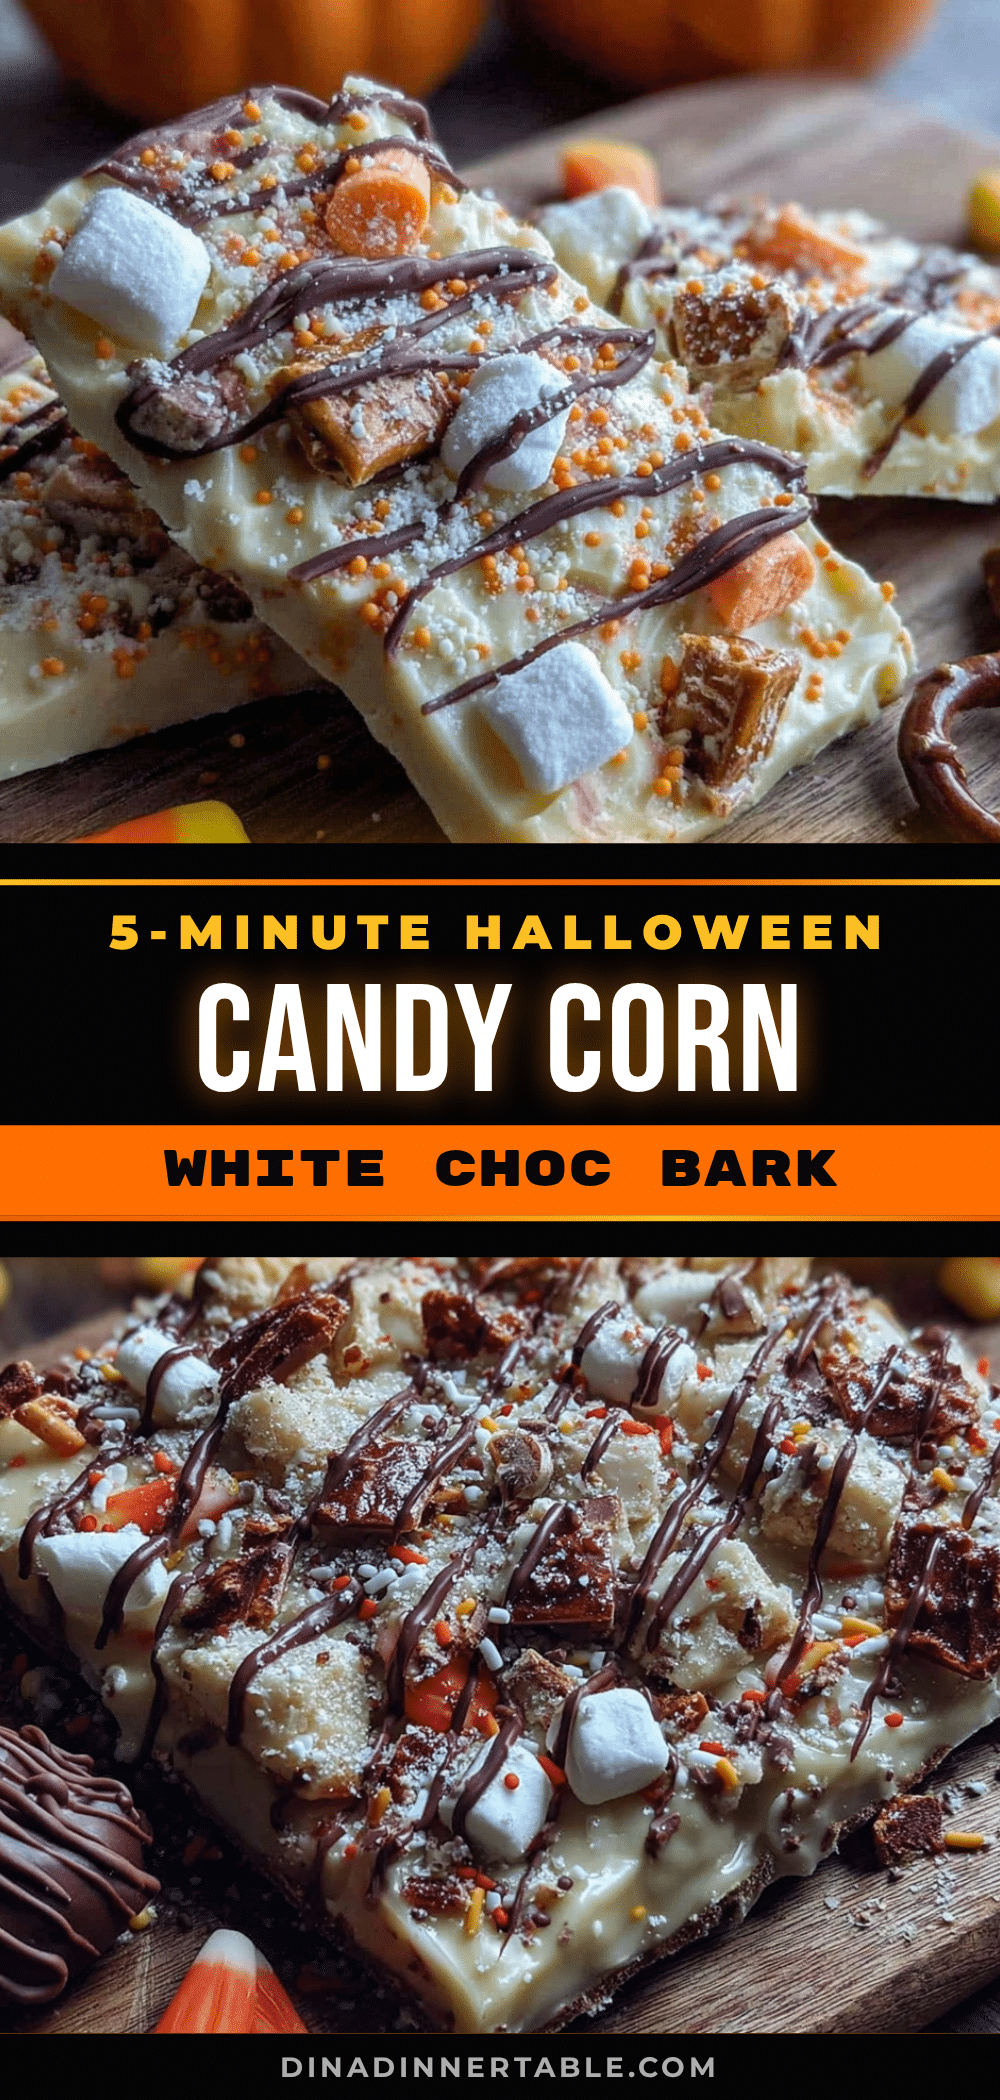
Easy 5-Minute Candy Corn White Chocolate Bark

A quick and easy Halloween treat made with melted white chocolate, candy corn, and sprinkles. Ready in just 10 minutes, this simple bark is perfect for last-minute parties and holiday gatherings.
- Prep Time: 5 minutes
- Cook Time: 5 minutes
- Total Time: 10 minutes
- Yield: 8 servings 1x
- Category: Dessert
- Cuisine: American
Ingredients
- 12 ounces (340 grams) white chocolate chips
- 1 cup (about 200 grams) candy corn
- 1 teaspoon (5 ml) coconut oil or vegetable shortening
- 2 tablespoons Halloween sprinkles (optional)
- 1/4 teaspoon flaky sea salt (optional)
Instructions
- Line your baking sheet with parchment paper, letting it extend slightly over the edges for easy removal.
- Pour the white chocolate chips into a microwave-safe bowl and add the coconut oil or shortening on top.
- Microwave in 30-second bursts on 50% power, stirring vigorously after each interval, until about 75% of the chips are melted and the mixture is mostly smooth.
- Stir continuously until completely smooth. If stubborn lumps remain, microwave for just 10 more seconds at 50% power.
- Pour the melted white chocolate onto the prepared baking sheet and spread into an even layer about 1/4 inch thick.
- Sprinkle the candy corn evenly over the melted chocolate, pressing each piece gently into the chocolate so it sticks.
- Add sprinkles and flaky salt if using, while the chocolate is still wet.
- Refrigerate for 10-15 minutes until completely set and firm to the touch.
- Lift the parchment paper out of the baking sheet and place the bark on a cutting board. Use a sharp knife to cut or break into irregular pieces.
- Serve immediately or store for later.
Notes
Don’t overheat the white chocolate—use 50% power and stir frequently. Let candy corn sit at room temperature for 10 minutes before using. Press candy corn into the chocolate, don’t just sprinkle. Cut at room temperature for clean breaks. Store in an airtight container at room temperature for up to 5 days.
Nutrition
- Serving Size: 1/8 of recipe
- Calories: 300
- Sugar: 34
- Sodium: 70
- Fat: 15
- Saturated Fat: 9
- Carbohydrates: 40
- Protein: 3.5
Keywords: Halloween bark, white chocolate bark, candy corn bark, easy Halloween treat, 5-minute dessert, no-bake dessert


