I was standing in line at the hardware store last October, holding a bag of lightbulbs I didn’t really need, when the older gentleman behind me—retired electrician, judging by the logo on his jacket—started talking about Halloween candy. “My granddaughter,” he said, shaking his head, “she doesn’t even eat the stuff. She just wants to make the creepy snacks for her friends.” And then, out of nowhere, he described these pretzel rods dipped in white chocolate with a slivered almond nail on the end. Witch fingers. Right there between the plumbing aisle and the paint samples. I mean, you just never know where a good recipe idea is going to find you.
I scribbled the basic concept on the back of my receipt before I forgot it. A few tweaks later—because honestly, the first batch looked more like sad ghost thumbs than witch fingers—and these Spooky White Chocolate Witch Finger Pretzel Rods became my go-to Halloween treat. They’re creepy, they’re cute, and they come together way faster than you’d think. Let me tell you, there’s something deeply satisfying about watching someone’s face when they realize they’re about to bite into a witch finger. Maybe you’ve been there—that moment when a snack is just playful enough to make everyone at the party smile.
The best part? These aren’t just for kids. I’ve brought them to adult Halloween gatherings and watched them disappear faster than the store-bought candy. There’s something about the combination of salty pretzel, sweet white chocolate, and that little almond nail that just works. And honestly, the slightly imperfect ones—the ones where the chocolate is a little lumpy or the nail is crooked—those are the most charming. Like real witch fingers, you know? Nobody’s expecting perfection from a witch.
Why You’ll Love This Recipe
After testing these Spooky White Chocolate Witch Finger Pretzel Rods at three different Halloween parties last year, I can tell you with confidence: this is the recipe that gets people talking. Not because it’s complicated—it’s actually one of the easiest treats I’ve ever made—but because it’s so cleverly simple. Here’s why you’ll keep coming back to it:
- Quick & Easy: From start to finish, you’re looking at about 20 minutes of active work. The rest is just waiting for the chocolate to set. Perfect for those “I need a Halloween treat NOW” moments.
- Simple Ingredients: Pretzel rods, white chocolate melting wafers, slivered almonds, and a little green food coloring. That’s it. No hunting through specialty stores for obscure ingredients.
- Perfect for Halloween Parties: These are the kind of treat that shows up on a platter and immediately draws a crowd. Kids love them, adults get a kick out of them, and everyone wants to know how you made them.
- Incredibly Photogenic: Let’s be real—half the fun of Halloween treats is posting them on social media. These witch fingers have that perfect mix of creepy and cute that gets all the likes.
- No Baking Required: If your oven is already full of other Halloween goodies, no problem. These come together on the stovetop or microwave with zero baking involved.
What makes these different from other witch finger recipes you might have seen? It’s the pretzel rod base. Most versions use cookies or shortbread, which are delicious but time-consuming. The pretzel gives you that satisfying salty-sweet contrast and a sturdy handle that makes these perfect for snacking without crumbling everywhere. Plus, the texture is just right—crisp pretzel, creamy chocolate, and that little crunch from the almond nail.
This is the kind of recipe that makes you feel like a Halloween hero without spending all day in the kitchen. It’s playful, it’s delicious, and honestly, it’s just plain fun to make. The first time you line up a row of these on a tray, you’ll see what I mean.
What Ingredients You Will Need
This recipe uses just a handful of simple ingredients to create something that looks far more complicated than it actually is. Here’s what you’ll need to gather:
For the Witch Fingers
- Pretzel rods (about 24): Look for the thick, straight pretzel rods, not the thin twisted ones. I prefer the brand Utz for their sturdy texture, but any brand works. You want rods that are relatively straight so they look like fingers, not bent ones that look like arthritic knuckles—unless that’s the look you’re going for!
- White chocolate melting wafers (12 ounces): These are different from white chocolate chips, which don’t melt as smoothly. Melting wafers (like Ghirardelli or Merckens) give you that perfect coating consistency. If you can’t find them, chopped white chocolate bars work in a pinch, but you’ll need to temper them properly.
- Slivered almonds (about 24): These become the fingernails. Look for slivered almonds that are relatively flat and uniform in shape. If they’re too curved, they won’t sit nicely on the chocolate. I like the Blue Diamond brand for consistent sizing.
- Green gel food coloring: This is non-negotiable for that witchy green tint. Liquid food coloring will seize your chocolate. Gel or oil-based coloring is the way to go. Americolor or Wilton brands work beautifully.
For Decoration (Optional but Fun)
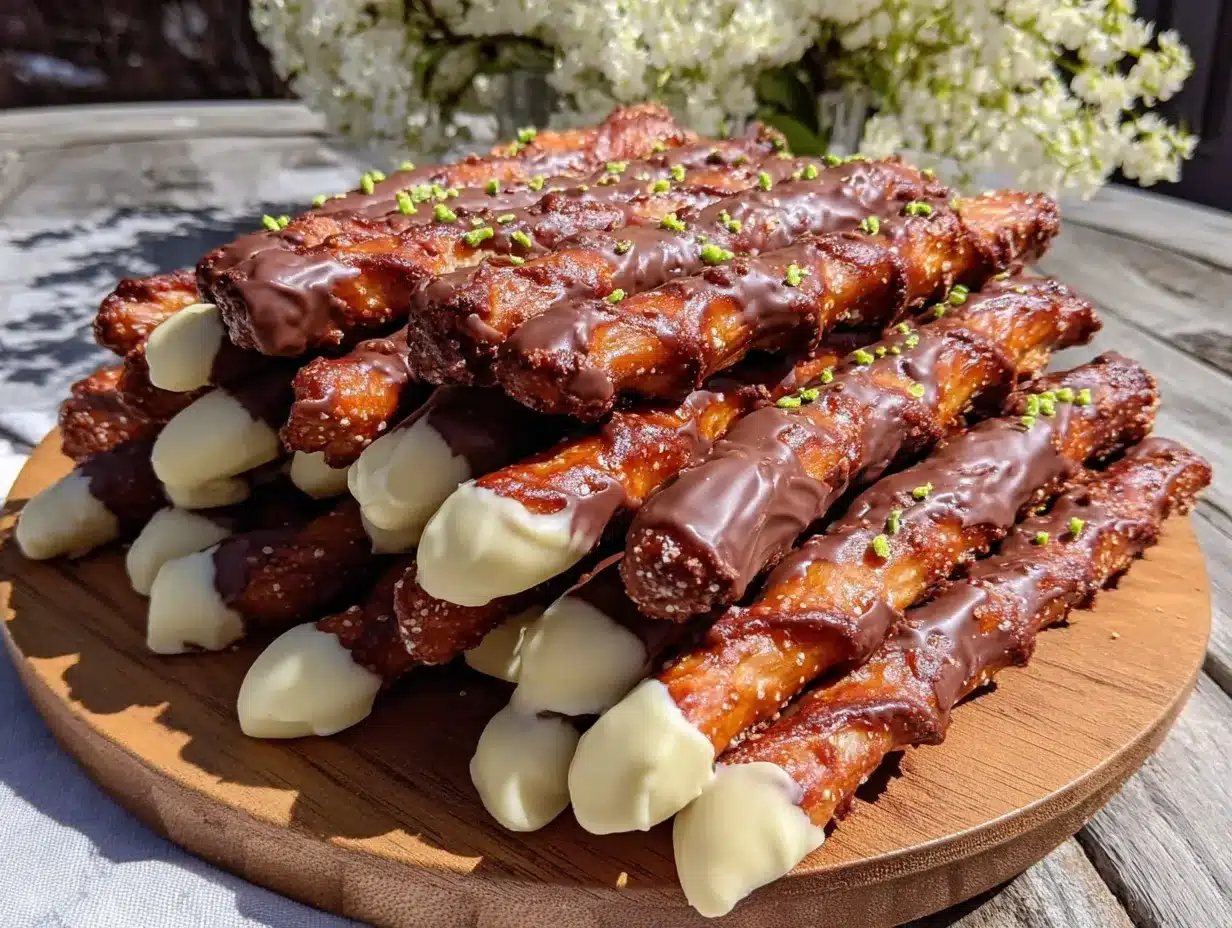
- Red piping gel or strawberry jam: A tiny dab at the “cuticle” area gives a bloody, gruesome effect that takes these from cute to properly creepy. (Adds that Halloween shock value)
- Edible glitter or luster dust: A light dusting makes them look magical rather than just green. (Use sparingly for a subtle shimmer)
- Black decorating gel: For adding wrinkles or knuckle lines if you want extra detail.
Ingredient Selection Tips: When choosing your pretzel rods, give them a gentle squeeze in the package to make sure none are broken. Broken rods are harder to dip and don’t look as finger-like. For the white chocolate, avoid “white confectionery coating” if possible—it doesn’t have the same creamy flavor and can taste waxy. Real white chocolate with cocoa butter is worth the extra few dollars. If you’re making these for a party with nut allergies, you can skip the almond nails and use a small dot of white chocolate instead, though they won’t look quite as authentic.
Seasonal Note: During October, many grocery stores stock white chocolate melting wafers in the baking aisle specifically for holiday treats. If you can’t find them, craft stores like Michaels or Joann Fabrics carry them year-round in their cake decorating sections.
Equipment Needed
You don’t need any fancy equipment for these Spooky White Chocolate Witch Finger Pretzel Rods, which is part of their charm. Here’s what you’ll want to have on hand:
- Microwave-safe bowl or double boiler: For melting the white chocolate. I use a glass Pyrex measuring cup because the pour spout makes dipping easier, but any microwave-safe bowl works. If you’re using a double boiler, just be careful not to let any water touch the chocolate—it will seize up instantly.
- Parchment paper or silicone baking mat: For setting the dipped pretzels on. Wax paper works in a pinch, but parchment is better because it doesn’t stick. I learned this the hard way when my first batch stuck to wax paper and I had to peel chocolate off in sad little flakes.
- Baking sheet or tray: Something flat to hold your parchment paper. A standard half-sheet pan is perfect.
- Small offset spatula or butter knife: For spreading the chocolate smoothly on each pretzel rod. You can also use a spoon, but the spatula gives you more control.
- Toothpicks: Handy for placing the almond nails and for any fine detail work with the decorating gel.
- Small piping bag or zip-top bag: If you want to pipe the chocolate instead of dipping. This gives you more control and less mess. A zip-top bag with the corner snipped off works perfectly.
Budget-Friendly Options: Don’t have a double boiler? No problem. A heatproof bowl set over a saucepan with an inch of simmering water works just as well. No offset spatula? A regular butter knife or even a clean craft stick will do the job. The beauty of this recipe is that it’s forgiving—you don’t need professional tools to get professional-looking results.
Preparation Method
Making these Spooky White Chocolate Witch Finger Pretzel Rods is straightforward, but there are a few tricks that make the difference between “those look kinda cool” and “wait, you MADE these?” Let me walk you through it step by step.
- Prep your workspace (5 minutes): Line a baking sheet with parchment paper. Arrange your pretzel rods nearby. Have your slivered almonds ready in a small bowl. Make sure your hands are clean and dry—chocolate does not like water.
- Melt the white chocolate (3-4 minutes): Place your white chocolate melting wafers in a microwave-safe bowl. Microwave in 30-second intervals at 50% power, stirring between each interval. It’s tempting to blast it on high to save time, but trust me—low and slow is the way to go. Burnt white chocolate has a sad, grainy texture and a flavor that reminds me of stale cereal. Stir until completely smooth. If you’re using a double boiler, keep the water at a gentle simmer, not a rolling boil.
- Add the green color (1 minute): Once your chocolate is fully melted and smooth, add a small amount of green gel food coloring. Start with just a tiny dab on the tip of a toothpick—you can always add more, but you can’t take it away. Stir thoroughly. You’re going for a pale, sickly green, not neon-bright. Think “witch skin,” not “radioactive slime.” If you accidentally go too dark, add a little more melted white chocolate to lighten it back up.
- Dip the pretzel rods (10 minutes): Hold a pretzel rod by one end and dip it into the melted green chocolate. You want to coat about two-thirds of the rod—leaving the top third bare as the “wrist” area. Gently twist and lift the pretzel, letting the excess chocolate drip back into the bowl. Here’s the trick I figured out after my first messy batch: don’t dip too fast. Let the chocolate flow over the pretzel naturally. If you rush, you get lumpy, uneven coating.
- Place on parchment (2 minutes): Lay the coated pretzel on your parchment-lined baking sheet. If the chocolate pools at the bottom, gently tap the baking sheet on the counter to encourage it to spread evenly. Don’t worry if it’s not perfect—remember, real witch fingers aren’t perfectly uniform either.
- Add the fingernail (5 minutes): While the chocolate is still wet, press a slivered almond onto the tip of the pretzel. Position it so the pointed end extends slightly beyond the chocolate, like a fingernail growing past the fingertip. Gently press down so it adheres. If the chocolate has started to set, don’t panic—just dip the almond in the melted chocolate first to create a little glue.
- Create the knuckle wrinkles (5 minutes): Using a toothpick or the tip of a small knife, gently drag lines across the chocolate to create knuckle wrinkles. You want 2-3 subtle lines about a third of the way down from the tip. Don’t press too hard—you’re just creating a suggestion of wrinkles, not cutting through the chocolate. I like to make them slightly uneven, like real knuckles.
- Add the bloody cuticle (optional) (3 minutes): For the full creepy effect, use a toothpick to dab a tiny bit of red piping gel or strawberry jam at the base of the almond nail, where it meets the chocolate. This creates a “bloody cuticle” effect that’s absolutely gruesome and perfect for Halloween. A little goes a long way—you want a suggestion of blood, not a crime scene.
- Let them set (20-30 minutes): Allow the finished witch fingers to set at room temperature. Don’t put them in the refrigerator unless you’re in a huge hurry—condensation can form and make the chocolate look dull instead of glossy. If you must use the fridge, wait until they’re mostly set first, then give them just 5 minutes to finish.
- Final inspection (2 minutes): Once set, check each finger. If any almonds have fallen off, you can reattach them with a tiny dab of melted chocolate. If the chocolate is too thick in some spots, you can gently smooth it with your finger (clean hands, obviously). These little imperfections are what make them look handmade and charming.
Sensory Cue: When you pick up a finished witch finger, you should feel the weight of the chocolate coating, hear a slight crackle if you bend it (don’t bend it too much—pretzels break!), and see a smooth, glossy green surface with subtle wrinkling at the knuckle area. The almond nail should be firmly attached and slightly shiny from the chocolate underneath.
Cooking Tips & Techniques
After making about six batches of these Spooky White Chocolate Witch Finger Pretzel Rods last Halloween season, I’ve collected a few hard-won tips that will save you from my early mistakes. Because let me tell you, I had some real disasters along the way.
Temperature is everything. White chocolate is finicky. If it’s too hot, it will be thin and runny, making a mess on your parchment paper. If it’s too cool, it will be thick and lumpy, giving your witch fingers a bumpy, unappealing texture. The sweet spot is when the chocolate is warm enough to flow smoothly off a spoon but not so hot that it feels uncomfortable on your wrist (like testing baby bottle temperature). If your chocolate starts to thicken while you’re working, pop it back in the microwave for 10 seconds at 50% power.
Don’t crowd your workspace. My first attempt, I tried to dip all 24 pretzels at once. By the time I got to number 12, the chocolate in the bowl had started to set, and the first ones I’d dipped were already dry, so the almonds wouldn’t stick. Now I work in batches of 6-8 at a time. It keeps the chocolate at the right consistency and gives me time to add the almond nails and knuckle wrinkles while everything is still wet.
The almond nail trick. I learned this from a cake decorator friend: if you’re having trouble getting the almonds to stick, dip just the tip of each almond into the melted chocolate before pressing it onto the pretzel. This creates a stronger bond and prevents the nails from falling off later. Also, sort through your almonds first and pick out the ones that are roughly the same size. Uneven nails look less witchy and more… weird.
Multitasking strategy. While your chocolate is melting, arrange your pretzel rods on the counter and have your almonds within easy reach. I like to lay out all my tools before I start—parchment, baking sheet, toothpicks, decorating gels. Once you start dipping, you won’t want to stop to search for something. It’s like a cooking show mise en place moment, and honestly, it makes the whole process so much more relaxing.
Common mistake: over-dipping. If you dip the pretzel too deep into the chocolate, you’ll end up with a thick, clumpy coating that looks more like a green blob than a witch finger. Aim for about two-thirds coverage. The exposed pretzel at the top gives it that “wrist” look and provides a clean area for holding while you eat. Plus, it looks more realistic—witches don’t have chocolate-covered forearms.
Variations & Adaptations
One of the best things about this recipe is how easy it is to adapt. Here are some variations I’ve tried and loved:
Color Variations
Not feeling green? Try purple for a magical witch vibe, or leave them white for “ghost fingers.” I made a batch last year with purple chocolate and silver luster dust, and they looked like they came straight from a fairy tale. For zombie fingers, use a pale gray or beige chocolate with a touch of green. The possibilities are endless, and each color gives the treat a completely different personality.
Dietary Adaptations
If you’re gluten-free, look for gluten-free pretzel rods. They’re available at most health food stores and online. The texture is slightly different—a bit more crumbly—but they work perfectly for this recipe. For a dairy-free version, use dairy-free white chocolate (Enjoy Life makes a good one) and check that your pretzels are dairy-free as well. Most are, but it’s worth double-checking. And if you’re avoiding nuts, skip the almond nails entirely and use a small dot of white chocolate to create a nail shape instead. They won’t look quite as realistic, but they’ll still be delicious.
Flavor Twists
Add a few drops of peppermint extract to the melted white chocolate for a cool, minty witch finger. Or try orange extract for a creamsicle-like flavor that’s surprisingly good with the salty pretzel. I once made a batch with a pinch of cinnamon and a drop of vanilla—they tasted like churros in witch finger form. For an adult version, a tiny splash of bourbon or rum extract adds warmth and complexity.
Different Coatings
Instead of white chocolate, try dark chocolate for “chocolate witch fingers” or caramel for a sticky, gooey version. If you use caramel, you’ll need to work quickly because it sets fast. I tried this once and ended up with caramel all over my hands, but the result was delicious. You can also roll the dipped pretzels in sprinkles, crushed cookies, or coconut flakes for added texture and color.
Serving & Storage Suggestions
These Spooky White Chocolate Witch Finger Pretzel Rods are best served at room temperature, arranged on a platter in a way that maximizes their creepy factor. I like to position them in a cluster, slightly overlapping, like a hand reaching up from the underworld. A black or dark purple platter makes the green color pop beautifully.
Presentation Ideas:
- Stand them upright in a jar or mug filled with candy corn or black jelly beans. They look like a bouquet of witch fingers—equal parts disturbing and delightful.
- Arrange them in a circle on a round platter with a small bowl of “blood” (red dipping sauce or strawberry jam) in the center.
- Place them on a bed of shredded coconut that’s been tinted green with food coloring for a “swamp” effect.
- Wrap individual fingers in cellophane bags tied with orange or black ribbon for party favors.
Storage Instructions: Store your witch fingers in an airtight container at room temperature for up to 5 days. Do not refrigerate them unless absolutely necessary—the condensation will ruin the glossy finish. If you live in a warm climate, you can store them in a cool, dark place like a pantry. Layer them between sheets of parchment paper to prevent the chocolate from sticking together.
Freezing: These freeze beautifully! Place them in a single layer on a baking sheet and freeze until solid (about 1 hour), then transfer to a freezer-safe container or zip-top bag. They’ll keep for up to 3 months. Thaw at room temperature for about 30 minutes before serving. The texture of the pretzel stays surprisingly crisp.
Flavor Development: Honestly, these taste best the day they’re made, when the pretzel is at its crunchiest and the chocolate is perfectly glossy. But they’re still delicious for several days after. The pretzel does soften slightly over time, absorbing some moisture from the chocolate, but it’s a subtle change that most people won’t notice.
Nutritional Information & Benefits
Let’s be real—these are a treat, not a health food. But here’s the nutritional breakdown so you know what you’re working with:
Per witch finger (approximate):
- Calories: 120-150
- Fat: 7-9g
- Carbohydrates: 15-18g
- Protein: 2-3g
- Sugar: 10-12g
- Sodium: 150-200mg
Health Highlights: The almonds provide a small amount of healthy fats, vitamin E, and magnesium. White chocolate contains calcium from the milk solids. And the pretzel gives you a bit of energy from carbohydrates. But honestly, the main benefit here is the joy and fun factor—sharing these with friends and family, watching their faces light up (or grimace in delighted horror), and creating Halloween memories. That’s worth more than any nutritional value.
Dietary Considerations: These contain dairy (white chocolate), gluten (pretzels), and nuts (almonds). They are not suitable for vegan, dairy-free, gluten-free, or nut-free diets unless modified as suggested in the variations section. Always check labels on your ingredients if you’re serving people with allergies.
Conclusion
These Spooky White Chocolate Witch Finger Pretzel Rods have become my signature Halloween treat, and I think they’ll become yours too. They’re quick enough to throw together on a busy October weeknight, impressive enough to bring to any party, and fun enough to make with kids or friends. The combination of salty pretzel, sweet white chocolate, and that creepy green color is just perfect for the season.
I love that this recipe came from such an unexpected source—a retired electrician in a hardware store line. It reminds me that good ideas can come from anywhere if you’re paying attention. And honestly, that’s what cooking is all about, isn’t it? Taking inspiration from the world around you and making it your own.
So go ahead, give these a try. Make them your own—add your favorite colors, try different decorations, experiment with flavors. And when you do, I’d love to hear about it. Drop a comment below and tell me how your witch fingers turned out, or share a photo on social media and tag me. Happy Halloween, and happy snacking!
Frequently Asked Questions
Can I make these witch fingers ahead of time?
Absolutely! You can make them up to 5 days in advance and store them in an airtight container at room temperature. They also freeze beautifully for up to 3 months. Just thaw at room temperature before serving.
My white chocolate seized and turned lumpy. What went wrong?
This usually happens when moisture gets into the chocolate—either from water in your bowl or from steam if you’re using a double boiler. Make sure all your tools are completely dry, and avoid getting any water in the chocolate. If it does seize, you can try adding a teaspoon of vegetable oil or shortening and stirring vigorously to smooth it out.
Can I use white chocolate chips instead of melting wafers?
You can, but white chocolate chips contain stabilizers that make them harder to melt smoothly. They’ll still work, but you might end up with a thicker coating that’s harder to spread evenly. If using chips, add a teaspoon of coconut oil or vegetable shortening to help them melt more smoothly.
How do I get the green color just right?
Start with a tiny amount of green gel food coloring—like the size of a grain of rice—and stir it in thoroughly. Add more in tiny increments until you reach your desired shade. Remember, you’re going for a pale, sickly witch green, not neon bright. And always use gel or oil-based coloring, never liquid drops, which will seize the chocolate.
My almond nails keep falling off. What am I doing wrong?
This usually means the chocolate was starting to set by the time you added the almonds. Try working in smaller batches (6-8 pretzels at a time) so you can add the almonds while the chocolate is still wet. You can also dip the tip of each almond in melted chocolate before pressing it onto the pretzel for extra adhesion.
Pin This Recipe!

Spooky White Chocolate Witch Finger Pretzels: Easy Halloween Treat

These Spooky White Chocolate Witch Finger Pretzel Rods are a quick and easy Halloween treat that combines salty pretzels, sweet white chocolate, and slivered almond nails for a creepy-cute snack that’s perfect for parties.
- Prep Time: 20 minutes
- Cook Time: 0 minutes
- Total Time: 50 minutes
- Yield: 24 servings 1x
- Category: Dessert
- Cuisine: American
Ingredients
- 24 pretzel rods (thick, straight ones like Utz)
- 12 ounces white chocolate melting wafers (e.g., Ghirardelli or Merckens)
- 24 slivered almonds (flat and uniform)
- Green gel food coloring (e.g., Americolor or Wilton)
- Red piping gel or strawberry jam (optional, for bloody cuticle)
- Edible glitter or luster dust (optional)
- Black decorating gel (optional, for knuckle lines)
Instructions
- Prep your workspace: Line a baking sheet with parchment paper. Arrange pretzel rods and slivered almonds nearby. Ensure hands are clean and dry.
- Melt the white chocolate: Place melting wafers in a microwave-safe bowl. Microwave in 30-second intervals at 50% power, stirring between each, until smooth. Alternatively, use a double boiler with gentle simmering water.
- Add the green color: Stir in a tiny dab of green gel food coloring (start with a toothpick tip) until you achieve a pale, sickly green. Add more if needed, but avoid neon brightness.
- Dip the pretzel rods: Hold a pretzel rod by one end and dip about two-thirds into the melted green chocolate. Gently twist and lift, letting excess drip back into the bowl. Place on parchment-lined baking sheet.
- Add the fingernail: While chocolate is still wet, press a slivered almond onto the tip, pointed end extending slightly beyond the chocolate. Press gently to adhere. If chocolate has set, dip almond in melted chocolate first.
- Create knuckle wrinkles: Use a toothpick or small knife to gently drag 2-3 subtle lines across the chocolate about a third of the way from the tip, creating uneven knuckle wrinkles.
- Add the bloody cuticle (optional): Dab a tiny bit of red piping gel or strawberry jam at the base of the almond nail with a toothpick for a gruesome effect.
- Let them set: Allow finished witch fingers to set at room temperature for 20-30 minutes. Avoid refrigeration to prevent condensation and dullness.
- Final inspection: Check each finger. Reattach any fallen almonds with a dab of melted chocolate. Smooth thick spots gently with a clean finger.
Notes
Work in batches of 6-8 pretzels to keep chocolate at the right consistency. If chocolate thickens, microwave for 10 seconds at 50% power. For stronger almond adhesion, dip almond tip in melted chocolate before pressing. Store in an airtight container at room temperature for up to 5 days. Freeze for up to 3 months.
Nutrition
- Serving Size: 1 witch finger
- Calories: 135
- Sugar: 11
- Sodium: 175
- Fat: 8
- Saturated Fat: 4
- Carbohydrates: 16
- Fiber: 1
- Protein: 2.5
Keywords: Halloween treats, witch fingers, pretzel rods, white chocolate, easy Halloween recipe, no-bake dessert, spooky snacks


