This was supposed to be a gingerbread cake. I had the whole thing planned out—a rich, spiced layer cake with cream cheese frosting, the kind you bring to a holiday party and watch disappear. But somewhere between measuring the molasses and reaching for the flour, I grabbed the wrong container. Instead of all-purpose flour, I grabbed a bag of almond flour I’d stashed in the pantry for another project. I didn’t realize until the dough was already mixed, and honestly, I was already running late for a friend’s cookie exchange. The cake was a no-go. The dough was too soft, too sticky, and definitely not bakeable as a cake. I stood there, spatula in hand, staring at this bowl of what felt like a complete kitchen failure. My first instinct was to toss it and start over. But then I thought—you know that feeling when you’re elbow-deep in a mess and just need to make it work? I grabbed a spoon, tasted the raw dough, and something clicked. It was *good*. Like, dangerously good. The spices were perfect, the texture was soft and fudgy, and the almond flour gave it this subtle richness I hadn’t expected. So I rolled the dough into little balls, dipped them in dark chocolate, and brought them to the exchange anyway—half expecting polite smiles and a trash can. Instead, people went quiet after the first bite. Then came the questions: “What is this?” “Can I have the recipe?” “Are there more?” That night, a failed cake turned into the most requested treat I’ve ever made. And honestly? I still laugh every time I make them.
Why You’ll Love These Guest-Favorite Gingerbread Cookie Dough Truffles
Let me tell you something—I’ve tested this recipe at least a dozen times since that first happy accident. I’ve brought them to potlucks, dinner parties, and even a neighbor’s holiday open house. Every single time, they’re the first thing to disappear. And I’m not just saying that to toot my own horn. There’s something about the combination of soft, spiced cookie dough and a crackly chocolate shell that just works. People can’t stop at one.
- No-Bake & Quick: These come together in about 20 minutes of active time. No oven required. Perfect for when you need a last-minute dessert for a gathering.
- Simple Pantry Ingredients: You probably already have most of these in your kitchen. No weird specialty items, no hunting down obscure spices.
- Perfect for Hosting: Make them a day ahead. They actually taste better after resting in the fridge overnight. Less stress before guests arrive.
- Crowd-Pleaser: I’ve seen kids, grandparents, and picky eaters all go back for seconds. The gingerbread flavor is familiar but the truffle format feels special.
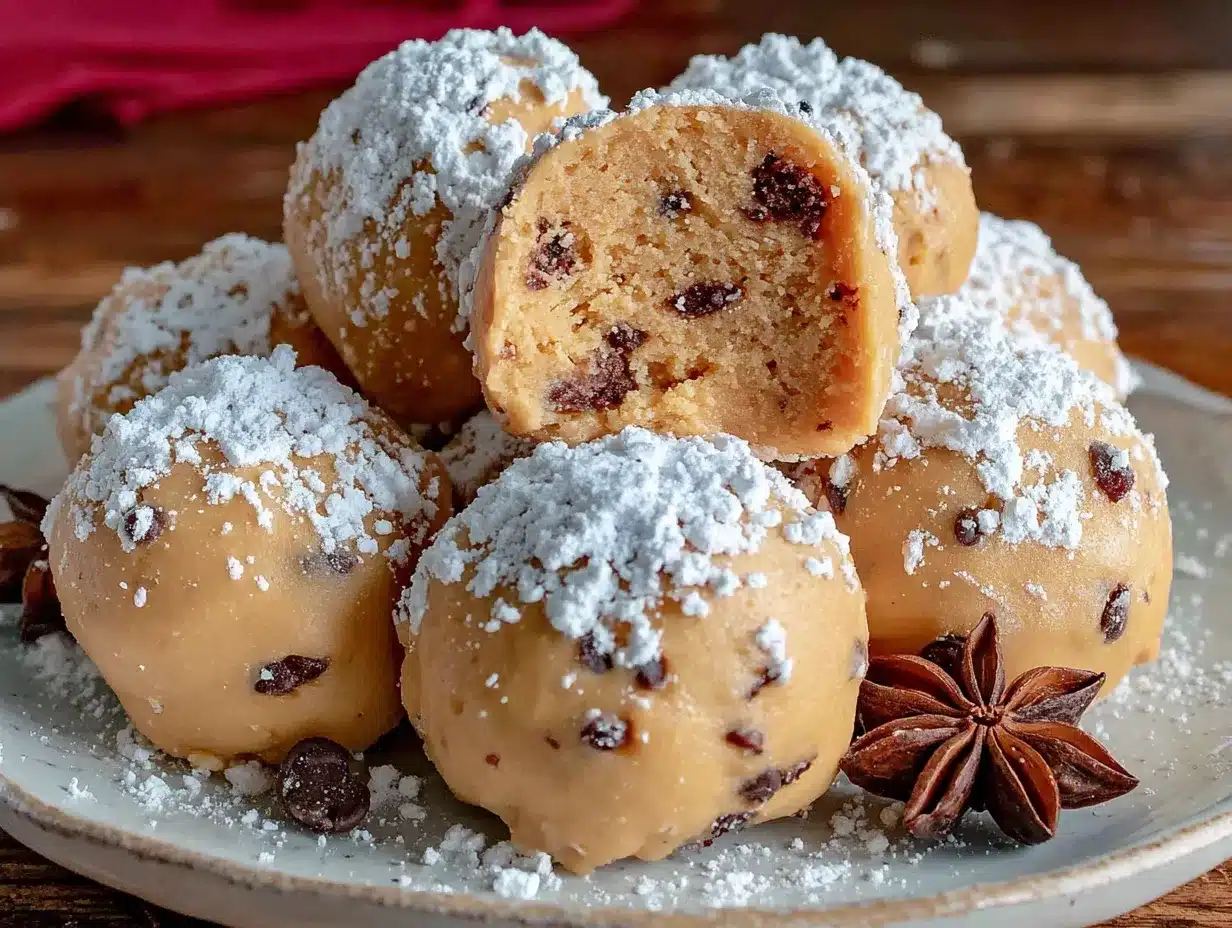
- Unbelievably Delicious: The texture is soft, almost fudge-like, with just the right amount of chew. The chocolate coating adds a satisfying snap.
What makes these different from other truffle recipes? It’s the almond flour base. Most cookie dough truffles use regular flour, which can taste raw or grainy. Almond flour gives a smooth, buttery texture that actually improves after chilling. Plus, the spices—ginger, cinnamon, cloves, and a hint of nutmeg—are balanced so nothing overpowers. I’ve had people tell me these taste like the holidays in a bite, and honestly, I can’t think of a better compliment.
If you’re hosting a dinner party or a festive get-together, these truffles are your secret weapon. They look impressive on a platter, they’re easy to grab and eat while mingling, and they don’t require forks or plates. Just set them out and watch them vanish. It’s the kind of recipe that makes you look like you spent hours in the kitchen when really, you just whisked, rolled, and dipped.
What Ingredients You Will Need
This recipe uses simple, wholesome ingredients to deliver big holiday flavor. Most are pantry staples, and the few that aren’t are easy to find at any grocery store. Here’s what you’ll need to make about 24 truffles.
For the Cookie Dough
- 1 ½ cups almond flour (I use Bob’s Red Mill for consistent texture; avoid coarse almond meal here)
- ¼ cup unsalted butter, softened (adds richness and helps the dough hold together)
- ¼ cup molasses (not blackstrap—use regular or mild molasses for the right sweetness)
- 2 tablespoons maple syrup (adds moisture and a subtle caramel note)
- 1 teaspoon vanilla extract (pure, not imitation)
- 1 ½ teaspoons ground ginger (the star spice—don’t skimp)
- 1 teaspoon ground cinnamon
- ½ teaspoon ground cloves
- ¼ teaspoon ground nutmeg (freshly grated if you have it)
- ¼ teaspoon salt (balances the sweetness and brings out the spices)
- 2 tablespoons coconut sugar or brown sugar (adds a tiny bit of crunch and deeper flavor)
For the Chocolate Coating
- 1 cup dark chocolate chips or chopped dark chocolate (I prefer 60-70% cacao for a nice contrast to the sweet dough)
- 1 teaspoon coconut oil or vegetable shortening (helps the chocolate set smoothly and gives a glossy finish)
Optional Garnishes
- Flaky sea salt
- Crushed gingerbread cookies
- White chocolate drizzle
- Crushed pecans or walnuts
Ingredient Notes & Swaps: If you’re nut-free, you can substitute the almond flour with an equal amount of oat flour or gluten-free all-purpose flour blend. The texture will be slightly different—less tender, a bit more dense—but still delicious. For a dairy-free version, use vegan butter sticks (not tub margarine) in place of regular butter. Coconut sugar works great if you want to keep things refined sugar-free, but brown sugar is fine too. Just make sure your molasses is fresh—old molasses can taste bitter. And if you don’t have maple syrup, honey works as a substitute, though it will change the flavor slightly.
Equipment Needed
You don’t need much for this recipe, which is part of the beauty. Here’s what I use:
- Medium mixing bowl (any bowl works, but a wide one makes mixing easier)
- Spatula or wooden spoon (for mixing the dough)
- Measuring cups and spoons (accuracy matters with the spices)
- Small cookie scoop or teaspoon (for uniform truffle sizes)
- Baking sheet lined with parchment paper (for chilling the dough balls)
- Double boiler or microwave-safe bowl (for melting chocolate)
- Fork or dipping tool (for coating the truffles in chocolate)
- Refrigerator (for setting the truffles)
If you don’t have a double boiler, a heatproof bowl set over a pot of simmering water works perfectly. I’ve also melted chocolate in the microwave dozens of times—just go in 20-second bursts and stir between each. No fancy equipment required. I will say, a small cookie scoop makes rolling the dough much faster and gives you evenly sized truffles. But a teaspoon works fine too. For storage, any airtight container will do. I use a glass meal prep container with a lid, but a zip-top bag works in a pinch.
Preparation Method
This is where the magic happens. Follow these steps, and you’ll have a batch of truffles that’ll steal the show at any gathering.
- Make the cookie dough: In a medium mixing bowl, combine the softened butter, molasses, maple syrup, and vanilla extract. Stir until smooth and well combined. The mixture should look like a thick, dark caramel. Add the almond flour, ground ginger, cinnamon, cloves, nutmeg, salt, and coconut sugar. Mix with a spatula until a soft dough forms. It will be slightly sticky but should hold together when pressed. If it feels too wet, add an extra tablespoon of almond flour. If too dry, add a teaspoon of maple syrup.
- Chill the dough: Cover the bowl with plastic wrap and refrigerate for at least 30 minutes. This step is crucial—chilled dough is much easier to roll. I’ve skipped this before and ended up with sticky, misshapen balls. Don’t be like me. Give it the full 30 minutes, or even an hour if you have time.
- Roll the truffles: Line a baking sheet with parchment paper. Using a small cookie scoop or a teaspoon, scoop out portions of the chilled dough. Roll each portion between your palms into a smooth ball, about 1 inch in diameter. Place each ball on the prepared baking sheet. You should get about 24 truffles. Pop the sheet back in the fridge for another 15-20 minutes while you prepare the chocolate.
- Melt the chocolate: In a double boiler or microwave-safe bowl, combine the dark chocolate chips and coconut oil. If using a double boiler, stir occasionally until smooth. If using a microwave, heat in 20-second bursts, stirring after each, until fully melted. Be careful not to overheat—chocolate seizes up if it gets too hot. The coconut oil helps keep it fluid and gives a beautiful shine.
- Dip the truffles: Remove the chilled dough balls from the fridge. Working one at a time, drop a truffle into the melted chocolate. Use a fork to gently roll it around until fully coated. Lift it out with the fork, letting excess chocolate drip back into the bowl. Transfer to the parchment-lined sheet. If you want to add garnishes like flaky salt or crushed cookies, sprinkle them on now before the chocolate sets.
- Set the truffles: Place the baking sheet back in the refrigerator for at least 20 minutes, or until the chocolate is firm to the touch. For the best texture, let them rest in the fridge for at least an hour before serving. The dough softens slightly, and the chocolate develops a clean snap.
- Serve and store: Arrange the truffles on a platter and watch them disappear. Store leftovers in an airtight container in the refrigerator for up to two weeks. They also freeze beautifully—just layer them between parchment in a freezer-safe container for up to three months.
Pro Tip: If your hands get sticky while rolling the dough, lightly dampen them with cold water. It helps prevent sticking without adding extra flour. Also, if the chocolate starts to thicken as you work, give it a quick 10-second zap in the microwave to loosen it up.
Cooking Tips & Techniques
After making these truffles more times than I can count, I’ve picked up a few tricks that make the process smoother and the results more consistent. Here’s what I wish someone had told me the first time.
Don’t skip the chill. I know I said it already, but it’s worth repeating. Warm dough is a nightmare to roll. It sticks to everything—your hands, the spoon, the counter. Chilling firms up the butter and lets the almond flour absorb the moisture, making the dough pliable and easy to shape. If you’re in a rush, pop the dough in the freezer for 15 minutes instead of 30 in the fridge.
Use good chocolate. The chocolate coating is half the experience. Cheap chocolate chips often contain stabilizers that prevent smooth melting. I’ve had the best luck with Ghirardelli or Guittard dark chocolate chips. If you’re feeling fancy, a chopped dark chocolate bar melts even more evenly. And don’t forget the coconut oil—it’s the secret to that glossy, professional finish.
Work in batches. Don’t try to dip all 24 truffles at once if you’re new to this. Keep half the dough balls in the fridge while you dip the first batch. Cold truffles hold their shape better in warm chocolate. I learned this the hard way when my first batch turned into chocolate puddles because the dough was too warm.
Tap off excess chocolate. After dipping, tap the fork gently against the edge of the bowl to shake off extra chocolate. This prevents pooling at the bottom of the truffle, which can create a thick, uneven base. Nobody wants a truffle that’s all chocolate and no dough.
Let them rest overnight. If you can resist eating them right away, let the truffles sit in the fridge overnight. The flavors meld together beautifully. The ginger and molasses become more pronounced, and the texture turns fudgy and luxurious. I’ve made these for holiday parties and prepped them two days in advance—they were even better on day two.
Variations & Adaptations
One of the best things about this recipe is how easy it is to tweak. Here are a few variations I’ve tried and loved.
Spiced White Chocolate Version
Swap the dark chocolate coating for white chocolate. Add a pinch of cinnamon and cardamom to the melted white chocolate for a chai-like twist. The sweetness of the white chocolate pairs beautifully with the spicy dough. I made these for a friend’s baby shower, and they were a hit.
Vegan & Dairy-Free Adaptation
Use vegan butter sticks (I like Miyoko’s or Earth Balance) in place of regular butter. Make sure your chocolate is dairy-free—many dark chocolates are naturally vegan, but double-check the label. Coconut oil works perfectly in place of butter in the chocolate coating. The texture is slightly firmer, but just as delicious.
Gluten-Free & Grain-Free
This recipe is already gluten-free if you use almond flour. For a nut-free version, substitute the almond flour with an equal amount of oat flour or sunflower seed flour. Note that sunflower seed flour can turn green when combined with baking soda or molasses, so stick with oat flour for the most appealing color.
Extra Spicy Gingerbread
If you love a strong ginger kick, add an extra ½ teaspoon of ground ginger and a pinch of cayenne pepper. The heat builds slowly and leaves a warm tingle. I made this version for a holiday party where people kept asking, “What’s that little kick?” It’s my personal favorite.
Peppermint Crunch
Crush a few candy canes or peppermint candies and sprinkle them over the chocolate coating before it sets. The minty crunch adds a festive touch that’s perfect for Christmas gatherings. Just make sure the peppermint is finely crushed so it sticks to the chocolate.
Serving & Storage Suggestions
These truffles are incredibly versatile when it comes to serving. Here’s how I like to present them for gatherings.
Serving Temperature: Serve them straight from the fridge. The chocolate stays firm and snappy, and the dough remains soft but not sticky. If you leave them out at room temperature for more than 30 minutes, the chocolate may soften, especially in a warm room. For a dinner party, I arrange them on a chilled marble board or a plate that’s been in the fridge for a few minutes.
Presentation Ideas: Arrange the truffles on a platter in a single layer. Sprinkle flaky sea salt over the top for a savory contrast. Add a few fresh rosemary sprigs or cranberries around the edges for a holiday look. If you’re feeling extra, drizzle white chocolate over the dark chocolate coating in zigzag patterns. It takes two minutes and looks like you bought them from a bakery.
What to Serve Alongside: These truffles pair beautifully with hot drinks. Think spiced chai, mulled wine, or a strong cup of coffee. For a dessert spread, serve them alongside gingerbread cookies, peppermint bark, or a cheese board with aged cheddar and dried figs. The sweetness of the truffles balances the saltiness of cheese and the tartness of dried fruit.
Storage Instructions: Store the truffles in an airtight container in the refrigerator for up to two weeks. Layer them between sheets of parchment paper to prevent sticking. If you’re stacking multiple layers, make sure the chocolate is fully set before adding the next layer. For longer storage, freeze them in a freezer-safe container for up to three months. Thaw in the refrigerator overnight before serving.
Flavor Development: These truffles actually improve after a day or two in the fridge. The spices mellow and blend together, and the texture becomes fudgier. I always make them at least 24 hours before I plan to serve them. It’s one less thing to worry about on the day of the party.
Nutritional Information & Benefits
Here’s the nutritional breakdown for one truffle (based on 24 servings). Keep in mind this is an estimate and can vary based on specific ingredients used.
| Nutrient | Amount Per Truffle |
|---|---|
| Calories | 98 |
| Total Fat | 7g |
| Saturated Fat | 3g |
| Carbohydrates | 9g |
| Fiber | 2g |
| Sugar | 6g |
| Protein | 2g |
| Sodium | 35mg |
Health Benefits: Almond flour is rich in vitamin E, magnesium, and healthy monounsaturated fats. It’s also lower in carbs than regular flour, making these truffles a better option for those watching their blood sugar. Dark chocolate contains antioxidants called flavonoids, which support heart health. The spices—ginger, cinnamon, and cloves—have anti-inflammatory properties and can aid digestion. Of course, these are still a treat, but it’s nice to know they offer a few nutritional perks.
Dietary Considerations: This recipe is naturally gluten-free and grain-free. With the vegan substitutions mentioned above, it can be made dairy-free and egg-free. It does contain tree nuts (almonds), so it’s not suitable for those with nut allergies unless you use the oat flour substitution.
Conclusion
These gingerbread cookie dough truffles started as a mistake, but they’ve become one of my most requested recipes. Every time I make them, I think back to that frantic afternoon in my kitchen—the wrong flour, the sticky dough, the last-minute pivot. It’s a good reminder that some of the best things in the kitchen come from accidents. You don’t have to be a perfect baker to create something people will love. You just need to be willing to try, and maybe mess up a little along the way.
If you make these truffles, I’d love to hear how they turn out. Did you add your own twist? Did you serve them at a party? Drop a comment below and let me know. And if you’re looking for other crowd-pleasing desserts, check out my no-bake chocolate peanut butter bars or my spiced pumpkin truffles for more no-fuss holiday treats.
Happy hosting, and happy accidental baking!
Frequently Asked Questions
Can I use regular flour instead of almond flour?
Yes, but the texture will be different. Regular flour creates a denser, slightly grittier truffle. If you use all-purpose flour, make sure to heat-treat it first to kill any potential bacteria. Spread the flour on a baking sheet and bake at 350°F for 5 minutes, then let it cool before using.
Why did my chocolate coating crack?
This usually happens if the truffles are too cold when you dip them. If the dough is frozen solid, the chocolate hardens too quickly and can crack. Let the chilled dough balls sit at room temperature for 5 minutes before dipping. Also, make sure your chocolate isn’t overheated—tempering issues can cause cracking too.
Can I make these without a double boiler?
Absolutely. A microwave works just as well. Heat the chocolate in 20-second bursts, stirring between each, until smooth. Just be careful not to burn it. You can also melt chocolate in a heatproof bowl set over a pot of simmering water—that’s essentially a DIY double boiler.
How long do these truffles last at room temperature?
They’re best kept refrigerated. At room temperature, the chocolate softens and the dough can become too sticky. If you’re serving them at a party, take them out of the fridge just before serving and put any leftovers back within an hour.
Can I freeze the dough instead of the finished truffles?
Yes! Roll the dough into balls and freeze them on a baking sheet until solid. Transfer to a freezer bag. When you’re ready to serve, thaw the dough balls in the fridge, then dip in melted chocolate. This is a great make-ahead option for busy holiday weeks.
Pin This Recipe!

Best Easy Gingerbread Cookie Dough Truffles

These no-bake gingerbread cookie dough truffles are a happy accident turned holiday favorite. Soft, spiced cookie dough is rolled into balls, dipped in dark chocolate, and chilled to perfection.
- Prep Time: 20 minutes
- Cook Time: 0 minutes
- Total Time: 1 hour 10 minutes (includes chilling)
- Yield: 24 truffles 1x
- Category: Dessert
- Cuisine: American
Ingredients
- 1 ½ cups almond flour
- ¼ cup unsalted butter, softened
- ¼ cup molasses (not blackstrap)
- 2 tablespoons maple syrup
- 1 teaspoon vanilla extract
- 1 ½ teaspoons ground ginger
- 1 teaspoon ground cinnamon
- ½ teaspoon ground cloves
- ¼ teaspoon ground nutmeg
- ¼ teaspoon salt
- 2 tablespoons coconut sugar or brown sugar
- 1 cup dark chocolate chips or chopped dark chocolate (60-70% cacao)
- 1 teaspoon coconut oil or vegetable shortening
- Flaky sea salt (optional)
- Crushed gingerbread cookies (optional)
- White chocolate drizzle (optional)
- Crushed pecans or walnuts (optional)
Instructions
- Make the cookie dough: In a medium mixing bowl, combine the softened butter, molasses, maple syrup, and vanilla extract. Stir until smooth and well combined. Add the almond flour, ground ginger, cinnamon, cloves, nutmeg, salt, and coconut sugar. Mix with a spatula until a soft dough forms. If too wet, add an extra tablespoon of almond flour; if too dry, add a teaspoon of maple syrup.
- Chill the dough: Cover the bowl with plastic wrap and refrigerate for at least 30 minutes.
- Roll the truffles: Line a baking sheet with parchment paper. Using a small cookie scoop or teaspoon, scoop out portions of the chilled dough and roll into smooth balls, about 1 inch in diameter. Place on the prepared sheet. Refrigerate for another 15-20 minutes.
- Melt the chocolate: In a double boiler or microwave-safe bowl, combine the dark chocolate chips and coconut oil. Heat until smooth, stirring occasionally. If using a microwave, heat in 20-second bursts, stirring after each.
- Dip the truffles: Remove the chilled dough balls from the fridge. Drop one truffle into the melted chocolate, roll with a fork until fully coated, then lift out and let excess drip off. Transfer to the parchment-lined sheet. Add garnishes before the chocolate sets.
- Set the truffles: Place the baking sheet back in the refrigerator for at least 20 minutes, or until the chocolate is firm. For best texture, let rest for at least an hour before serving.
- Serve and store: Arrange on a platter. Store leftovers in an airtight container in the refrigerator for up to two weeks, or freeze for up to three months.
Notes
Chill the dough thoroughly for easier rolling. Use good quality dark chocolate for the best flavor and texture. These truffles improve after resting overnight in the fridge.
Nutrition
- Serving Size: 1 truffle
- Calories: 98
- Sugar: 6
- Sodium: 35
- Fat: 7
- Saturated Fat: 3
- Carbohydrates: 9
- Fiber: 2
- Protein: 2
Keywords: gingerbread truffles, no-bake truffles, cookie dough truffles, holiday dessert, gluten-free truffles


