I was standing in the school pickup line last Thursday when the wind shifted and carried the smell of garlic and hot oil from someone’s takeout bag across the parking lot. And just like that, I was eight years old again, sitting at my Aunt Louise’s tiny kitchen table in her apartment above the dry cleaners on Maple Street. She’d just pulled a baking sheet of chicken thighs from the oven, the skin so crispy it crackled when she cut into it, and the garlic-parmesan smell filled every corner of that little space. She passed me a plate and said, “Careful, it’s hot,” but I was already blowing on it, already taking that first bite that left a little greasy fingerprint of happiness on my chin.
Aunt Louise has been gone for six years now, and I haven’t had her chicken thighs since. Honestly, I tried to make them a few times over the years, but they never came out right. The skin was either soggy or burnt, and the seasoning never quite landed. I figured maybe some things are just meant to stay in the past. But then my youngest, Theo, started asking for chicken every single night. You know how it is — you make something once and suddenly it’s the only thing they want, and you’re stuck trying to recreate magic on a Tuesday night with limited patience and a hungry audience.
That smell in the parking lot sent me straight to the grocery store. I grabbed chicken thighs, a block of Parmesan, and a head of garlic, determined to finally crack the code. Only I didn’t have the patience for a hot oven, and honestly, I didn’t want to heat up the whole kitchen. So I grabbed my air fryer — that dusty appliance I’d almost given away twice — and figured I’d give it a shot. The first batch was decent. The second was good. By the third try, I had it. That same crackling skin, that same garlicky, cheesy crust, but faster and with way less mess. And when Theo took his first bite and said, “Mom, this is the best chicken ever,” I knew I’d finally caught that feeling again.
Why You’ll Love This Recipe
Let me tell you why this crispy air fryer garlic parmesan chicken thighs recipe has become a non-negotiable staple in our house. I’ve tested this at least a dozen times across different air fryer models, and I can say with confidence that it works every single time. Here’s what makes it special:
- Kid-Approved and Picky-Eater Tested: My kids are tough critics. Theo once refused to eat anything that touched a piece of bell pepper. But these chicken thighs? He asks for them by name. The crispy coating and savory flavor are just universally loved.
- Ready in Under 30 Minutes: No marinating overnight, no complicated steps. From fridge to table in about 25 minutes. That’s faster than delivery and way better for your wallet.
- Simple Pantry Ingredients: You likely have everything you need right now. Garlic powder, Parmesan, breadcrumbs, chicken thighs. No fancy trips to a specialty store.
- Budget-Friendly: Chicken thighs are one of the most affordable cuts of meat. This recipe stretches your dollar while still feeling like a treat. Perfect for feeding a family without breaking the bank.
- Crispy Without the Frying: The air fryer gives you that deep-fried crunch without all the oil. Less mess, less guilt, and honestly, better texture than oven-baked versions I’ve tried.
- Leftovers That Reheat Beautifully: This is huge for busy families. These chicken thighs reheat in the air fryer in about 4 minutes and come out almost as crispy as the first time. No sad, soggy leftovers here.
I’ve made this for weeknight dinners, for Sunday meal prep, and even for a little gathering when my neighbor stopped by unannounced. Every single time, someone asks for the recipe. It’s one of those dishes that makes you look like you spent way more effort than you actually did. And honestly, that’s my favorite kind of cooking.
What Ingredients You Will Need
This recipe uses simple, wholesome ingredients that come together to create something genuinely special. The magic is in the combination of textures and flavors — the salty Parmesan, the aromatic garlic, the crunchy breadcrumb coating, all wrapped around juicy, tender chicken thighs. Here’s everything you’ll need:
For the Chicken
- 2 pounds boneless, skinless chicken thighs (about 6-8 thighs) — I prefer boneless for quicker cooking and easier eating, especially for kids. If you use bone-in, just add about 8-10 minutes to the cooking time.
- 1 tablespoon olive oil — Helps the coating stick and promotes browning. You can use avocado oil if that’s what you have.
- 1 teaspoon salt — I use fine sea salt. Kosher salt works too, just use a bit more.
- 1/2 teaspoon black pepper — Freshly ground is best, but pre-ground works in a pinch.
For the Crispy Coating
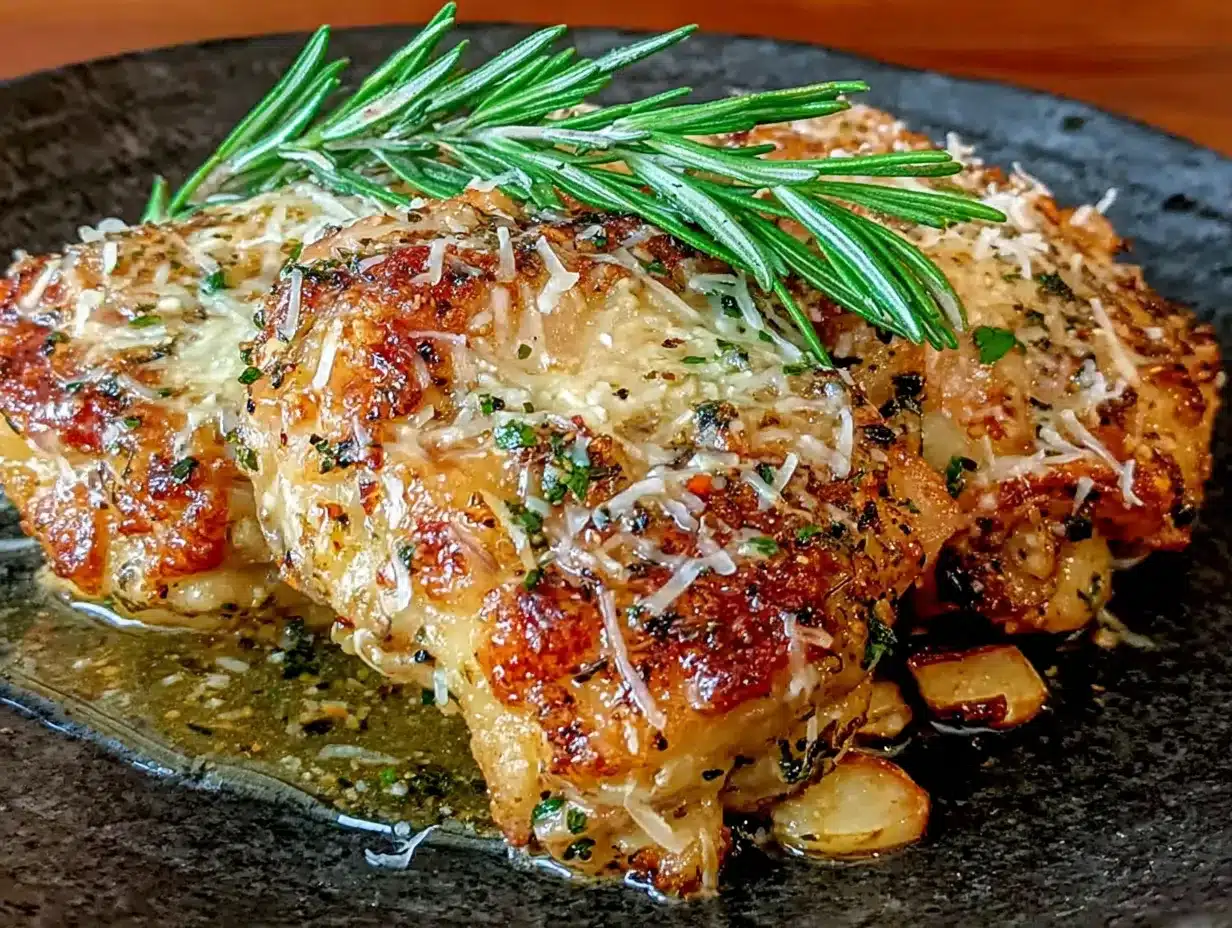
- 1/2 cup grated Parmesan cheese — The pre-grated kind in the green can works fine here, but freshly grated from a block gives better flavor and texture. I recommend BelGioioso or a good store-brand block Parmesan for best results.
- 1/2 cup panko breadcrumbs — Panko gives that extra-crispy texture. Regular breadcrumbs will work, but they won’t be as crunchy. Look for the Japanese-style panko in the Asian section or near the breadcrumbs.
- 1 teaspoon garlic powder — Not garlic salt. Garlic powder distributes evenly and doesn’t add extra sodium. I prefer the Spice Island or Simply Organic brand.
- 1 teaspoon onion powder — Adds depth without being overpowering. Kids won’t even notice it’s there.
- 1 teaspoon dried Italian seasoning — A blend of oregano, basil, rosemary, and thyme. If you don’t have it, use 1/2 teaspoon dried oregano and 1/2 teaspoon dried basil.
- 1/2 teaspoon paprika — Adds color and a subtle smoky sweetness. Smoked paprika is amazing here if you have it.
For Serving (Optional but Recommended)
- Fresh parsley, chopped — For garnish and a pop of freshness. My kids think it makes it “fancy.”
- Extra grated Parmesan — Because more cheese is never a bad idea.
- Lemon wedges — A squeeze of lemon right before eating brightens everything up. I didn’t think this mattered until I tried it. Now I never skip it.
Substitution Notes: If you need a gluten-free option, use gluten-free panko or almond flour mixed with Parmesan. For a dairy-free version, swap the Parmesan with nutritional yeast (use about 1/4 cup) and add an extra tablespoon of breadcrumbs. I’ve tried both and they work surprisingly well.
Equipment Needed
You don’t need much to make this recipe, which is part of why I love it. Here’s what you’ll need:
- Air Fryer: Any model works. I use a 5.8-quart Cosori, which fits about 6-8 thighs comfortably. If you have a smaller air fryer, just cook in batches. Don’t overcrowd the basket — that’s the number one mistake that leads to soggy chicken.
- Mixing Bowls: One medium bowl for the coating mixture and one small bowl for the oil. Nothing fancy needed.
- Tongs: For turning the chicken without messing up the coating. I prefer silicone-tipped ones so they don’t scratch the air fryer basket.
- Measuring Spoons: For accuracy. I’ve eyeballed the seasonings before and it’s just not the same.
- Meat Thermometer: Not strictly necessary, but highly recommended if you’re new to cooking chicken. You want an internal temperature of 165°F. I use a simple instant-read thermometer from ThermoPro that cost about $15 and has saved me from undercooked chicken more times than I can count.
- Cutting Board and Knife: For trimming any excess fat from the thighs. A sharp chef’s knife makes this quick work.
If you don’t have an air fryer, you can bake these in a 400°F oven for about 25-30 minutes on a wire rack set over a baking sheet. The texture won’t be quite as crispy, but it’s still delicious. I’ve done it when my air fryer was on the fritz and nobody complained.
Preparation Method
Alright, let’s get cooking. This is straightforward, but I’ll walk you through every step with the little tricks I’ve learned along the way.
- Prep the chicken (5 minutes): Pat the chicken thighs dry with paper towels. This is crucial — moisture is the enemy of crispiness. If the chicken is wet, the coating will steam instead of crisp. Trim off any excess fat or weird bits. Season both sides with the salt and pepper. Let them sit while you prepare the coating.
- Mix the coating (3 minutes): In a medium bowl, combine the grated Parmesan, panko breadcrumbs, garlic powder, onion powder, Italian seasoning, and paprika. Stir with a fork until everything is evenly distributed. The Parmesan should be well mixed — you don’t want clumps of cheese in one bite and nothing in another.
- Coat the chicken (5 minutes): Drizzle the olive oil over the seasoned chicken thighs and use your hands to rub it in evenly. This helps the coating stick. Now, one by one, press each thigh into the breadcrumb mixture, turning to coat all sides. Press firmly so the coating adheres. I use my right hand for the dry mix and keep my left hand clean for handling the oiled chicken — less messy that way.
- Preheat the air fryer (3 minutes): Set your air fryer to 400°F and let it preheat for about 3 minutes. I know some recipes say you don’t need to preheat, but I’ve found the difference is noticeable. The crust sets faster and gets crunchier.
- Arrange in the basket (2 minutes): Place the coated chicken thighs in the air fryer basket in a single layer. Make sure they’re not touching — leave a little space between each piece for air to circulate. If you need to cook in batches, do it. Overcrowding leads to steaming, and steaming leads to sad, soft coating. Trust me, I learned this the hard way on a busy Tuesday when I tried to cram all eight thighs in at once.
- Air fry (12-15 minutes): Cook at 400°F for 12 minutes. Then carefully flip each thigh using tongs and cook for another 3-5 minutes, or until the internal temperature reaches 165°F and the coating is deep golden brown and crispy. The exact time depends on your air fryer and the thickness of the thighs. My Cosori usually takes exactly 14 minutes total.
- Rest (3 minutes): This is the hardest part. Let the chicken rest in the air fryer basket (turned off) for 2-3 minutes before serving. This lets the juices redistribute and the coating set. If you cut into them immediately, you’ll lose all those lovely juices.
- Serve: Transfer to a plate, sprinkle with fresh parsley and extra Parmesan if you’re feeling fancy, and serve with lemon wedges on the side. Watch everyone grab for seconds.
Sensory cues to look for: The chicken should look deep golden brown with visible crunchy bits of Parmesan. When you tap the coating with a fork, it should sound crisp, not soft. The smell should be garlicky and nutty from the browned cheese. When you cut into a thigh, the juices should run clear and the meat should be opaque all the way through.
Cooking Tips & Techniques
After making these crispy air fryer garlic parmesan chicken thighs more times than I can count, I’ve picked up a few things that make a real difference. Here are my best tips:
Don’t skip drying the chicken. I know it seems like an extra step, but patting the thighs dry is non-negotiable. Wet chicken creates steam, and steam is the enemy of crispiness. I use about three paper towels per batch and really press them in.
Use panko, not regular breadcrumbs. I tried this with regular Italian breadcrumbs once because that’s what I had, and the texture was just… fine. Panko gives that light, airy crunch that makes these so addictive. The bigger flakes create more surface area for crisping.
Spray with a little oil for extra crunch. If you want that deep-fried level of crispiness, give the coated thighs a light spray with cooking oil (avocado oil spray works great) before air frying. I don’t always do this, but when I’m trying to impress, it’s a game-changer.
Flip halfway through. This ensures even browning on both sides. I’ve forgotten to flip before and ended up with one side perfect and the other side pale. The extra 30 seconds of effort is worth it.
Let the air fryer recover between batches. If you’re cooking multiple batches, give the air fryer a minute or two to come back up to temperature before adding the next batch. Dropping cold chicken into a slightly cooled basket leads to uneven cooking.
My biggest failure: The first time I made these, I used way too much oil thinking it would help the coating stick. It didn’t. The coating slid right off in the air fryer and I ended up with bare chicken thighs covered in soggy breadcrumb sludge. Lesson learned — a light drizzle is all you need.
Variations & Adaptations
One of the best things about this recipe is how adaptable it is. Here are some variations I’ve tried and loved:
Spicy Version: Add 1/2 teaspoon cayenne pepper and 1 teaspoon red pepper flakes to the coating mix. My husband loves this version. The kids? Not so much. So I make a separate batch for him with a little label on the container.
Lemon Herb Version: Add the zest of one lemon and 2 tablespoons of fresh chopped herbs (parsley, thyme, rosemary) to the coating. Skip the Italian seasoning. This version is brighter and feels more spring-like. I serve it with a side of roasted asparagus.
Air Fryer Chicken Tenders: Cut the chicken thighs into strips before coating. Reduce cooking time to 8-10 minutes total. Perfect for little hands and lunchboxes. My kids actually prefer this version because it feels more like “fast food.”
Gluten-Free Adaptation: Use gluten-free panko (I like the Ian’s brand) or crushed pork rinds for a keto-friendly option. The texture is slightly different but still delicious. My gluten-sensitive friend raved about the pork rind version.
Cheese Lover’s Version: Add an extra 1/4 cup Parmesan to the coating and sprinkle a little more on top halfway through cooking. It gets all melty and crispy in the best way. Just watch the salt — Parmesan is salty, so you might want to reduce the added salt slightly.
Serving & Storage Suggestions
Serving: These chicken thighs are best served hot and fresh, right out of the air fryer. I like to serve them on a big platter with lemon wedges and a sprinkle of fresh parsley. For a complete meal, pair them with:
- Simple steamed green beans or roasted broccoli
- Mashed potatoes or rice to soak up any juices
- A crisp green salad with a lemon vinaigrette
- Roasted potatoes or sweet potato fries (cook them in the air fryer at the same time if you have a dual-basket model)
Storage: Leftover chicken thighs keep well in an airtight container in the refrigerator for up to 4 days. The coating will soften slightly, but don’t worry — we’ll fix that in the reheating step.
Freezing: You can freeze the cooked chicken thighs for up to 3 months. Let them cool completely, then wrap individually in plastic wrap and place in a freezer bag. To thaw, move to the refrigerator overnight.
Reheating: This is the key — do NOT use the microwave. It will turn your crispy coating into a sad, soggy mess. Instead, reheat in the air fryer at 375°F for 3-4 minutes, flipping halfway through. They’ll come out almost as crispy as the first time. You can also reheat in a 375°F oven for about 10 minutes.
How flavors develop: Honestly, these are almost better the next day. The garlic and Parmesan flavors meld together overnight, and the chicken stays incredibly moist. I’ve been known to make a double batch just for leftovers.
Nutritional Information & Benefits
Here’s the approximate nutritional breakdown per serving (based on 6 servings, using 2 pounds of chicken thighs):
| Nutrient | Amount per Serving |
|---|---|
| Calories | 320 |
| Protein | 32g |
| Fat | 18g |
| Saturated Fat | 6g |
| Carbohydrates | 8g |
| Fiber | 1g |
| Sugar | 1g |
| Sodium | 620mg |
Health Benefits: Chicken thighs are a great source of protein, iron, and B vitamins. They’re more flavorful and forgiving than chicken breasts, which means you’re less likely to overcook them. The Parmesan adds calcium and a little extra protein. Using the air fryer instead of deep frying significantly reduces the fat and calorie content while still giving you that satisfying crunch.
Dietary Considerations: This recipe is naturally low-carb (about 8g per serving) and can be made gluten-free with simple substitutions. It’s not dairy-free due to the Parmesan, but you can use the nutritional yeast swap mentioned earlier. Always check your ingredient labels for hidden allergens.
FAQs
Can I use chicken breasts instead of thighs?
Yes, but you’ll need to adjust the cooking time. Chicken breasts cook faster and can dry out more easily. Cut them to a uniform thickness (about 1 inch) and cook at 400°F for 10-12 minutes, flipping halfway. Check for 165°F internal temperature.
Why is my coating not sticking?
This usually happens for one of three reasons: the chicken wasn’t dried properly, you didn’t use enough oil, or you didn’t press the coating firmly enough. Make sure to pat the chicken dry, use the full tablespoon of oil, and really press that coating into the meat.
Can I make these ahead of time for a party?
Absolutely. Cook them fully, let them cool, and store in the refrigerator. When you’re ready to serve, reheat in the air fryer at 375°F for 3-4 minutes. They’ll be almost as good as fresh. I’ve done this for game day gatherings and nobody knew they weren’t just made.
How do I keep the coating from burning?
Parmesan can burn quickly because of the high fat content. Keep an eye on them during the last few minutes of cooking. If you notice the coating getting too dark before the chicken is cooked through, reduce the temperature to 375°F and add a few extra minutes.
Can I double this recipe?
Yes, but you’ll need to cook in batches. Don’t overcrowd the air fryer basket. Each batch needs space for air to circulate. I usually cook 6-8 thighs per batch in my 5.8-quart air fryer. Keep the cooked batch warm in a 200°F oven while you finish the rest.
Conclusion
These crispy air fryer garlic parmesan chicken thighs have become a lifeline in our kitchen. They’re the kind of recipe that makes you feel like you’ve got it all figured out — even on nights when you’re tired, the kids are cranky, and the only thing on the schedule is getting dinner on the table fast. They’re proof that you don’t need complicated techniques or fancy ingredients to make something genuinely delicious.
I love this recipe because it brings back that feeling from Aunt Louise’s kitchen, but in a way that fits my life right now. It’s fast enough for a Tuesday, special enough for a Sunday, and affordable enough that I don’t feel guilty making it twice a week. And honestly, watching Theo ask for seconds — that’s the real win.
I’d love to hear how these turn out for you. Did your kids gobble them up? Did you try a fun variation? Drop a comment below and let me know. And if you’re looking for more easy, family-friendly dinners, don’t forget to browse around — there’s plenty more where this came from. Happy cooking, friends!
Pin This Recipe!
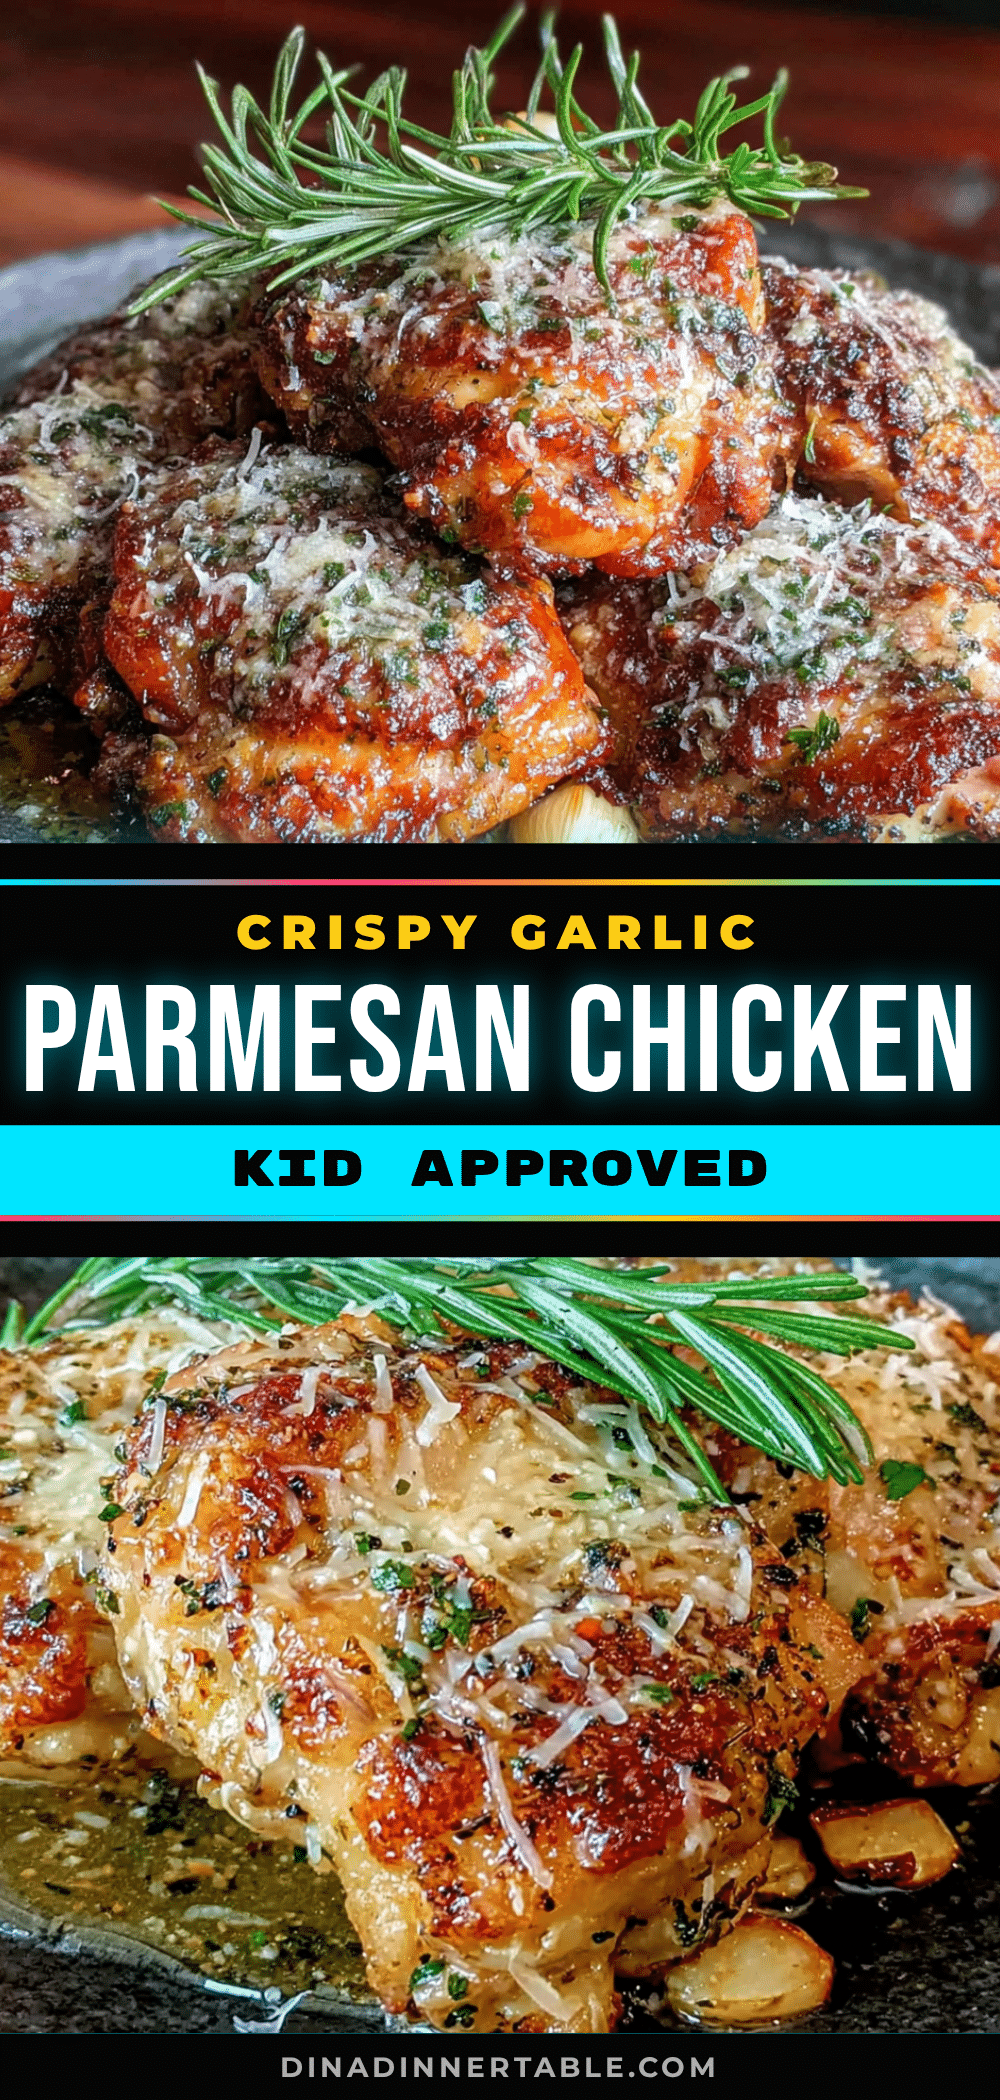
Crispy Air Fryer Garlic Parmesan Chicken Thighs

These crispy air fryer garlic parmesan chicken thighs are ready in under 30 minutes and made with simple pantry ingredients. They’re kid-approved, budget-friendly, and reheat beautifully.
- Prep Time: 15 minutes
- Cook Time: 15 minutes
- Total Time: 30 minutes
- Yield: 6 servings 1x
- Category: Main Course
- Cuisine: American
Ingredients
- 2 pounds boneless, skinless chicken thighs (about 6–8 thighs)
- 1 tablespoon olive oil
- 1 teaspoon salt
- 1/2 teaspoon black pepper
- 1/2 cup grated Parmesan cheese
- 1/2 cup panko breadcrumbs
- 1 teaspoon garlic powder
- 1 teaspoon onion powder
- 1 teaspoon dried Italian seasoning
- 1/2 teaspoon paprika
- Fresh parsley, chopped (for garnish, optional)
- Extra grated Parmesan (for serving, optional)
- Lemon wedges (for serving, optional)
Instructions
- Pat the chicken thighs dry with paper towels. Trim off excess fat. Season both sides with salt and pepper.
- In a medium bowl, combine grated Parmesan, panko breadcrumbs, garlic powder, onion powder, Italian seasoning, and paprika. Stir until evenly distributed.
- Drizzle olive oil over the seasoned chicken thighs and rub it in evenly. Press each thigh into the breadcrumb mixture, turning to coat all sides. Press firmly so the coating adheres.
- Preheat the air fryer to 400°F for about 3 minutes.
- Place the coated chicken thighs in the air fryer basket in a single layer, making sure they are not touching. Cook in batches if necessary.
- Air fry at 400°F for 12 minutes. Flip each thigh using tongs and cook for another 3-5 minutes, or until the internal temperature reaches 165°F and the coating is deep golden brown and crispy.
- Let the chicken rest in the air fryer basket (turned off) for 2-3 minutes before serving.
- Transfer to a plate, sprinkle with fresh parsley and extra Parmesan if desired, and serve with lemon wedges.
Notes
For extra crunch, spray the coated thighs lightly with cooking oil before air frying. If using bone-in chicken thighs, add 8-10 minutes to the cooking time. Leftovers reheat best in the air fryer at 375°F for 3-4 minutes.
Nutrition
- Serving Size: 1 serving (about 1 t
- Calories: 320
- Sugar: 1
- Sodium: 620
- Fat: 18
- Saturated Fat: 6
- Carbohydrates: 8
- Fiber: 1
- Protein: 32
Keywords: air fryer chicken thighs, garlic parmesan chicken, crispy chicken thighs, easy chicken recipe, family dinner


