It was 11:47 PM on a rainy Tuesday, and I had a craving for something I couldn’t quite name. Not a burrito, exactly, but something wrapped, something warm, something that would make my family happy without me having to stand over the stove for an hour. I didn’t have the energy for a full dinner prep, but I had leftover rice, a few chicken breasts hiding in the back of the fridge, and a stack of flour tortillas that were dangerously close to their expiration date. The idea arrived like a tired, beautiful revelation: chicken and rice burritos, but not just any burritos—ones I could make a dozen of, freeze, and pull out on the nights when even the thought of cooking felt like too much.
Honestly, I was half-asleep when I started shredding that chicken. My cat, Mittens, sat on the counter judging me, and I almost dropped the whole bowl of rice on the floor. But something about the late hour loosened the usual rules. I didn’t measure the cumin perfectly. I threw in some leftover black beans because why not. And you know what? That midnight experiment turned into the most requested meal in my house. These burritos became my secret weapon for busy weeknights, sick days, and the times when “what’s for dinner?” feels like a personal attack. Maybe you’ve been there—staring into the fridge at 6 PM with nothing planned and a hungry family circling like sharks. This recipe is for those moments.
These aren’t just any burritos. They’re freezer-friendly, kid-approved, and built from ingredients that won’t wreck your grocery budget. The filling is simple—chicken, rice, beans, cheese, and a few spices—but the magic is in how it all comes together. Every bite is warm, comforting, and just a little bit messy, which is exactly how food should feel when you’re feeding people you love. I keep a stash in my freezer at all times now, and I’ve never been more grateful for my own late-night craziness.
Why You’ll Love This Recipe
Let me tell you why these burritos have earned a permanent spot in my weekly rotation. I’ve tested this recipe at least a dozen times, tweaking the seasoning, adjusting the moisture level, and figuring out the best way to wrap them so they don’t fall apart in the freezer. What I ended up with is a burrito that checks every box for a busy family.
- Quick & Easy: The filling comes together in about 30 minutes, and assembly is a breeze. Once you get into a rhythm, you can wrap a dozen burritos in under 15 minutes. Perfect for meal prep Sunday or a lazy afternoon.
- Simple Ingredients: You probably have most of these in your kitchen right now. Chicken, rice, canned beans, cheese, tortillas—nothing fancy, nothing expensive. No trips to a specialty store required.
- Perfect for Busy Weeknights: These are my go-to for those nights when homework runs late, someone has soccer practice, or I just don’t want to cook. Pull one out of the freezer, heat it up, and dinner is served in under 5 minutes.
- Crowd-Pleaser: My kids, who once declared they “don’t like burritos,” now ask for these weekly. The filling is mild enough for picky eaters but flavorful enough for adults. It’s a rare win-win in my house.
- Unbelievably Delicious: The combination of tender chicken, fluffy rice, melted cheese, and just the right amount of spice is pure comfort. And because the filling isn’t too wet, the tortillas stay intact and don’t get soggy, even after freezing.
What makes this recipe different from all the other burrito recipes out there? It’s the method. I cook the chicken with the rice and seasonings all in one pot, which means the flavors meld together beautifully and the filling stays perfectly moist without being watery. Plus, I’ve cracked the code on freezing—wrapping them tightly in foil and reheating them in a skillet gives you that crispy exterior that makes a frozen burrito taste fresh-made. This isn’t just another version of chicken and rice burritos. It’s the version you’ll come back to again and again.
Honestly, this recipe is the kind that makes you close your eyes after the first bite. It’s comfort food reimagined—faster, budget-friendly, but with the same soul-soothing satisfaction. Whether you’re feeding a crowd or just trying to survive a chaotic Tuesday, these burritos have your back.
What Ingredients You Will Need
This recipe uses simple, wholesome ingredients to deliver bold flavor and satisfying texture without the fuss. Most of these are pantry staples, which means you can whip up a batch anytime the craving strikes.
For the Filling
- 1 lb boneless, skinless chicken breasts (about 2-3 breasts) — You can also use chicken thighs for extra juiciness. I prefer breasts because they shred easily and are leaner, but thighs work great too.
- 1 cup long-grain white rice — Uncooked. I use jasmine or basmati for the best texture. Brown rice works but will need a longer cooking time and a bit more liquid.
- 2 cups low-sodium chicken broth — This adds so much flavor compared to water. If you’re in a pinch, water plus a bouillon cube works fine.
- 1 can (15 oz) black beans, drained and rinsed — Or pinto beans, if that’s what you have. Both work beautifully.
- 1 cup frozen corn kernels — No need to thaw. Adds a little sweetness and texture.
- 1 small onion, diced — Yellow or white onion. I’ve used red onion in a pinch, and it was fine, just a bit sharper.
- 2 cloves garlic, minced — Fresh is best, but jarred minced garlic works in a hurry.
- 1 can (4 oz) diced green chiles — These are mild and add a lovely background warmth. If you want more heat, use a small diced jalapeño instead.
- 1 teaspoon ground cumin — The backbone of the seasoning. Don’t skip it.
- 1 teaspoon chili powder — I use a mild blend. Adjust based on your family’s heat tolerance.
- ½ teaspoon smoked paprika — Adds a subtle smokiness that makes these burritos feel special.
- ½ teaspoon salt, plus more to taste — I start with this and adjust at the end.
- ¼ teaspoon black pepper — Freshly ground if you can.
- 2 tablespoons olive oil — For sautéing the onion and garlic.
For Assembly
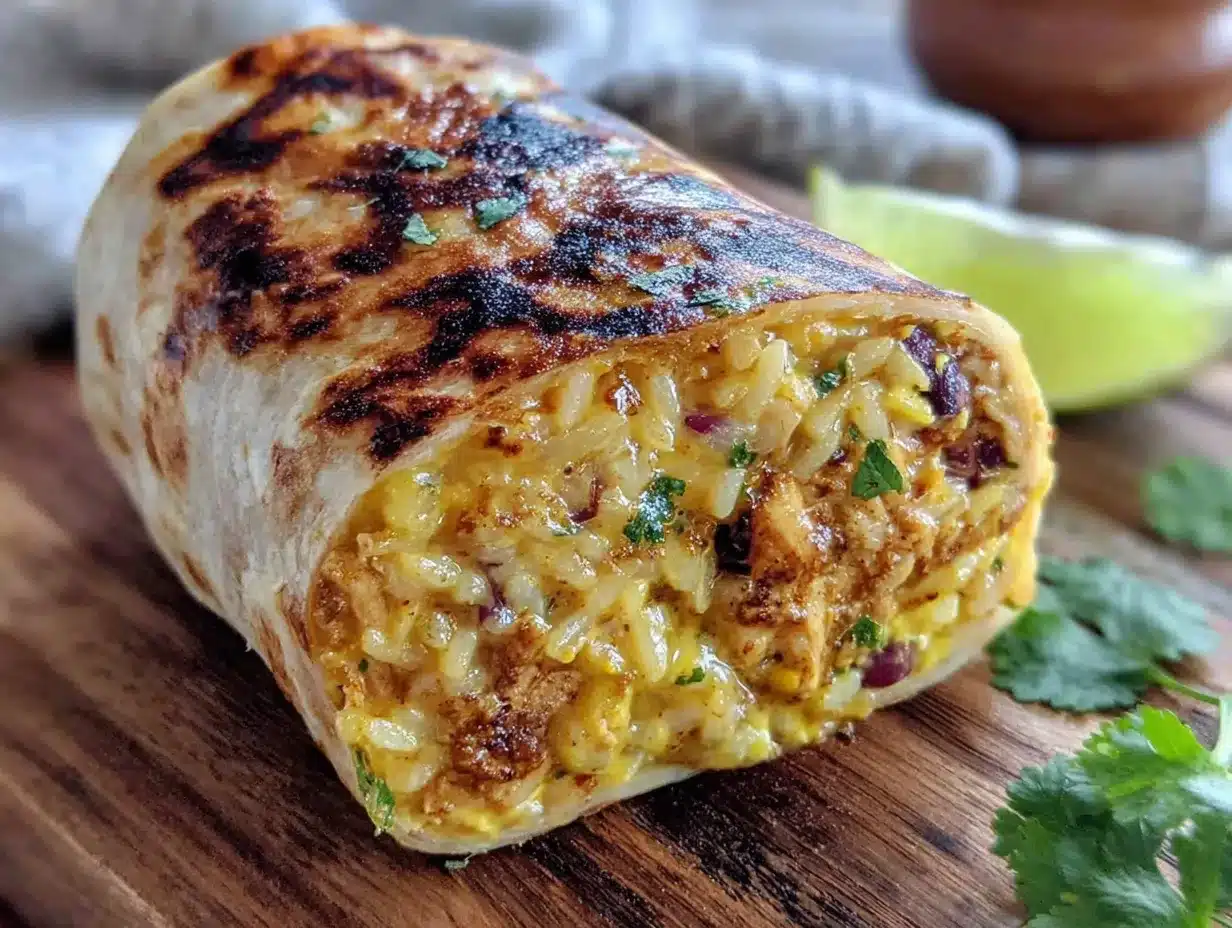
- 8-10 large flour tortillas (10-inch size) — Burrito-sized. Look for ones that are soft and pliable. I like Mission brand or the store-brand version. Corn tortillas will crack when you try to roll them, so stick with flour.
- 2 cups shredded Mexican blend cheese — Or cheddar, Monterey Jack, or a mix. Pre-shredded is fine, but freshly shredded melts better.
- Optional extras for serving: Sour cream, salsa, guacamole, chopped cilantro, hot sauce — whatever your family loves.
Ingredient Selection Tips
I recommend using a good-quality chicken broth, like Swanson or Kitchen Basics, for the best flavor. If you’re watching your sodium, go with low-sodium and adjust the salt at the end. For the tortillas, avoid the “extra thin” or “low-carb” varieties—they tend to tear when you roll them. You want a sturdy, standard flour tortilla that can handle a generous filling and a trip to the freezer. And one more thing: don’t skip the green chiles. They’re not spicy, I promise. They just add a little something that makes the filling taste more like a restaurant-style burrito.
Substitution guidance? Sure. Use brown rice for a fiber boost, but increase the broth to 2 ½ cups and cook for about 45 minutes instead of 20. For a dairy-free version, skip the cheese or use a plant-based shred. And if you’re gluten-free, swap the flour tortillas for large gluten-free wraps—just be extra gentle when rolling because they’re less forgiving.
Equipment Needed
You don’t need a fancy kitchen to make these burritos. Here’s what I use:
- Large pot or Dutch oven (5-6 quart) — For cooking the chicken and rice together. A heavy-bottomed pot works best for even heat.
- Cutting board and sharp knife — For dicing the onion and mincing the garlic.
- Wooden spoon or spatula — For stirring the filling.
- Two forks — For shredding the cooked chicken. You can also use a hand mixer on low speed if you’re in a hurry, but forks give you better control.
- Large bowl — For mixing the filling before assembly.
- Baking sheet — For lining up the assembled burritos before freezing. I line mine with parchment paper for easy cleanup.
- Aluminum foil — For wrapping each burrito individually. Heavy-duty foil is worth the extra cost—it holds up better in the freezer.
- Freezer-safe zip-top bags — For storing the wrapped burritos. Gallon-sized bags work perfectly.
If you don’t have a Dutch oven, any large pot with a lid will do. I’ve made this in a regular stockpot and even in an Instant Pot (using the sauté function then pressure cooking for 10 minutes). For the foil, if you only have regular foil, double-wrap each burrito to prevent freezer burn. And honestly, you don’t need a fancy shredding tool—two forks and a little patience work just fine. I’ve shredded chicken with a fork while watching TV, and it’s oddly satisfying.
Preparation Method
Let’s get cooking. This method is straightforward, but I’ll walk you through every step with the little details that make a big difference.
Step 1: Cook the Chicken and Rice
Heat the olive oil in your large pot over medium heat. Add the diced onion and cook for 3-4 minutes, until it’s soft and translucent. You should hear a gentle sizzle—if it’s silent, the heat is too low. Add the minced garlic and cook for 30 seconds, just until fragrant. Don’t let it brown, or it’ll turn bitter.
Add the chicken breasts to the pot, then pour in the chicken broth. Sprinkle in the cumin, chili powder, smoked paprika, salt, and pepper. Stir everything together, then bring the liquid to a boil. Once it’s boiling, reduce the heat to low, cover the pot, and let it simmer for 15 minutes.
After 15 minutes, remove the chicken breasts from the pot and set them on a cutting board. They should be cooked through—no pink in the center. Add the uncooked rice to the pot with the broth, stir, and bring it back to a simmer. Cover and cook for 15-18 minutes, until the rice is tender and has absorbed most of the liquid. While the rice cooks, shred the chicken using two forks. It should pull apart easily. If it’s still tough, it needs a few more minutes of cooking.
Step 2: Combine the Filling
Once the rice is done, return the shredded chicken to the pot. Add the drained black beans, frozen corn, and diced green chiles. Stir everything together until it’s evenly combined. Taste the filling and adjust the seasoning—maybe a little more salt, a pinch of cumin, or a dash of hot sauce if you want some heat. The filling should be moist but not soupy. If it looks too wet, let it cook uncovered for 2-3 minutes to evaporate excess liquid.
Remove the pot from the heat and let the filling cool for about 10 minutes. This is important—if you try to assemble the burritos while the filling is piping hot, the steam will make the tortillas soggy, and nobody wants that. I usually spread the filling out on a baking sheet to cool it faster.
Step 3: Assemble the Burritos
Lay a tortilla flat on your work surface. Spoon about ⅔ cup of the filling into the center, leaving a 1-inch border around the edges. Sprinkle about 2 tablespoons of shredded cheese on top of the filling. Don’t overstuff—it’s better to have a slightly smaller burrito that rolls up neatly than a bloated one that bursts.
Fold the sides of the tortilla inward over the filling, then fold the bottom edge up and over the filling, tucking it tightly. Roll the burrito away from you, keeping it snug but not too tight. The goal is a tight cylinder with no gaps. If the tortilla cracks, it’s either too dry or too cold. Warm it in the microwave for 10 seconds to make it pliable again.
Step 4: Freeze the Burritos
Place each assembled burrito on a parchment-lined baking sheet, seam-side down, making sure they’re not touching. Pop the baking sheet in the freezer for 1-2 hours, until the burritos are firm to the touch. This is called “flash freezing,” and it prevents them from sticking together later.
Once frozen, wrap each burrito tightly in a piece of aluminum foil. I like to label mine with a permanent marker—”Chicken & Rice Burrito, Nov 2024″—so I know what’s in there and when I made them. Place the wrapped burritos in a freezer-safe zip-top bag, squeeze out as much air as possible, and seal. They’ll keep for up to 3 months, though they rarely last that long in my house.
Cooking Tips & Techniques
Over the years, I’ve learned a few things the hard way. Let me share them so you don’t have to repeat my mistakes.
Don’t overcook the chicken. I once left the chicken simmering for 25 minutes because I got distracted folding laundry. It came out dry and stringy, not the tender shreds you want. Stick to 15 minutes, then check it. If it’s not done, give it 3-5 more minutes, no more.
Watch the rice-to-liquid ratio. This is the most common issue I see. Too much liquid makes the filling mushy, and too little leaves the rice crunchy. Measure carefully. If you’re using a different type of rice, adjust the liquid accordingly—brown rice needs more, jasmine needs slightly less.
Let the filling cool before assembling. I cannot stress this enough. Hot filling creates steam, which turns your tortillas into a sticky mess. I once rushed the process because the kids were hungry, and I ended up with a dozen sad, torn burritos. Patience pays off here.
Roll them tight but not too tight. If you roll too loosely, the filling falls out when you eat it. Too tight, and the tortilla rips. The sweet spot is a firm, even roll with the sides tucked in securely. Practice makes perfect—my first few were ugly, but they still tasted great.
Reheat from frozen, not thawed. For the best texture, reheat the burrito directly from the freezer. Unwrap the foil, wrap the burrito in a damp paper towel, and microwave for 2-3 minutes, flipping halfway. Or, for a crispy exterior, heat it in a dry skillet over medium heat for 4-5 minutes per side. The skillet method is my favorite—it gives you that golden, slightly crunchy tortilla that makes a frozen burrito taste like it came from a restaurant.
Variations & Adaptations
One of the best things about this recipe is how easy it is to customize. Here are some variations I’ve tried and loved.
Dietary Variations
Vegetarian: Skip the chicken and use two cans of black beans or pinto beans instead. Add an extra ½ cup of rice to make up the volume. The flavor is still fantastic, and it’s a great meatless Monday option.
Dairy-Free: Omit the cheese or use a plant-based shred. I’ve tried Daiya and Follow Your Heart, and both melt reasonably well. The burritos are still delicious without cheese, honestly—the seasoned rice and beans carry the flavor.
Flavor Twists
Southwest Style: Add ½ teaspoon of chipotle powder and a squeeze of lime juice to the filling. Top with fresh cilantro before rolling. This gives the burritos a smoky, tangy kick that my husband loves.
Breakfast Burritos: Swap the chicken for scrambled eggs and add cooked breakfast sausage or bacon. Use the same rice and bean base but reduce the cumin. These freeze just as well and make for an easy grab-and-go breakfast.
Seasonal Adaptations
In summer, I sometimes swap the frozen corn for fresh corn cut off the cob. It adds a pop of sweetness that’s hard to beat. In fall, I’ll add ½ cup of cooked, diced sweet potato to the filling. It’s a little extra work, but the sweetness pairs beautifully with the smoky spices.
Different Cooking Methods
If you’re in a rush, use rotisserie chicken instead of cooking your own. Shred the meat and skip the first 15 minutes of cooking—just sauté the onion and garlic, add the broth and rice, and proceed. You’ll save about 20 minutes. I’ve done this on nights when I’m running late, and it works perfectly.
Serving & Storage Suggestions
These burritos are incredibly versatile when it comes to serving. Here’s how I handle it.
Serving: I usually serve these burritos straight from the freezer, reheated and cut in half on the diagonal. They’re perfect on their own, but my family loves them with a side of sour cream, salsa, and a simple salad. For a heartier meal, serve with Mexican rice or refried beans. The burritos are also great for lunch—my kids take them to school in a thermos, and they stay warm until noon.
Storage: As I mentioned, these burritos freeze beautifully for up to 3 months. Make sure they’re tightly wrapped in foil and stored in a freezer bag with the air squeezed out. I label mine with the date so I can rotate the stash. If you’re planning to eat them within a week, you can store them in the refrigerator instead. Just keep them wrapped in foil and place them in an airtight container.
Reheating: The microwave is the fastest method—unwrap the foil, wrap the burrito in a damp paper towel, and microwave for 2-3 minutes. For a crispy exterior, use a skillet: heat a dry skillet over medium heat, place the unwrapped burrito in the pan, and cook for 4-5 minutes per side, until golden and heated through. I prefer the skillet method because the texture is so much better. The tortilla gets slightly crunchy on the outside while staying soft and warm inside.
How flavors develop: Honestly, these burritos taste even better after a day or two in the fridge. The flavors meld together, and the filling becomes more cohesive. If you’re meal prepping, make them a day ahead and refrigerate before freezing—the extra time allows the seasoning to deepen.
Nutritional Information & Benefits
Here’s an approximate nutritional breakdown for one burrito (based on 10 servings, using standard ingredients):
| Nutrient | Amount per Burrito |
|---|---|
| Calories | 380 |
| Protein | 28g |
| Carbohydrates | 42g |
| Fiber | 6g |
| Fat | 12g |
| Saturated Fat | 5g |
| Sodium | 680mg |
These burritos are a balanced meal in one package. The chicken provides lean protein for muscle repair and satiety, while the rice and beans offer complex carbohydrates and fiber for steady energy. Black beans are also rich in iron and folate. The cheese adds calcium, and the corn contributes a touch of vitamin C. If you’re watching your sodium, use low-sodium broth and reduce the added salt—you can always adjust at the table.
Dietary considerations: This recipe can be made gluten-free by using certified gluten-free tortillas. It’s also easily adaptable for dairy-free diets. It’s not low-carb by nature, but you could use cauliflower rice and skip the tortilla for a burrito bowl version. Overall, it’s a wholesome, satisfying meal that fits into a balanced diet without feeling like a compromise.
Conclusion
These Kid-Approved Freezer-Friendly Chicken and Rice Burritos have saved my sanity more times than I can count. They’re the recipe I turn to when I need a win—when the week is long, the budget is tight, and everyone is hungry. The best part? They’re made from simple ingredients you already know how to cook, and they freeze like a dream. Whether you’re a seasoned meal prepper or a busy parent just trying to get dinner on the table, these burritos are for you.
I encourage you to make a batch this weekend. Customize them to your family’s taste—add more spice, swap in different beans, or load them up with extra cheese. That’s the beauty of this recipe: it’s a starting point, not a rulebook. And when you pull one out of the freezer on a hectic Tuesday night and take that first warm, cheesy bite, you’ll thank your past self for being so smart.
I’d love to hear how they turn out for you. Drop a comment below and let me know what variations you tried, or share a photo of your burrito stash on Pinterest. Happy cooking, friends—you’ve got this.
Frequently Asked Questions
Can I use brown rice instead of white rice?
Yes, but you’ll need to adjust the cooking time and liquid. Use 2 ½ cups of broth instead of 2 cups, and cook the rice for about 40-45 minutes instead of 15-18. The texture will be slightly chewier, but it works great.
How do I prevent the burritos from getting soggy in the freezer?
The key is to let the filling cool completely before assembling. Hot filling creates steam, which makes the tortillas soggy. Also, make sure you’re not adding too much liquid to the filling—it should be moist but not wet. Flash freezing on a baking sheet before wrapping also helps.
Can I use corn tortillas instead of flour?
I don’t recommend it. Corn tortillas are smaller and less pliable, so they tend to crack when you try to roll them. If you need a gluten-free option, look for large gluten-free flour tortillas or wraps made from cassava or almond flour.
How long do these burritos last in the freezer?
Properly wrapped and stored in a freezer bag, these burritos will stay fresh for up to 3 months. After that, they’re still safe to eat but may develop freezer burn. I recommend labeling them with the date so you can keep track.
Can I make these burritos in an Instant Pot?
Absolutely. Use the sauté function to cook the onion and garlic, then add the chicken, broth, and seasonings. Pressure cook on high for 10 minutes, then do a quick release. Remove the chicken, shred it, add the rice, and pressure cook for another 5 minutes. Proceed with the recipe as written from there.
Pin This Recipe!
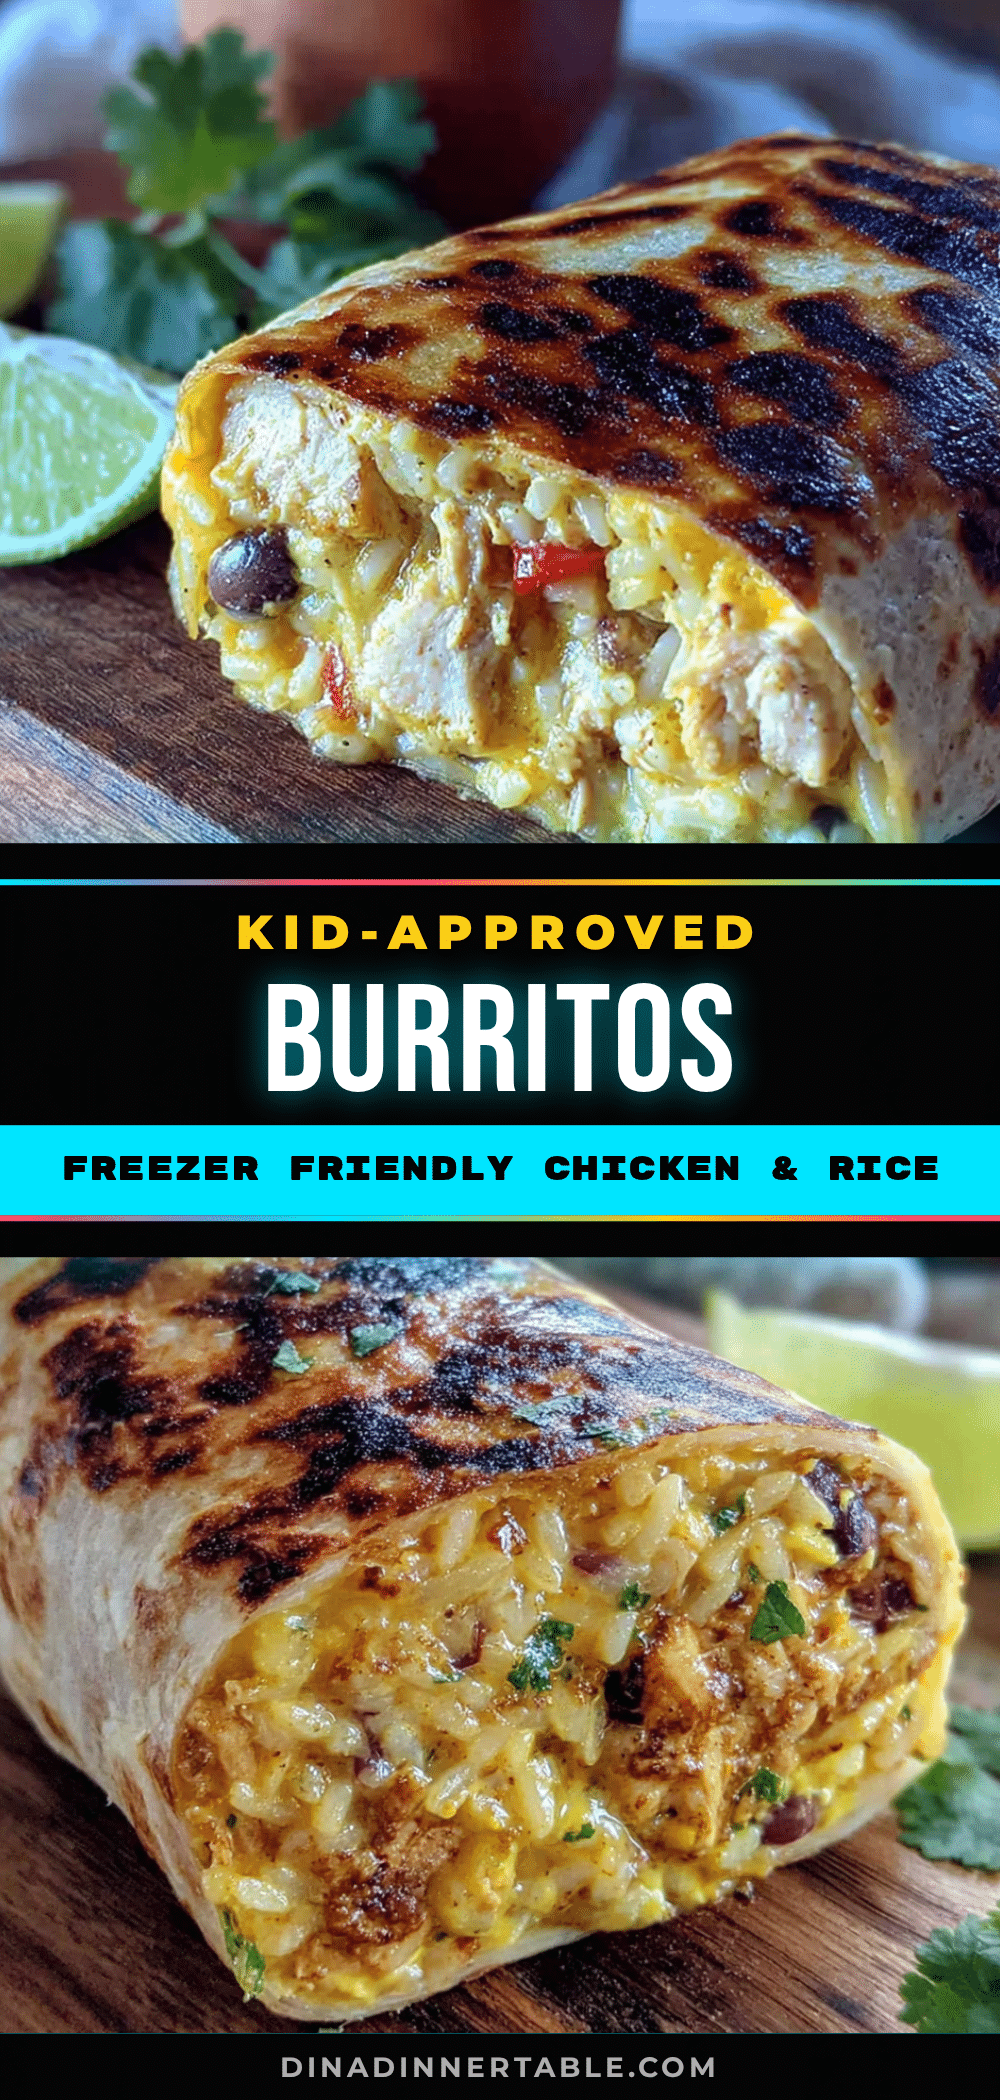
Kid-Approved Chicken and Rice Burritos: Freezer-Friendly Meal

These freezer-friendly chicken and rice burritos are a busy family’s secret weapon. Made with simple ingredients like chicken, rice, black beans, and cheese, they come together in about 30 minutes and can be frozen for up to 3 months for quick weeknight dinners.
- Prep Time: 15 minutes
- Cook Time: 30 minutes
- Total Time: 45 minutes
- Yield: 8-10 servings 1x
- Category: Main Course
- Cuisine: Mexican
Ingredients
- 1 lb boneless, skinless chicken breasts (about 2–3 breasts)
- 1 cup long-grain white rice (uncooked)
- 2 cups low-sodium chicken broth
- 1 can (15 oz) black beans, drained and rinsed
- 1 cup frozen corn kernels
- 1 small onion, diced
- 2 cloves garlic, minced
- 1 can (4 oz) diced green chiles
- 1 teaspoon ground cumin
- 1 teaspoon chili powder
- ½ teaspoon smoked paprika
- ½ teaspoon salt, plus more to taste
- ¼ teaspoon black pepper
- 2 tablespoons olive oil
- 8–10 large flour tortillas (10-inch size)
- 2 cups shredded Mexican blend cheese
- Optional extras for serving: sour cream, salsa, guacamole, chopped cilantro, hot sauce
Instructions
- Heat olive oil in a large pot over medium heat. Add diced onion and cook for 3-4 minutes until soft and translucent. Add minced garlic and cook for 30 seconds until fragrant.
- Add chicken breasts to the pot, then pour in chicken broth. Sprinkle with cumin, chili powder, smoked paprika, salt, and pepper. Stir, bring to a boil, then reduce heat to low, cover, and simmer for 15 minutes.
- Remove chicken from pot and set aside on a cutting board. Add uncooked rice to the pot with the broth, stir, and bring to a simmer. Cover and cook for 15-18 minutes until rice is tender and liquid is absorbed.
- While rice cooks, shred the chicken using two forks.
- Once rice is done, return shredded chicken to the pot. Add drained black beans, frozen corn, and diced green chiles. Stir to combine. Taste and adjust seasoning if needed. If filling is too wet, cook uncovered for 2-3 minutes to evaporate excess liquid.
- Remove pot from heat and let filling cool for about 10 minutes (spread on a baking sheet to cool faster).
- Lay a tortilla flat. Spoon about ⅔ cup of filling into the center, leaving a 1-inch border. Sprinkle about 2 tablespoons of shredded cheese on top.
- Fold the sides of the tortilla inward over the filling, then fold the bottom edge up and over the filling, tucking tightly. Roll the burrito away from you into a tight cylinder.
- Place assembled burritos seam-side down on a parchment-lined baking sheet, not touching. Freeze for 1-2 hours until firm.
- Once frozen, wrap each burrito tightly in aluminum foil. Place wrapped burritos in a freezer-safe zip-top bag, squeeze out air, and seal. Store for up to 3 months.
Notes
Let the filling cool completely before assembling to prevent soggy tortillas. For best results, reheat from frozen: unwrap foil, wrap in a damp paper towel, and microwave for 2-3 minutes, or reheat in a dry skillet over medium heat for 4-5 minutes per side for a crispy exterior. These burritos taste even better after a day or two in the fridge as flavors meld.
Nutrition
- Serving Size: 1 burrito
- Calories: 380
- Sugar: 2
- Sodium: 680
- Fat: 12
- Saturated Fat: 5
- Carbohydrates: 42
- Fiber: 6
- Protein: 28
Keywords: chicken burritos, rice burritos, freezer-friendly, kid-approved, meal prep, weeknight dinner