My sister had sworn she hated pumpkin for twenty-seven years. Twenty-seven years of turning down pumpkin pie at Thanksgiving, making a face at pumpkin spice lattes, and pushing aside any baked good that dared contain the orange gourd. Then I caught her—last October, standing in my kitchen at 6:47 AM, eating a broken scone crumb by crumb off the baking sheet. She had her back to me like that would somehow make her invisible.
“That’s my breakfast,” I said, leaning against the doorframe.
She froze, a brown-butter-glazed crumb halfway to her mouth. “This isn’t pumpkin.”
“It absolutely is.”
She put the crumb down. Picked it back up. Ate it. Then she sighed in that way only little sisters can—half defeat, half delight—and said, “Fine. Send me the recipe.”
Honestly, I get it. Most pumpkin scones are dense, dry, and taste more like a candle aisle than an actual pastry. They crumble into sadness the second you bite them. But these flaky maple pumpkin scones with brown butter glaze? They’re different. They’re the kind of thing that makes you question everything you thought you knew about pumpkin baked goods.
The trick is treating the pumpkin like a supporting actor, not the star. Too many recipes drown the dough in pumpkin puree until it’s heavy and wet. I learned through trial and error—and believe me, there was error—that you need just enough pumpkin to give color and moisture without weighing down the layers. The real magic happens in the folding. That’s what creates the flaky, buttery structure that shatters when you bite into it.
Maybe you’ve been burned by bad pumpkin scones before. I don’t blame you. But this version? It’s the one that converts people. My sister is living proof.
Why You’ll Love This Recipe
These flaky maple pumpkin scones with brown butter glaze aren’t just another fall baking project. They’re the result of eight test batches, one near-kitchen-meltdown, and a breakthrough moment involving a bench scraper at two in the morning. Here’s what makes them worth your time:
- Real Flaky Layers : Most pumpkin scones are basically sweet biscuits with pumpkin flavor. These actually have visible, shatteringly tender layers thanks to a lamination technique that folds butter into the dough like a rough puff pastry. No complicated rolling required.
- Maple + Brown Butter Magic : The glaze isn’t just sweet—it’s nutty, toasty, and deeply caramelized. Browning the butter takes five extra minutes and completely transforms the flavor profile. You’ll never go back to plain powdered sugar glaze.
- Not Too Sweet : The scone itself has just enough sweetness to balance the pumpkin and warm spices. The glaze adds the sweetness, so you control how much goes on each scone. Perfect for breakfast or afternoon tea without a sugar crash.
- Simple Ingredients : No specialty flours, no obscure spice blends, no trips to three different grocery stores. Pumpkin puree, butter, flour, maple syrup, and basic pantry spices. That’s it.
- Make-Ahead Friendly : The dough freezes beautifully. Shape the scones, freeze them on a baking sheet, then bake straight from frozen when company shows up or you need a quick breakfast that feels special.
- Crowd-Pleaser : I’ve served these to pumpkin lovers, pumpkin skeptics, and one person who claimed to hate all baked goods (rude, but I forgave them). Every single one asked for seconds. The texture wins people over before the flavor even registers.
This recipe is comfort food that feels a little fancy without being fussy. It’s the kind of thing you make on a Sunday morning with coffee playing in the background, or when you want to impress brunch guests without spending hours in the kitchen. And honestly? It’s the recipe that made my sister finally admit she was wrong about pumpkin. That alone makes it worth keeping in your back pocket.
What Ingredients You Will Need
This recipe uses simple, wholesome ingredients to deliver bold flavor and satisfying texture without the fuss. Most of these are pantry staples, and the few that aren’t are easy to find at any grocery store.
For the Scones
- 2 ½ cups (300g) all-purpose flour – I use King Arthur Flour for consistent results, but any unbleached all-purpose flour works. Spoon and level your flour—don’t scoop directly from the bag or you’ll end up with dense scones.
- ½ cup (100g) granulated sugar – Adds just enough sweetness. You can reduce this to ⅓ cup if you prefer a less sweet scone, but the texture may be slightly less tender.
- 1 tablespoon baking powder – Make sure it’s fresh. Expired baking powder is the #1 reason scones don’t rise properly.
- 1 teaspoon ground cinnamon – Use Ceylon cinnamon if you can find it; it’s milder and more floral than the standard cassia variety.
- ½ teaspoon ground ginger – Adds warmth without heat.
- ½ teaspoon ground nutmeg – Freshly grated is ideal, but pre-ground works in a pinch.
- ¼ teaspoon ground cloves – A little goes a long way. Skip it if you’re not a clove fan.
- ½ teaspoon salt – Fine sea salt or table salt. Don’t skip it—salt balances the sweetness and enhances the spices.
- ½ cup (113g) cold unsalted butter, cut into small cubes – This is non-negotiable. The butter must be cold. I pop my cubed butter in the freezer for 10 minutes before starting. Using a good European-style butter like Plugrà or Kerrygold gives you more butterfat, which means flakier layers.
- ½ cup (120g) pumpkin puree – Not pumpkin pie filling. Make sure you’re buying 100% pure pumpkin puree. Libby’s is my go-to brand because it’s consistently thick and not watery.
- ⅓ cup (80ml) cold heavy cream – Plus extra for brushing the tops. The cream adds richness and helps create those tender layers. You can substitute whole milk, but the scones won’t be as flaky.
- ¼ cup (60ml) pure maple syrup – Real maple syrup, not pancake syrup. Grade A dark amber has the strongest flavor and works best here.
- 1 teaspoon vanilla extract – Pure vanilla extract, not imitation. It rounds out the pumpkin and spice flavors.
For the Brown Butter Glaze
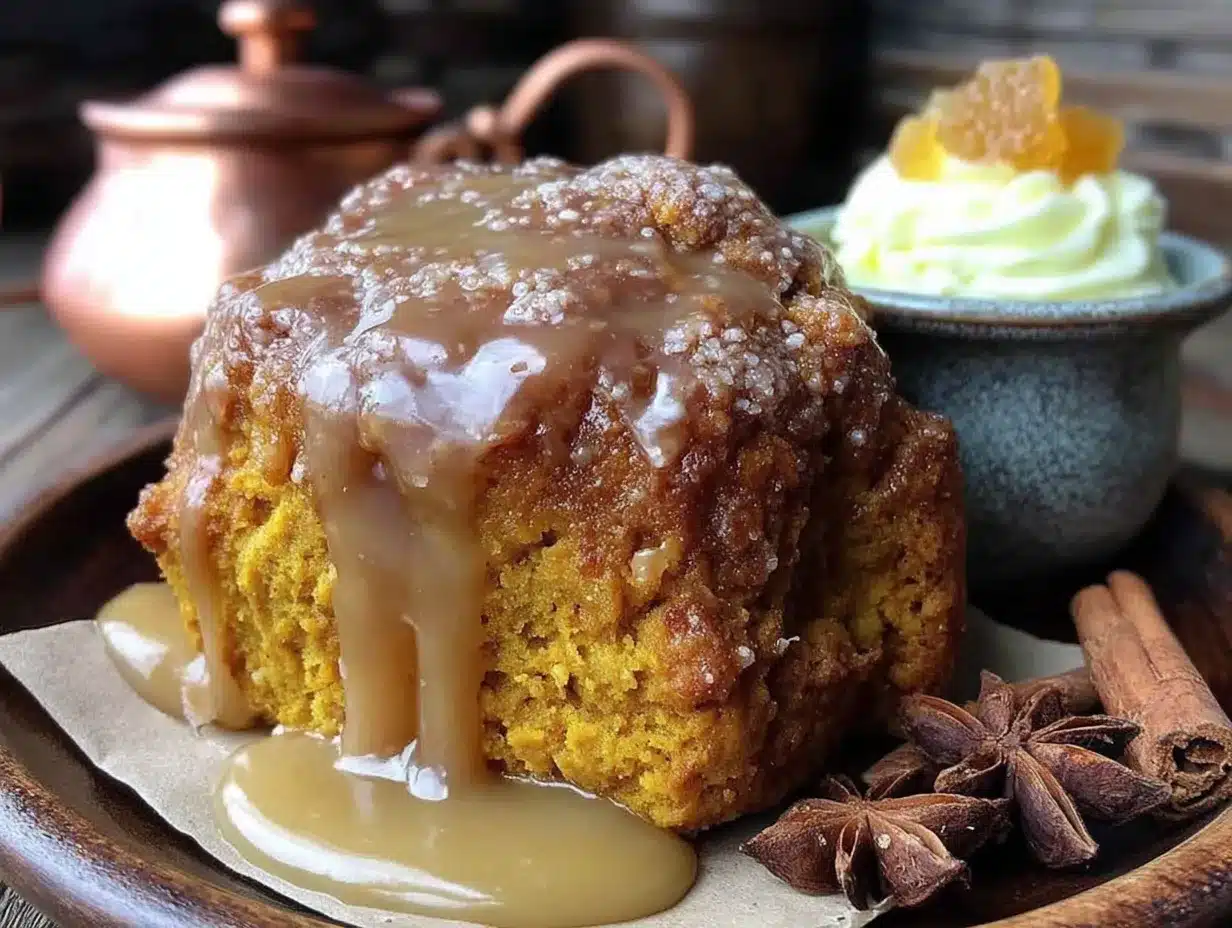
- ¼ cup (56g) unsalted butter – You’ll brown this first, so don’t skip that step. It’s what gives the glaze its signature nutty flavor.
- 1 ½ cups (180g) powdered sugar – Sift it if it’s lumpy. Nobody wants a lumpy glaze.
- 3 tablespoons pure maple syrup – Adds maple flavor and helps the glaze set with a slight shine.
- 2-3 tablespoons milk or heavy cream – Use as needed to reach your desired consistency. Heavy cream makes the glaze richer and creamier.
- Pinch of salt – Balances the sweetness and brings out the brown butter flavor.
Ingredient Selection Tip: When choosing pumpkin puree, look for cans that say “100% pure pumpkin” and check the ingredient list—it should only say pumpkin. Some store brands add water or sugar. If your pumpkin puree looks watery, spread it on a paper towel-lined plate for a few minutes to absorb excess moisture before using.
Substitution Guidance: For a dairy-free version, use cold vegan butter (I like Miyoko’s) and full-fat canned coconut cream instead of heavy cream. The flavor will be slightly different but still delicious. For a gluten-free option, use a 1:1 gluten-free flour blend that contains xanthan gum. Cup4Cup works well here.
Equipment Needed
Nothing fancy required. Here’s what you’ll need:
- Large mixing bowl – For combining dry ingredients.
- Pastry cutter or two forks – To cut the cold butter into the flour. A pastry cutter gives you more control, but two forks work fine in a pinch.
- Bench scraper – Not strictly necessary, but it makes folding and cutting the dough so much easier. I bought mine for $8 and it’s one of my most-used tools.
- Baking sheet – Line it with parchment paper for easy cleanup.
- Rolling pin – For flattening the dough. You can also use your hands if you’re careful.
- Sharp knife or bench scraper – For cutting the scones into triangles.
- Small saucepan – For browning the butter. A light-colored pan helps you see the color change.
- Whisk – For the glaze.
- Wire cooling rack – Placing the scones on a rack after baking prevents soggy bottoms.
If you don’t have a pastry cutter, you can grate frozen butter directly into the flour using a box grater. It’s messy but effective. And if you don’t have a bench scraper, a flat spatula works for folding the dough. I’ve made these scones in a tiny apartment kitchen with minimal equipment—they still turned out amazing.
Preparation Method
Here’s how to make the flakiest maple pumpkin scones of your life. Take your time with the folding—it’s the most important part.
- Preheat your oven to 400°F (200°C) and line a baking sheet with parchment paper. Position the rack in the upper third of the oven for even browning.
- Whisk together the dry ingredients in a large bowl: 2 ½ cups (300g) all-purpose flour, ½ cup (100g) granulated sugar, 1 tablespoon baking powder, 1 teaspoon cinnamon, ½ teaspoon ginger, ½ teaspoon nutmeg, ¼ teaspoon cloves, and ½ teaspoon salt. Make sure the baking powder is evenly distributed—clumps of baking powder will create bitter spots in your scones.
- Cut in the cold butter. Add the ½ cup (113g) of cold cubed butter to the flour mixture. Use a pastry cutter or two forks to cut the butter into the flour until the mixture looks like coarse meal with pea-sized butter pieces. Some butter pieces should be slightly larger than others—that’s what creates flaky layers. Work quickly so the butter stays cold. If the butter starts to soften, pop the bowl in the freezer for 5 minutes.
- Mix the wet ingredients. In a separate small bowl, whisk together ½ cup (120g) pumpkin puree, ⅓ cup (80ml) cold heavy cream, ¼ cup (60ml) maple syrup, and 1 teaspoon vanilla extract until smooth. The mixture should be thick but pourable.
- Combine wet and dry. Pour the wet mixture into the dry mixture. Stir with a fork or spatula until just combined. The dough will look shaggy and slightly dry in spots—that’s exactly what you want. Overmixing at this stage will develop gluten and make your scones tough.
- Turn the dough out onto a lightly floured surface. Use your hands to bring the dough together into a rough rectangle about 1 inch thick. Don’t knead it—just press it together gently.
- Here’s the magic part: the folds. Fold the right third of the dough over the center, then fold the left third over that (like folding a letter). Gently press the dough down into a rectangle again. Rotate the dough 90 degrees and repeat the folding process. Do this three times total. Each fold creates layers that will separate during baking, giving you those beautiful flaky sheets. If the dough sticks to your surface, dust it with a little extra flour.
- Shape the dough. After the final fold, shape the dough into a rectangle about ¾ inch thick and roughly 6×8 inches. Don’t make it too thin or the scones will be flat. Use a sharp knife or bench scraper to cut the rectangle into 8 triangles. Cut straight down—don’t saw back and forth or you’ll seal the edges and prevent rising.
- Place the scones on the prepared baking sheet, spacing them about 2 inches apart. They won’t spread much, but they need room for the heat to circulate. Brush the tops with a little heavy cream—this helps them brown beautifully and gives a slight crust.
- Bake for 15-18 minutes, rotating the baking sheet halfway through. The scones are done when they’re golden brown on the bottom and the tops are lightly golden. A toothpick inserted into the center should come out clean or with a few moist crumbs. Don’t overbake—they’ll continue cooking slightly on the hot baking sheet after you pull them out.
- Let the scones cool on the baking sheet for 5 minutes, then transfer them to a wire rack to cool completely before glazing. If you glaze them while they’re still warm, the glaze will melt and slide right off.
- While the scones cool, make the brown butter glaze. Place ¼ cup (56g) unsalted butter in a small saucepan over medium heat. Melt the butter, swirling the pan occasionally. It will foam up, then the foam will subside and you’ll see brown specks forming at the bottom. This takes about 5-7 minutes. Keep a close eye on it—brown butter can go from perfect to burnt in seconds. When it smells nutty and looks amber-colored, remove it from the heat immediately and pour it into a heatproof bowl to stop the cooking.
- Let the brown butter cool for 5 minutes, then whisk in 1 ½ cups (180g) powdered sugar, 3 tablespoons maple syrup, and a pinch of salt. Add 2-3 tablespoons of milk or heavy cream, one tablespoon at a time, until the glaze is thick but pourable. It should coat the back of a spoon and slowly drip off.
- Drizzle the glaze over the cooled scones. Use a spoon to drizzle it back and forth, or transfer the glaze to a piping bag and snip off the tip for more control. Let the glaze set for about 15 minutes before serving.
Sensory Cue: When you cut into a finished scone, you should hear a slight crackle as the knife breaks through the flaky layers. The interior should be tender and slightly crumbly, not dense or gummy. If your scone feels heavy, you either overmixed the dough or used too much liquid.
Cooking Tips & Techniques
I’ve made these scones roughly forty-seven times (yes, I counted). Here’s what I’ve learned the hard way so you don’t have to.
Keep everything cold. I cannot stress this enough. Cold butter creates steam pockets in the oven, which creates flaky layers. If your butter melts into the flour before baking, you’ll get dense, flat scones. I cube my butter and freeze it for 10-15 minutes before starting. I also chill my mixing bowl and pastry cutter if I remember. Every degree counts.
Don’t skip the folding. I know it seems fussy, but those three folds are what transform a standard pumpkin scone into something that actually flakes. The first time I made these, I skipped the folding because I was in a hurry. The scones were fine—tasty, even—but they were basically biscuits. The folding makes the difference between good and unforgettable.
Watch your pumpkin puree. Different brands have different moisture levels. If your dough feels sticky and wet after adding the pumpkin mixture, add an extra tablespoon of flour. If it feels dry and crumbly, add a splash more cream. The dough should be slightly tacky but not sticky. I once used a store-brand pumpkin puree that was much wetter than Libby’s, and the scones spread into flat, sad pancakes. Learn from my mistake.
Brown butter patience. Browning butter is one of those things that seems intimidating until you’ve done it once. The key is medium heat and constant attention. Swirl the pan every 30 seconds or so. When the foam subsides and you see brown specks forming, you’re almost there. Remove it from the heat immediately—the residual heat will continue browning it for another 30 seconds. I ruined my first batch of brown butter by walking away to check my phone. Don’t be like me.
Glaze consistency matters. If your glaze is too thick, it won’t drizzle smoothly. If it’s too thin, it’ll run off the scones and pool on the rack. Aim for the consistency of thick maple syrup. Add milk one tablespoon at a time until you get there. And let the scones cool completely before glazing—warm scones will turn your beautiful glaze into a melted mess.
Multitasking tip: While the scones are baking, clean up your workspace and brown the butter. This way, by the time the scones are cool enough to glaze, your brown butter has cooled to the right temperature and you’re ready to go. Efficient timing makes the whole process feel effortless.
Variations & Adaptations
One of the best things about this recipe is how adaptable it is. Here are some variations I’ve tried and loved:
Dark Chocolate Chip Pumpkin Scones. Add ½ cup (85g) dark chocolate chips to the dough right before the folding step. The bitter chocolate pairs beautifully with the warm spices and maple glaze. I made this version for a friend who “doesn’t like pumpkin” (sound familiar?) and she ate three.
Vegan Maple Pumpkin Scones. Substitute the cold butter with cold vegan butter (Miyoko’s works best), use full-fat canned coconut cream instead of heavy cream, and replace the egg wash with a coconut cream brush. The texture is slightly less flaky but still tender and delicious. For the glaze, use vegan butter and plant-based milk.
Gluten-Free Version. Use a 1:1 gluten-free flour blend that contains xanthan gum, like Cup4Cup or King Arthur Measure for Measure. Add an extra tablespoon of cream since gluten-free flours tend to absorb more liquid. The scones will be more delicate, so handle them gently. They won’t be as flaky as the original, but they’re still really good.
Spice Variations. Swap the cinnamon-ginger-nutmeg-clove blend for 2 teaspoons of pumpkin pie spice if that’s what you have. Or try a chai-inspired blend with cardamom, allspice, and a pinch of black pepper. I made a cardamom-orange version last December that was absolutely killer—just add 1 teaspoon of orange zest to the wet ingredients.
Savory-Sweet Twist. Reduce the sugar to ¼ cup and add ½ cup of sharp cheddar cheese, finely grated, to the dry ingredients. Skip the maple glaze and brush the baked scones with melted brown butter instead. The combination of pumpkin, cheddar, and brown butter is unexpectedly amazing. My neighbor tried this version and now requests it every time I bake.
Mini Scones. Cut the dough into 16 smaller triangles instead of 8 and reduce the baking time to 12-14 minutes. Perfect for brunch buffets or when you want to feel less guilty about eating three.
Serving & Storage Suggestions
These scones are best served the day they’re made, but they still hold up well for a couple of days if stored properly.
Serving Temperature: Serve at room temperature or slightly warm. If you want to reheat them, pop them in a 300°F (150°C) oven for 5 minutes. The microwave will make them soggy—don’t do it. I speak from experience.
Presentation: Arrange the glazed scones on a wooden board or a pretty plate. Sprinkle a little flaky sea salt over the glaze for a gorgeous finish and a salty-sweet contrast. A dusting of cinnamon on the plate adds visual appeal. Serve with a cup of hot coffee, chai tea, or a maple latte for the full fall experience.
Storage: Store unglazed scones in an airtight container at room temperature for up to 3 days. If you’ve already glazed them, layer them between sheets of parchment paper so the glaze doesn’t stick together. Do not refrigerate—the refrigerator dries out baked goods and makes them stale faster.
Freezing: These freeze beautifully. Freeze unglazed baked scones in a single layer on a baking sheet, then transfer to a freezer-safe bag for up to 3 months. Thaw at room temperature for about 30 minutes, then warm in the oven and glaze fresh. You can also freeze the unbaked shaped scones on a baking sheet, then transfer to a bag. Bake from frozen, adding 2-3 minutes to the baking time.
Flavor Development: The spices actually mellow and meld together after a day, so day-old scones have a more rounded flavor. The texture won’t be as flaky, but the flavor might even be better. My sister claims she prefers them on day two. I think she just likes having an excuse to eat scones for breakfast two days in a row.
Nutritional Information & Benefits
Let’s be real—these are scones with a brown butter glaze. They’re a treat, not a health food. But they’re made with real ingredients, and there are a few redeeming qualities worth mentioning.
Estimated Nutrition Per Scone (1 of 8, with glaze): Approximately 380 calories, 18g fat (11g saturated), 52g carbohydrates, 28g sugar, 4g protein, 2g fiber, 290mg sodium. Values will vary based on specific ingredients and glaze application.
Pumpkin Benefits: Pumpkin is packed with vitamin A (in the form of beta-carotene), which supports eye health and immune function. It also contains fiber, which helps with digestion and keeps you feeling full. Is it enough to offset the butter and sugar? Probably not, but it’s nice to know there’s something nutritious in there.
Maple Syrup: Real maple syrup contains antioxidants and minerals like zinc and manganese. It’s still sugar, so use it in moderation, but it’s a more natural sweetener than refined sugar. The brown butter glaze uses both powdered sugar and maple syrup, so it’s definitely a sometimes-food.
Dietary Considerations: These scones are vegetarian. They can be made vegan or gluten-free using the substitutions listed above. They contain dairy, gluten, and eggs (if you use an egg wash). Not suitable for nut-free diets if you use almond milk in the glaze.
My personal take? I believe in eating real food that makes you happy. These scones make me happy. I make them for special occasions and lazy Sunday mornings, and I don’t apologize for the butter content. Life is too short for bad scones.
Conclusion
These flaky maple pumpkin scones with brown butter glaze are the kind of recipe that changes minds. My sister is living proof that even the most stubborn pumpkin hater can be converted with the right combination of texture, flavor, and a little bit of patience.
What makes these scones special isn’t just the pumpkin or the maple or even that incredible brown butter glaze. It’s the texture—those delicate, buttery layers that shatter when you bite into them. It’s the kind of baking achievement that makes you feel like a professional, even if you’re just making breakfast in your pajamas.
I encourage you to make these your own. Add chocolate chips if that’s your thing. Experiment with the spices. Skip the glaze if you want a less sweet scone (but honestly, don’t skip the glaze—it’s the best part). The recipe is a starting point, not a rulebook.
When you make these—and I hope you do—come back and tell me how they turned out. Did you convert a pumpkin skeptic? Did you discover a new favorite variation? Did you eat three in one sitting and feel zero regret? I want to hear about it. Leave a comment below, share your photos, and let’s keep this scone conversation going.
Now go preheat your oven. Your kitchen is about to smell amazing.
Frequently Asked Questions
Can I use pumpkin pie filling instead of pumpkin puree?
No. Pumpkin pie filling contains added sugar and spices, which will throw off the balance of this recipe. Always use 100% pure pumpkin puree. If you accidentally buy pie filling, you can still use it, but reduce the sugar in the recipe by half and skip the added spices. The texture will be different, though.
Why did my scones turn out dense and heavy?
This usually happens for one of three reasons: overmixing the dough (which develops gluten), using butter that was too warm (which prevents flaky layers from forming), or adding too much liquid (which makes the dough heavy). Next time, mix until just combined, keep your butter very cold, and measure your pumpkin puree carefully.
Can I make the dough the night before and bake in the morning?
Absolutely. Shape the scones, place them on a parchment-lined baking sheet, wrap the whole sheet tightly in plastic wrap, and refrigerate overnight. Bake them straight from the fridge the next morning—no need to let them come to room temperature. You may need to add 1-2 minutes to the baking time.
How do I know when the brown butter is done?
Watch for three signs: the butter will smell nutty and toasty, it will turn a golden-amber color, and you’ll see small brown specks forming at the bottom of the pan. Once you see those specks, remove the pan from the heat immediately. The residual heat will continue browning the butter for another 30 seconds. If it smells burnt, you’ve gone too far—start over.
Can I skip the glaze and just eat the scones plain?
You can, but the scones are intentionally not very sweet on their own. The glaze adds the sweetness and that incredible brown butter flavor. If you want to skip the glaze, increase the sugar in the dough to ¾ cup and brush the baked scones with melted butter and a sprinkle of cinnamon sugar while they’re still warm. They won’t be as special, but they’ll still be good.
Pin This Recipe!
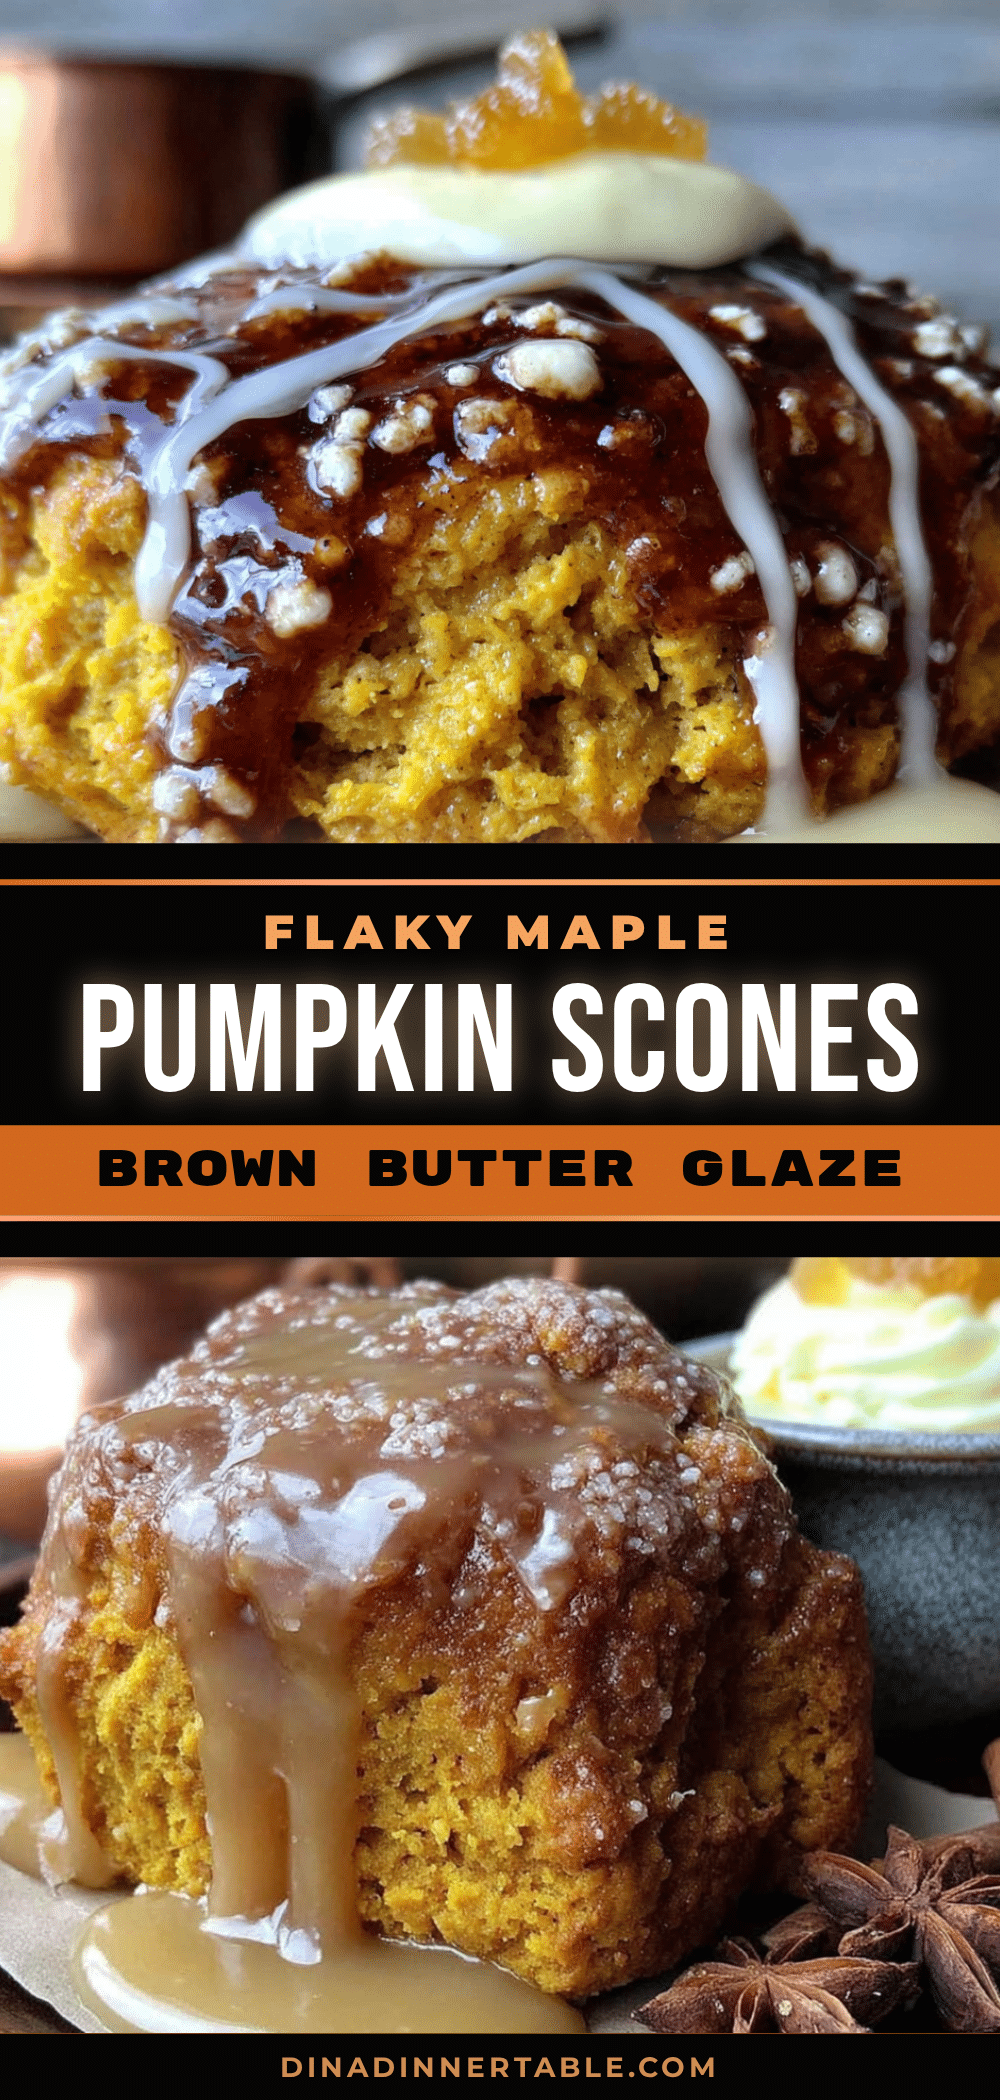
Flaky Maple Pumpkin Scones with Brown Butter Glaze

These flaky maple pumpkin scones with brown butter glaze are the kind of recipe that changes minds. They feature real flaky layers, a maple and brown butter glaze, and are not too sweet, making them perfect for breakfast or afternoon tea.
- Prep Time: 20 minutes
- Cook Time: 18 minutes
- Total Time: 38 minutes
- Yield: 8 servings 1x
- Category: Breakfast
- Cuisine: American
Ingredients
- 2 ½ cups (300g) all-purpose flour
- ½ cup (100g) granulated sugar
- 1 tablespoon baking powder
- 1 teaspoon ground cinnamon
- ½ teaspoon ground ginger
- ½ teaspoon ground nutmeg
- ¼ teaspoon ground cloves
- ½ teaspoon salt
- ½ cup (113g) cold unsalted butter, cut into small cubes
- ½ cup (120g) pumpkin puree
- ⅓ cup (80ml) cold heavy cream
- ¼ cup (60ml) pure maple syrup
- 1 teaspoon vanilla extract
- ¼ cup (56g) unsalted butter (for glaze)
- 1 ½ cups (180g) powdered sugar
- 3 tablespoons pure maple syrup (for glaze)
- 2–3 tablespoons milk or heavy cream (for glaze)
- Pinch of salt (for glaze)
Instructions
- Preheat your oven to 400°F (200°C) and line a baking sheet with parchment paper.
- Whisk together the dry ingredients in a large bowl: flour, sugar, baking powder, cinnamon, ginger, nutmeg, cloves, and salt.
- Cut in the cold butter using a pastry cutter or two forks until the mixture looks like coarse meal with pea-sized butter pieces.
- In a separate small bowl, whisk together pumpkin puree, cold heavy cream, maple syrup, and vanilla extract until smooth.
- Pour the wet mixture into the dry mixture and stir until just combined. The dough will look shaggy.
- Turn the dough out onto a lightly floured surface and bring it together into a rough rectangle about 1 inch thick.
- Fold the right third of the dough over the center, then fold the left third over that. Gently press down into a rectangle again. Rotate 90 degrees and repeat the folding process three times total.
- Shape the dough into a rectangle about ¾ inch thick and roughly 6×8 inches. Cut into 8 triangles.
- Place the scones on the prepared baking sheet, spacing them about 2 inches apart. Brush tops with heavy cream.
- Bake for 15-18 minutes, rotating the baking sheet halfway through, until golden brown.
- Let the scones cool on the baking sheet for 5 minutes, then transfer to a wire rack to cool completely.
- While the scones cool, make the brown butter glaze: melt ¼ cup unsalted butter in a small saucepan over medium heat. Swirl occasionally until it turns amber and smells nutty, about 5-7 minutes. Remove from heat immediately.
- Let the brown butter cool for 5 minutes, then whisk in powdered sugar, 3 tablespoons maple syrup, and a pinch of salt. Add milk or cream one tablespoon at a time until the glaze is thick but pourable.
- Drizzle the glaze over the cooled scones. Let set for about 15 minutes before serving.
Notes
Keep all ingredients cold for flaky layers. Do not overmix the dough. Brown butter can burn quickly, so watch it carefully. Let scones cool completely before glazing.
Nutrition
- Serving Size: 1 scone
- Calories: 380
- Sugar: 28
- Sodium: 290
- Fat: 18
- Saturated Fat: 11
- Carbohydrates: 52
- Fiber: 2
- Protein: 4
Keywords: pumpkin scones, maple scones, brown butter glaze, fall baking, breakfast scones, flaky scones


