There used to be a tiny bakery tucked between a laundromat and a dusty thrift store on Grand Avenue that made the most hauntingly beautiful ghost meringues. When they closed—just a handwritten sign taped to the door one Tuesday, “Sorry, folks, we’re done”—I honestly felt a little crushed. Those little white puffs with their chocolate chip eyes had become my October ritual, the thing I looked forward to every fall.
After seven tries—some that collapsed into sad puddles, others that browned in the oven like they’d been sunbathing too long—I finally got it. And let me tell you, the first time I pulled a perfectly crisp, pure white ghost out of the oven, I may have actually squealed. My neighbor knocked on the wall to ask if everything was okay. Worth it.
These light ghost meringue cookies with chocolate chip eyes are everything I loved about those bakery ghosts: ethereally light, melt-in-your-mouth sweet, and just spooky enough to make you smile. They’re the kind of Halloween treat that feels special without being complicated, and honestly, they’ve become my most-requested recipe every October. Maybe you’ve been there—chasing a flavor memory from a place that no longer exists. This one’s for you.
Why You’ll Love This Recipe
Let’s be real for a second. Halloween treats are usually either adorable but taste like cardboard, or delicious but look like a Pinterest fail. These ghost meringues? They’re the rare unicorn that nails both.
- Quick & Easy: Comes together in under 20 minutes of active prep time. The oven does the rest of the work while you clean up or start on your costume.
- Simple Ingredients: Egg whites, sugar, cream of tartar, vanilla, and chocolate chips. That’s it. No weird stabilizers or specialty extracts.
- Perfect for Halloween Parties: They’re the life of the party—light, spooky, and totally kid-approved. Adults love them too, especially with coffee.
- Crowd-Pleaser: I’ve brought these to school parties, office potlucks, and neighborhood gatherings. They disappear every single time.
- Unbelievably Delicious: The texture is what gets people. That first bite where the cookie just dissolves on your tongue? Pure magic.
What makes this version different from the rest is the technique. I spent those seven failed batches figuring out exactly how to keep them perfectly white (no browning!), how to pipe the ghost shape without it looking like a blob, and how to get the chocolate chip eyes to stay put instead of sliding off. This isn’t just another meringue recipe—it’s the one I’d serve to anyone who told me they couldn’t make good meringues.
There’s something about these cookies that makes people close their eyes after the first bite. Maybe it’s the nostalgia, maybe it’s the perfect sweetness, or maybe it’s just that they’re so light they feel like eating a cloud. Whatever it is, this recipe delivers that feeling every single time.
What Ingredients You Will Need
This recipe uses simple, kitchen-staple ingredients to create something that looks like it came from a fancy bakery. Here’s what you’ll need and why each one matters.
For the Meringue Base
- 4 large egg whites, room temperature (this is crucial—cold egg whites don’t whip up as well, so let them sit out for about 30 minutes)
- 1 cup (200g) granulated white sugar (not powdered sugar—the granulated sugar dissolves into the meringue for that perfect structure)
- 1/4 teaspoon cream of tartar (this stabilizes the egg whites and helps them hold their shape; you can substitute with 1/2 teaspoon lemon juice if needed)
- 1 teaspoon vanilla extract (pure vanilla extract gives the best flavor, but imitation works in a pinch)
- Pinch of salt (balances the sweetness and helps the egg whites whip up)
For the Ghost Faces
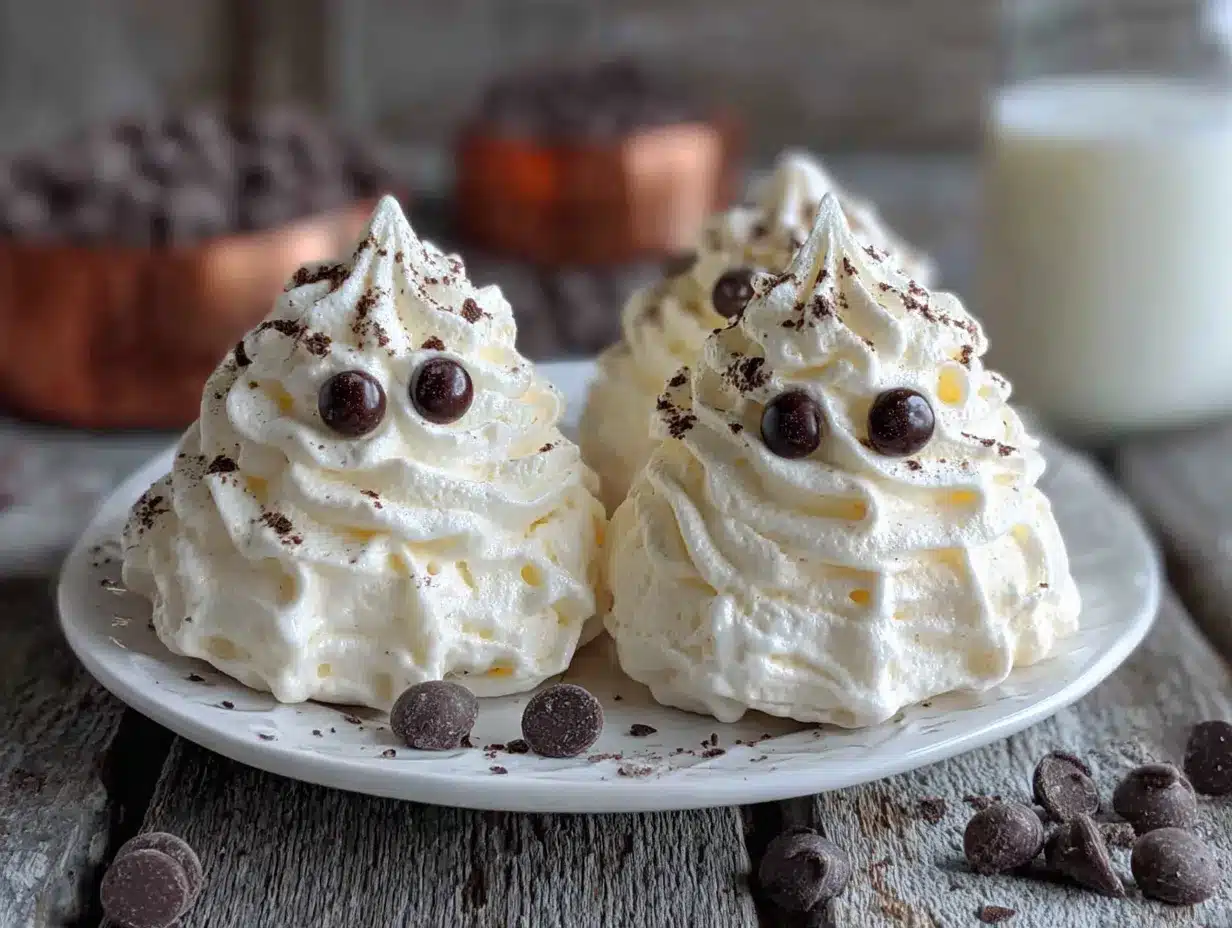
- 1/4 cup mini chocolate chips (I prefer Ghirardelli mini chips—they’re small enough to look like eyes but sturdy enough not to melt into the meringue)
- Optional: 1 tablespoon black sanding sugar (for an extra spooky sparkle, though I usually skip this)
A quick note on the egg whites: I’ve tested this with both fresh eggs and pasteurized liquid egg whites from a carton. Fresh eggs consistently give better results—the meringue is fluffier and holds its shape longer. If you’re using carton egg whites, whip them a minute or two longer than the recipe says.
For the sugar, please don’t try to substitute with a sugar alternative like stevia or monk fruit. Meringue relies on the sugar dissolving completely into the egg whites to create that stable structure. Sugar-free versions tend to collapse or turn out sticky. If you need a lower-sugar option, look for a specific keto meringue recipe instead.
The chocolate chips are where you can get creative. I’ve used regular semi-sweet chips, dark chocolate chips, and even those tiny star-shaped sprinkles for a different look. Just make sure whatever you use is small enough to look proportional on a ghost that’s only about 2 inches tall.
Equipment Needed
You don’t need a professional bakery setup for these, but a few specific tools make a big difference.
- Electric stand mixer or hand mixer: You can technically whip meringue by hand with a whisk, but your arm will hate you. A stand mixer with the whisk attachment is ideal. I use my KitchenAid and it works perfectly every time.
- Large mixing bowl: Make sure it’s completely clean and dry—any trace of grease will prevent the egg whites from whipping up properly. Glass or metal bowls work best; plastic can sometimes hold onto oils.
- Piping bag with a large round tip: I use a Wilton 1A tip. If you don’t have a piping bag, a sturdy zip-top bag with the corner snipped off works fine—just be careful not to squeeze too hard.
- Baking sheets lined with parchment paper: Parchment is non-negotiable here. Wax paper will stick, and silicone mats can sometimes cause the meringues to spread too much.
- Cooling rack: Meringues need to cool completely on the baking sheet, but a rack helps with airflow if you need to speed things up.
- Small offset spatula: Not essential, but helpful for gently lifting the ghosts off the parchment without breaking them.
Budget-friendly tip: If you don’t own a piping bag, grab a pack of disposable ones from the grocery store—they’re under $5 and last for months. Or just use the zip-top bag method. I’ve done it both ways and honestly, the ghosts look the same.
Preparation Method
Let’s get into the actual making of these adorable little ghosts. I’ll walk you through every step, including what things should look and feel like along the way.
- Preheat your oven to 200°F (93°C). Yes, that low temperature is intentional. Meringues dry out slowly; they don’t bake in the traditional sense. Line two baking sheets with parchment paper and set them aside.
- Clean your mixing bowl and whisk attachment thoroughly. Even a tiny bit of grease can ruin your meringue. I wipe mine down with a little white vinegar on a paper towel, then dry completely. It sounds fussy, but trust me on this one—I learned the hard way after a batch that refused to whip up.
- Separate your eggs while they’re cold, then let the whites come to room temperature. Cold eggs separate more cleanly (the yolks break less often), but room-temperature whites whip up higher and more stable. So separate them first, then let them sit for 30 minutes. If you’re in a hurry, place the bowl of egg whites in a larger bowl of warm water for 5 minutes.
- Add the cream of tartar and salt to the egg whites. Start beating on medium speed until the mixture becomes foamy and opaque, about 1-2 minutes. You’ll see lots of tiny bubbles, and the mixture will look like a cloudy sea foam.
- With the mixer running on medium-high, start adding the sugar one tablespoon at a time. I know this is tedious, but adding the sugar slowly is what gives you that silky, stable meringue. Each spoonful should dissolve completely before you add the next. This takes about 3-4 minutes total. Resist the urge to dump it all in at once—I did that on attempt number three and ended up with gritty, weeping meringue.
- Once all the sugar is added, increase the speed to high. Beat until the mixture is glossy, stiff, and holds firm peaks. How do you know it’s ready? Lift the whisk attachment—the meringue should stand up straight without drooping. Also, rub a tiny bit between your fingers. If it feels smooth and not grainy, the sugar has dissolved completely. This takes about 5-7 minutes with a stand mixer, longer with a hand mixer.
- Add the vanilla extract and beat for another 30 seconds to incorporate it evenly. The meringue will look like marshmallow fluff—thick, shiny, and impossibly white.
- Transfer the meringue to your piping bag fitted with the round tip. If you’re using a zip-top bag, snip about 1/2 inch off one corner after filling it. Don’t overfill the bag—about halfway is plenty, otherwise it gets hard to control.
- Pipe the ghosts onto the prepared baking sheets. Hold the bag straight up and down, about 1/2 inch above the parchment. Squeeze gently to create a round base, then lift the bag straight up while continuing to squeeze, creating a tall, tapered shape. Release pressure and pull away quickly to create a little peak on top. Each ghost should be about 1.5-2 inches tall. Space them about 1 inch apart—they don’t spread much, but they need a little breathing room.
- Here’s the tricky part: adding the eyes. While the meringue is still wet, gently press two mini chocolate chips into each ghost to create eyes. I place them about halfway down the ghost, slightly angled for that cute “spooky but friendly” look. Don’t push them in too deep or they’ll disappear into the meringue. Just a gentle press so they stick.
- Bake for 1 hour and 15 minutes, then turn off the oven and leave the ghosts inside for another 30 minutes without opening the door. This slow drying process is what gives meringues their signature crisp texture and pure white color. Opening the oven too early lets in humidity and can cause cracking or browning.
- After the 30-minute rest in the oven, remove the baking sheets and let the ghosts cool completely on the sheets. They should lift easily off the parchment—if they stick, they need more drying time. Pop them back in the turned-off oven for another 15 minutes and check again.
One more thing: if your kitchen is humid (like mine in the summer), the meringues might take longer to dry out. Don’t rush them. A slightly longer drying time is always better than pulling them out too early.
Cooking Tips & Techniques
I’ve made enough failed meringues to fill a small landfill, so let me save you the trouble with some hard-earned wisdom.
The humidity problem: Meringue is basically a sponge for moisture. If you’re making these on a rainy day, they might turn out sticky or chewy instead of crisp. I only make meringues when the humidity is below 50%. Sounds dramatic, but it’s the difference between light-as-air ghosts and sad, chewy blobs.
Don’t over-bake: The biggest mistake I made early on was thinking they needed to look “done” like a regular cookie. Meringues should be dry and firm to the touch but still pure white. If they start turning tan or golden, your oven is too hot. I actually keep an oven thermometer inside because my oven runs 25 degrees hot. Worth the $8 investment.
The piping technique: Here’s something I figured out after way too many attempts. When you’re piping the ghost shape, start with a slightly wider base than you think you need. As the meringue dries, the bottom will firm up and support the tall shape. If your base is too narrow, the ghost will tip over during baking. I learned this when batch number four looked like a field of fallen tombstones.
Timing strategy: These are perfect for making the night before a party. They bake for about 2 hours total (including the rest time in the turned-off oven), then cool completely on the counter. Store them in an airtight container overnight, and they’ll be perfectly crisp the next day. Just don’t refrigerate them—the fridge introduces moisture that softens the meringue.
The chocolate chip trick: If your chocolate chips keep sliding off the meringue (this happened to me constantly), try this: dip the flat side of each chip in a tiny bit of melted chocolate before pressing it into the meringue. The melted chocolate acts like glue. It’s an extra step, but it guarantees the eyes stay put.
Variations & Adaptations
Once you’ve mastered the basic ghost, the possibilities are honestly endless. Here are some variations I’ve tried and loved.
Spooky color twist: Add a tiny drop of purple or black gel food coloring to the meringue before piping. Swirl it in gently so you get a marbled effect rather than solid color. I made a batch of purple ghosts last year and they looked like they’d stepped out of a haunted fairy tale.
Different face expressions: Instead of just eyes, pipe a tiny mouth using melted chocolate or a food-safe marker. I’ve done happy ghosts, surprised ghosts, and one batch that looked mildly annoyed. My kids thought the annoyed ones were hilarious.
Flavor variations: Swap the vanilla extract for peppermint, almond, or even orange extract. Just use the same amount. Peppermint ghosts are especially fun for a Christmas-themed treat—just call them snow ghosts instead.
Gluten-free and dairy-free: These cookies are naturally both! Meringue contains no flour or dairy, so they’re safe for most dietary restrictions. Just double-check your chocolate chips are dairy-free if that’s a concern—some brands add milk solids.
Mini ghost pops: Insert a lollipop stick into the bottom of each ghost before baking. Once they’re dry, you have ghost pops that are perfect for handing out at parties. I did this for my niece’s Halloween party and the kids went absolutely wild for them.
One variation I tried that didn’t work: adding cocoa powder to make chocolate ghosts. The cocoa powder deflated the meringue and the ghosts came out flat and sad. Stick to the basic recipe for the best texture.
Serving & Storage Suggestions
These ghosts are best served at room temperature, right after they’ve cooled completely. The texture is perfect—crisp on the outside, airy on the inside, and they literally dissolve on your tongue.
For a Halloween party display, arrange the ghosts on a large platter with some black and orange sprinkles scattered around. I like to place them on a bed of crushed black cookies (Oreos work great) to look like a spooky graveyard. Add a few plastic spiders for extra effect.
They pair beautifully with hot chocolate, coffee, or even a warm apple cider. The sweetness of the meringue balances the bitterness of coffee perfectly. I’ve also served them alongside vanilla ice cream for a light, crunchy dessert.
Storage instructions: Store the ghosts in an airtight container at room temperature for up to 2 weeks. I layer them between sheets of parchment paper so they don’t bump into each other and break. Do not refrigerate them—the moisture will make them sticky and soft.
Freezer instructions: You can freeze baked meringues for up to 3 months. Place them in a single layer in a freezer-safe container with parchment between layers. Thaw at room temperature for about 15 minutes before serving. They’ll lose a tiny bit of their crispness, but they’re still delicious.
One thing I love about these cookies is that the flavor actually improves after a day or two. The vanilla seems to mellow and deepen, and the chocolate chips set up perfectly. So don’t stress about making them fresh the day of your party—they’re even better the next day.
Nutritional Information & Benefits
Let’s be honest—these are cookies, not health food. But compared to most Halloween treats, they’re surprisingly light.
Per serving (1 ghost cookie):
– Calories: approximately 35-40
– Fat: 0.5g
– Carbohydrates: 8g
– Sugar: 7g
– Protein: 1g
The main ingredient is egg whites, which are pure protein and contain no fat or cholesterol. The sugar is the only significant source of calories, so these are much lighter than butter-based cookies or candy. A single ghost has about a third of the calories of a typical Halloween candy bar.
For anyone watching their sugar intake, these are still a treat, but the portion size is naturally small. One or two ghosts satisfy that sweet craving without overdoing it. And because they’re so light and airy, you feel like you’re eating more than you actually are.
Dietary considerations: These are naturally gluten-free, dairy-free, and nut-free (assuming your chocolate chips are processed in a nut-free facility). They’re also kosher if you use certified kosher ingredients. The only common allergen is eggs, so they’re not suitable for anyone with an egg allergy.
From a wellness perspective, I love that these cookies let me participate in Halloween treats without the heavy, greasy feeling that comes from butter-laden cookies or candy. They feel festive and fun without the food coma afterward.
Conclusion
These light ghost meringue cookies with chocolate chip eyes are the Halloween treat you didn’t know you needed. They’re spooky enough to impress at parties, simple enough to make with kids, and light enough that you can eat three without feeling guilty. Plus, they’re naturally gluten-free and dairy-free, which makes them a great option for guests with dietary restrictions.
I love that this recipe lets me recreate that bakery magic from Grand Avenue in my own kitchen. Every time I pipe those little ghosts and press in their chocolate chip eyes, I feel like I’m keeping a little piece of that place alive. And when I see people’s faces light up after that first bite—that’s the real reward.
I’d love to hear how your ghosts turn out! Did you try any fun variations? Did your kids help with the piping? Drop a comment below and let me know. And if you share them on social media, tag me—I want to see your spooky creations. Happy Halloween, and happy baking!
Frequently Asked Questions
Why did my meringue cookies turn out sticky or chewy?
Sticky meringue usually means they weren’t dried out long enough, or you made them on a humid day. Try baking them for an additional 15-20 minutes at 200°F, then letting them cool completely in the turned-off oven. If the humidity is above 50%, wait for a drier day.
Can I use liquid egg whites from a carton?
Yes, but they don’t whip up as well as fresh egg whites. If using carton egg whites, beat them for an extra 2-3 minutes and make sure they reach stiff peaks before adding the sugar. The texture might be slightly less airy, but they’ll still work.
How do I keep the chocolate chip eyes from falling off?
Press the chips into the meringue while it’s still wet, but don’t push them in too deep. If they still fall off, dip the flat side of each chip in a tiny bit of melted chocolate before pressing it into the meringue. The melted chocolate acts as glue.
Can I make these ahead of time for a party?
Absolutely! These cookies actually taste better the next day. Bake them up to 2 weeks in advance and store them in an airtight container at room temperature. Just don’t refrigerate them, and keep them away from moisture.
Why did my meringue collapse during baking?
Collapsed meringue usually means the egg whites were under-whipped or the sugar wasn’t fully dissolved. Make sure your meringue reaches stiff peaks and feels smooth when rubbed between your fingers. Also, avoid opening the oven door during baking—the temperature change can cause collapse.
Pin This Recipe!
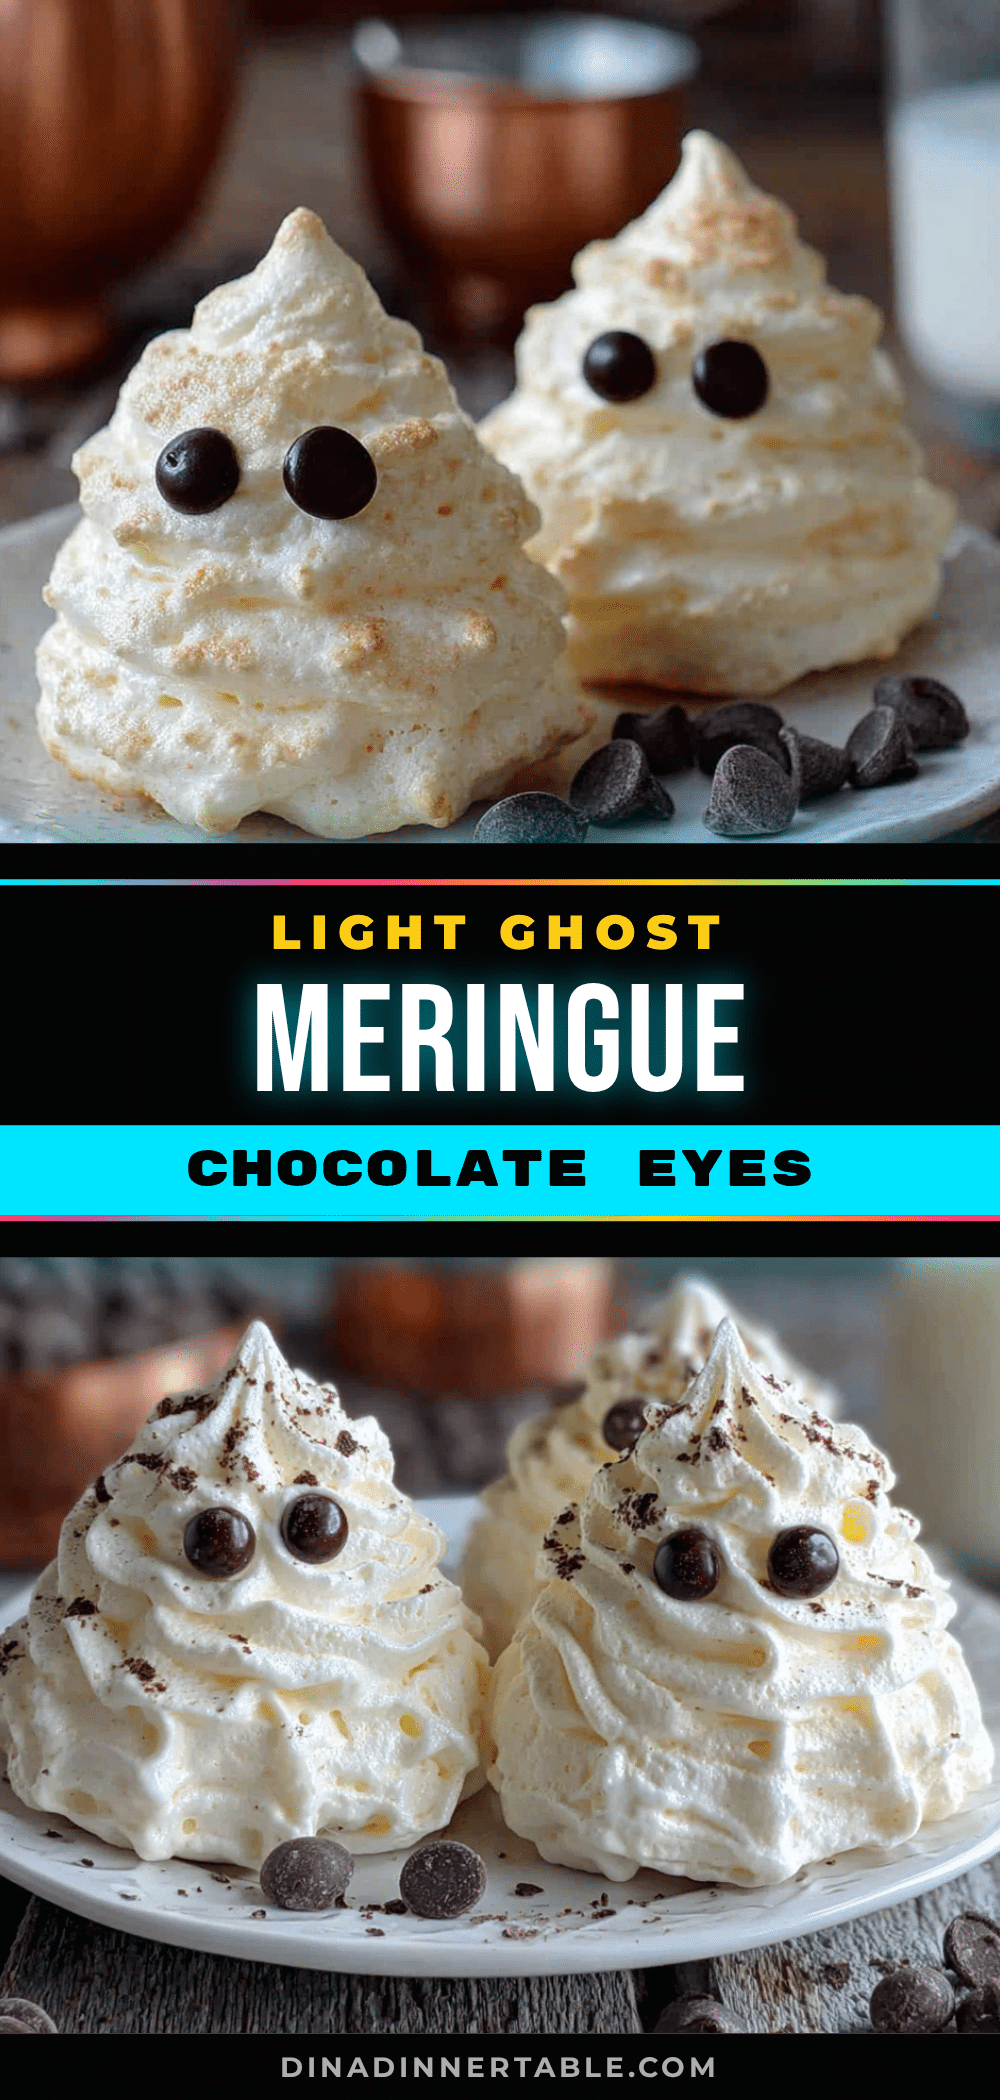
Light Ghost Meringue Cookies: Easy Halloween Treat
These light ghost meringue cookies with chocolate chip eyes are ethereally light, melt-in-your-mouth sweet, and just spooky enough to make you smile. They’re the perfect Halloween treat that feels special without being complicated.
- Prep Time: 20 minutes
- Cook Time: 1 hour 15 minutes
- Total Time: 2 hours 5 minutes (includes 30 minutes resting in oven)
- Yield: 24 servings 1x
- Category: Dessert
- Cuisine: American
Ingredients
- 4 large egg whites, room temperature
- 1 cup (200g) granulated white sugar
- 1/4 teaspoon cream of tartar
- 1 teaspoon vanilla extract
- Pinch of salt
- 1/4 cup mini chocolate chips
- Optional: 1 tablespoon black sanding sugar
Instructions
- Preheat your oven to 200°F (93°C). Line two baking sheets with parchment paper and set them aside.
- Clean your mixing bowl and whisk attachment thoroughly. Wipe with white vinegar on a paper towel, then dry completely.
- Separate your eggs while they’re cold, then let the whites come to room temperature (about 30 minutes).
- Add the cream of tartar and salt to the egg whites. Start beating on medium speed until foamy and opaque, about 1-2 minutes.
- With the mixer running on medium-high, add the sugar one tablespoon at a time, allowing each spoonful to dissolve completely before adding the next (about 3-4 minutes total).
- Once all sugar is added, increase speed to high. Beat until mixture is glossy, stiff, and holds firm peaks (about 5-7 minutes with a stand mixer). The meringue should feel smooth, not grainy, when rubbed between fingers.
- Add the vanilla extract and beat for another 30 seconds to incorporate evenly.
- Transfer the meringue to a piping bag fitted with a large round tip (or a sturdy zip-top bag with 1/2 inch snipped off one corner).
- Pipe ghosts onto prepared baking sheets: hold bag straight up and down, squeeze gently to create a round base, then lift straight up while continuing to squeeze to create a tall, tapered shape. Release pressure and pull away quickly to create a little peak on top. Each ghost should be about 1.5-2 inches tall, spaced 1 inch apart.
- While meringue is still wet, gently press two mini chocolate chips into each ghost to create eyes, placed about halfway down and slightly angled.
- Bake for 1 hour and 15 minutes, then turn off the oven and leave ghosts inside for another 30 minutes without opening the door.
- Remove baking sheets and let ghosts cool completely on the sheets. They should lift easily off the parchment. If they stick, return to turned-off oven for another 15 minutes.
Notes
Make sure egg whites are at room temperature for best results. Avoid making meringues on humid days (humidity above 50%). Do not open oven door during baking or resting time. Store in airtight container at room temperature for up to 2 weeks. Do not refrigerate. Can be frozen for up to 3 months.
Nutrition
- Serving Size: 1 ghost cookie
- Calories: 3540
- Sugar: 7
- Sodium: 15
- Fat: 0.5
- Carbohydrates: 8
- Protein: 1
Keywords: ghost meringue cookies, Halloween cookies, meringue cookies, ghost cookies, easy Halloween treat, gluten-free cookies, dairy-free cookies


