I was standing in my neighbor Margie’s kitchen last fall, watching her pull a pan of golden-brown bars out of the oven. The smell was ridiculous—like a warm hug mixed with a fancy coffee shop. She didn’t say anything at first. She just set the pan on the counter, cut me a piece while it was still warm, and handed it over on a napkin. “Try this,” she said. “It’s my grandma’s pecan pie, but easier.”
One bite and I honestly forgot what I was even doing there. The crust was buttery and firm, not that soggy mess you sometimes get with traditional pecan pie. The filling was rich and nutty with this subtle warmth that I couldn’t quite place at first. Margie laughed at my face. “Maple syrup and a splash of bourbon,” she said. “But don’t worry—the alcohol cooks off. My kids have been eating these since they could chew.”
I asked for the recipe right there, standing at her counter with crumbs on my shirt. She scribbled it on a sticky note, and I tucked it into my wallet like it was cash. That sticky note got crumpled and stained over the next few weeks because I made these bars at least four times. I tweaked a few things—added a little more salt to balance the sweetness, swapped in a different brand of maple syrup after a disappointing batch—and eventually landed on this version. Maybe you’ve been there too, where a recipe finds you at exactly the right moment and suddenly becomes part of your regular rotation.
These Kid-Approved Maple Bourbon Pecan Pie Bars have become my go-to for every family gathering, school bake sale, and Tuesday night when we just need something sweet. They’re easier than a full pie, they travel well, and somehow they make everyone—from my picky five-year-old to my bourbon-loving father-in-law—happy at the same table. That’s a small miracle, if you ask me.
Why You’ll Love This Recipe
Let me tell you why these bars have earned a permanent spot in my kitchen. I’ve tested this recipe more times than I can count, and every single batch has disappeared faster than I expected. That’s not bragging—that’s just what happens when you get the balance right.
- Quick & Easy: From start to finish, these bars come together in about an hour. The crust takes ten minutes to press into the pan, and the filling is just stirring everything together in one bowl. No rolling pins, no chilling dough, no fuss.
- Simple Ingredients: You probably already have most of these in your pantry. Butter, flour, sugar, eggs, pecans. The maple syrup and bourbon are the only “special” items, and honestly, you can skip the bourbon if you need to—I’ll show you how later.
- Perfect for Family Gatherings: These bars are sturdy enough to pack in a lunchbox or bring to a potluck. They slice cleanly, they don’t get messy, and they look impressive without requiring any fancy decoration skills.
- Crowd-Pleaser: I’m not kidding when I say kids and adults both go crazy for these. The maple and bourbon flavors are warm and cozy, not boozy or overwhelming. My neighbor’s kids have been eating them for years, and my own kids now request them for every birthday celebration.
- Unbelievably Delicious: The texture is what gets me every time. That buttery shortbread crust, the gooey maple-pecan filling, the slight crunch from toasted pecans on top—it’s comfort food in bar form.
What makes this recipe different from the dozens of pecan pie bar recipes out there? It’s the combination of maple syrup and bourbon that creates this deep, layered sweetness that doesn’t cloy. Most recipes rely on corn syrup, which is fine, but maple adds a complexity that makes you take a second bite just to figure out what’s going on. Plus, the crust is pre-baked, so it stays crisp instead of getting soggy. That’s a game-changer, honestly.
This is the kind of dessert that makes you close your eyes after the first bite. It’s familiar enough to feel like home but special enough to serve at a holiday dinner. And the best part? You don’t have to stress about making a perfect pie crust or dealing with a runny filling. These bars are forgiving, reliable, and absolutely delicious.
What Ingredients You Will Need
This recipe uses simple, wholesome ingredients to deliver that rich, nutty flavor and satisfying texture. Most of these are pantry staples, which makes these bars perfect for last-minute baking emergencies—and yes, those are a real thing in my house.
For the Crust
- 1 ½ cups all-purpose flour (I use King Arthur Flour for consistent results, but any brand works fine)
- ½ cup powdered sugar (this makes the crust tender and melt-in-your-mouth, unlike granulated sugar which can make it gritty)
- ¾ cup cold unsalted butter, cut into small cubes (cold butter is key for a flaky texture—don’t let it soften)
- ¼ teaspoon salt (I prefer fine sea salt for baking because it dissolves evenly)
For the Filling
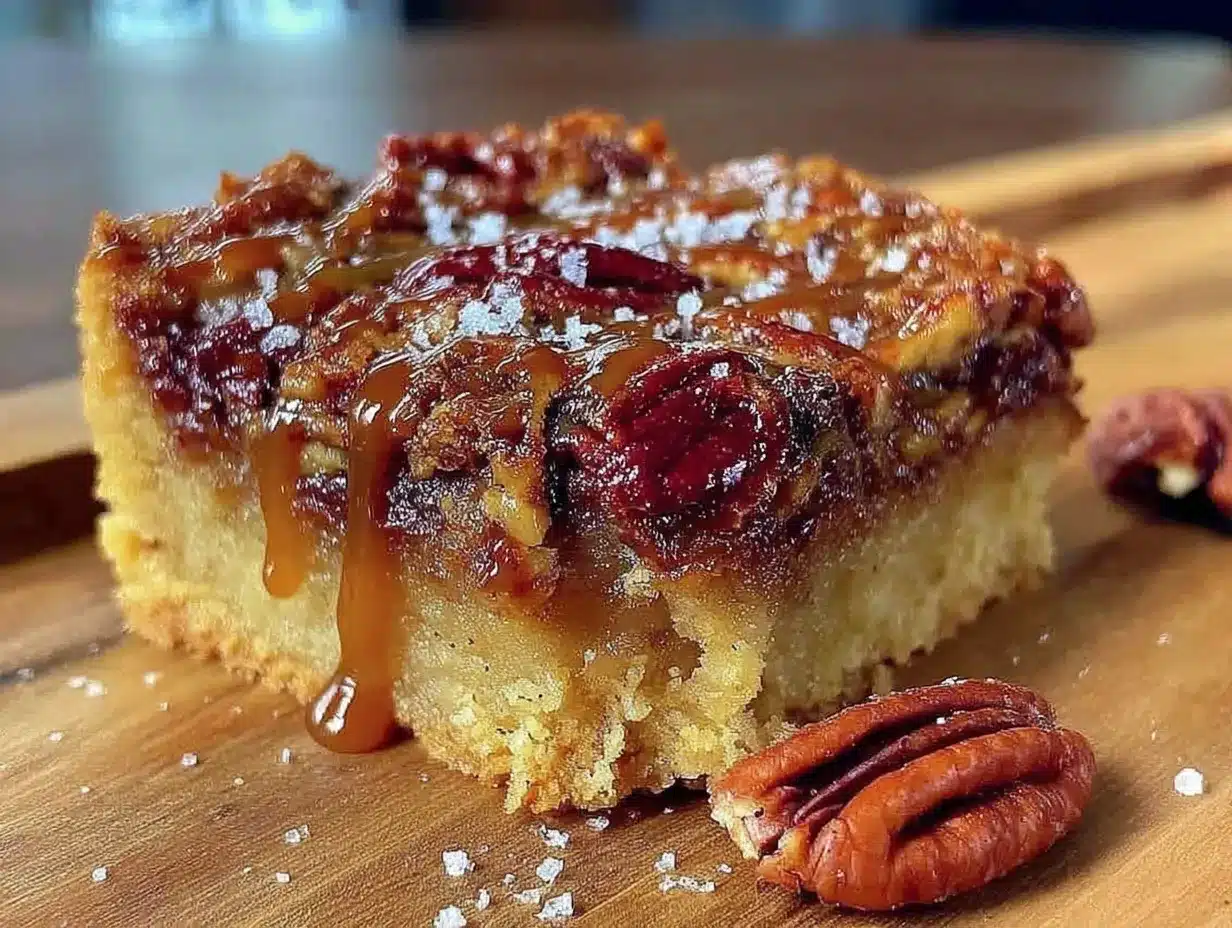
- 3 large eggs, room temperature (cold eggs can seize the mixture, so let them sit out for 20 minutes)
- ¾ cup pure maple syrup (not pancake syrup—use the real stuff. I recommend Grade A Dark Amber for the strongest maple flavor)
- ¼ cup packed brown sugar (light or dark both work; dark gives a deeper molasses flavor)
- 3 tablespoons unsalted butter, melted and slightly cooled
- 2 tablespoons bourbon (use a decent drinking bourbon, not the cheapest bottle. The alcohol cooks off, so the flavor remains without the kick)
- 1 teaspoon vanilla extract (pure vanilla, not imitation, if you can swing it)
- 2 cups pecan halves or pieces (I prefer halves for a prettier top, but pieces work just fine and are usually cheaper)
Ingredient Tips and Substitutions
For the maple syrup, I’ve tested this with both Grade A Amber and Grade B (now called Grade A Dark), and the dark syrup gives a more robust flavor that stands up to the bourbon. If you only have the lighter syrup, it’ll still be delicious—just slightly less intense.
If you’re baking for kids or want to keep it alcohol-free, you can replace the bourbon with an equal amount of maple syrup or a teaspoon of maple extract mixed with water. The flavor profile changes a bit, but it’s still amazing. I’ve done it when making these for my son’s preschool class, and nobody complained.
For the pecans, I recommend toasting them lightly before adding them to the filling. Spread them on a baking sheet at 350°F for 5-7 minutes until they smell fragrant. This step is optional but worth it—toasted pecans have a deeper, nuttier flavor that makes the bars taste more complex.
One more thing about the butter: use unsalted so you control the salt level. If all you have is salted butter, reduce the added salt in the crust to just a pinch.
Equipment Needed
You don’t need a fancy kitchen to make these bars. Here’s what you’ll need:
- 9×13-inch baking pan (metal or glass both work, but metal gives a crisper crust)
- Parchment paper (for lining the pan—trust me, this makes cleanup so much easier)
- Mixing bowls (one medium for the crust, one large for the filling)
- Pastry cutter or fork (for cutting butter into the flour for the crust)
- Whisk (for mixing the filling ingredients together)
- Measuring cups and spoons
- Cooling rack (helps the bars cool evenly and prevents a soggy bottom)
- Sharp knife (for clean slices—a serrated knife works best)
If you don’t have a pastry cutter, don’t worry. I’ve used my fingers to work the butter into the flour for years before I bought one. The key is to work quickly so the butter stays cold. You can also use a food processor—just pulse until the mixture looks like coarse sand, then dump it into the pan and press.
I recommend using a metal baking pan over glass because metal conducts heat better and gives you a more even bake. Glass pans can sometimes make the crust soggy because they don’t brown as well. But if glass is all you have, it’ll still work—just keep an eye on the baking time and add a few extra minutes if needed.
Preparation Method
Let’s get baking. I’ve broken this down into clear steps with all the little details I’ve learned from making these bars more times than I can count.
Step 1: Preheat and Prep the Pan
Preheat your oven to 350°F (175°C). Line your 9×13-inch baking pan with parchment paper, leaving some overhang on two opposite sides. This creates little “handles” that let you lift the entire batch out of the pan once it’s cooled. Spray the parchment lightly with nonstick cooking spray or brush with melted butter.
Step 2: Make the Crust
In a medium bowl, whisk together the flour, powdered sugar, and salt. Add the cold butter cubes. Using a pastry cutter or your fingertips, cut the butter into the flour mixture until it resembles coarse meal with some pea-sized butter pieces remaining. Don’t overwork it—you want those little butter chunks because they create flakiness.
Dump the mixture into your prepared pan and press it firmly into an even layer. I use the bottom of a flat measuring cup to really pack it down. This is important—if the crust isn’t pressed firmly, it’ll crumble when you cut the bars later.
Bake the crust for 15-18 minutes, until it’s lightly golden around the edges. It won’t be fully cooked through, and that’s fine. Set it on a cooling rack while you make the filling.
Step 3: Make the Filling
In a large bowl, whisk the eggs until they’re frothy and light yellow, about 30 seconds. Add the maple syrup, brown sugar, melted butter, bourbon, and vanilla extract. Whisk until everything is smooth and combined. Don’t over-whisk—you don’t want to incorporate too much air, which can make the filling puff up and then collapse.
Stir in the pecans. The filling will look thin and liquidy—that’s normal. It thickens as it bakes.
Step 4: Assemble and Bake
Pour the filling over the hot crust. Yes, hot crust—this helps the filling set evenly and prevents a soggy bottom. Spread the pecans around so they’re distributed evenly, because they tend to float to the top during baking.
Bake for 28-32 minutes, until the edges are set and the center is just slightly jiggly. You want that slight jiggle—if you overbake, the filling will be firm and almost rubbery instead of soft and gooey. The center should look puffed and golden when it’s done.
Here’s a tip I learned the hard way: rotate the pan halfway through baking. My oven has hot spots, and the first few times I made these, one side was darker than the other. Rotating ensures even baking.
Step 5: Cool and Slice
Let the bars cool completely in the pan on a wire rack. This takes about 2 hours at room temperature. Don’t rush this step—if you cut into them while they’re warm, the filling will run everywhere and you’ll have a delicious but messy situation. I speak from experience.
Once cooled, use the parchment handles to lift the entire slab out of the pan. Place it on a cutting board. Use a sharp knife to slice into squares. I usually cut 24 bars (6 rows by 4 rows), but you can make them bigger or smaller depending on your needs. Wipe the knife clean between cuts for neat edges.
Cooking Tips & Techniques
After making these bars at least twenty times, I’ve collected a few tricks that make a real difference. Let me share what I’ve learned—including a few mistakes I’ve made so you don’t have to.
Toast your pecans. I mentioned this earlier, but it deserves repeating. Toasting brings out the natural oils in the nuts and makes them taste richer and more complex. Spread them on a baking sheet at 350°F for 5-7 minutes, shaking the pan halfway through. Watch them closely—they burn fast. You’ll know they’re done when they smell nutty and look slightly darker.
Don’t overmix the filling. I made this mistake once when I was distracted by my toddler. I whisked the eggs and sugar for way too long, and the filling came out with a weird, foamy texture on top. Whisk just until everything is combined—about 30 seconds of vigorous mixing is plenty.
Use room temperature eggs. Cold eggs can make the melted butter seize up and create lumps in your filling. If you forgot to take them out of the fridge, place them in a bowl of warm water for 5 minutes before cracking them. Problem solved.
Check for doneness with the jiggle test. The center should wobble slightly when you shake the pan. If it’s completely firm, it’s overbaked. If it’s sloshing like soup, it needs more time. That gentle jiggle is your sweet spot.
Let the bars cool completely. I cannot stress this enough. The first time I made these, I was impatient and cut into them after 30 minutes. The filling oozed out, the crust crumbled, and I ended up eating the pieces with a spoon. Delicious, but not exactly presentable. Patience pays off here.
Use parchment paper. I know it’s an extra step, but it makes lifting the bars out of the pan so much easier. Without it, you’ll be struggling to get the first piece out without destroying everything. Trust me on this one.
Variations & Adaptations
One of the things I love about this recipe is how flexible it is. Here are some variations I’ve tried and loved.
Bourbon-Free Version
If you’re baking for kids or someone who avoids alcohol, replace the bourbon with an extra 2 tablespoons of maple syrup and ½ teaspoon of maple extract. The maple extract gives you that warm, woodsy flavor that bourbon usually provides. I’ve made this version for school events and church potlucks, and nobody has ever guessed it’s booze-free.
Chocolate Pecan Bars
For the chocolate lovers in your life, sprinkle ½ cup of semi-sweet chocolate chips over the crust before pouring in the filling. The chocolate melts into the pecan mixture and creates these gooey pockets of goodness. My kids went absolutely wild for this version. I also tried it with dark chocolate chips once, and it was incredible—the bitterness of the dark chocolate balanced the sweetness perfectly.
Gluten-Free Option
Replace the all-purpose flour with a 1:1 gluten-free baking flour blend. I’ve tested this with Bob’s Red Mill Gluten-Free 1-to-1 Baking Flour, and it worked beautifully. The crust is slightly more crumbly, but the flavor is still fantastic. Make sure your oats (if you add any) are certified gluten-free too.
Seasonal Twist
In the fall, I add ½ teaspoon of cinnamon and ¼ teaspoon of nutmeg to the filling. It gives the bars a cozy, pumpkin-spice vibe that’s perfect for Thanksgiving. In the summer, I swap half the pecans for toasted coconut flakes—it’s lighter and feels more tropical.
Nut-Free Adaptation
If you have nut allergies in your family, replace the pecans with roasted pumpkin seeds or sunflower seeds. The texture is different, but the crunch is still there. I made this version for a friend’s son who has a tree nut allergy, and he ate three bars without stopping.
Serving & Storage Suggestions
These bars are versatile when it comes to serving. Here’s how I handle them.
Serving Temperature: I prefer these bars at room temperature. The filling is soft and gooey without being runny. If you refrigerate them, let them sit out for 15-20 minutes before serving so the texture softens up. You can also serve them slightly warm—just pop a slice in the microwave for 10 seconds. It’s like having fresh-baked bars all over again.
Presentation Ideas: For holidays, I dust the bars with a light sprinkle of powdered sugar or flaky sea salt right before serving. The salt especially is a game-changer—it cuts through the sweetness and makes the flavors pop. For a fancy touch, drizzle them with melted dark chocolate or caramel sauce.
What to Serve With Them: A scoop of vanilla ice cream is the classic pairing, and for good reason. The cold, creamy ice cream against the warm, nutty bars is pure heaven. A dollop of whipped cream works too. For a grown-up dessert, serve with a small glass of bourbon or coffee. The coffee’s bitterness balances the sweetness beautifully.
Storage Instructions: Store the bars in an airtight container at room temperature for up to 5 days. Layer them between sheets of parchment paper so they don’t stick together. If your kitchen is warm, refrigerate them—the filling can get a bit soft at room temperature after a few days. They’ll keep in the fridge for up to a week.
Freezing: These bars freeze beautifully. Wrap individual slices in plastic wrap, then place them in a freezer-safe bag or container. They’ll keep for up to 3 months. To thaw, just leave them at room temperature for about an hour, or microwave a frozen bar for 20-30 seconds. I always keep a stash in my freezer for unexpected guests or late-night cravings.
Flavor Development: Here’s something interesting—these bars actually taste better the next day. The flavors meld together overnight, and the filling sets up perfectly. So if you’re making them for a party, bake them a day ahead. Your future self will thank you.
Nutritional Information & Benefits
Let’s be real—these are dessert bars, not health food. But I believe in knowing what you’re eating so you can enjoy them mindfully.
Per serving (based on 24 bars):
- Calories: 245
- Fat: 16g
- Carbohydrates: 24g
- Protein: 3g
- Fiber: 1g
- Sugar: 16g
Pecans are actually a nutritional powerhouse. They’re packed with healthy monounsaturated fats, which are good for heart health. They also contain magnesium, zinc, and vitamin E. Maple syrup provides manganese and zinc, plus antioxidants called polyphenols. So while these bars are definitely a treat, they’re not completely empty calories.
If you’re watching your sugar intake, you can reduce the brown sugar to 2 tablespoons and add an extra tablespoon of maple syrup. The bars will be slightly less sweet but still delicious. I’ve tried this, and honestly, I didn’t miss the extra sugar.
For anyone with dietary restrictions: these bars contain gluten, dairy, eggs, and tree nuts. I’ve included gluten-free and nut-free variations above if you need them.
Conclusion
These Kid-Approved Maple Bourbon Pecan Pie Bars have become a staple in my kitchen for good reason. They’re easy enough for a Tuesday night baking session, impressive enough for a holiday table, and forgiving enough that even my early mistakes still tasted amazing. The combination of buttery shortbread crust, rich maple-pecan filling, and that subtle bourbon warmth is something special.
I love that this recipe came from a casual conversation in my neighbor’s kitchen. It reminds me that the best recipes often come from real people sharing what they love, not from fancy cookbooks or complicated techniques. Margie’s grandma probably never imagined her recipe would end up on a blog, but here we are.
I encourage you to make these bars your own. Swap the bourbon for extra maple syrup if that’s what your family needs. Add chocolate chips if your kids demand it. Sprinkle sea salt on top because you saw it on Pinterest and wanted to try it. That’s the beauty of a good recipe—it’s a starting point, not a rulebook.
When you make these, I’d love to hear how they turned out. Drop a comment below and tell me about your favorite variation or any tweaks you made. Did your kids love them? Did you serve them at a party and watch them disappear? Share your story—I read every comment, and honestly, they make my day.
Now go preheat your oven. Your family is about to be very happy.
Frequently Asked Questions
Can I make these bars without bourbon?
Absolutely. Replace the bourbon with 2 tablespoons of maple syrup and ½ teaspoon of maple extract. The flavor will be slightly different but still delicious. I’ve made this version many times for kids and non-drinkers, and it’s always a hit.
Why did my crust turn out soggy?
A soggy crust usually means you didn’t pre-bake it long enough, or you poured the filling into a cold crust. Always pre-bake the crust until it’s lightly golden, and pour the filling in while the crust is still warm. This helps the filling set properly and prevents moisture from soaking into the crust.
Can I use corn syrup instead of maple syrup?
You can, but the flavor will be different. Corn syrup is sweeter and less complex than maple syrup. If you must substitute, use half corn syrup and half maple syrup for a better balance. I’ve tried it with all corn syrup, and the bars were one-dimensional and cloyingly sweet.
How do I get clean, neat slices?
Let the bars cool completely before cutting—this is non-negotiable. Use a sharp knife and wipe it clean between cuts with a damp paper towel. For the cleanest slices, chill the bars in the refrigerator for 30 minutes before cutting. They’ll firm up and slice like a dream.
Can I double this recipe?
Yes, but use two separate 9×13-inch pans instead of one larger pan. Doubling the recipe in a single pan will change the baking time and thickness, and you’ll end up with bars that are either underbaked in the middle or overbaked at the edges. Two pans give you consistent results.
Pin This Recipe!
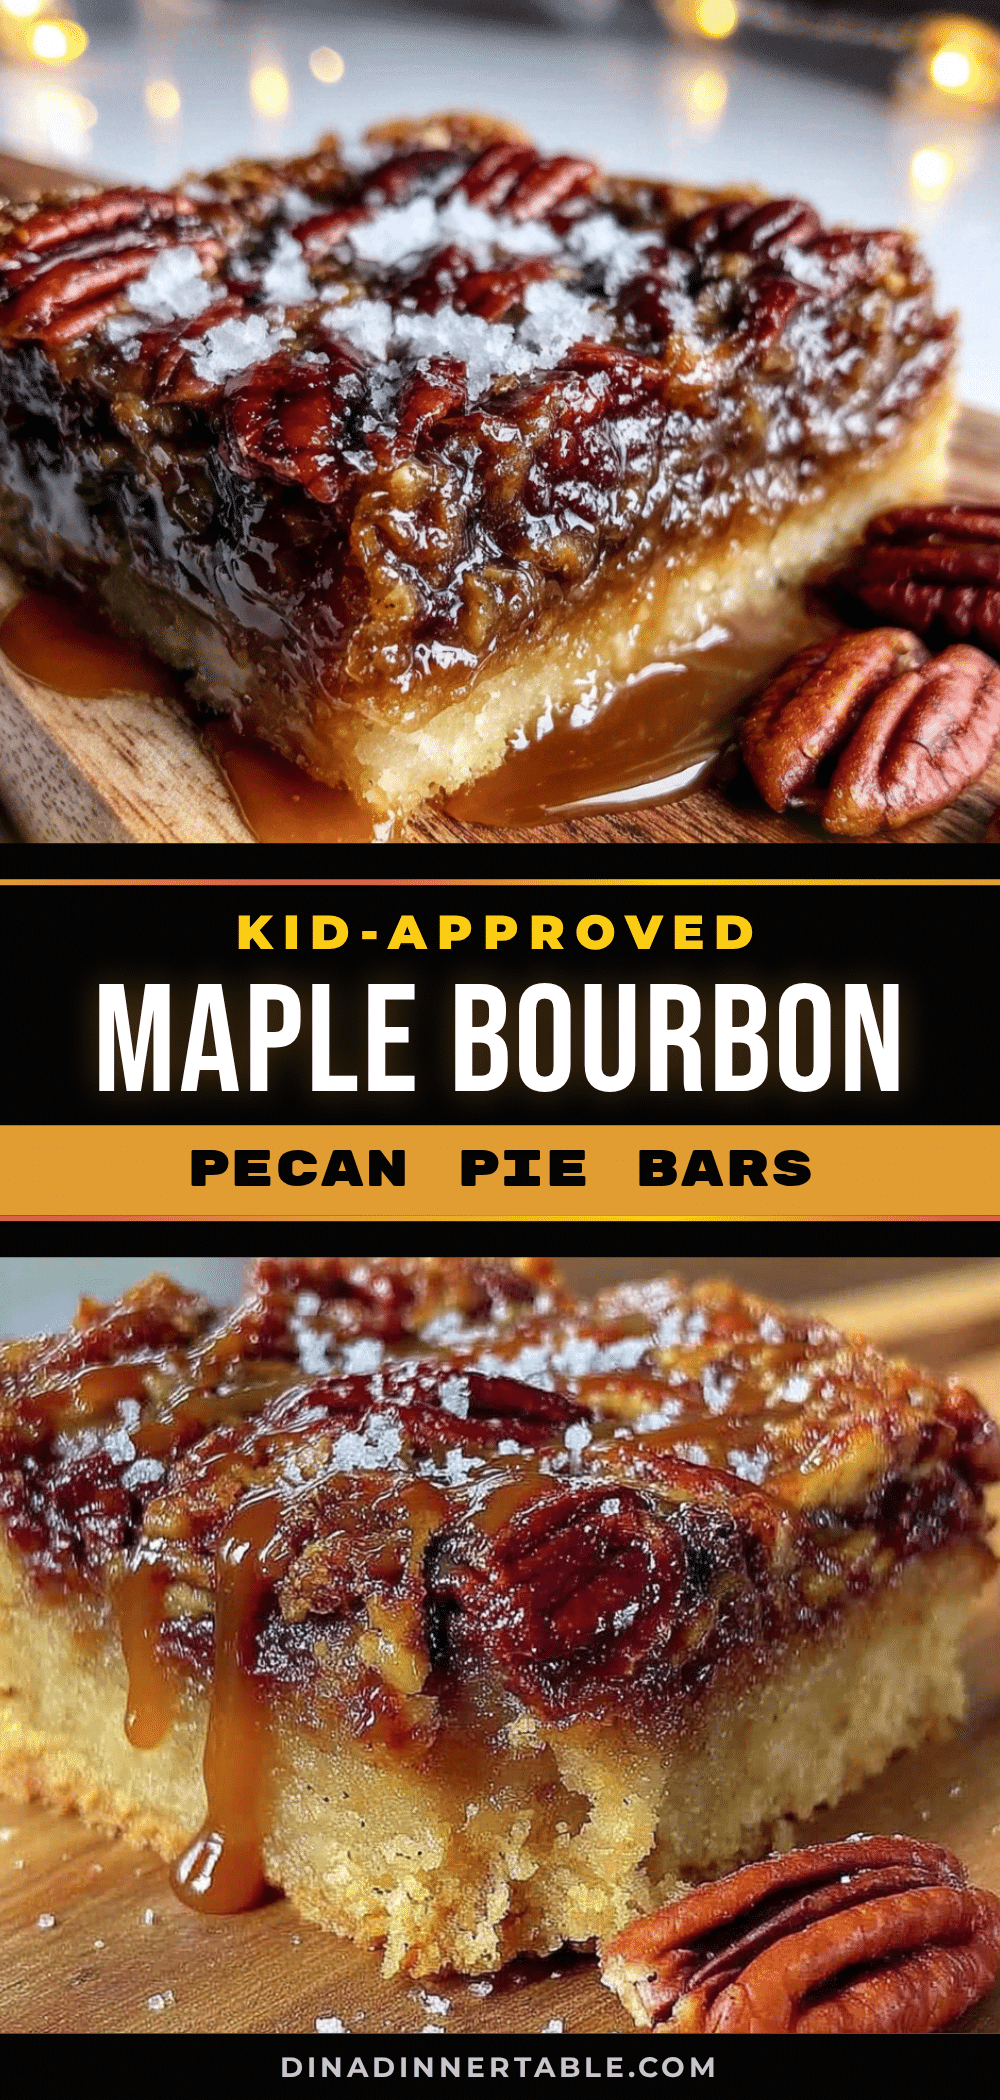
Best Kid-Approved Maple Bourbon Pecan Pie Bars
These easy pecan pie bars feature a buttery shortbread crust, a rich maple-pecan filling with a hint of bourbon, and are perfect for family gatherings, bake sales, or a simple weeknight treat.
- Prep Time: 15 minutes
- Cook Time: 45 minutes
- Total Time: 1 hour
- Yield: 24 bars 1x
- Category: Dessert
- Cuisine: American
Ingredients
- 1 ½ cups all-purpose flour
- ½ cup powdered sugar
- ¾ cup cold unsalted butter, cut into small cubes
- ¼ teaspoon salt
- 3 large eggs, room temperature
- ¾ cup pure maple syrup
- ¼ cup packed brown sugar
- 3 tablespoons unsalted butter, melted and slightly cooled
- 2 tablespoons bourbon
- 1 teaspoon vanilla extract
- 2 cups pecan halves or pieces
Instructions
- Preheat oven to 350°F (175°C). Line a 9×13-inch baking pan with parchment paper, leaving overhang on two opposite sides. Lightly spray with nonstick cooking spray or brush with melted butter.
- In a medium bowl, whisk together flour, powdered sugar, and salt. Add cold butter cubes and cut in with a pastry cutter or fingertips until mixture resembles coarse meal with some pea-sized butter pieces.
- Press mixture firmly into an even layer in the prepared pan. Bake for 15-18 minutes until lightly golden around the edges. Set on a cooling rack.
- In a large bowl, whisk eggs until frothy and light yellow, about 30 seconds. Add maple syrup, brown sugar, melted butter, bourbon, and vanilla extract. Whisk until smooth and combined.
- Stir in pecans. Pour filling over hot crust, spreading pecans evenly.
- Bake for 28-32 minutes, rotating pan halfway through, until edges are set and center is just slightly jiggly.
- Cool completely in the pan on a wire rack, about 2 hours. Use parchment handles to lift slab onto a cutting board. Slice into 24 bars (6 rows by 4 rows) with a sharp knife, wiping clean between cuts.
Notes
For best results, toast pecans at 350°F for 5-7 minutes before adding. Use room temperature eggs. Let bars cool completely before slicing. Bars taste even better the next day. For a bourbon-free version, replace bourbon with 2 tablespoons maple syrup and ½ teaspoon maple extract.
Nutrition
- Serving Size: 1 bar
- Calories: 245
- Sugar: 16
- Sodium: 85
- Fat: 16
- Saturated Fat: 6
- Carbohydrates: 24
- Fiber: 1
- Protein: 3
Keywords: pecan pie bars, maple bourbon, kid-friendly, easy dessert, Thanksgiving, holiday baking


