My neighbor Karen wasn’t trying to impress anyone. I’d stopped by to borrow a bundt pan—mine had mysteriously vanished after last Thanksgiving—and the smell of vanilla and something almost like birthday cake hit me before I even got through her front door. It was the second week of December, and her house already looked like a holiday catalog had sneezed tinsel everywhere, but there she was, standing at her kitchen counter in an old sweater, rolling little balls of something between her palms like it was the most ordinary thing in the world.
“Oh, those are just cake pops,” she said when I asked what she was making. “My kids help me make them every year. Nothing fancy.” Nothing fancy, she said, while I stood there absolutely mesmerized by the sight of these perfect little spheres cooling on a baking sheet, waiting for their white chocolate drizzle. I mean, honestly, I’d spent the last three Decembers trying to make a decent gingerbread house that looked less like a structural hazard and more like a cozy cottage, and here she was casually churning out bakery-quality treats without breaking a sweat.
She handed me one that had already been dipped—still slightly warm—and let me tell you, that first bite stopped me mid-sentence. The outside had that satisfying snap of set white chocolate, and the inside was this incredibly moist, tender crumb that tasted like the holidays wrapped up in a single bite. I asked her for the recipe, and she kind of shrugged and said, “It’s really just leftover cake and frosting. You probably already know how to make them.” But I didn’t. And honestly, the casual way she said it—like it was no big deal—made me want to learn even more.
Maybe you’ve been there, standing in someone else’s kitchen, watching them make something that looks absolutely magical while they act like it’s the easiest thing in the world. That’s exactly how these cozy Christmas cake pops with white chocolate drizzle came into my life. And now, every December, I make a batch. Sometimes two.
Why You’ll Love This Recipe
Let me be straight with you—I’ve tested a lot of cake pop recipes over the years, and most of them are either too dry, too crumbly, or they fall apart the second you try to dip them. These cozy Christmas cake pops with white chocolate drizzle are none of those things. They’re the real deal, and here’s why you’re going to fall for them:
- No special baking required: You can use a boxed cake mix or leftover homemade cake. Seriously, this is the ultimate “use what you’ve got” recipe.
- Perfect for holiday gifting: They look like you spent hours in the kitchen, but the whole process is surprisingly forgiving. I’ve made these with my niece who’s five, and she could roll the balls just fine.
- Make-ahead friendly: You can prep the cake balls days in advance and dip them when you’re ready. Total lifesaver during the chaos of December.
- Completely customizable: Change the cake flavor, swap the frosting, add sprinkles—these little guys are basically a blank canvas for your holiday creativity.
- Kid-approved and adult-obsessed: I brought a batch to my book club last week, and they disappeared faster than the mulled wine. No joke.
What makes these different from every other cake pop recipe out there is the texture. Most recipes end up dense and almost fudge-like, which is fine, but these are light and tender with just the right amount of crumb. The secret? A little trick I picked up from watching Karen that day—she used slightly less frosting than most recipes call for, which keeps the inside from getting too heavy. It’s a small thing, but it makes all the difference.
These cozy Christmas cake pops with white chocolate drizzle are the kind of treat that makes you close your eyes after the first bite. They’re nostalgic without being fussy, festive without being complicated, and honestly, they just taste like Christmas morning feels.
What Ingredients You Will Need
This recipe uses simple, pantry-friendly ingredients to create something that looks and tastes far more impressive than the sum of its parts. Most of these are probably already in your kitchen, which is exactly how holiday baking should be.
For the Cake Pops
- 1 box vanilla or yellow cake mix (about 15.25 ounces) — I prefer Duncan Hines for the fluffiest texture, but any brand works. You can also use a homemade vanilla cake recipe if you’re feeling ambitious.
- 3 large eggs, room temperature — Cold eggs can make the batter lumpy, so let them sit out for about 30 minutes first.
- 1/2 cup vegetable oil (or melted coconut oil for a subtle flavor twist)
- 1 cup water
- 1/2 cup prepared cream cheese frosting — Store-bought is totally fine here. I use Pillsbury because it’s consistent, but homemade works beautifully too. The key is using less than you think you need.
For the Coating
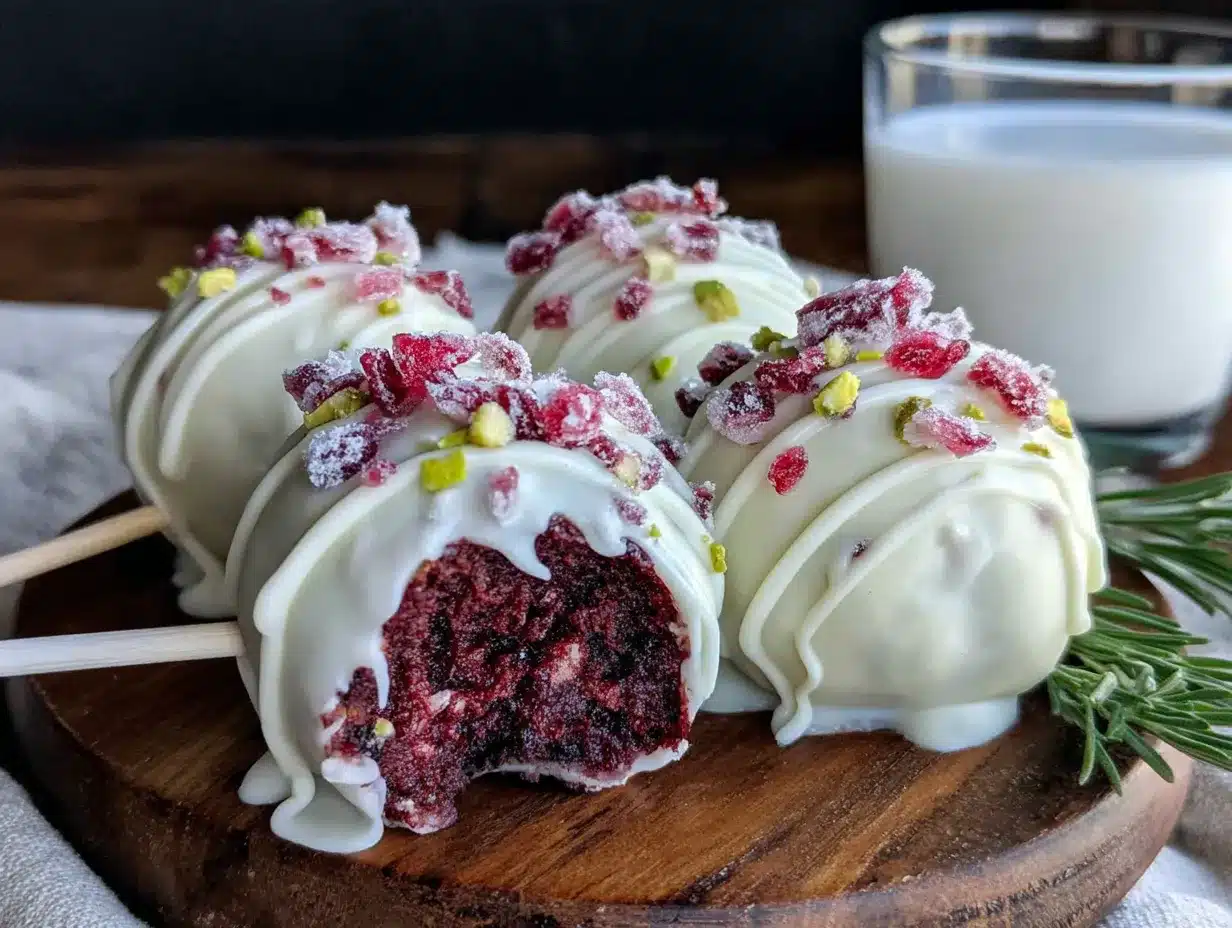
- 12 ounces white chocolate melting wafers — Ghirardelli makes my favorite ones. They melt smoothly and set with a nice shine. Avoid white chocolate chips, which often contain stabilizers that prevent smooth melting.
- 1 tablespoon coconut oil or shortening — This thins the chocolate just enough for easy dipping and gives that beautiful drizzle consistency.
For Decoration
- Red and green sprinkles — Christmas-themed jimmies or nonpareils work great
- Crushed candy canes — Optional but highly recommended for that extra festive crunch
- Gold or silver edible glitter — Because Christmas deserves a little sparkle
For the Sticks
- 20-24 lollipop sticks — You can find these at craft stores or online. Make sure they’re food-grade.
- A block of styrofoam or a cardboard box with holes poked in it — This is how you’ll let the pops dry upright
A quick note on ingredient selection: I’ve tried this recipe with both homemade and boxed cake, and honestly, the boxed version holds up better for cake pops. Homemade cake tends to be more delicate, which can lead to crumbling when you’re rolling the balls. If you do use homemade cake, make sure it’s completely cool and a day old—fresh cake is too soft to hold its shape.
Equipment Needed
You don’t need a ton of fancy equipment for these cozy Christmas cake pops with white chocolate drizzle, but a few specific tools will make your life much easier.
- 9×13-inch baking pan — For baking the cake. A round pan works too, but the rectangle gives you more even cooling.
- Large mixing bowl — For crumbling the cake and mixing with frosting
- Electric hand mixer or stand mixer — For beating the cake batter. You can do it by hand, but your arm will thank you for the help.
- Cookie scoop — A 1-tablespoon scoop makes perfectly uniform cake balls. I use mine constantly during the holidays.
- Baking sheet lined with parchment paper — For freezing the cake balls before dipping
- Microwave-safe bowl — For melting the white chocolate. A glass measuring cup works great because the spout makes dipping easier.
- Lollipop sticks — 20 to 24, depending on how big you make your pops
- Styrofoam block or DIY drying rack — I’ve used a shoebox with holes poked in it before. Desperate times, you know?
If you don’t have a cookie scoop, a melon baller works surprisingly well. And if you’re short on lollipop sticks, you can serve these as little cake truffles instead—just skip the sticks and place them in mini paper liners. I’ve done that for cookie exchanges, and they’re just as cute.
Preparation Method
Making these cozy Christmas cake pops with white chocolate drizzle is more about patience than skill. Take your time, especially with the chilling steps, and you’ll be rewarded with pops that look like they came from a bakery.
- Bake the cake. Preheat your oven to 350°F (175°C). Grease your 9×13-inch pan lightly. In a large bowl, beat the cake mix, eggs, oil, and water together until smooth—about 2 minutes on medium speed. Pour the batter into the prepared pan and bake for 28 to 32 minutes, or until a toothpick inserted in the center comes out clean. Let the cake cool completely in the pan. This is crucial—warm cake will turn into a gummy mess when you try to crumble it.
- Crumble the cake. Once the cake is completely cool—like, leave it for at least an hour—break it into large chunks and transfer them to a large mixing bowl. Use your hands to crumble the cake into fine, even crumbs. There shouldn’t be any large pieces remaining. This step is oddly satisfying. I usually put on a Christmas playlist and zone out.
- Add the frosting. Spoon the cream cheese frosting into the crumbled cake, starting with about 1/3 cup. Use your hands or a spatula to mix it in thoroughly. The mixture should hold together when you squeeze a handful—like damp sand. If it’s too dry, add more frosting a tablespoon at a time. If it’s too wet, add a little more crumbled cake. This is where most people go wrong. Too much frosting makes the pops heavy and greasy. Trust me, less is more.
- Roll the balls. Scoop out about 1 tablespoon of the mixture and roll it between your palms into a smooth ball. Place each ball on the parchment-lined baking sheet. You should get about 20 to 24 balls. Wash your hands halfway through if the mixture starts sticking—clean hands roll better.
- Chill the balls. Pop the baking sheet into the refrigerator for at least 2 hours, or until the balls are firm to the touch. You can also freeze them for 30 to 45 minutes if you’re in a hurry. This step is non-negotiable. Warm cake balls will slide right off the sticks.
- Insert the sticks. Melt about 2 tablespoons of the white chocolate wafers in the microwave—15-second intervals, stirring between each. Dip the tip of each lollipop stick into the melted chocolate, then insert it about halfway into a cake ball. The chocolate acts like glue, holding the stick in place. Return the pops to the refrigerator for another 15 minutes to set. Yes, this extra step is worth it. I learned the hard way after watching three pops slide off their sticks mid-dip.
- Melt the coating. Place the remaining white chocolate wafers and the coconut oil in a microwave-safe bowl. Microwave in 30-second intervals, stirring thoroughly after each, until the chocolate is smooth and fully melted. Be careful not to overheat—white chocolate burns easily and turns grainy. If it starts looking clumpy, you’ve gone too far. Start over with fresh chocolate.
- Dip the pops. Hold a cake pop by the stick and submerge it completely in the melted white chocolate. Gently tap the stick on the edge of the bowl to let the excess drip off. Don’t swirl or shake—that creates air bubbles. Let the chocolate do the work.
- Decorate immediately. While the coating is still wet, sprinkle on your red and green sprinkles, crushed candy canes, or edible glitter. Work quickly—the chocolate sets fast, especially if your kitchen is cool.
- Let them set. Stick the finished pops into your styrofoam block or DIY drying rack. Let them sit at room temperature until the coating is completely firm—about 30 minutes. Don’t refrigerate them at this stage, or the white chocolate may develop condensation and look streaky.
And that’s it. You’ve just made a batch of cozy Christmas cake pops with white chocolate drizzle that would make Karen proud.
Cooking Tips & Techniques
After about a dozen batches of these cozy Christmas cake pops with white chocolate drizzle, I’ve collected a few hard-won tips that’ll save you some frustration.
First, the crumb issue. If your cake balls are cracking when you roll them, the mixture is too dry. Add frosting one teaspoon at a time until it holds together. If they’re greasy and won’t stay round, you’ve added too much frosting. The fix? Crumble up a few plain cake crumbs and mix them in to absorb the excess.
The dipping technique matters more than you think. I used to dip my pops straight down and pull them out fast, which left me with a thick, uneven coating that cracked when it set. The trick is to dip slowly, pull out gently, and let the excess drip off naturally. If you see any cracks forming in the coating while it’s still wet, dip the pop again quickly to seal them.
Temperature is everything. Your cake balls need to be cold—like, straight-from-the-freezer cold—when you dip them. But your white chocolate should be warm, not hot. If the chocolate is too hot, it will melt the cake ball and create a mess. Aim for about 90°F (32°C), which is warm to the touch but not uncomfortable.
One thing I learned the hard way: Don’t try to dip too many pops at once. The white chocolate will start to cool and thicken, making the coating lumpy. Work in batches of 5 to 6, rewarming the chocolate in the microwave for 10 seconds if needed. And if your kitchen is humid, add an extra teaspoon of coconut oil to keep the chocolate flowing smoothly.
Multitasking tip: While the cake is baking and cooling, prep your sprinkles and decorations. Have everything within arm’s reach before you start dipping. Once you start, you won’t have time to go searching for the red sprinkles.
Variations & Adaptations
One of the best things about these cozy Christmas cake pops with white chocolate drizzle is how easily they adapt to different tastes and dietary needs. Here are a few variations I’ve tried and loved:
Chocolate Base
Swap the vanilla cake mix for a chocolate one and use chocolate frosting instead of cream cheese. The white chocolate drizzle against dark chocolate is stunning, and the flavor combo is basically a black forest cake in pop form. I made these for a New Year’s Eve party, and they were gone in 20 minutes.
Vegan Version
Use a vegan cake mix (most Duncan Hines varieties are accidentally vegan) and replace the eggs with flax eggs (1 tablespoon ground flaxseed mixed with 3 tablespoons water per egg). Use vegan cream cheese frosting and dairy-free white chocolate. The texture is slightly denser but still delicious—my vegan friend Sarah couldn’t tell the difference.
Gluten-Free Option
King Arthur makes an excellent gluten-free yellow cake mix that holds up beautifully for cake pops. Just make sure your frosting and white chocolate are certified gluten-free. The crumb is a bit more delicate, so handle the balls gently when rolling.
Peppermint Twist
Add 1/2 teaspoon peppermint extract to the cake batter and crush up a few candy canes to mix into the frosting before combining with the cake crumbs. Top with extra crushed candy canes and a drizzle of dark chocolate for a festive look that screams “winter wonderland.”
Gingerbread Variation
Use a spice cake mix and replace the cream cheese frosting with a brown butter frosting (or just use store-bought vanilla with a teaspoon of molasses stirred in). Roll the finished pops in crushed ginger snaps for extra crunch. This version tastes like Christmas in a single bite.
Serving & Storage Suggestions
These cozy Christmas cake pops with white chocolate drizzle are best served at room temperature. The white chocolate coating should be firm but not hard, and the inside should be tender and moist. If you’ve refrigerated them, let them sit out for about 15 minutes before serving to take the chill off.
For a holiday party: Arrange the pops upright in a tall glass vase or a dedicated cake pop stand. I like to nestle a few sprigs of rosemary or small pine branches around the base for a rustic, festive look. If you’re giving them as gifts, wrap each pop in a clear cellophane bag tied with a red ribbon—they look adorable and stay fresh.
Storage: These pops keep well in an airtight container in the refrigerator for up to 5 days. Layer them between sheets of parchment paper so the decorations don’t get smudged. For longer storage, you can freeze the undipped cake balls for up to 3 months. Just thaw them in the refrigerator overnight before dipping.
Reheating? Don’t. These are meant to be served cold or at room temperature. The white chocolate coating will melt if you try to warm them up, and honestly, they’re perfect just as they are.
One thing I love about these pops is that the flavors actually get better after a day or two. The moisture from the frosting distributes evenly through the cake crumbs, making the texture even more tender. So don’t stress about making them the morning of your party—they’re actually better made the day before.
Nutritional Information & Benefits
Let’s be real—these cozy Christmas cake pops with white chocolate drizzle are a treat, not a health food. But here’s the estimated nutritional breakdown for one pop (based on 24 pops):
| Nutrient | Amount per pop |
|---|---|
| Calories | 185 |
| Total Fat | 9g |
| Saturated Fat | 4g |
| Carbohydrates | 25g |
| Sugar | 16g |
| Protein | 2g |
That said, there are a few small redeeming qualities. If you use a boxed cake mix fortified with vitamins and minerals (some brands add iron and B vitamins), you’re getting a tiny nutritional boost. And white chocolate does contain calcium from the milk solids. But honestly, these are about joy, not nutrients.
For those with dietary concerns: this recipe contains gluten, dairy, and eggs. The vegan and gluten-free variations above address those needs. And if you’re watching your sugar intake, you can reduce the amount of sprinkles or skip the drizzle—though I’d argue the drizzle is the whole point.
My personal take? The holidays are about indulgence and connection. One of these pops with a cup of coffee on a snowy afternoon is a moment of pure comfort. And that has its own kind of nutritional value.
Conclusion
These cozy Christmas cake pops with white chocolate drizzle are everything I love about holiday baking—simple ingredients, a little patience, and a result that feels genuinely special. They remind me of that afternoon at Karen’s house, standing in her kitchen while she made something extraordinary look completely ordinary. That’s the magic of a great recipe, isn’t it? It makes you feel like you can do it too.
I hope you give these a try, whether you’re making them for a cookie exchange, a holiday party, or just because it’s December and you want something sweet. Don’t be afraid to customize them—add your favorite sprinkles, try a different cake flavor, or go wild with the decorations. The best recipes are the ones that become yours.
If you make these, I’d love to hear how they turned out. Drop a comment below and let me know what variations you tried, or tag me in your photos on social media. There’s nothing better than seeing these little pops bring joy to someone else’s holiday table. Happy baking, friends!
Frequently Asked Questions
Why are my cake pops falling off the sticks?
This usually happens when the cake balls aren’t cold enough before dipping, or you didn’t use the “glue” method of dipping the stick in melted chocolate first. Make sure your balls are thoroughly chilled—at least 2 hours in the fridge—and always dip the stick tip in melted chocolate before inserting it.
Can I use dark chocolate instead of white chocolate?
Absolutely. Dark chocolate pairs beautifully with vanilla cake pops, especially if you add a pinch of sea salt on top. Just use the same melting method and adjust the sweetness to your taste.
How far in advance can I make these?
You can make the cake balls up to 3 days ahead and keep them in the fridge. Dip them the day before or the morning of your event. The fully assembled pops stay fresh for up to 5 days in an airtight container in the refrigerator.
My white chocolate is seizing up—what do I do?
White chocolate seizes when it comes into contact with even a drop of water. Make sure your bowl and utensils are completely dry. If it does seize, you can try adding a teaspoon of coconut oil and stirring vigorously, but sometimes it’s better to start fresh with new chocolate.
Can I freeze these cake pops?
Yes! Freeze the undipped cake balls in a single layer on a baking sheet, then transfer them to a freezer bag for up to 3 months. Thaw in the refrigerator overnight before dipping. Fully assembled pops don’t freeze as well—the white chocolate can develop condensation when thawed.
Pin This Recipe!
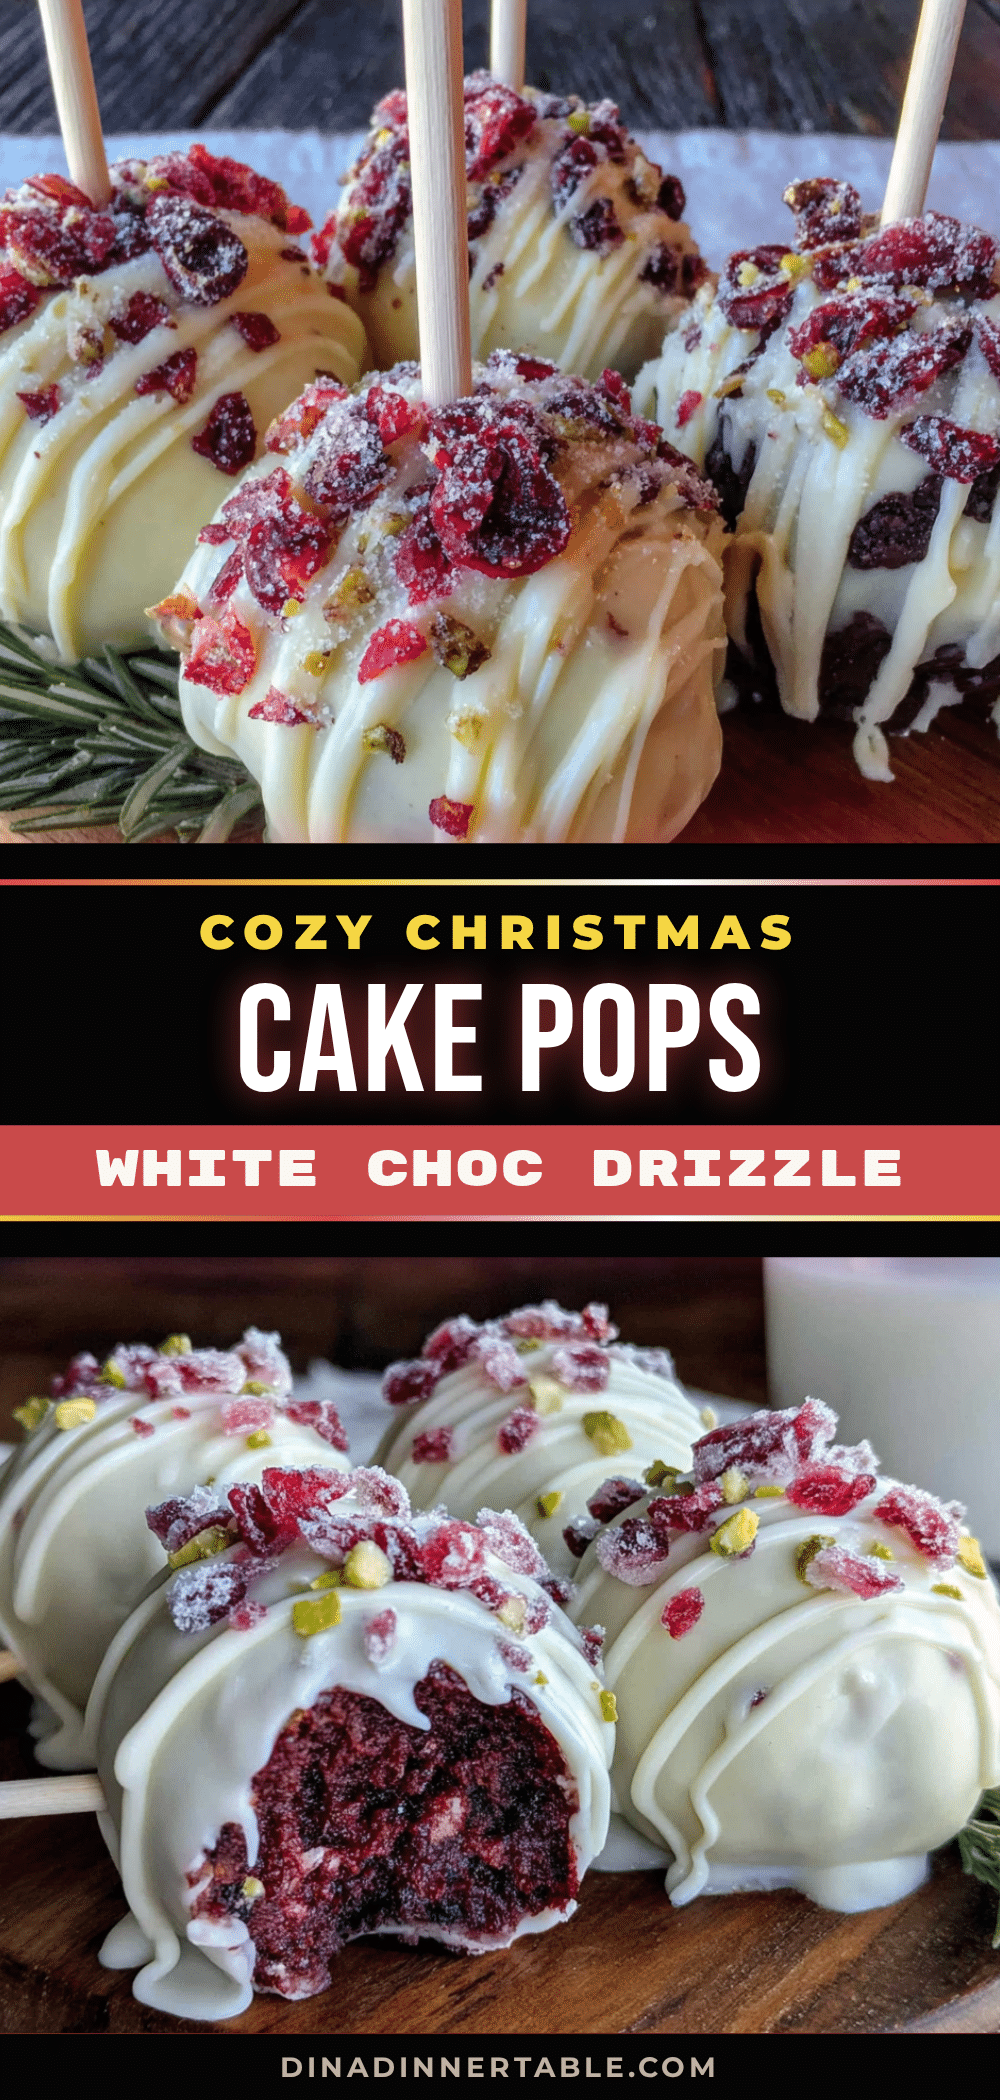
Cozy Christmas Cake Pops with White Chocolate Drizzle

These tender, moist cake pops are dipped in smooth white chocolate and decorated with festive sprinkles. They’re the perfect make-ahead holiday treat that looks bakery-quality but comes together with simple ingredients and a little patience.
- Prep Time: 30 minutes
- Cook Time: 30 minutes
- Total Time: 3 hours (includes chilling time)
- Yield: 20-24 servings 1x
- Category: Dessert
- Cuisine: American
Ingredients
- 1 box vanilla or yellow cake mix (about 15.25 ounces)
- 3 large eggs, room temperature
- 1/2 cup vegetable oil (or melted coconut oil)
- 1 cup water
- 1/2 cup prepared cream cheese frosting (store-bought or homemade)
- 12 ounces white chocolate melting wafers (e.g., Ghirardelli)
- 1 tablespoon coconut oil or shortening
- Red and green sprinkles (Christmas-themed jimmies or nonpareils)
- Crushed candy canes (optional)
- Gold or silver edible glitter (optional)
- 20–24 lollipop sticks (food-grade)
- A block of styrofoam or a cardboard box with holes poked in it (for drying)
Instructions
- Preheat oven to 350°F (175°C). Grease a 9×13-inch baking pan lightly.
- In a large bowl, beat the cake mix, eggs, oil, and water together until smooth, about 2 minutes on medium speed.
- Pour the batter into the prepared pan and bake for 28 to 32 minutes, or until a toothpick inserted in the center comes out clean. Let the cake cool completely in the pan (at least 1 hour).
- Once the cake is completely cool, break it into large chunks and transfer to a large mixing bowl. Use your hands to crumble the cake into fine, even crumbs with no large pieces remaining.
- Add the cream cheese frosting to the crumbled cake, starting with about 1/3 cup. Mix thoroughly with your hands or a spatula until the mixture holds together when squeezed (like damp sand). Add more frosting a tablespoon at a time if too dry, or more cake crumbs if too wet.
- Scoop out about 1 tablespoon of the mixture and roll it between your palms into a smooth ball. Place each ball on a parchment-lined baking sheet. You should get about 20 to 24 balls.
- Refrigerate the baking sheet for at least 2 hours, or freeze for 30 to 45 minutes, until the balls are firm to the touch.
- Melt about 2 tablespoons of the white chocolate wafers in the microwave in 15-second intervals, stirring between each. Dip the tip of each lollipop stick into the melted chocolate, then insert it about halfway into a cake ball. Return the pops to the refrigerator for 15 minutes to set.
- Place the remaining white chocolate wafers and the coconut oil in a microwave-safe bowl. Microwave in 30-second intervals, stirring thoroughly after each, until smooth and fully melted. Do not overheat.
- Hold a cake pop by the stick and submerge it completely in the melted white chocolate. Gently tap the stick on the edge of the bowl to let the excess drip off. Do not swirl or shake.
- While the coating is still wet, immediately sprinkle on red and green sprinkles, crushed candy canes, or edible glitter.
- Stick the finished pops into a styrofoam block or DIY drying rack. Let them sit at room temperature until the coating is completely firm, about 30 minutes. Do not refrigerate at this stage.
Notes
Use slightly less frosting than you think you need to keep the inside light and tender. Chill the cake balls thoroughly before dipping to prevent them from falling off the sticks. Work in batches of 5-6 when dipping to keep the white chocolate from cooling and thickening. The pops are best served at room temperature and can be stored in an airtight container in the refrigerator for up to 5 days.
Nutrition
- Serving Size: 1 cake pop
- Calories: 185
- Sugar: 16
- Sodium: 180
- Fat: 9
- Saturated Fat: 4
- Carbohydrates: 25
- Protein: 2
Keywords: Christmas cake pops, white chocolate drizzle, holiday treats, cake pops recipe, easy Christmas dessert, festive cake pops, homemade cake pops


