I wasn’t expecting baking advice from my accountant, but there I was, hunched over a stack of receipts last February, listening to him describe exactly how to make red velvet cupcakes. He was supposed to be explaining my quarterly taxes, but instead, he was telling me about the time his grandmother taught him to fold cocoa powder into buttermilk. Honestly, I didn’t even know accountants baked. But something about the way he talked—like he was describing a secret handshake—made me grab a sticky note and scribble down his tips. That sticky note sat on my fridge for six months before I finally tried it, and let me tell you, it was the best tax season I ever had.
The original recipe was just a standard round cake, but I couldn’t stop thinking about how perfect it would be for a cozy night in. You know that feeling when you want something that looks like a celebration but feels like a hug? That’s these cupcakes. I tweaked the batter to be a little more forgiving (because nobody needs stress-baking to be stressful), and I swapped the round pans for a heart-shaped mold I found at a thrift store for three dollars. The first batch came out lopsided, and I may have forgotten the vanilla extract. But the second batch? That was the one.
I keep making these because they remind me that good things can come from the most unexpected places. A quiet accountant, a thrift-store find, and a rainy Saturday afternoon turned into something I now bake every time I need a little comfort. Maybe you’ve been there—looking for a recipe that feels like a warm blanket. These heart-shaped cupcakes are exactly that. They’re soft, they’re velvety, and they’ve got just enough chocolate to make you close your eyes after the first bite.
Why You’ll Love This Recipe
I’ve tested this recipe more times than I care to admit, and it’s finally the version I reach for every time. It’s not just another red velvet recipe—it’s the one I’ve tweaked to be foolproof, even for a rainy Tuesday when you’re out of eggs (swap in applesauce, it works). Here’s why this one stands out:
- Quick & Easy: From start to finish, you’re looking at about 45 minutes. That includes cooling time. Perfect for when you need a treat fast.
- Simple Ingredients: No mail-order buttermilk or fancy extracts. You probably have most of this in your pantry right now.
- Perfect for Cozy Nights: Whether it’s Valentine’s Day, a Galentine’s brunch, or just a Wednesday that felt too long, these cupcakes fit right in.
- Crowd-Pleaser: I brought a batch to a potluck last month, and someone asked for the recipe before they even finished the first one. Kids love the heart shape, adults love the flavor.
- Unbelievably Delicious: The texture is so soft it practically melts. The tang from the buttermilk and the hint of cocoa make it taste way more complicated than it is.
What makes this recipe different from the rest? It’s the buttermilk. I know, I know—every red velvet recipe uses buttermilk. But I found that letting it sit with the vinegar for just five minutes before mixing makes the crumb incredibly tender. It’s a tiny step, but it’s the one that turned this from “good” to “I need to make these again immediately.” Plus, the heart shape isn’t just for looks—it makes the edges slightly crispier, which is my favorite part.
This recipe isnt just good—it is the kind that makes you feel like you’ve got your act together, even if you’re baking in your pajamas. It’s comfort food reimagined: simpler, faster, but with the same soul-soothing satisfaction. Perfect for impressing someone special without breaking a sweat.
What Ingredients You Will Need
This recipe uses simple, wholesome ingredients to deliver that classic red velvet flavor and tender crumb. Most of these are pantry staples, so you probably won’t need a special trip to the store.
- All-purpose flour – 1 ½ cups (190g). Spoon and level it for the best texture. I use King Arthur Flour for consistent results.
- Unsweetened cocoa powder – 1 tablespoon (5g). Just enough for that subtle chocolate flavor. Don’t use Dutch-process here; natural cocoa works best.
- Baking soda – 1 teaspoon (5g). Make sure it’s fresh—test it by dropping a pinch in vinegar; it should fizz.
- Salt – ½ teaspoon (3g). Fine sea salt is my go-to.
- Unsalted butter – ½ cup (113g), softened to room temperature. If you only have salted butter, reduce the added salt to ¼ teaspoon.
- Granulated sugar – 1 cup (200g). Regular white sugar works perfectly.
- Vegetable oil – ¼ cup (60ml). Keeps the cupcakes moist. Canola or avocado oil also work.
- Large eggs – 2, room temperature. Cold eggs can make the batter seize up. Let them sit on the counter for 30 minutes.
- Buttermilk – 1 cup (240ml), room temperature. If you don’t have buttermilk, add 1 tablespoon of lemon juice or white vinegar to regular milk and let it sit for 5 minutes.
- White vinegar – 1 teaspoon (5ml). This reacts with the baking soda to help the cupcakes rise.
- Vanilla extract – 2 teaspoons (10ml). Pure vanilla is best, but imitation works in a pinch.
- Red food coloring – 2 tablespoons (30ml). I prefer gel food coloring for a vibrant red without thinning the batter. Start with 1 tablespoon and add more if you want a deeper color.
For the cream cheese frosting:
- Cream cheese – 8 ounces (226g), softened. Full-fat is best for a stable frosting.
- Unsalted butter – ¼ cup (57g), softened.
- Powdered sugar – 3 cups (360g), sifted to avoid lumps.
- Vanilla extract – 1 teaspoon (5ml).
- Pinch of salt – Just a tiny one to balance the sweetness.
I recommend using a gel-based red food coloring from a brand like Americolor or Wilton. The liquid stuff can make the batter too runny. And for the buttermilk, if you’re in a hurry, the milk-and-vinegar trick works like a charm—I’ve used it a dozen times.
Equipment Needed
You don’t need a fancy kitchen to pull these off. Here’s what you’ll want:
- Heart-shaped cupcake pan – This is the star of the show. I found mine at a thrift store, but you can grab one online or at most kitchen supply stores. If you don’t have one, a standard muffin tin works—just know the hearts are more fun.
- Electric mixer – A hand mixer or stand mixer both work. I’ve made these with a whisk and a strong arm, but the mixer makes it easier.
- Mixing bowls – At least two: one for dry ingredients, one for wet.
- Measuring cups and spoons – For accuracy. I use dry measuring cups for flour and sugar, and a liquid measuring cup for buttermilk.
- Rubber spatula – For scraping down the bowl and folding in the food coloring.
- Wire cooling rack – Helps the cupcakes cool evenly so the frosting doesn’t melt.
- Piping bag or zip-top bag – For the frosting. A zip-top bag with the corner snipped off works in a pinch.
- Cupcake liners – Heart-shaped ones if you can find them, or plain white ones to let the red color pop.
If you don’t have a heart-shaped pan, you can bake the batter in a standard 12-cup muffin tin and cut the tops into hearts with a cookie cutter. It’s a little extra work, but the result is still adorable.
Preparation Method
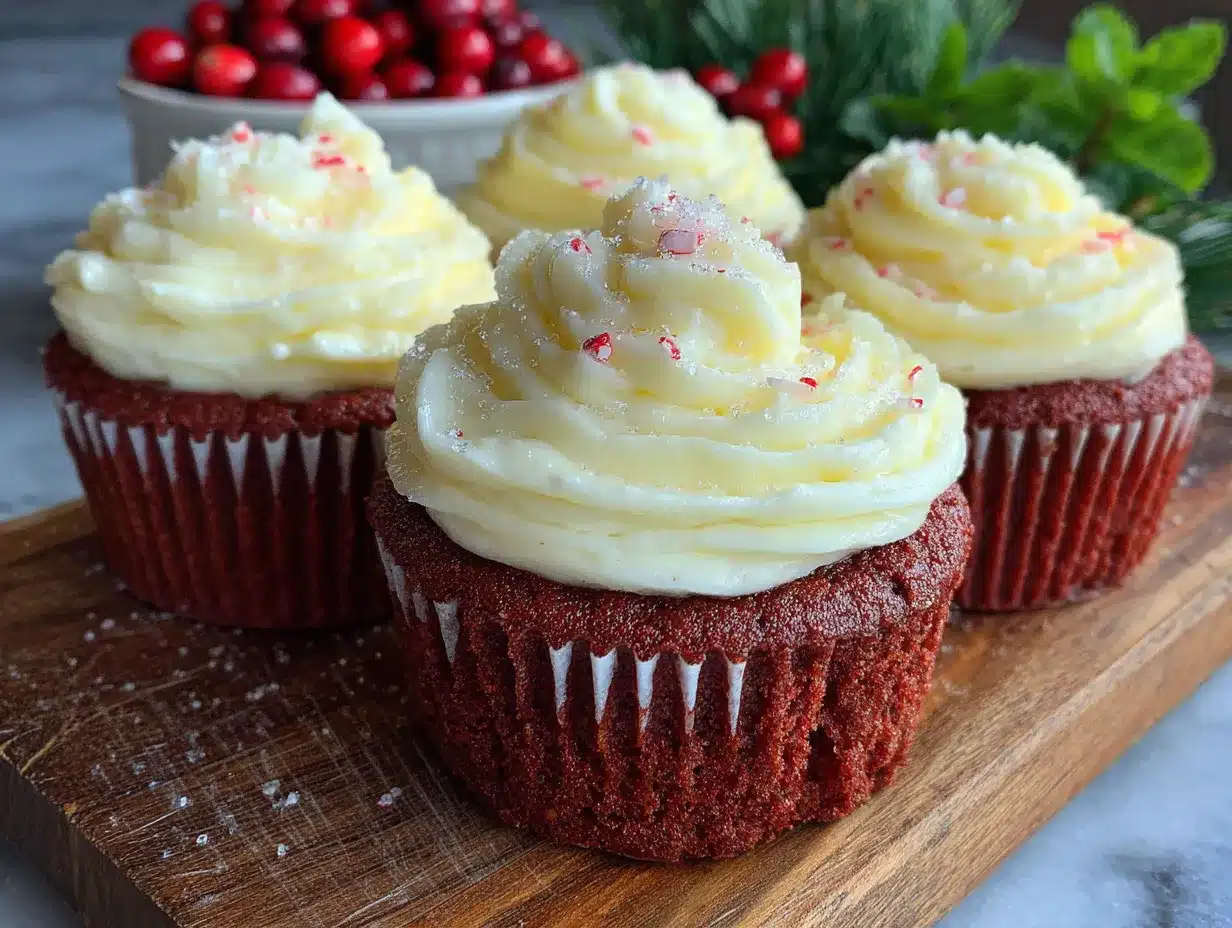
Let’s get baking. This recipe makes about 12 heart-shaped cupcakes, or 14 if you’re generous with the batter.
- Preheat your oven to 350°F (175°C). Line your heart-shaped cupcake pan with liners, or grease it well if you’re going without. I like to use a light spray of baking spray with flour.
- In a medium bowl, whisk together the flour, cocoa powder, baking soda, and salt. Set it aside. This step ensures everything is evenly distributed so you don’t get a pocket of baking soda in one cupcake. Trust me, I’ve been there—it’s not pleasant.
- In a large bowl, beat the softened butter and granulated sugar together until light and fluffy, about 3 minutes with an electric mixer on medium speed. Scrape down the sides of the bowl halfway through.
- Add the vegetable oil and beat for another minute. The oil adds moisture that butter alone can’t provide. The batter should look smooth and slightly glossy.
- Add the eggs one at a time, beating well after each addition. Then mix in the vanilla extract. The batter might look a little curdled at this point—that’s normal, don’t panic.
- In a small bowl or liquid measuring cup, combine the buttermilk, white vinegar, and red food coloring. Stir it gently. The vinegar will react with the buttermilk to create a slight tang, which is the hallmark of red velvet.
- Alternate adding the dry ingredients and the buttermilk mixture to the butter mixture. Start with one-third of the dry ingredients, mix until just combined, then add half the buttermilk mixture. Repeat, ending with the dry ingredients. Mix until just incorporated—overmixing will make the cupcakes tough. The batter should be a vibrant red and slightly thick.
- Divide the batter evenly among the prepared cups, filling each about two-thirds full. I use a cookie scoop for even portions. Tap the pan gently on the counter to release any air bubbles.
- Bake for 15 to 18 minutes, or until a toothpick inserted into the center comes out clean. The tops should spring back when lightly touched. Let the cupcakes cool in the pan for 5 minutes, then transfer them to a wire rack to cool completely. Don’t rush this—warm cupcakes will melt your frosting into a puddle.
- While the cupcakes cool, make the frosting. In a large bowl, beat the softened cream cheese and butter together until smooth and creamy, about 2 minutes. Gradually add the sifted powdered sugar, one cup at a time, beating on low speed. Add the vanilla and salt, then beat on medium-high for 2 minutes until light and fluffy. If the frosting is too soft, refrigerate it for 15 minutes before piping.
- Once the cupcakes are completely cool, pipe or spread the frosting on top. I like to use a star tip for a pretty swirl, but a simple dollop with a spatula looks just as charming. If you want, sprinkle a few red sugar crystals or a tiny heart-shaped candy on top.
Cooking Tips & Techniques
I’ve made these cupcakes at least a dozen times, and I’ve learned a few things the hard way. Here’s what I wish someone had told me:
- Don’t overmix the batter. I know I said it already, but it’s worth repeating. Overmixing develops gluten, which makes the cupcakes dense and rubbery. Mix until the flour just disappears—a few streaks are fine.
- Room temperature ingredients matter. Cold butter doesn’t cream well, and cold eggs can make the batter lumpy. Take everything out of the fridge 30 minutes before you start. If you forget, you can warm the eggs in a bowl of warm water for 5 minutes.
- Use gel food coloring. Liquid food coloring can throw off the liquid balance in the batter. Gel is more concentrated, so you use less, and it gives a deeper, more vibrant red. I once used liquid and ended up with pinkish cupcakes that were a little soggy—never again.
- Check your baking soda. If your baking soda is old, the cupcakes won’t rise properly. Test it by dropping a pinch into a bowl of vinegar—if it fizzes vigorously, it’s good. If not, buy a new box.
- Cool completely before frosting. I know it’s tempting to slather that cream cheese frosting on warm cupcakes, but it will slide right off. I’ve made that mistake on a busy evening, and I ended up with a sticky mess. Patience pays off.
- For consistent shapes, use a cookie scoop to portion the batter. It ensures all the cupcakes are the same size, so they bake evenly. My first batch had one tiny cupcake and one giant one—the giant one was raw in the middle.
Variations & Adaptations
One of the best things about this recipe is how easy it is to tweak. Here are a few ways I’ve made it my own:
- Gluten-free version: Swap the all-purpose flour for a 1:1 gluten-free baking blend. I’ve used Bob’s Red Mill with great results. Add an extra tablespoon of buttermilk to keep the batter moist.
- Dairy-free version: Use vegan butter and a dairy-free cream cheese for the frosting. For the buttermilk, mix 1 cup of unsweetened almond milk with 1 tablespoon of lemon juice. The texture is slightly less tender, but still delicious.
- Chocolate lover’s twist: Add ½ cup of mini chocolate chips to the batter. Fold them in gently at the end. It turns these into a double-chocolate red velvet situation, and honestly, it’s incredible.
- Spiced red velvet: Add ½ teaspoon of cinnamon and a pinch of nutmeg to the dry ingredients. It gives the cupcakes a warm, cozy flavor that’s perfect for fall. I tried this on a whim last November, and it’s now my go-to for Thanksgiving.
- Lemon velvet variation: Replace the red food coloring with yellow, and add 1 tablespoon of lemon zest to the batter. Use a lemon cream cheese frosting (just add zest and a splash of lemon juice). It’s bright, tangy, and totally unexpected.
If you want to bake these as a cake instead, pour the batter into two 6-inch round pans and bake for 25 to 30 minutes. The heart-shaped cupcakes are cuter, but a layer cake feels more special for a birthday.
Serving & Storage Suggestions
These cupcakes are best served at room temperature, which lets the cream cheese frosting soften slightly and the cake stay tender. If you’ve refrigerated them, let them sit on the counter for 15 minutes before serving.
For a cozy presentation, arrange them on a white cake stand or a wooden board. A few fresh raspberries or a dusting of powdered sugar on the plate adds a nice touch. They pair beautifully with a cup of hot coffee, a mug of spiced chai, or even a glass of cold milk—especially if you’re eating one after a long day.
To store leftovers, place them in an airtight container in the refrigerator for up to 4 days. The cream cheese frosting needs to stay chilled if your kitchen is warm. If you’ve frosted them, I recommend placing a piece of parchment paper between layers to prevent sticking. For longer storage, you can freeze the unfrosted cupcakes for up to 3 months. Wrap each one tightly in plastic wrap, then place them in a freezer bag. Thaw at room temperature, then frost as usual. The flavor actually improves after freezing—the buttermilk tang becomes more pronounced.
One thing I’ve noticed: these cupcakes taste even better the next day. The flavors meld together overnight, and the crumb becomes even more tender. So if you can resist eating them all on day one, you’re in for a treat on day two.
Nutritional Information & Benefits
Here’s an approximate breakdown per cupcake (with frosting):
| Nutrient | Amount |
|---|---|
| Calories | 385 |
| Total Fat | 18g |
| Saturated Fat | 10g |
| Cholesterol | 65mg |
| Sodium | 210mg |
| Total Carbohydrates | 52g |
| Dietary Fiber | 1g |
| Sugars | 38g |
| Protein | 4g |
While these are definitely a treat, they’re not without some redeeming qualities. The buttermilk adds a dose of calcium and probiotics, and the cocoa powder provides a small amount of antioxidants. The cream cheese frosting has a bit of protein, too. I think of these as a soul-warming indulgence—perfect for when you need a little joy, not a health kick. If you’re watching your sugar, you can reduce the frosting sugar to 2 cups, but it won’t be as stiff for piping.
This recipe contains gluten, dairy, and eggs. For allergen-friendly options, check the variations section above.
Conclusion
These cozy red velvet heart-shaped cupcakes are more than just a pretty dessert. They’re the kind of recipe that makes you feel like you’ve got a little magic in your kitchen. The soft, velvety crumb, the tangy cream cheese frosting, and that vibrant red color all come together to create something that feels special without being fussy. Whether you’re baking for a quiet night in, a small celebration, or just because you need a pick-me-up, these cupcakes deliver every time.
I love this recipe because it reminds me that the best things often come from the most unexpected places—like a tax appointment that turned into a baking lesson. It’s forgiving enough for beginners, but impressive enough to wow anyone who takes a bite. I hope you make them your own, whether that means adding chocolate chips, swapping in gluten-free flour, or just enjoying them exactly as written.
If you try these, I’d love to hear about it. Drop a comment below and tell me how they turned out, or share a photo on Pinterest with your own twist. Happy baking, and remember—sometimes the coziest moments start with a little red velvet.
Frequently Asked Questions
Can I make these cupcakes without a heart-shaped pan?
Absolutely. Use a standard 12-cup muffin tin and bake as directed. After they cool, you can cut the tops into heart shapes using a cookie cutter, or just leave them round—they’ll still taste amazing.
Why did my cupcakes turn out dry?
Overbaking is the most common culprit. Start checking at 15 minutes, and pull them out as soon as a toothpick comes out clean. Also, make sure you measured your flour correctly—spoon it into the cup and level it off, don’t scoop directly from the bag.
Can I use natural food coloring instead of gel?
You can, but the color will be less vibrant, and you may need to reduce the buttermilk slightly to compensate for the extra liquid. Start with 2 tablespoons of liquid coloring and see how the batter looks.
How do I get my cream cheese frosting to be stiff enough for piping?
Make sure your cream cheese and butter are fully softened, but not melted. Beat them well before adding the sugar. If the frosting is too soft, refrigerate it for 15 to 20 minutes before piping. You can also add an extra ¼ cup of powdered sugar.
Can I freeze these cupcakes with the frosting on?
I don’t recommend it. The cream cheese frosting can become grainy when thawed. Instead, freeze the unfrosted cupcakes, then thaw and frost them fresh. It only takes a few extra minutes, and the texture is much better.
Pin This Recipe!
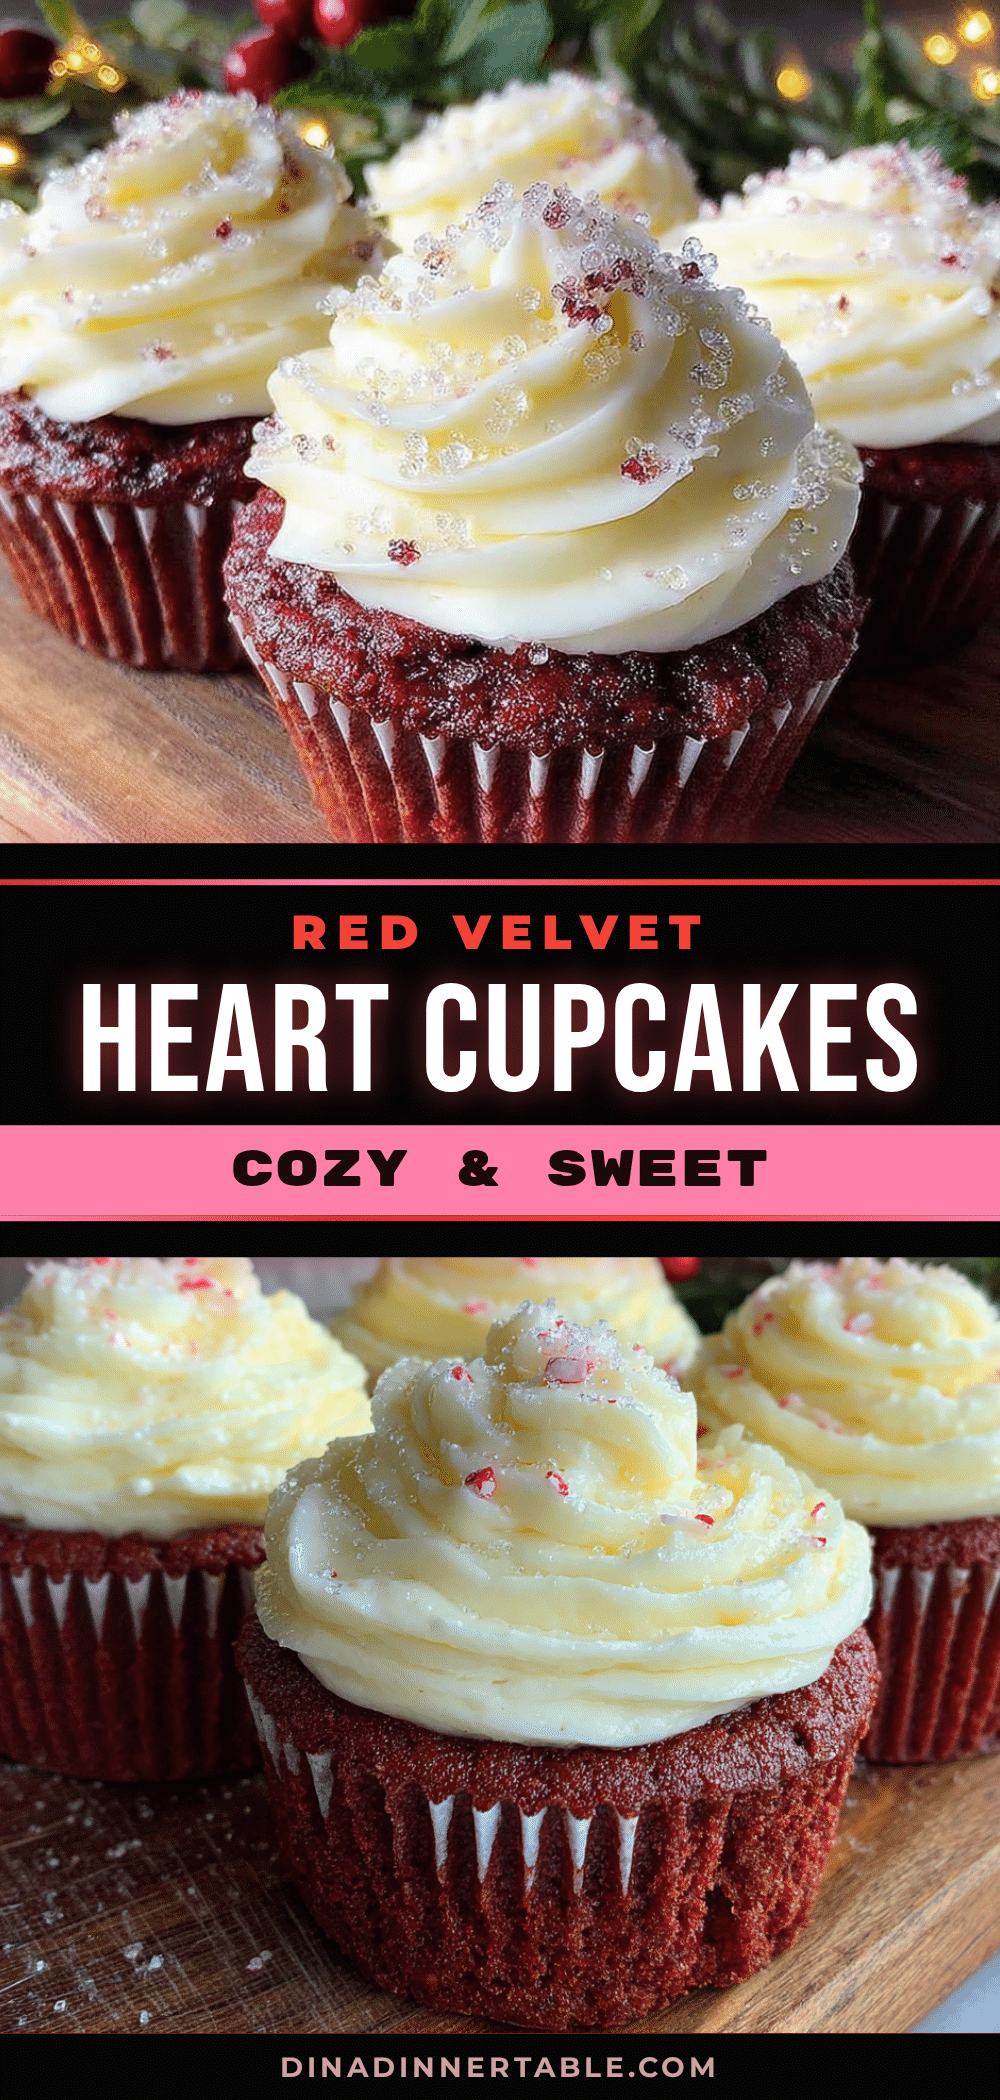
Easy Red Velvet Heart-Shaped Cupcakes Recipe
These soft, velvety red velvet heart-shaped cupcakes are topped with a tangy cream cheese frosting. They’re a cozy, foolproof treat perfect for Valentine’s Day, Galentine’s brunch, or any day you need a little comfort.
- Prep Time: 15 minutes
- Cook Time: 18 minutes
- Total Time: 45 minutes
- Yield: 12 servings 1x
- Category: Dessert
- Cuisine: American
Ingredients
- 1 ½ cups (190g) all-purpose flour
- 1 tablespoon (5g) unsweetened cocoa powder
- 1 teaspoon (5g) baking soda
- ½ teaspoon (3g) fine sea salt
- ½ cup (113g) unsalted butter, softened
- 1 cup (200g) granulated sugar
- ¼ cup (60ml) vegetable oil
- 2 large eggs, room temperature
- 1 cup (240ml) buttermilk, room temperature
- 1 teaspoon (5ml) white vinegar
- 2 teaspoons (10ml) vanilla extract
- 2 tablespoons (30ml) red gel food coloring
- For the cream cheese frosting:
- 8 ounces (226g) cream cheese, softened
- ¼ cup (57g) unsalted butter, softened
- 3 cups (360g) powdered sugar, sifted
- 1 teaspoon (5ml) vanilla extract
- Pinch of fine sea salt
Instructions
- Preheat your oven to 350°F (175°C). Line a heart-shaped cupcake pan with liners or grease it well.
- In a medium bowl, whisk together the flour, cocoa powder, baking soda, and salt. Set aside.
- In a large bowl, beat the softened butter and granulated sugar together until light and fluffy, about 3 minutes with an electric mixer on medium speed. Scrape down the sides halfway through.
- Add the vegetable oil and beat for another minute until smooth and glossy.
- Add the eggs one at a time, beating well after each addition. Mix in the vanilla extract.
- In a small bowl or liquid measuring cup, combine the buttermilk, white vinegar, and red food coloring. Stir gently.
- Alternate adding the dry ingredients and the buttermilk mixture to the butter mixture, starting and ending with the dry ingredients. Mix until just combined—do not overmix.
- Divide the batter evenly among the prepared cups, filling each about two-thirds full. Tap the pan gently on the counter to release air bubbles.
- Bake for 15 to 18 minutes, or until a toothpick inserted into the center comes out clean. Cool in the pan for 5 minutes, then transfer to a wire rack to cool completely.
- While the cupcakes cool, make the frosting: In a large bowl, beat the softened cream cheese and butter together until smooth and creamy, about 2 minutes. Gradually add the sifted powdered sugar, one cup at a time, beating on low speed. Add the vanilla and salt, then beat on medium-high for 2 minutes until light and fluffy. If too soft, refrigerate for 15 minutes before piping.
- Once the cupcakes are completely cool, pipe or spread the frosting on top. Garnish as desired.
Notes
For best results, use room temperature ingredients. Let the buttermilk sit with the vinegar for 5 minutes before mixing for a tender crumb. Do not overmix the batter. Cool cupcakes completely before frosting to prevent melting. For a dairy-free version, use vegan butter and dairy-free cream cheese; for gluten-free, use a 1:1 gluten-free flour blend. Cupcakes taste even better the next day.
Nutrition
- Serving Size: 1 cupcake with frost
- Calories: 385
- Sugar: 38
- Sodium: 210
- Fat: 18
- Saturated Fat: 10
- Carbohydrates: 52
- Fiber: 1
- Protein: 4
Keywords: red velvet cupcakes, heart-shaped cupcakes, cream cheese frosting, Valentine's Day dessert, easy cupcake recipe, red velvet dessert, homemade cupcakes