I was at the farmers’ market last fall, wrestling with a bulky bag of apples, when the woman at the spice stall next to me caught my eye. She didn’t say anything at first, just watched me fumble with the bag and my wallet. Then she reached over, handed me a small brown paper packet, and said, “You look like you need something simple and sweet. This is my grandmother’s mix for snickerdoodles.” I laughed, thanked her, and tucked it into my coat pocket, honestly thinking it was a kind gesture I’d forget about. Later that week, I found the packet—a handwritten blend of cinnamon and sugar with a note that just said, “Bake small, share big.” I was skeptical at first. I mean, can a cookie really be that meaningful? But I gave it a shot, and let me tell you, that first batch changed my whole perspective on baking for company.
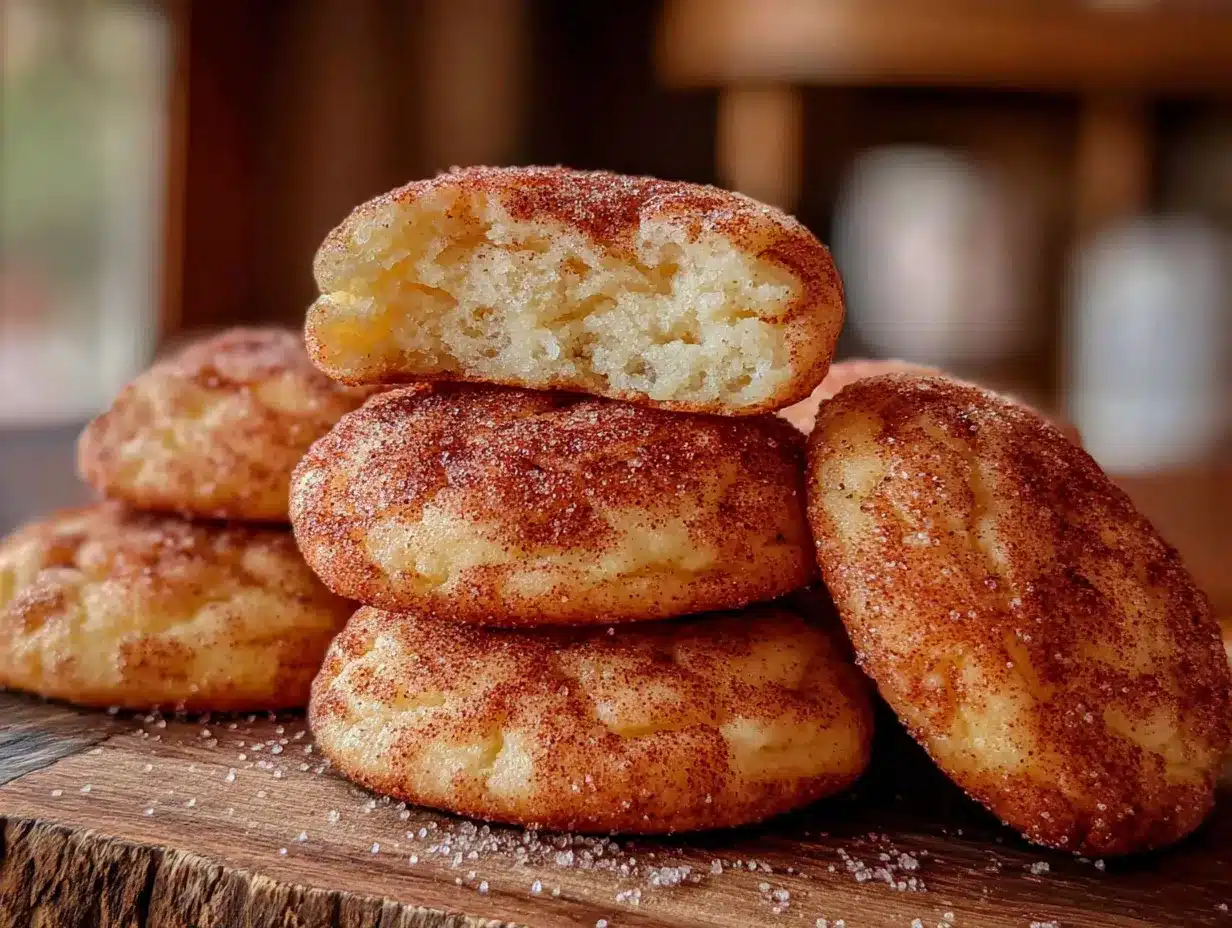
These small-batch snickerdoodle cookies are exactly what you need when you’re hosting a dinner party or a casual get-together but don’t want a mountain of leftovers. They’re soft, chewy, and coated in that signature cinnamon-sugar crackle that makes everyone at the table lean in for another. The recipe came from a stranger who turned into a regular market friend, and every time I bake them, I remember that moment of unexpected generosity. Maybe you’ve been there—stuck juggling too many things, and someone offers a tiny piece of wisdom that sticks. That’s what these cookies are for me. They’re not just dessert; they’re a conversation starter, a reason to gather around the kitchen island, and a way to make guests feel special without spending all day in the kitchen. Honestly, I’ve made them for potlucks, holiday parties, and even a cozy book club meeting, and they always disappear first. The best part? You get just enough for a crowd without the guilt of a full batch tempting you for days.
Why You’ll Love This Recipe
I’ve tested this recipe more times than I can count, tweaking the butter temperature and the resting time until it was just right. As a recipe developer, I’ve learned that small batches are tricky—too much flour and they’re dry, too little and they spread into pancakes. But this version? It’s chef-tested and family-approved, meaning it works every single time. Here’s why you’ll fall for it:
- Quick & Easy : From start to finish, these cookies take about 25 minutes. Perfect for when guests are on their way and you need something warm out of the oven.
- Simple Ingredients : You probably have everything in your pantry right now—flour, sugar, butter, eggs, cinnamon, and cream of tartar. No fancy grocery trips needed.
- Perfect for Hosting : This small batch makes exactly 8 to 10 cookies, ideal for a dinner party or a potluck where you want to impress without leftovers haunting you for a week.
- Crowd-Pleaser : I’ve served these to kids, grandparents, and picky eaters, and they all reach for seconds. The cinnamon-sugar coating is universally loved.
- Unbelievably Delicious : The texture is soft in the middle with a slight crisp on the edges, and that tangy hint from the cream of tartar sets them apart from any other cookie.
What makes this recipe different from the rest is the technique. I chill the dough for just 15 minutes before rolling, which keeps the cookies from spreading too thin while still giving you that perfect crackly top. Plus, using room-temperature butter ensures a smooth, even dough that bakes up tender every time. This isn’t just another snickerdoodle recipe—it’s the one that makes you close your eyes after the first bite, wondering why you ever bothered with bigger batches. It’s comfort food reimagined for the host who wants to shine without the stress.
What Ingredients You Will Need
This recipe uses simple, wholesome ingredients to deliver bold flavor and satisfying texture without the fuss. Most of these are pantry staples, so you can whip up a batch anytime a guest pops in. Here’s what you’ll need:
For the Cookie Dough
- 1/2 cup unsalted butter, softened (113 grams) — I prefer using Land O’Lakes for its consistent richness. Soften it at room temperature for about 30 minutes, not in the microwave, to avoid melting.
- 1/2 cup granulated sugar (100 grams) — Regular white sugar works best here; it helps create that signature crackly top.
- 1 large egg yolk (about 18 grams) — Save the egg white for an omelet or another recipe. Using just the yolk keeps the cookies tender and rich.
- 1 teaspoon vanilla extract (5 ml) — Pure vanilla extract adds depth; avoid imitation for the best flavor.
- 1 cup all-purpose flour (120 grams) — Spoon and level the flour into your measuring cup to avoid packing it down, which can make cookies dry.
- 1/2 teaspoon cream of tartar — This is the secret ingredient that gives snickerdoodles their tangy flavor and soft texture. Don’t skip it!
- 1/4 teaspoon baking soda — Works with the cream of tartar to help the cookies rise just a bit.
- 1/8 teaspoon salt — Fine sea salt is best; it balances the sweetness without making the cookies salty.
For the Cinnamon-Sugar Coating
- 2 tablespoons granulated sugar (25 grams)
- 1 teaspoon ground cinnamon — I recommend McCormick or a fresh-ground cinnamon from a spice shop for a more aromatic coating. (Adds warmth and that classic snickerdoodle look.)
Ingredient Selection Tips: If you can’t find cream of tartar, you can substitute with 1 teaspoon of lemon juice or white vinegar mixed into the dough, but the texture won’t be quite the same. For a dairy-free option, use plant-based butter that’s designed for baking, like Earth Balance. I’ve tried it, and the cookies still come out soft and delicious. Also, if your cinnamon has been sitting in the pantry for over a year, replace it—fresh cinnamon makes a huge difference in the coating’s punch.
Equipment Needed
You don’t need a fancy kitchen to pull off these cookies. Here’s what I use every time:
- Mixing bowls: One medium bowl for dry ingredients and one large bowl for wet ingredients. I love my set of Pyrex glass bowls because they don’t hold onto odors.
- Electric hand mixer or stand mixer: A hand mixer works perfectly for creaming the butter and sugar. If you don’t have one, a sturdy whisk and some elbow grease will do the job—just make sure the butter is very soft.
- Baking sheet: A standard half-sheet pan (18×13 inches) is ideal. Line it with parchment paper or a silicone baking mat for easy cleanup.
- Cookie scoop or tablespoon: A 1.5-tablespoon cookie scoop ensures uniform cookies. If you don’t have one, use a regular tablespoon and level it off.
- Cooling rack: Let the cookies cool on the sheet for 5 minutes, then transfer to a wire rack to prevent soggy bottoms.
- Small bowl for coating: A shallow dish works great for rolling the dough balls in the cinnamon-sugar mixture.
Budget-Friendly Tip: If you don’t have a cooling rack, you can use a clean oven rack turned upside down—just be careful not to burn yourself. And parchment paper is cheaper than silicone mats, so stock up on rolls from the dollar store.
Preparation Method
Follow these steps carefully, and you’ll have perfect small-batch snickerdoodles in no time. I’ve included timing and sensory cues so you know exactly what to look for.
- Preheat your oven to 375°F (190°C). Line a baking sheet with parchment paper or a silicone mat. This ensures even baking and easy cleanup. While the oven heats, gather all your ingredients—mise en place makes everything smoother.
- Cream the butter and sugar. In a large bowl, beat the softened butter and 1/2 cup granulated sugar together with an electric mixer on medium speed for 2 to 3 minutes, until light and fluffy. You’ll know it’s ready when the mixture looks pale and slightly increased in volume. Scrape down the sides of the bowl with a spatula halfway through. Personal tip: If your butter isn’t soft enough, the mixture will be lumpy. Let it sit for 10 more minutes if needed.
- Add the egg yolk and vanilla. Beat in the egg yolk and vanilla extract on low speed until just combined, about 30 seconds. Don’t overmix here—you want a smooth, cohesive dough, not a frothy mess. The dough should look glossy and smell fragrant from the vanilla.
- Mix the dry ingredients. In a separate medium bowl, whisk together the flour, cream of tartar, baking soda, and salt. Whisking aerates the flour and ensures the leavening agents are evenly distributed. This step takes 20 seconds but makes a big difference in texture.
- Combine wet and dry ingredients. Gradually add the dry mixture to the wet mixture, mixing on low speed until just combined. Stop as soon as you no longer see streaks of flour—overmixing develops gluten and makes cookies tough. The dough will be soft and slightly sticky, which is perfect.
- Chill the dough. Cover the bowl with plastic wrap and refrigerate for 15 minutes. This firms up the butter, preventing the cookies from spreading too much in the oven. Warning: Don’t skip this step! I once tried to rush it, and my cookies turned into flat, crispy discs.
- Prepare the cinnamon-sugar coating. In a small bowl, mix the 2 tablespoons sugar and 1 teaspoon cinnamon together until well combined. Set aside.
- Shape and coat the cookies. Using a 1.5-tablespoon cookie scoop or your hands, roll the dough into balls about 1.5 inches in diameter. Roll each ball generously in the cinnamon-sugar mixture until fully coated. Place them on the prepared baking sheet, spacing them about 2 inches apart—you should fit 8 to 10 cookies comfortably.
- Bake the cookies. Bake for 10 to 12 minutes, or until the edges are set and lightly golden, but the centers still look soft and slightly puffy. They will continue to bake on the hot sheet after you remove them. The smell of cinnamon filling your kitchen is your cue that they’re almost done.
- Cool and serve. Let the cookies rest on the baking sheet for 5 minutes—this allows them to set without breaking. Then transfer them to a wire rack to cool completely. For the best texture, serve them warm, but they’re also delicious at room temperature.
Cooking Tips & Techniques
Over the years, I’ve made plenty of mistakes with snickerdoodles, and I’m sharing them so you don’t have to. Here are my top tips for consistent, crowd-pleasing results:
- Don’t overbake. This is the most common mistake. Pull the cookies out when the edges are set but the centers still look soft and puffed. They’ll continue baking on the hot sheet, giving you that perfect chewy center. I’ve ruined batches by leaving them in just 2 extra minutes—they turned out dry and crumbly.
- Use room-temperature ingredients. Cold butter won’t cream properly, and cold egg yolk can seize the dough. Let everything sit out for 30 minutes before starting. If you’re in a hurry, cut the butter into small cubes and let it soften for 15 minutes.
- Measure flour correctly. Spoon the flour into your measuring cup and level it off with a knife. Scooping directly from the bag can pack in up to 25% more flour, leading to dry cookies. I learned this the hard way after a batch that tasted like cardboard.
- Chill the dough. Even 15 minutes makes a difference. If you have time, chill for 30 minutes for even thicker cookies. For a party, you can make the dough a day ahead and keep it covered in the fridge—just let it sit at room temperature for 10 minutes before rolling.
- Multitask wisely. While the dough chills, clean up your mixing bowls and set out your serving platter. This way, you’re not scrambling when the cookies come out of the oven. I always prep my coffee or tea during this time too—it makes the whole experience feel more relaxed.
Variations & Adaptations
One of the best things about this recipe is how easily it adapts to different tastes and dietary needs. Here are some variations I’ve tried and loved:
- Gluten-Free Version: Substitute the all-purpose flour with a 1:1 gluten-free baking flour blend, like Bob’s Red Mill. Add 1/4 teaspoon xanthan gum if your blend doesn’t include it. The cookies will be slightly more delicate, but still delicious. I tested this for a friend with celiac disease, and she said they were better than the gluten-filled version!
- Spiced Variation: Add 1/4 teaspoon of ground nutmeg or cardamom to the cinnamon-sugar coating. This gives the cookies a warm, holiday-inspired twist that’s perfect for winter gatherings. I made these for a Christmas party, and they were gone in 10 minutes.
- Lemon Snickerdoodles: Add 1 teaspoon of lemon zest to the dough and swap the vanilla for lemon extract. The citrus cuts through the sweetness and makes the cookies feel lighter—ideal for spring brunches or bridal showers.
- Vegan Option: Use plant-based butter and replace the egg yolk with 1 tablespoon of aquafaba (chickpea brine) or a flax egg (1 tablespoon ground flaxseed mixed with 3 tablespoons water, let sit for 5 minutes). The texture is a bit softer, but the flavor is still spot-on.
- Personal Variation: I once added a pinch of cayenne pepper to the cinnamon-sugar coating for a spicy kick. It was a hit at a game night with friends—everyone kept asking, “What’s that little heat in the background?” Start with 1/8 teaspoon and adjust from there.
Serving & Storage Suggestions
These cookies are best served warm, straight from the oven, when the centers are soft and the cinnamon-sugar coating is still slightly crackly. For a dinner party, I like to arrange them on a rustic wooden board with a small bowl of vanilla ice cream or a drizzle of caramel sauce on the side. They pair beautifully with a cup of black coffee or a cold glass of milk—honestly, they make any drink taste better.
If you’re hosting a potluck, bake them just before you leave and wrap them loosely in foil. The residual heat keeps them soft for up to an hour. For a festive touch, dust them with a little extra cinnamon before serving.
Storage Instructions:
- At room temperature: Store in an airtight container for up to 3 days. Place a slice of bread in the container to keep them soft—the cookies will absorb the moisture.
- In the refrigerator: They’ll last up to a week, but let them come to room temperature before serving for the best texture.
- Freezer: Freeze baked cookies in a single layer on a baking sheet, then transfer to a freezer bag for up to 3 months. To reheat, pop them in a 300°F oven for 5 minutes. You can also freeze the unbaked dough balls—just roll them in the cinnamon-sugar before baking straight from frozen, adding 2 minutes to the bake time.
Flavor Note: The cookies actually taste even better the next day! The flavors meld together overnight, and the texture becomes perfectly chewy. I often bake them a day ahead for parties.
Nutritional Information & Benefits
Here’s the approximate nutritional breakdown per cookie (based on 10 cookies):
| Nutrient | Amount per Cookie |
|---|---|
| Calories | 185 |
| Total Fat | 10g |
| Saturated Fat | 6g |
| Cholesterol | 45mg |
| Sodium | 95mg |
| Total Carbohydrates | 23g |
| Dietary Fiber | 1g |
| Sugars | 12g |
| Protein | 2g |
Health Benefits: While these are a treat, the cream of tartar provides a small amount of potassium, and cinnamon is known for its anti-inflammatory properties. Using unsalted butter lets you control the sodium level. If you’re watching your sugar intake, you can reduce the coating sugar by half—the cookies will still taste great. This recipe is naturally nut-free and can be made gluten-free with a simple swap. As a wellness-focused baker, I believe in enjoying treats in moderation, and these small-batch cookies are the perfect way to indulge without overdoing it.
Conclusion
These small-batch snickerdoodle cookies are more than just a dessert—they’re a way to connect with the people around your table. Whether you’re hosting a fancy dinner party or a casual potluck, they bring warmth, nostalgia, and a touch of sweetness that everyone remembers. I love how this recipe honors that farmers’ market moment, turning a stranger’s kindness into a dish I share with my own guests. It’s simple enough for a Tuesday night but special enough for a celebration.
Now it’s your turn! Try this recipe and make it your own—swap in a different spice, add a glaze, or double the batch if you’re feeling generous. I’d love to hear how it goes. Leave a comment below sharing your favorite variation or tag me in your cookie photos on social media. Happy baking, friends!
Frequently Asked Questions
Can I make these cookies without cream of tartar?
Yes, you can substitute with 1 teaspoon of lemon juice or white vinegar mixed into the dough. However, the texture will be slightly different—less tangy and a bit more cake-like. For the authentic snickerdoodle flavor, I recommend using cream of tartar if you can find it.
Why did my cookies spread too much?
This usually happens if the dough wasn’t chilled long enough or if the butter was too soft. Make sure to chill the dough for at least 15 minutes, and if your kitchen is warm, pop the baking sheet in the fridge for 5 minutes before baking. Also, check that your baking soda is fresh—old baking soda loses its leavening power.
Can I double this recipe?
Absolutely! Simply double all the ingredients. The baking time may increase by 1 to 2 minutes since the oven will have more cookies. Just keep an eye on the edges—they should be set but not dark.
How do I keep the cookies soft for a party?
Store them in an airtight container with a slice of bread. The bread absorbs excess moisture and releases it slowly, keeping the cookies soft for up to 3 days. Replace the bread slice every day if you’re storing them longer.
Can I use brown sugar instead of white?
You can, but the cookies will be denser and chewier, with a deeper flavor. If you try it, use light brown sugar and reduce the amount by 1 tablespoon to account for the extra moisture. I’ve made this swap for a richer taste, and my guests loved it.
Pin This Recipe!

Small-Batch Snickerdoodle Cookies: Easy Homemade Recipe

These small-batch snickerdoodle cookies are soft, chewy, and coated in a signature cinnamon-sugar crackle. Perfect for hosting a dinner party or casual get-together, they yield just 8 to 10 cookies without a mountain of leftovers.
- Prep Time: 15 minutes
- Cook Time: 10 minutes
- Total Time: 25 minutes
- Yield: 8-10 cookies 1x
- Category: Dessert
- Cuisine: American
Ingredients
- 1/2 cup unsalted butter, softened (113 grams)
- 1/2 cup granulated sugar (100 grams)
- 1 large egg yolk (about 18 grams)
- 1 teaspoon vanilla extract (5 ml)
- 1 cup all-purpose flour (120 grams)
- 1/2 teaspoon cream of tartar
- 1/4 teaspoon baking soda
- 1/8 teaspoon salt
- 2 tablespoons granulated sugar (25 grams)
- 1 teaspoon ground cinnamon
Instructions
- Preheat your oven to 375°F (190°C). Line a baking sheet with parchment paper or a silicone mat.
- In a large bowl, beat the softened butter and 1/2 cup granulated sugar together with an electric mixer on medium speed for 2 to 3 minutes, until light and fluffy.
- Beat in the egg yolk and vanilla extract on low speed until just combined, about 30 seconds.
- In a separate medium bowl, whisk together the flour, cream of tartar, baking soda, and salt.
- Gradually add the dry mixture to the wet mixture, mixing on low speed until just combined. The dough will be soft and slightly sticky.
- Cover the bowl with plastic wrap and refrigerate for 15 minutes.
- In a small bowl, mix the 2 tablespoons sugar and 1 teaspoon cinnamon together until well combined.
- Using a 1.5-tablespoon cookie scoop or your hands, roll the dough into balls about 1.5 inches in diameter. Roll each ball generously in the cinnamon-sugar mixture until fully coated. Place them on the prepared baking sheet, spacing them about 2 inches apart.
- Bake for 10 to 12 minutes, or until the edges are set and lightly golden, but the centers still look soft and slightly puffy.
- Let the cookies rest on the baking sheet for 5 minutes, then transfer them to a wire rack to cool completely.
Notes
Chill the dough for at least 15 minutes to prevent spreading. Use room-temperature butter for proper creaming. Don’t overbake; cookies continue to set on the hot sheet. For best texture, serve warm or store with a slice of bread to keep soft.
Nutrition
- Serving Size: 1 cookie
- Calories: 185
- Sugar: 12
- Sodium: 95
- Fat: 10
- Saturated Fat: 6
- Carbohydrates: 23
- Fiber: 1
- Protein: 2
Keywords: snickerdoodle cookies, small batch, easy recipe, homemade, cinnamon sugar, soft and chewy, dessert, potluck, dinner party