My roommate Sam asked me why I couldn’t just cook the rice right in the same pan as the beef. I started to explain why that wouldn’t work—something about absorption ratios and steam escaping. Then I stopped. Honestly, I had no good reason. I’d just always done it separately because that’s how my mom did it, and that’s how her mom did it before her. So I shrugged and said, “You know what? Let’s try it.”
That Tuesday night, standing over a single skillet with Sam watching me like a hawk, I fully expected to end up with a gummy, overcooked mess. I browned the beef, tossed in the aromatics, poured in the broth, and stirred in the rice. Then I clamped the lid on and held my breath. Twenty minutes later, I lifted that lid, and let me tell you—the smell alone made me a believer. The rice was perfectly tender. The beef was juicy. And that cheese on top? It melted into this golden blanket that made the whole thing look like pure comfort in a pan.
I’ve made this Easy Cheesy Ground Beef & Rice Skillet Recipe at least a dozen times since that night. It’s become my go-to for those evenings when I need dinner on the table fast but still want something that feels like a hug. Maybe you’ve been there—staring into the fridge, tired, hungry, and just hoping for a meal that doesn’t require a sink full of dishes. This one’s for you.
Why You’ll Love This Recipe
Let me tell you why this dish has earned a permanent spot in my weekly rotation. It’s not just another ground beef recipe—it’s the one I actually look forward to eating.
- One-Pan Wonder: Everything cooks in a single skillet. Less cleanup means more time to actually enjoy your evening.
- Budget-Friendly: Ground beef, rice, and a few pantry staples—this meal won’t break the bank, and it feeds a crowd.
- Ready in 30 Minutes: From start to finish, you’re looking at about half an hour. Perfect for those busy weeknights when takeout is tempting.
- Crowd-Pleaser: I’ve served this to picky kids, hungry teenagers, and adults who claim they don’t eat “simple” food. Every single person went back for seconds.
- Incredibly Cozy: There’s something about the combination of seasoned beef, tender rice, and melted cheese that just hits different. It’s comfort food at its finest.
What makes this recipe different from all the other skillet dinners out there? It’s the technique. Most recipes have you cook the rice separately, which means extra pots and a longer timeline. By cooking the rice directly in the pan with the beef and broth, every grain absorbs all that savory flavor. The result is a cohesive, deeply satisfying dish that tastes like it simmered for hours—even though it came together in minutes.
This isn’t just another version of cheesy beef and rice. It’s the one that makes you close your eyes after the first bite. It’s comfort food reimagined—simpler, faster, but with the same soul-soothing satisfaction. Perfect for impressing your family on a random Wednesday or turning a simple meal into something memorable.
What Ingredients You Will Need
This recipe uses simple, wholesome ingredients to deliver bold flavor and satisfying texture without the fuss. Most of these are pantry staples, so you might already have everything you need.
- Ground Beef (1 lb / 450g): I recommend 80/20 for the best flavor. The fat renders down and adds richness to the rice. If you use leaner beef, consider adding a tablespoon of oil to compensate.
- Yellow Onion (1 medium, diced): Adds a sweet, savory base. You can substitute white or red onion if that’s what you have.
- Garlic (3 cloves, minced): Fresh is best here. Jarred minced garlic works in a pinch, but fresh gives that aromatic punch.
- Long-Grain White Rice (1 cup / 200g): I use standard white rice. Basmati or jasmine work beautifully too. Avoid instant rice—it will turn mushy.
- Beef Broth (2 cups / 480ml): Use low-sodium so you can control the salt. Chicken broth works if that’s what you have, but beef adds deeper flavor.
- Canned Diced Tomatoes (1 can, 14.5 oz / 410g): I prefer fire-roasted for extra smokiness. Don’t drain them—the liquid helps cook the rice.
- Shredded Cheddar Cheese (1 cup / 120g): Sharp cheddar gives the most flavor. Pre-shredded is fine, but freshly shredded melts more smoothly.
- Chili Powder (1 teaspoon): Adds warmth without heat. Adjust to your preference.
- Cumin (1/2 teaspoon): Earthy and slightly nutty. It pairs perfectly with the beef and tomatoes.
- Salt and Black Pepper (to taste): Start with 1/2 teaspoon salt and 1/4 teaspoon pepper, then adjust.
- Olive Oil (1 tablespoon): For browning the beef. You can skip this if using 80/20 beef.
- Optional Garnishes: Fresh parsley, chopped green onions, or a dollop of sour cream. These add freshness and color.
I personally recommend using Hunt’s fire-roasted diced tomatoes for that extra layer of flavor. If you’re in a pinch, regular diced tomatoes work just fine. For the cheese, Tillamook sharp cheddar is my go-to—it melts like a dream.
For substitutions: Use brown rice, but increase the broth to 2 1/2 cups and cook for 40-45 minutes. For a gluten-free option, this recipe is naturally GF as long as your broth is certified gluten-free. For a dairy-free version, swap the cheddar with a plant-based shred that melts well.
Equipment Needed
You don’t need a fancy kitchen to pull this off. Here’s what you’ll need:
- Large Skillet with Lid (12-inch / 30cm): A deep, heavy-bottomed skillet works best. Cast iron or stainless steel are ideal. If you don’t have a lid, use aluminum foil tightly sealed.
- Wooden Spoon or Spatula: For breaking up the beef and stirring. Silicone works too.
- Chef’s Knife and Cutting Board: For dicing the onion and mincing the garlic.
- Measuring Cups and Spoons: Accuracy matters, especially for the rice and broth.
- Box Grater: If you’re shredding your own cheese. It’s worth the extra minute.
I’ve made this in a non-stick skillet before, and it works fine—just be careful not to scratch the surface when stirring. If you’re using cast iron, make sure it’s well-seasoned to prevent sticking. My favorite tool for this recipe is my old Lodge 12-inch skillet. It’s been through hundreds of meals and distributes heat perfectly.
Budget-friendly tip: You don’t need a high-end pan. A basic non-stick skillet from the grocery store will get the job done. Just make sure it has a tight-fitting lid.
Preparation Method
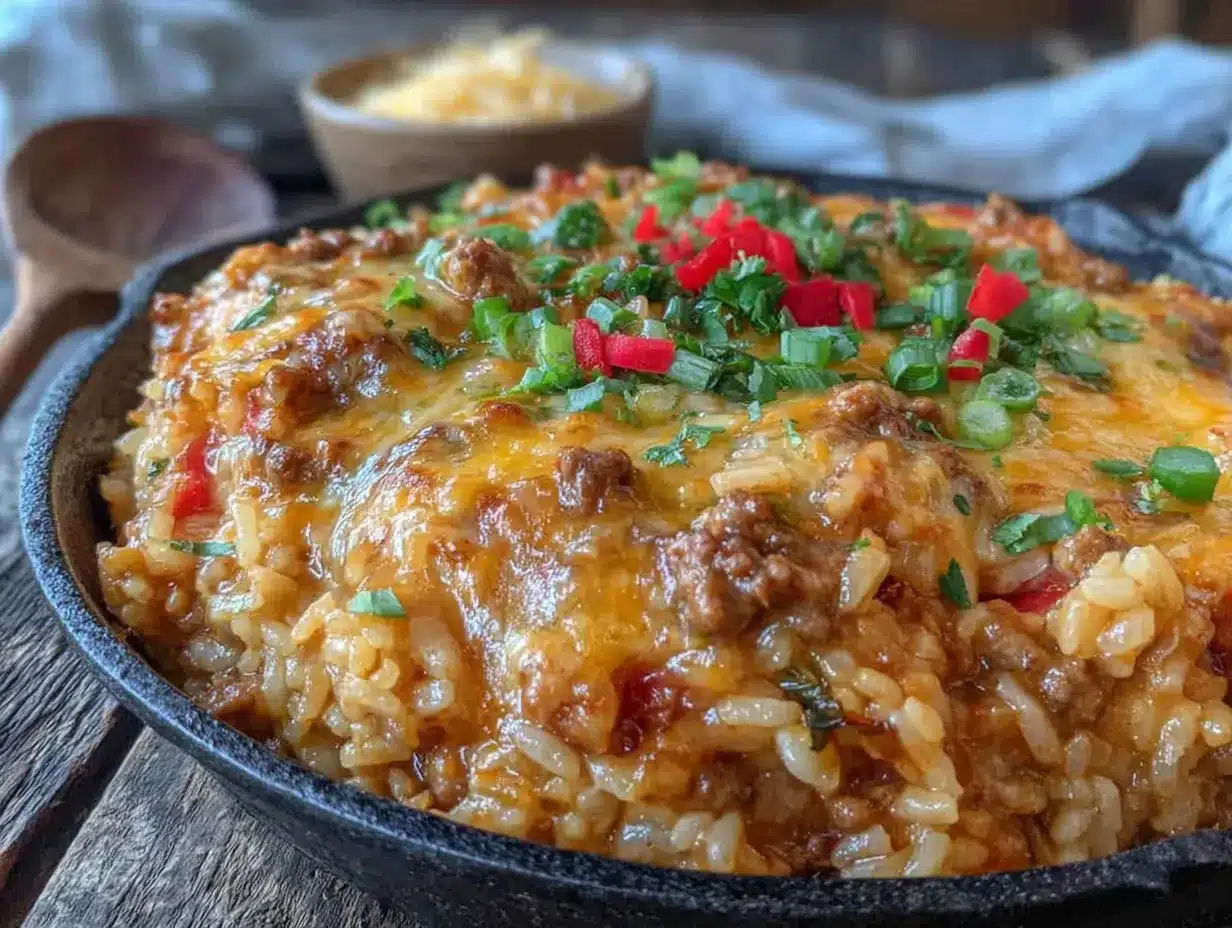
Let’s get cooking. Follow these steps, and you’ll have a perfect skillet dinner every time.
- Brown the Beef: Heat the olive oil in your large skillet over medium-high heat. Add the ground beef and break it apart with your wooden spoon. Cook for 5-7 minutes, until browned and no longer pink. Don’t drain all the fat—leave about a tablespoon for flavor. If there’s excess, tilt the pan and spoon some out.
- Cook the Aromatics: Reduce heat to medium. Add the diced onion and cook for 3-4 minutes, until softened and translucent. Stir occasionally to prevent burning. Add the minced garlic and cook for 30 seconds—just until fragrant. Your kitchen should smell amazing right about now.
- Add the Seasonings: Sprinkle in the chili powder, cumin, salt, and pepper. Stir everything together and cook for 1 minute. This toasts the spices and deepens their flavor.
- Add the Rice and Liquids: Pour in the uncooked rice, beef broth, and undrained diced tomatoes. Stir well to combine, scraping up any browned bits from the bottom of the pan. Those bits are pure flavor.
- Bring to a Boil: Increase heat to high and bring the mixture to a rolling boil. This should take about 2-3 minutes. Watch it carefully so it doesn’t boil over.
- Simmer and Cook: Once boiling, reduce heat to low, cover with the lid, and let it simmer for 18-20 minutes. Do not lift the lid during this time—the steam is what cooks the rice perfectly. Set a timer and walk away.
- Check the Rice: After 18 minutes, remove the lid carefully (steam is hot!). The rice should be tender and most of the liquid should be absorbed. If it’s still a bit soupy, cover and cook for 2-3 more minutes.
- Add the Cheese: Sprinkle the shredded cheddar evenly over the top. Cover again and let it sit for 2-3 minutes, until the cheese is melted and bubbly. This is the hardest part—waiting.
- Rest and Serve: Remove from heat and let the skillet rest for 5 minutes. This allows the rice to absorb any remaining liquid and makes serving easier. Garnish with fresh parsley or green onions if desired.
Pro tip: If the rice is tender but there’s still a little liquid left, that’s okay. It will absorb during the resting time. If the rice is still crunchy and the liquid is gone, add 1/4 cup of water, cover, and cook for 5 more minutes.
Cooking Tips & Techniques
I’ve learned a few things the hard way so you don’t have to. Here are my best tips for skillet success.
Don’t Rush the Browning: Let the beef get a good sear. If you stir it constantly, it will steam instead of brown. Let it sit for a minute or two between stirs. That deep brown color means flavor.
Resist the Urge to Peek: I know it’s tempting to lift that lid and check on the rice. Don’t do it. Every time you lift the lid, steam escapes, and that steam is what cooks the rice. Trust the process—your timer is your best friend.
Toast the Rice First: For extra nutty flavor, add the dry rice to the pan after cooking the aromatics and stir it for 1-2 minutes before adding the liquid. This is a game-changer I discovered after a few batches that felt a little flat.
Use the Right Pan Size: A 12-inch skillet gives enough surface area for even cooking. If your pan is too small, the rice might cook unevenly. If it’s too large, the liquid might evaporate too quickly.
Season as You Go: Don’t dump all the salt in at once. Season the beef while it browns, add more with the spices, and adjust at the end. Layered seasoning creates depth.
I once forgot to add the rice—just completely spaced out and poured the broth in without it. I realized my mistake, added the rice anyway, and ended up with a soupy mess. Lesson learned: always double-check your ingredients before you start cooking.
Variations & Adaptations
This recipe is incredibly versatile. Here are some ways to make it your own.
Spicy Southwestern Version: Add 1 diced jalapeño with the onion, use pepper jack cheese instead of cheddar, and stir in a can of drained black beans with the rice. Top with fresh cilantro and a squeeze of lime.
Vegetarian Option: Swap the ground beef for 1 lb of plant-based crumbles or 2 cups of cooked lentils. Use vegetable broth instead of beef broth. The cooking time stays the same.
Low-Carb Adaptation: Replace the rice with 2 cups of cauliflower rice. Reduce the broth to 1 cup and cook for only 10-12 minutes, since cauliflower rice cooks much faster. Watch it closely to avoid mushiness.
Cheesy Mexican Rice Skillet: Add 1/2 cup of frozen corn and 1/4 cup of chopped cilantro with the tomatoes. Use a Mexican cheese blend on top. Serve with tortilla chips for scooping.
Creamy Version: Stir in 1/2 cup of sour cream or cream cheese after the rice is cooked, just before adding the cheese. This makes it extra rich and decadent. I tried this on a cold winter night and it was pure magic.
Allergen-Friendly Swaps: Use certified gluten-free broth and dairy-free cheese shreds. For a low-sodium version, use no-salt-added broth and tomatoes, and season lightly with salt at the end.
Serving & Storage Suggestions
This skillet is a meal in itself, but here’s how to make it a complete dinner.
Serving Temperature: Serve hot, right from the skillet. The cheese should be melty and the rice steaming. A side of crusty bread or warm tortillas is perfect for sopping up any extra goodness.
What to Serve With It: A simple green salad with a tangy vinaigrette cuts through the richness. Roasted vegetables like broccoli or bell peppers add color and nutrients. For a heartier meal, serve with refried beans or a cup of black bean soup.
Storage: Let the skillet cool completely, then transfer leftovers to an airtight container. Refrigerate for up to 4 days. The flavors actually meld together and taste even better the next day.
Freezing: This freezes beautifully. Portion into freezer-safe containers and freeze for up to 3 months. Thaw overnight in the refrigerator before reheating.
Reheating: The best method is on the stovetop. Add a splash of broth or water to the pan, cover, and heat over medium-low for 5-7 minutes, stirring occasionally. You can also microwave individual portions in 30-second bursts, stirring between each. Add a little water to prevent drying out.
Flavor Development: Like many one-pot meals, this skillet gets better after a day in the fridge. The rice absorbs more of the seasoned broth, and the flavors become more cohesive. I often make a double batch just for the leftovers.
Nutritional Information & Benefits
Here’s a rough estimate per serving (based on 6 servings):
- Calories: 420
- Protein: 28g
- Carbohydrates: 38g
- Fat: 18g
- Fiber: 3g
- Iron: 20% of Daily Value
- Calcium: 25% of Daily Value
This meal offers a solid balance of protein, carbs, and fat. The ground beef provides high-quality protein and iron, which supports energy levels and healthy blood. The tomatoes are rich in lycopene, an antioxidant linked to heart health. Rice offers easily digestible carbohydrates for quick energy. And yes, cheese adds calcium for strong bones—plus, it makes everything taste better.
Dietary considerations: This recipe is naturally gluten-free (check your broth). For lower sodium, use no-salt-added broth and tomatoes. For a lighter version, use lean ground beef and reduce the cheese by half. I personally love that this meal keeps me full for hours without feeling heavy—it’s comfort food that actually nourishes you.
Conclusion
This Easy Cheesy Ground Beef & Rice Skillet Recipe is proof that simple ingredients, cooked with a little intention, can create something truly special. It’s the meal I turn to when I need a win in the kitchen—when I want dinner to feel effortless but still satisfying.
I hope you give it a try and make it your own. Maybe you’ll add extra spice, or swap in a different cheese, or serve it with a side that feels right to you. That’s the beauty of a recipe like this—it’s a starting point, not a rule book.
When you make it, I’d love to hear how it turned out. Drop a comment below and let me know what variations you tried. Did your family love it? Did you discover a new favorite? Share your photos and tag me—I can’t wait to see your cozy skillet dinners. Happy cooking, friend!
Frequently Asked Questions
Can I use ground turkey instead of beef?
Absolutely. Ground turkey works great, though it’s leaner so you might want to add a tablespoon of olive oil for moisture. The cooking time stays the same.
Why is my rice still crunchy after 20 minutes?
This usually means the heat was too low or the lid wasn’t sealed properly. Add 1/4 cup of water, cover tightly, and cook for 5 more minutes. Next time, make sure your skillet is at a steady simmer before covering.
Can I make this in a slow cooker?
Yes, but the texture will be different. Brown the beef and onions first, then transfer everything except the cheese to a slow cooker. Cook on low for 2-3 hours, until the rice is tender. Add cheese at the end and let it melt before serving.
How do I prevent the cheese from clumping?
Shred your own cheese from a block. Pre-shredded cheese has anti-caking agents that prevent smooth melting. Also, add the cheese off the heat and let residual warmth do the work.
Can I double this recipe?
Yes, but use a larger pan (14-inch or a Dutch oven). Keep the liquid-to-rice ratio the same and expect the cooking time to increase by 5-10 minutes. Check for doneness before serving.
Pin This Recipe!

Easy Cheesy Ground Beef & Rice Skillet Recipe

A one-pan wonder featuring seasoned ground beef, tender rice, and melted cheddar cheese, all cooked together in a single skillet for a quick, comforting weeknight dinner.
- Prep Time: 10 minutes
- Cook Time: 25 minutes
- Total Time: 35 minutes
- Yield: 6 servings 1x
- Category: Main Course
- Cuisine: American
Ingredients
- 1 lb (450g) ground beef (80/20 recommended)
- 1 medium yellow onion, diced
- 3 cloves garlic, minced
- 1 cup (200g) long-grain white rice
- 2 cups (480ml) low-sodium beef broth
- 1 can (14.5 oz / 410g) diced tomatoes (fire-roasted preferred), undrained
- 1 cup (120g) shredded sharp cheddar cheese
- 1 teaspoon chili powder
- 1/2 teaspoon cumin
- Salt and black pepper to taste (start with 1/2 tsp salt and 1/4 tsp pepper)
- 1 tablespoon olive oil
- Optional garnishes: fresh parsley, chopped green onions, sour cream
Instructions
- Heat olive oil in a large 12-inch skillet over medium-high heat. Add ground beef and cook for 5-7 minutes, breaking it apart, until browned. Leave about 1 tablespoon of fat in the pan; drain excess if needed.
- Reduce heat to medium. Add diced onion and cook for 3-4 minutes until softened. Add minced garlic and cook for 30 seconds until fragrant.
- Stir in chili powder, cumin, salt, and pepper. Cook for 1 minute to toast the spices.
- Add uncooked rice, beef broth, and undrained diced tomatoes. Stir well, scraping up any browned bits from the bottom.
- Increase heat to high and bring to a rolling boil (about 2-3 minutes).
- Reduce heat to low, cover with a lid, and simmer for 18-20 minutes. Do not lift the lid during this time.
- After 18 minutes, remove lid carefully. Rice should be tender and most liquid absorbed. If still soupy, cover and cook 2-3 more minutes.
- Sprinkle shredded cheddar evenly over the top. Cover and let sit for 2-3 minutes until cheese is melted and bubbly.
- Remove from heat and let rest for 5 minutes. Garnish with parsley or green onions if desired. Serve hot.
Notes
For extra nutty flavor, toast the dry rice in the pan for 1-2 minutes before adding liquids. Do not lift the lid while simmering to ensure perfect rice. If rice is still crunchy after cooking, add 1/4 cup water, cover, and cook 5 more minutes. Leftovers keep well in the fridge for up to 4 days and can be frozen for up to 3 months.
Nutrition
- Serving Size: 1 serving (about 1.5
- Calories: 420
- Sugar: 4
- Sodium: 680
- Fat: 18
- Saturated Fat: 8
- Carbohydrates: 38
- Fiber: 3
- Protein: 28
Keywords: ground beef, rice, skillet, one-pan, cheesy, weeknight dinner, comfort food, easy recipe