This was supposed to be a simple batch of buttercream. I had grand plans for a fancy piping project—rosettes, ruffles, the whole nine yards—for my niece’s birthday party. I’d spent the entire morning making the perfect vanilla cupcakes, feeling pretty pleased with myself. Then, in a moment of pure chaos, I knocked the entire bowl of finished buttercream off the counter. It landed face-down on the kitchen floor. My dog, bless his heart, didn’t even try to eat it. He just looked at me like, “Well, that’s a shame.” I had no time to re-make the frosting, no energy to start over, and a living room full of six-year-olds about to arrive. I grabbed the last stick of butter, a bag of powdered sugar that was barely half full, and a splash of milk. I whipped up a quick, thin batch of white icing—way too runny for any fancy piping—and just started slathering it on the cupcakes with a spatula. It looked like lumpy ghosts. I grabbed a tube of black decorating gel, drew two tiny eyes and a mouth on each, and called them “Ghost Cupcakes.” The kids went absolutely wild. They didn’t want the fancy ones. They wanted the ghosts. Honestly, that little kitchen disaster taught me more about feeding a crowd than any cookbook ever has. Maybe you’ve been there—when the plan falls apart but the result is somehow better? These Kid-Approved Ghost Vanilla Cupcakes with Buttercream Faces are a happy accident I’ve been making on purpose ever since.
Why You’ll Love This Recipe
Let’s face it, finding a Halloween treat that doesn’t cost a fortune and actually gets eaten is a win. These ghost cupcakes are that win. They use a simple, from-scratch vanilla cupcake base that’s way more budget-friendly than a box mix when you’re feeding a crowd. Plus, the “fancy” part is just a smear of frosting and a squiggle of gel. No piping bags, no fancy tips, no stress.
- Budget-Friendly Ingredients: You likely have everything in your pantry right now. Butter, sugar, flour, eggs, vanilla. That’s it. No special Halloween sprinkles or candy melts required.
- Kid-Approved & Parent-Approved: The kids love making the faces, and parents love that they’re simple enough for little hands to help without making a huge mess. I mean, a little mess is fine, but this one stays contained.
- Perfect for Classroom Parties: These are sturdy enough to pack in a lunchbox and don’t have any weird artificial flavors. They’re just good, honest vanilla cupcakes.
- Unbelievably Delicious: The cupcake itself is light, fluffy, and perfectly moist. The buttercream is sweet and creamy—the perfect blank canvas for a spooky face. It’s comfort food reimagined as a Halloween classic.
This recipe isn’t just another Halloween cupcake. It’s the one that saves your sanity when you’re short on time and patience. It’s the kind of recipe that makes you close your eyes after the first bite because it tastes like childhood, minus the stress. Perfect for impressing your kid’s classmates without breaking the bank or your spirit.
What Ingredients You Will Need
This recipe uses simple, wholesome ingredients to deliver a classic vanilla flavor and a soft, tender crumb. The frosting is a basic buttercream that comes together in minutes, and the decorating is as easy as it gets. Most of these are pantry staples, so you probably won’t need a special trip to the store.
- For the Vanilla Cupcakes:
- 1 ½ cups (190g) all-purpose flour (spooned and leveled)
- 1 ½ teaspoons baking powder
- ¼ teaspoon baking soda
- ¼ teaspoon salt
- ½ cup (113g) unsalted butter, softened (I use Land O’Lakes for consistent results)
- 1 cup (200g) granulated sugar
- 2 large eggs, room temperature (adds richness and structure)
- 2 teaspoons pure vanilla extract (don’t skimp here—it’s the star flavor)
- ½ cup (120ml) whole milk, room temperature (use 2% if that’s what you have)
- For the Buttercream Faces:
- 1 cup (226g) unsalted butter, softened (adds creaminess)
- 3 cups (360g) powdered sugar, sifted (sifting prevents lumps)
- 2 teaspoons pure vanilla extract
- 2-3 tablespoons heavy cream or whole milk (use as needed for spreadable consistency)
- Pinch of salt (balances the sweetness)
- 1 tube black decorating gel (found in the baking aisle, or use black frosting in a piping bag)
Ingredient Tips: For the fluffiest cupcakes, make sure your butter and eggs are truly at room temperature. Cold butter won’t cream properly, and cold eggs can make the batter curdle. If you’re in a rush, place the eggs in a bowl of warm water for 5 minutes. I recommend using a good quality vanilla extract—it makes a real difference in the final flavor. For the frosting, if you don’t have heavy cream, whole milk works perfectly. You just might need a little less.
Substitution Guidance: You can swap the all-purpose flour with a 1:1 gluten-free baking flour blend for a gluten-free version. For a dairy-free option, use vegan butter and a plant-based milk like oat or almond milk. The texture will be slightly different, but the ghosts will still be delicious.
Equipment Needed
You don’t need a fancy kitchen to pull these off. Here’s what you’ll need to get the job done without any fuss.
- Muffin Tin: A standard 12-cup muffin tin is perfect. I’ve had good luck with both non-stick and dark metal pans—just adjust your baking time by a minute or two if using dark metal.
- Cupcake Liners: White or black liners look best for the ghost theme. I prefer the foil-lined ones because they peel off cleanly.
- Electric Mixer: A hand mixer or stand mixer works great. I’ve made these with a whisk and some elbow grease too, but it takes a bit longer to get the butter fluffy.
- Mixing Bowls: You’ll need a large bowl for the batter and a medium one for the dry ingredients.
- Spatula: A rubber spatula is essential for scraping down the bowl and for spreading the frosting.
- Cooling Rack: Letting the cupcakes cool completely is crucial—warm cupcakes will melt your buttercream into a puddle.
- Offset Spatula (Optional): This makes spreading the frosting even easier, but a butter knife works just fine.
Budget-Friendly Tip: If you don’t have a cooling rack, you can use the oven rack (turned upside down) or just a clean towel on the counter. The cupcakes just need airflow to cool evenly.
Preparation Method
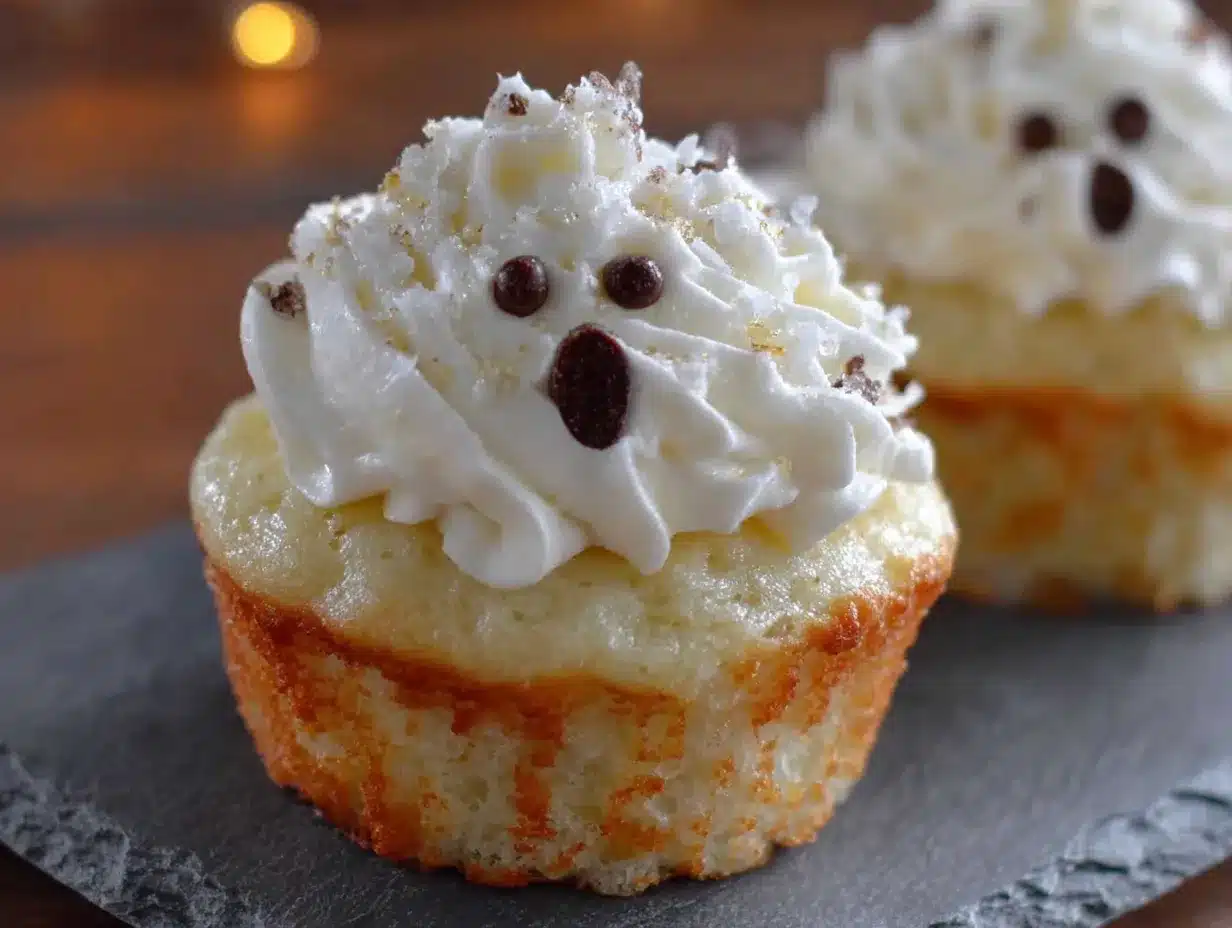
Let’s get to the fun part. This method is broken down into simple steps, so even if you’re baking with a toddler “helping,” you’ll be fine.
- Preheat and Prep (5 minutes): Preheat your oven to 350°F (175°C). Line your muffin tin with 12 cupcake liners. This is a good job for little hands—they can place the liners in the tin while you measure ingredients.
- Mix Dry Ingredients (2 minutes): In a medium bowl, whisk together the flour, baking powder, baking soda, and salt. This ensures the leavening agents are evenly distributed, so your cupcakes rise evenly. Set this aside.
- Cream Butter and Sugar (3-4 minutes): In a large bowl, beat the softened butter and granulated sugar together with an electric mixer on medium speed until light and fluffy. This should take about 3 minutes. Scrape down the sides of the bowl with your spatula. You’ll know it’s ready when it looks pale and almost like a thick paste.
- Add Eggs and Vanilla (2 minutes): Add the eggs one at a time, beating well after each addition. Then, beat in the vanilla extract. The batter might look a little curdled at this point—that’s totally normal, don’t panic. It will come together when you add the flour.
- Alternate Dry and Wet Ingredients (3 minutes): With the mixer on low speed, add about one-third of the dry ingredients to the butter mixture, mixing until just combined. Pour in half of the milk, mixing until just combined. Repeat with another third of the dry ingredients, then the remaining milk, and finally the last of the dry ingredients. Stop mixing as soon as the flour disappears. Overmixing will make tough cupcakes.
- Fill the Liners (2 minutes): Divide the batter evenly among the 12 cupcake liners. I use a standard ice cream scoop for this—it’s less messy and gives you perfectly even portions. Each liner should be about ⅔ full.
- Bake (18-20 minutes): Bake for 18-20 minutes, or until a toothpick inserted into the center of a cupcake comes out clean or with a few moist crumbs. The tops should be lightly golden. Let them cool in the pan for 5 minutes, then transfer to a cooling rack to cool completely. This is the hardest part—waiting!
- Make the Buttercream (5 minutes): While the cupcakes cool, make the frosting. In a large bowl, beat the softened butter on medium speed until smooth and creamy, about 1 minute. Gradually add the sifted powdered sugar, one cup at a time, beating on low speed until combined. Add the vanilla extract and a pinch of salt. Add the heavy cream or milk, one tablespoon at a time, beating on medium-high until the frosting is light, fluffy, and spreadable. You want it to be soft enough to smear easily but thick enough to hold a ghost shape.
- Assemble the Ghosts (10 minutes): Once the cupcakes are completely cool, it’s time to make ghosts. Take a generous spoonful of buttercream and drop it onto the center of a cupcake. Use your offset spatula or butter knife to spread it outwards and upwards, creating a lumpy, ghost-like shape. Don’t try to make it smooth—the lumpier, the cuter. Repeat with the remaining cupcakes.
- Draw the Faces (5 minutes): Take your tube of black decorating gel and squeeze two small dots for eyes and a little oval for a mouth. You can make them look surprised, happy, or spooky—let the kids decide. I like to make a few with different expressions. That’s it! You’re done.
Sensory Cue: When the butter and sugar are creamed, it should look like a light, fluffy cloud. When you add the eggs, the batter will smell incredibly sweet and vanilla-y. The cupcakes are done when the kitchen smells like a bakery and the tops spring back lightly when touched.
Cooking Tips & Techniques
I’ve made these ghost cupcakes about a dozen times now, and I’ve learned a few things the hard way so you don’t have to.
- Don’t Overmix the Batter: This is the number one mistake I made the first time. I kept mixing to get the batter perfectly smooth, and the cupcakes came out dense and tough. Mix just until the flour disappears. A few lumps are fine—they’ll bake out.
- Cool Completely: I know it’s tempting, but do not frost warm cupcakes. The buttercream will melt into a greasy mess. I once tried to speed things up by putting them in the fridge, and the condensation made the frosting slide right off. Patience is key.
- Make the Frosting Spreadable: If your buttercream is too stiff, add a little more cream. If it’s too runny, add a bit more powdered sugar. The perfect consistency for ghost cupcakes is soft enough to spread easily but thick enough to hold a peak. You want it to look a little rustic.
- Let the Kids Go Wild: I learned this from my niece’s party. Don’t worry about making perfect faces. The charm of these cupcakes is that they look like a kid made them. Hand the decorating gel to a five-year-old and just watch the magic happen. Some ghosts will have one eye, some will have three eyes—it’s all part of the fun.
- Multitask Like a Pro: While the cupcakes are baking, you can clean up the mixing bowls and measure out the frosting ingredients. That way, by the time the cupcakes are cool, you’re ready to go. It makes the whole process feel less chaotic.
Variations & Adaptations
These ghost cupcakes are a blank canvas, and I love playing around with different flavors and looks. Here are a few variations I’ve tried and loved.
- Chocolate Ghost Cupcakes: Swap out ¼ cup of the flour for ¼ cup of unsweetened cocoa powder. The dark chocolate ghosts look extra spooky against the white buttercream. I made these for a Halloween potluck and they disappeared first.
- Mint Chocolate Chip Ghosts: Add ½ teaspoon of peppermint extract to the cupcake batter and fold in ½ cup of mini chocolate chips. The little green flecks look like ghost freckles. It’s a fun twist that tastes like a Thin Mint.
- Gluten-Free & Dairy-Free Version: Use a 1:1 gluten-free baking flour blend in the cupcakes and vegan butter and oat milk in the frosting. The texture is a little more crumbly, but the flavor is still spot on. I’ve made these for a friend with celiac disease and she was thrilled.
- Pumpkin Spice Ghosts: Add 1 teaspoon of pumpkin pie spice to the dry ingredients and replace the milk with pumpkin puree (reduce the amount to ⅓ cup). The orange-tinted cupcakes with white ghosts are a gorgeous fall combination.
- Colorful Buttercream: If you want to skip the black gel, you can tint your buttercream with a few drops of food coloring. Make half the batch purple and half green for a monster mash vibe. The kids love picking their monster color.
Serving & Storage Suggestions
These cupcakes are best served at room temperature, which makes them perfect for parties. The buttercream softens slightly, making each bite melt in your mouth. I like to arrange them on a black platter or a wooden board for a fun Halloween display.
Storage: Store any leftover cupcakes in an airtight container at room temperature for up to 2 days. If your kitchen is warm, you can store them in the fridge, but let them sit out for 15 minutes before serving to soften the frosting. The flavor actually gets better after a day—the vanilla really settles in.
Freezing: You can freeze the unfrosted cupcakes for up to 3 months. Wrap them tightly in plastic wrap and then in foil. When you’re ready to serve, thaw them at room temperature, then make the frosting and decorate. I do this all the time for last-minute school parties. Just don’t freeze them with the frosting on—the texture gets weird.
Reheating: If you want a warm cupcake (which I highly recommend), pop an unfrosted one in the microwave for 10 seconds. Then frost it. The warmth makes the buttercream melt a little, creating a gooey, delicious mess. It’s my favorite way to eat them.
Nutritional Information & Benefits
Let’s be real—these are cupcakes, not health food. But they’re made with real ingredients, and that counts for something. Here’s a rough estimate per cupcake (based on the recipe as written, with standard buttercream).
| Nutrient | Amount per Cupcake |
|---|---|
| Calories | 380 kcal |
| Fat | 22g |
| Saturated Fat | 14g |
| Carbohydrates | 45g |
| Sugar | 35g |
| Protein | 4g |
Health Benefits: The butter provides a good source of Vitamin A, which is great for eye health (ironic for a ghost, I know). The eggs add protein and choline, which supports brain development in kids. And honestly, the joy these cupcakes bring is a pretty good mental health boost too. They’re a treat, and there’s nothing wrong with that in moderation.
Dietary Considerations: This recipe contains gluten, dairy, and eggs. For a gluten-free or dairy-free version, see the variations section above. The black decorating gel is usually vegan and gluten-free, but check the label to be sure.
Conclusion
These Kid-Approved Ghost Vanilla Cupcakes with Buttercream Faces are more than just a Halloween dessert. They’re a reminder that the best things in life often come from happy accidents. That day on my kitchen floor, covered in buttercream, I learned that perfection is overrated. What matters is that the food is made with love, shared with joy, and tastes absolutely delicious. These cupcakes are simple, affordable, and fun—everything a family recipe should be.
I’d love to see your ghost creations! Leave a comment below and tell me what expressions your kids came up with. Did you try any of the variations? Share your photos on Pinterest and tag me—I can’t wait to see your spooky (and silly) faces. Now go make some ghosts, and don’t be afraid to let a little chaos into your kitchen. It’s where the best recipes are born.
Frequently Asked Questions
Can I use a boxed cake mix for these ghost cupcakes?
Absolutely! If you’re short on time, a box of white or vanilla cake mix works perfectly. Just follow the package instructions and let the cupcakes cool completely before frosting. The recipe is forgiving that way.
How far in advance can I make these cupcakes?
You can bake the cupcakes up to 2 days in advance and store them in an airtight container at room temperature. I recommend making the frosting and decorating them the day you plan to serve them for the best texture. The buttercream dries out a bit if left uncovered for too long.
Can I use a piping bag instead of a spatula for the frosting?
Sure, if you want a more uniform ghost shape. Use a large round tip and pipe a tall swirl, then use a toothpick to drag the frosting into a ghostly shape. But honestly, the spatula method is faster and gives them that charming, homemade look that kids love.
My buttercream is too runny. What did I do wrong?
This usually happens if the butter was too soft or if you added too much liquid. Don’t worry—just add more sifted powdered sugar, one tablespoon at a time, until it reaches a spreadable consistency. If it’s too thick, add a splash of milk. You can always fix buttercream.
Can I use a different color for the faces?
Of course! Black gel is classic, but you can use any color decorating gel. Red makes them look like angry ghosts, purple looks magical, and green is perfect for a monster theme. Let the kids pick their favorite color.
Pin This Recipe!
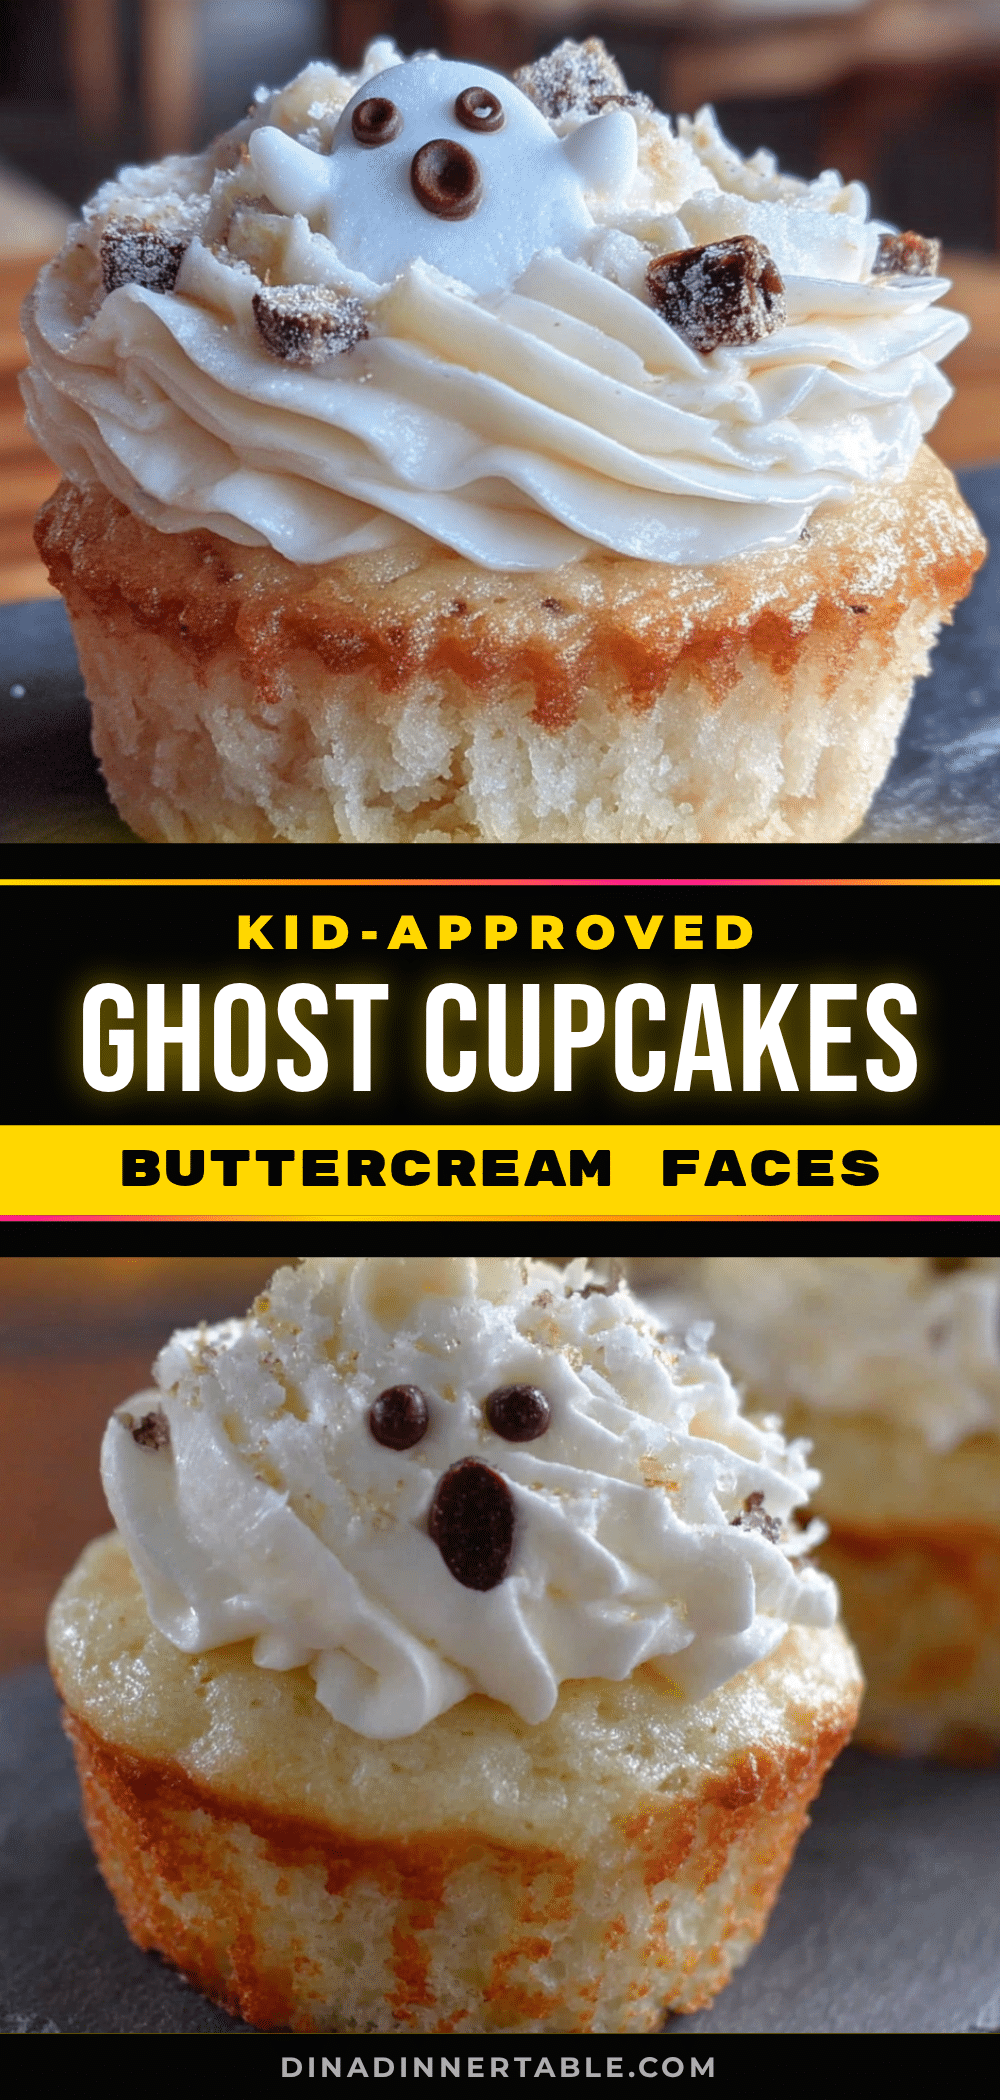
Easy Ghost Vanilla Cupcakes: Kid-Approved Buttercream Faces
These ghost vanilla cupcakes are a happy accident turned Halloween tradition. Made with a simple, from-scratch vanilla cupcake base and topped with a smear of buttercream and a squiggle of black gel, they’re budget-friendly, kid-approved, and perfect for classroom parties.
- Prep Time: 20 minutes
- Cook Time: 20 minutes
- Total Time: 40 minutes
- Yield: 12 cupcakes 1x
- Category: Dessert
- Cuisine: American
Ingredients
- 1 ½ cups (190g) all-purpose flour (spooned and leveled)
- 1 ½ teaspoons baking powder
- ¼ teaspoon baking soda
- ¼ teaspoon salt
- ½ cup (113g) unsalted butter, softened
- 1 cup (200g) granulated sugar
- 2 large eggs, room temperature
- 2 teaspoons pure vanilla extract
- ½ cup (120ml) whole milk, room temperature
- 1 cup (226g) unsalted butter, softened (for buttercream)
- 3 cups (360g) powdered sugar, sifted
- 2 teaspoons pure vanilla extract (for buttercream)
- 2–3 tablespoons heavy cream or whole milk
- Pinch of salt
- 1 tube black decorating gel
Instructions
- Preheat oven to 350°F (175°C). Line a 12-cup muffin tin with cupcake liners.
- In a medium bowl, whisk together flour, baking powder, baking soda, and salt.
- In a large bowl, beat softened butter and granulated sugar with an electric mixer on medium speed until light and fluffy, about 3 minutes.
- Add eggs one at a time, beating well after each addition. Beat in vanilla extract.
- With mixer on low speed, add one-third of the dry ingredients, mixing until just combined. Pour in half of the milk, mixing until just combined. Repeat with another third of dry ingredients, remaining milk, and final third of dry ingredients. Do not overmix.
- Divide batter evenly among the 12 liners, filling each about ⅔ full.
- Bake for 18-20 minutes, or until a toothpick inserted into the center comes out clean. Cool in pan for 5 minutes, then transfer to a cooling rack to cool completely.
- For buttercream: In a large bowl, beat softened butter on medium speed until smooth and creamy, about 1 minute. Gradually add sifted powdered sugar, one cup at a time, beating on low. Add vanilla extract and salt. Add heavy cream or milk, one tablespoon at a time, beating on medium-high until light, fluffy, and spreadable.
- Once cupcakes are completely cool, drop a generous spoonful of buttercream onto each cupcake. Use an offset spatula or butter knife to spread it outwards and upwards into a lumpy ghost shape.
- Use black decorating gel to draw two small dots for eyes and an oval for a mouth on each ghost.
Notes
For fluffiest cupcakes, ensure butter and eggs are at room temperature. Do not overmix batter. Cool cupcakes completely before frosting to prevent buttercream from melting. If buttercream is too runny, add more sifted powdered sugar; if too thick, add a splash of milk. Let kids decorate for extra fun.
Nutrition
- Serving Size: 1 cupcake
- Calories: 380
- Sugar: 35
- Sodium: 180
- Fat: 22
- Saturated Fat: 14
- Carbohydrates: 45
- Protein: 4
Keywords: ghost cupcakes, vanilla cupcakes, Halloween cupcakes, kid-friendly, buttercream, easy Halloween dessert, ghost faces


