My neighbor Maria wasn’t trying to impress anyone. I’d stopped by to borrow a bag of sugar—classic, right?—and this sweet, buttery, almost coconut-y smell hit me before I even got past her front door. She was in the kitchen, completely unfazed, while her two kids were practically vibrating with excitement next to her. They had powdered sugar on their noses and white chocolate smeared on their fingers. And there, cooling on a sheet of parchment paper, were these creepy-crawly little popcorn hands. Honestly, I forgot all about the sugar. I stood there, mouth slightly open, watching her drizzle more white chocolate over what looked like a pile of ghostly fingers. “It’s just popcorn,” she said, shrugging. Let me tell you, it was not just popcorn.
She handed me one—still warm—and I bit into a knuckle. The crunch, the sweet white chocolate, the tiny hint of salt from the popcorn… I mean, I’ve had fancy caramel corn and gourmet truffle popcorn, but this was different. This was fun. This was the kind of thing that makes kids squeal and adults sneak extra pieces when no one’s looking. I asked her where she got the idea, and she just laughed. “Pinterest, probably. But I messed it up the first time. The hands fell apart.” That’s the thing I love about Maria—she’s not a perfectionist. She’s a “let’s just try it and see what happens” kind of cook. And that’s exactly the energy you need for a recipe like this. Maybe you’ve been there, scrolling through Halloween treats that look amazing but take three hours and a culinary degree? Yeah, this isn’t that.
This is the recipe that stays with you because it’s simple, it’s ridiculous in the best way, and it makes people smile. I’ve made it every Halloween since that afternoon at Maria’s house. And every single time, someone asks for the recipe. So here it is—my version, with a few tweaks I learned the hard way.
Why You’ll Love This Recipe
Let’s be real for a second. Halloween treats can be a total hassle. You’ve got the costume drama, the pumpkin carving, the candy buying—and by the time you think about making something special for the class party or the family movie night, you’re already exhausted. That’s where these Kid-Approved White Chocolate Halloween Popcorn Hands come in. They’re the perfect mix of “wow, that’s so cool” and “wow, that took me twenty minutes.”
- Quick & Easy: From start to finish, you’re looking at about 20 minutes of active work. The hardest part is waiting for the chocolate to set, and even that’s just fridge time.
- Simple Ingredients: You probably have most of this stuff already. Popcorn, white chocolate chips, a little oil, and some candy eyeballs. No weird gelatin molds or specialty baking tools.
- Perfect for Halloween Parties: Class parties, trunk-or-treat events, spooky movie nights—these hands fit right in. Kids go absolutely nuts for them, and adults can’t stop snacking on the broken pieces.
- Crowd-Pleaser: I’ve brought these to three different Halloween gatherings now, and they’re always the first thing to disappear. Even the picky eaters who “don’t like popcorn” suddenly change their minds.
- Unbelievably Delicious: The combination of salty, crunchy popcorn and sweet, creamy white chocolate is basically magic. Add a little Halloween sprinkles on top, and you’ve got a treat that looks fancy but tastes like pure comfort.
What makes this recipe different from all the other popcorn recipes out there? It’s the hands. The shape makes it feel special without being complicated. You’re not piping intricate spider webs or tempering chocolate. You’re just making popcorn, coating it, and shaping it into something fun. It’s the kind of recipe that makes you look like a Halloween hero with almost zero effort. And honestly, isn’t that what we all need?
What Ingredients You Will Need
This recipe uses simple, pantry-friendly ingredients to create something that looks like it came from a fancy bakery. Here’s what you’ll need to grab:
For the Popcorn Base
- 10 cups of popped popcorn (about 1/2 cup of unpopped kernels, or one standard bag of microwave popcorn, lightly salted) — You want it fresh and crunchy. Stale popcorn will make sad, chewy hands.
- 2 tablespoons of coconut oil or vegetable oil — Coconut oil adds a subtle sweetness that pairs beautifully with the white chocolate. Vegetable oil works fine if that’s what you’ve got.
- 1/4 teaspoon of salt (optional, but recommended if using plain popcorn) — A little salt balances the sweetness.
For the White Chocolate Coating
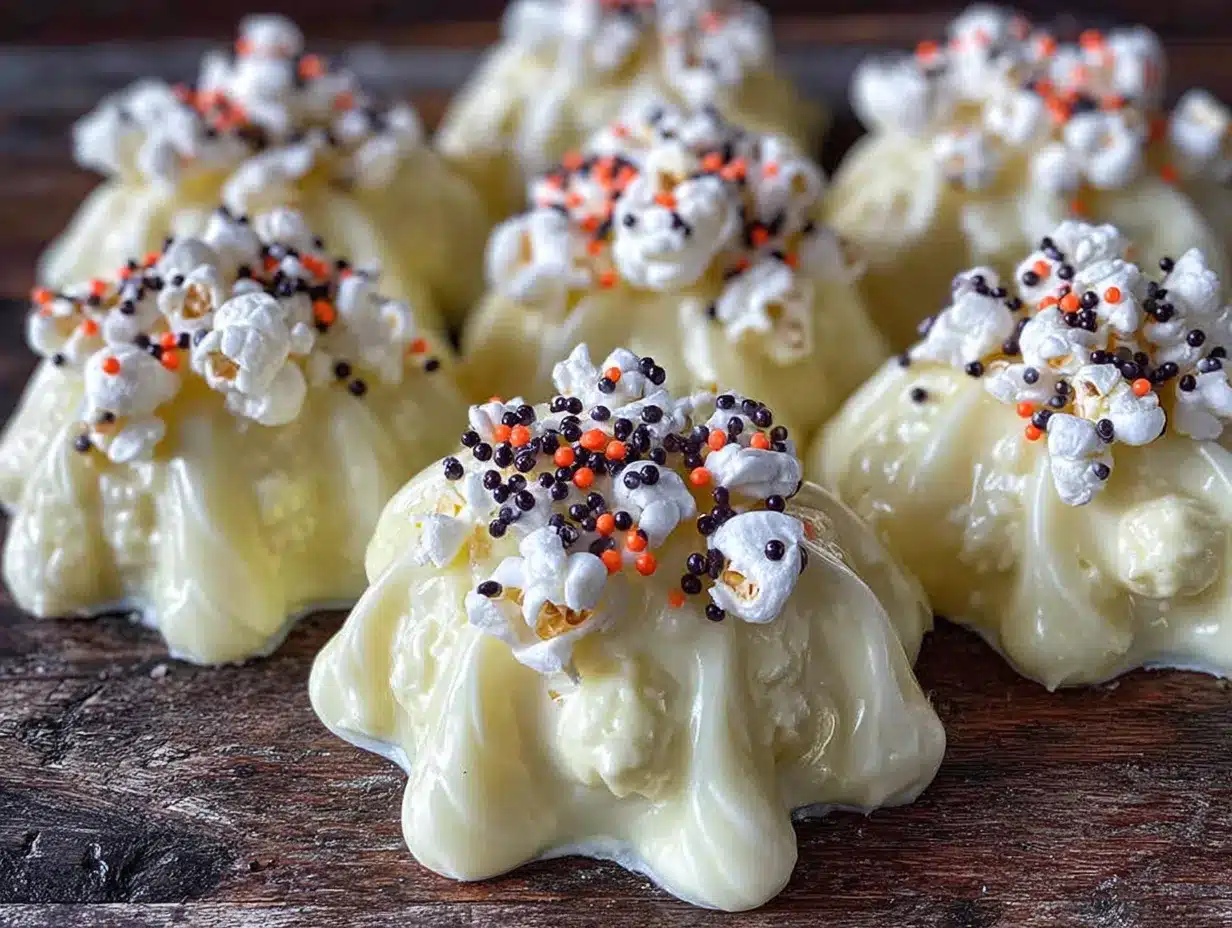
- 12 ounces (about 2 cups) of white chocolate chips or melting wafers — I prefer Ghirardelli white chocolate chips for the smoothest melt, but any brand works. Melting wafers (like Wilton’s) are even easier because they don’t need tempering.
- 1 tablespoon of coconut oil or vegetable shortening — This helps the chocolate stay smooth and gives it a nice shine. Don’t skip it unless you like grainy chocolate.
For Decoration & Assembly
- 1/2 cup of Halloween sprinkles (orange, black, purple, or a mix) — The more variety, the better. I like the little pumpkin-shaped sprinkles for extra cuteness.
- 24-30 candy eyeballs — You can find these at any craft store or in the baking aisle. They’re non-negotiable for the “hand” look.
- Disposable food-safe gloves (optional, but highly recommended) — Your hands will get messy. Trust me on this one.
- Parchment paper or silicone baking mats — For easy cleanup and non-stick setting.
Substitution Notes
If you need a dairy-free version, use dairy-free white chocolate chips (Enjoy Life makes a good one) and skip the butter. For a nut-free option, just double-check your white chocolate brand—some are processed in facilities that handle nuts. And if you’re out of coconut oil, any neutral oil like canola or grapeseed will work just fine.
Equipment Needed
You don’t need a fancy kitchen to pull this off. Here’s what you’ll need:
- A large mixing bowl — Big enough to toss the popcorn without spilling it everywhere. I use my biggest stainless steel bowl.
- A microwave-safe bowl or a double boiler — For melting the white chocolate. A double boiler gives you more control, but the microwave is faster. Just be careful not to burn the chocolate.
- A rubber spatula — For gentle folding. A wooden spoon works too, but the spatula is better for scraping every last bit of chocolate.
- A baking sheet — Lined with parchment paper or a silicone mat. This is where your hands will set.
- Disposable food-safe gloves — I know I mentioned these already, but they’re worth repeating. You’re going to be shaping sticky, chocolate-covered popcorn with your hands. Gloves make the whole process way less frustrating.
- A small cookie scoop or spoon — For portioning the popcorn mixture evenly. This helps all your hands end up roughly the same size.
If you don’t have gloves, you can use two spoons to shape the hands, but it’s trickier. Honestly, just buy the gloves. They’re cheap and they save you from having to scrub white chocolate out from under your fingernails for days.
Preparation Method
Alright, let’s get into it. Follow these steps carefully, and you’ll have a batch of spooky, delicious popcorn hands that’ll steal the show at any Halloween party.
- Pop your popcorn. If you’re using kernels on the stovetop, heat 2 tablespoons of coconut oil in a large pot over medium-high heat. Add 3 kernels and wait for them to pop. Once they do, add the remaining 1/2 cup of kernels, cover the pot, and shake it gently until the popping slows to about 2 seconds between pops. Pour the popcorn into your giant bowl and pick out any unpopped kernels. If you’re using microwave popcorn, just pop it according to the package directions and pour it into the bowl. Let it cool for a minute or two—you don’t want it steaming hot when you add the chocolate.
- Melt the white chocolate. Place your white chocolate chips and 1 tablespoon of coconut oil in a microwave-safe bowl. Microwave in 30-second intervals, stirring well after each one. It usually takes about 1.5 to 2 minutes total. Stop when the chocolate is mostly melted and stir until it’s completely smooth. Be careful not to overheat it—white chocolate burns easily and turns into a grainy, clumpy mess. If that happens, you’ll have to start over. (I learned this the hard way during my second attempt at Maria’s recipe. It was not pretty.)
- Combine the popcorn and chocolate. Pour the melted white chocolate over the popcorn. Use your rubber spatula to gently fold everything together. Work from the bottom up, trying to coat every piece of popcorn. Don’t stir too aggressively, or you’ll crush the popcorn into tiny pieces. You want those nice, big, crunchy clusters.
- Add the sprinkles. While the chocolate is still wet, sprinkle in about 1/3 cup of your Halloween sprinkles. Fold gently to distribute them evenly. The sprinkles add color and crunch, plus they make the hands look extra festive.
- Let the mixture cool slightly. Let the popcorn sit in the bowl for about 2-3 minutes. It should still be warm but not hot. This makes it easier to handle without burning your fingers (even through gloves).
- Shape the hands. Put on your disposable gloves. Scoop out about 1/3 cup of the popcorn mixture. Squeeze it gently in your hand to form a compact ball, then start shaping it into a hand. You want a rounded palm area with five little “fingers” sticking out. Don’t worry about making them perfect—the slightly messy, claw-like look is actually more Halloween-appropriate. Place each shaped hand on your parchment-lined baking sheet. Repeat until you’ve used all the mixture. You should get about 8-10 hands, depending on size.
- Add the eyes. While the chocolate is still tacky, press 2-3 candy eyeballs onto each hand. I like to put one on the palm and one or two on the fingers, but you can arrange them however you want. The weirder, the better.
- Let them set. Place the baking sheet in the refrigerator for at least 30 minutes, or until the white chocolate is completely firm. If you’re in a hurry, you can pop them in the freezer for 15 minutes. Just don’t leave them in there too long, or the popcorn might get soggy when they thaw.
- Serve and enjoy. Once set, the hands are ready to eat. They’re best served cold or at room temperature. Arrange them on a platter with some extra candy eyeballs scattered around for a truly creepy effect.
Cooking Tips & Techniques
I’ve made this recipe about a dozen times now, and I’ve definitely learned a few things along the way. Here are my best tips to help you avoid my mistakes:
- Don’t skip the oil in the chocolate. White chocolate can be finicky. Adding a little coconut oil or shortening keeps it smooth and gives it a beautiful sheen. Without it, you might end up with a thick, clumpy mess that’s impossible to coat the popcorn with.
- Work quickly once the chocolate is melted. White chocolate starts to set pretty fast, especially if your kitchen is cool. Have all your ingredients and tools ready before you start melting. The first time I made these, I was scrambling to find the sprinkles while the chocolate hardened in the bowl. Not fun.
- Don’t over-squeeze the hands. You want them to hold their shape, but if you squeeze too hard, you’ll crush the popcorn and end up with dense, hard lumps. Gentle pressure is the key. Think of it like making a snowball—firm enough to hold together, but not packed solid.
- Use fresh popcorn. Day-old popcorn is sad popcorn. It’s chewy and doesn’t hold the chocolate well. Always make fresh popcorn for this recipe. Your hands will thank you.
- Let the kids help with the eyeballs. This is the fun part. My niece and nephew go absolutely wild placing the candy eyes. It’s a great way to get little hands involved without them touching the hot chocolate. Just be prepared for some very creative eye placement.
- Double the batch if you’re bringing them to a party. Seriously. These things disappear fast. I made a single batch for a neighborhood Halloween get-together last year, and they were gone in ten minutes. People were literally hovering around the platter.
Variations & Adaptations
One of the best things about this recipe is how easy it is to customize. Here are a few variations I’ve tried and loved:
- Spooky Spider Version: Instead of hands, shape the popcorn into round balls and press eight pretzel sticks into each one for spider legs. Add two big candy eyes on top. My kids went bonkers for these.
- Dark Chocolate Twist: Swap the white chocolate for dark or milk chocolate. The bitterness of dark chocolate pairs surprisingly well with the salty popcorn. Use orange and black sprinkles for a classic Halloween look.
- Monster Munch: Skip the hand-shaping altogether and just spread the coated popcorn on the baking sheet in a single layer. Break it into chunks after it sets. Add candy corn or candy pumpkins for extra color. This is my go-to when I’m short on time.
- Nutty Halloween Crunch: Add 1/2 cup of roasted, salted peanuts or almonds to the popcorn before coating. The extra crunch is amazing, and the salt balances the sweetness perfectly.
- Allergen-Friendly Version: Use dairy-free white chocolate and certified gluten-free popcorn. Most popcorn is naturally gluten-free, but some brands add flavorings that contain gluten, so check the label if that’s a concern.
Serving & Storage Suggestions
These popcorn hands are best served the same day you make them, but they’ll keep for a few days if stored properly. Here’s what I recommend:
- Serving Temperature: Serve them cold or at room temperature. If they’ve been in the fridge, let them sit out for about 5 minutes before serving—they’re a little less shocking to the teeth that way.
- Presentation Ideas: Arrange the hands on a black platter or a dark-colored cake stand. Scatter extra candy eyeballs, plastic spiders, or fake cobwebs around for a truly creepy display. I once served them on a bed of shredded coconut “bones” that I tinted with a little black food coloring. It was extra, but the kids loved it.
- Storage: Store any leftovers in an airtight container at room temperature for up to 3 days. If your kitchen is warm, keep them in the fridge to prevent the chocolate from softening. Layer them between sheets of parchment paper so they don’t stick together.
- Freezing: You can freeze these for up to a month. Place them in a single layer on a baking sheet and freeze until solid, then transfer to a freezer-safe bag or container. Thaw in the fridge overnight before serving. The texture might be slightly less crunchy, but they’re still delicious.
- Flavor Development: Honestly, these are best fresh. The popcorn stays crunchiest the first day. After that, it starts to absorb a little moisture from the chocolate and gets slightly chewy. Still tasty, but not as satisfyingly crispy.
Nutritional Information & Benefits
Let’s be real: these are a treat, not a health food. But here’s the breakdown if you’re curious:
Per serving (1 hand, approximately 1/3 cup of mixture):
- Calories: 220-250
- Fat: 14g (8g saturated)
- Carbohydrates: 26g (18g sugar)
- Protein: 3g
- Fiber: 1g
- Sodium: 95mg
Health Highlights: Popcorn is a whole grain, so you’re getting a little fiber and some antioxidants called polyphenols. White chocolate doesn’t have the same benefits as dark chocolate, but it does contain calcium and a small amount of protein from the milk solids. The sprinkles are basically pure sugar and food coloring—no nutritional value, but lots of fun.
Dietary Considerations: This recipe can be made dairy-free and gluten-free with simple substitutions. It’s not low-sugar or low-fat by any stretch, but as an occasional Halloween treat, it’s perfectly fine. I always remind myself that balance is key—my kids eat these alongside their veggies and fruit, and nobody’s worse for wear.
Conclusion
Look, I know there are a million Halloween treat recipes out there. But these Kid-Approved White Chocolate Halloween Popcorn Hands are different. They’re fun without being fussy. They’re impressive without requiring a pastry chef’s skills. And most importantly, they taste amazing. Every time I make them, I think about that afternoon at Maria’s house—the smell, the mess, the way her kids were laughing. That’s what cooking should feel like. Not stressful, not perfect, just joyful.
I really hope you give these a try. Customize them however you want—add more sprinkles, use different candy eyes, shape them into monsters instead of hands. Make them your own. And when you do, I’d love to hear about it. Drop a comment below and tell me how yours turned out. Did your kids help? Did they disappear at the party? Share a photo if you’ve got one. Let’s make this Halloween a little sweeter, one popcorn hand at a time.
Frequently Asked Questions
Can I use microwave popcorn for this recipe?
Absolutely! Just make sure you use a lightly salted or unsalted variety. The heavily buttered kinds can make the white chocolate slide off. Pop it fresh and let it cool for a minute before adding the chocolate.
How do I keep the popcorn from getting soggy?
The key is working quickly and letting the hands set in the fridge. Don’t leave them out at room temperature for too long, especially if your kitchen is warm. And always use fresh popcorn—stale popcorn absorbs moisture and turns chewy fast.
Can I make these ahead of time?
You can make them up to 2 days in advance. Store them in an airtight container in the fridge. Let them sit at room temperature for about 5 minutes before serving to take the chill off.
My white chocolate seized up and turned grainy. What went wrong?
This usually happens when the chocolate gets too hot or when a tiny bit of water gets into the bowl. Always melt white chocolate on low power in the microwave or use a double boiler. If it seizes, you can try adding a teaspoon of coconut oil and stirring vigorously, but honestly, it’s often easier to start over with fresh chocolate.
Can I use colored candy melts instead of white chocolate?
Yes! Colored candy melts (like orange or purple) work perfectly and add an extra festive touch. Just follow the melting instructions on the package. They tend to set a little harder than white chocolate, which is actually nice for keeping the hand shapes intact.
Pin This Recipe!
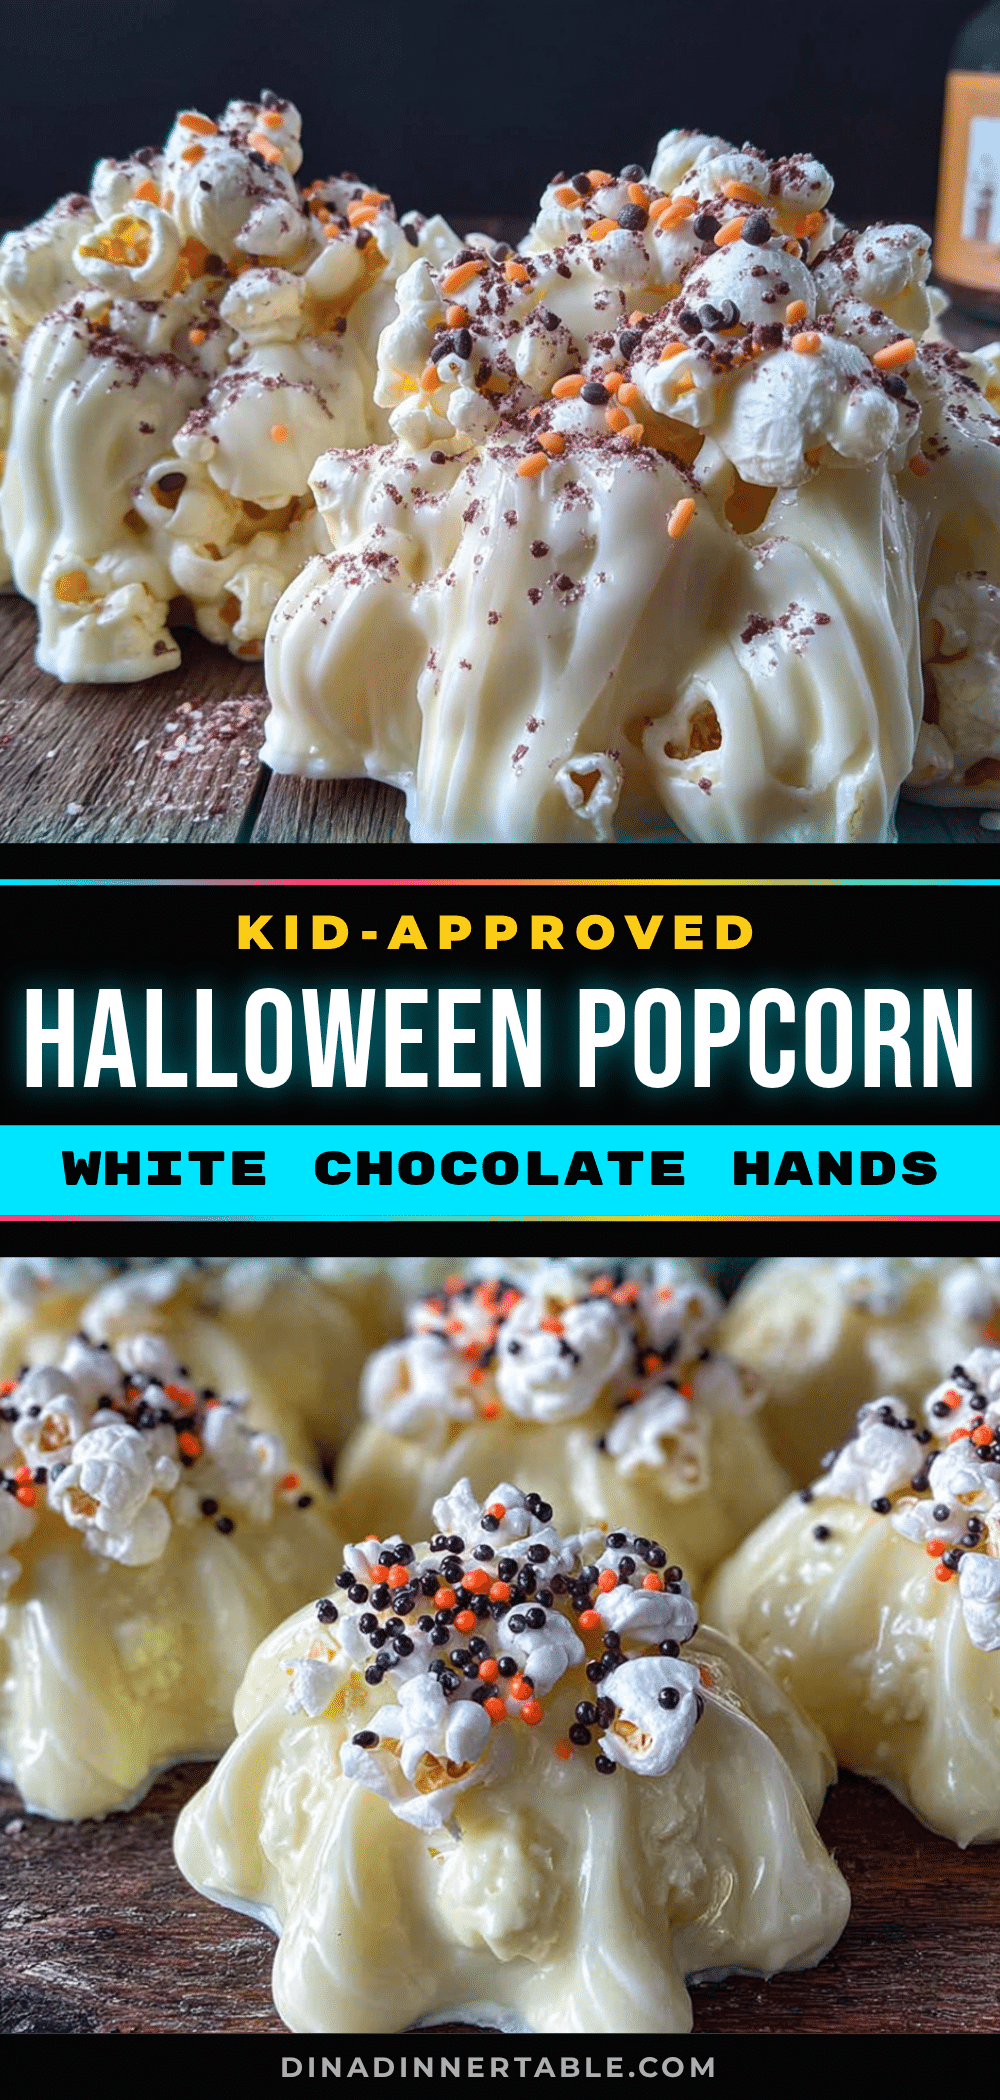
Kid-Approved White Chocolate Halloween Popcorn Hands
These spooky popcorn hands are coated in creamy white chocolate, decorated with candy eyeballs and Halloween sprinkles, and shaped into creepy-crawly fingers. They’re quick, easy, and perfect for Halloween parties.
- Prep Time: 20 minutes
- Cook Time: 5 minutes
- Total Time: 55 minutes (including 30 minutes chilling)
- Yield: 8-10 servings 1x
- Category: Dessert
- Cuisine: American
Ingredients
- 10 cups popped popcorn (about 1/2 cup unpopped kernels or one standard bag of lightly salted microwave popcorn)
- 2 tablespoons coconut oil or vegetable oil
- 1/4 teaspoon salt (optional, if using plain popcorn)
- 12 ounces (about 2 cups) white chocolate chips or melting wafers
- 1 tablespoon coconut oil or vegetable shortening
- 1/2 cup Halloween sprinkles (orange, black, purple, or mix)
- 24–30 candy eyeballs
- Disposable food-safe gloves (optional but recommended)
- Parchment paper or silicone baking mats
Instructions
- Pop your popcorn. If using kernels on the stovetop, heat 2 tablespoons of coconut oil in a large pot over medium-high heat. Add 3 kernels and wait for them to pop. Once they do, add the remaining 1/2 cup of kernels, cover the pot, and shake it gently until the popping slows to about 2 seconds between pops. Pour the popcorn into a giant bowl and pick out any unpopped kernels. If using microwave popcorn, pop it according to package directions and pour into the bowl. Let it cool for a minute or two…
- Melt the white chocolate. Place white chocolate chips and 1 tablespoon of coconut oil in a microwave-safe bowl. Microwave in 30-second intervals, stirring well after each one, until mostly melted (about 1.5 to 2 minutes total). Stir until completely smooth. Be careful not to overheat.
- Combine the popcorn and chocolate. Pour the melted white chocolate over the popcorn. Use a rubber spatula to gently fold everything together, coating every piece of popcorn without crushing it.
- Add the sprinkles. While the chocolate is still wet, sprinkle in about 1/3 cup of Halloween sprinkles. Fold gently to distribute evenly.
- Let the mixture cool slightly. Let the popcorn sit in the bowl for about 2-3 minutes until still warm but not hot.
- Shape the hands. Put on disposable gloves. Scoop out about 1/3 cup of the popcorn mixture. Squeeze gently to form a compact ball, then shape into a hand with a rounded palm and five little fingers. Place each shaped hand on a parchment-lined baking sheet. Repeat until all mixture is used (about 8-10 hands).
- Add the eyes. While the chocolate is still tacky, press 2-3 candy eyeballs onto each hand (on the palm and/or fingers).
- Let them set. Place the baking sheet in the refrigerator for at least 30 minutes, or until the white chocolate is completely firm. For a quicker set, freeze for 15 minutes.
- Serve and enjoy. Once set, serve cold or at room temperature. Arrange on a platter with extra candy eyeballs for a creepy effect.
Notes
Work quickly once chocolate is melted. Don’t over-squeeze the hands. Use fresh popcorn for best crunch. Let kids help place the candy eyes. Double the batch for parties. Store leftovers in an airtight container at room temperature for up to 3 days or freeze for up to a month.
Nutrition
- Serving Size: 1 hand (approximatel
- Calories: 235
- Sugar: 18
- Sodium: 95
- Fat: 14
- Saturated Fat: 8
- Carbohydrates: 26
- Fiber: 1
- Protein: 3
Keywords: Halloween popcorn, white chocolate popcorn, popcorn hands, Halloween treats, kid-friendly Halloween, spooky snacks, easy Halloween recipe


