There used to be a tiny, hole-in-the-wall Halloween pop-up bar in my old neighborhood in Brooklyn called The Cauldron. Every October, they’d transform their back room into this gloriously tacky haunted parlor, and they served the most ridiculously fun food. Their signature snack was a plate of deviled eggs that looked exactly like monster eyeballs. When they closed for good after the pandemic, I felt a genuine pang of loss. Not just for the bar itself, but for those eggs. They were the perfect bite of nostalgia and horror, all at once.
After about six tries—honestly, the first batch looked more like sad, jaundiced golf balls than anything spooky—I finally cracked the code. I mean, it took me a full afternoon of staring at a dozen hard-boiled eggs, muttering about food coloring ratios. My kitchen looked like a crime scene, but I got there. The secret, let me tell you, is in the layering of the “iris” and the tiny, terrifying bloodshot veins.
This recipe for Monster Eyeball Deviled Eggs is my love letter to that little bar. It’s the appetizer that steals the show every single time. You know that feeling when you bring a dish to a party and people just stop and stare? That’s this recipe. Maybe you’ve been there, scrolling for something that isn’t just another bowl of chips. These eggs are creepy, delicious, and surprisingly easy to pull off. They’re the reason I still love hosting a spooky get-together, and I’m so excited to share the exact method with you.
Why You’ll Love This Recipe
These aren’t just any deviled eggs. They are a full-blown Halloween production that tastes just as good as it looks. I’ve tested this method more times than I care to admit, and I can tell you with confidence that this is the best version. It’s the kind of recipe that makes you look like a culinary genius with very little actual stress.
- Quick & Easy : The active prep time is only about 20 minutes. Once your eggs are boiled and cooled, the assembly is a breeze. Perfect for a busy weeknight before a costume party or a last-minute spooky craving.
- Simple Ingredients : You probably already have most of this in your fridge. Eggs, mayo, mustard, and a little food coloring. No need for a specialty grocery run for exotic spices.
- Perfect for Halloween : This is the ultimate crowd-pleaser for any spooky occasion. From adult costume parties to kid-friendly school harvest festivals, these eyeballs fit right in.
- Crowd-Pleaser : I’ve watched people who “don’t like deviled eggs” eat three of these. The fun factor completely overrides any pickiness. Kids and adults alike go nuts for them.
- Unbelievably Delicious : The tangy, creamy filling is perfectly balanced. The slight saltiness of the olive “pimento” (the pupil) is a genius textural contrast. It’s next-level comfort food disguised as a monster.
What makes this recipe different from the rest? It’s the technique. I don’t just plop a black olive slice on top and call it a day. I actually create a realistic-looking iris using a simple trick with food coloring and a tiny brush. This isn’t just another version of a spooky egg—it’s your best version. It’s the one that gets photographed and talked about long after the party is over.
What Ingredients You Will Need
This recipe uses simple, pantry-friendly ingredients to deliver a bold, tangy flavor and a seriously creepy visual impact. The magic is all in how you assemble them. Here’s what you’ll need to gather.
- For the Eggs:
- 12 large eggs, hard-boiled and peeled (look for eggs that are a week or two old for easier peeling)
- Ice water bath (for shocking the eggs after boiling)
- For the Filling:
- 1/3 cup mayonnaise (I prefer Hellmann’s or Duke’s for a tangy, rich base)
- 1 tablespoon yellow mustard (adds that classic deviled egg zing)
- 1 teaspoon white vinegar (brightens the flavor)
- 1/4 teaspoon salt
- 1/8 teaspoon black pepper
- 1/4 teaspoon paprika (plus more for garnish, optional)
- For the Monster Eyeball Decoration:
- 1 can (6 oz) large pitted black olives, drained
- 1 jar (4 oz) sliced pimentos or roasted red peppers, drained and patted dry (these will be the “bloodshot” veins)
- Red and blue gel food coloring (I use Americolor brand for the most vibrant, non-watery colors)
- A small, clean paintbrush or a toothpick (for painting the “veins”)
A note on the olives: You want the largest pitted black olives you can find. I recommend Lindsay Large Black Pitted Olives. The bigger the olive, the more surface area you have to create the “iris” and “pupil.” For the pimentos, make sure you pat them very dry with a paper towel. If they are wet, they won’t stick to the olive and the red color will bleed into the filling.
Equipment Needed
You don’t need any fancy gear for this, which is part of the beauty. Here’s the basic toolkit you’ll need to summon these monsters.
- A large saucepan: For boiling the eggs. Make sure it’s big enough to hold all 12 eggs in a single layer.
- A slotted spoon: For gently lowering the eggs into the boiling water and fishing them out.
- A large bowl: For the ice water bath.
- A sharp knife and cutting board: For halving the eggs and slicing the olives.
- A small spoon or piping bag: For filling the egg whites. I personally find a piping bag with a star tip gives a much cleaner, more professional look, but a sturdy zip-top bag with the corner snipped off works perfectly too. A small spoon is your budget-friendly backup.
- A small mixing bowl and fork: For mashing the yolks and mixing the filling.
- A small, clean paintbrush: This is your secret weapon. A fine-tipped artist’s brush (like a size 1 or 2) is perfect for painting the bloodshot veins. Don’t use a brush you care about for anything else after this!
I’ve made these with just a spoon and a toothpick before, and they still turned out fantastic. The piping bag just makes the filling look extra polished. If you’re using a new paintbrush, give it a quick wash with warm water and soap to remove any loose bristles before you start.
Preparation Method
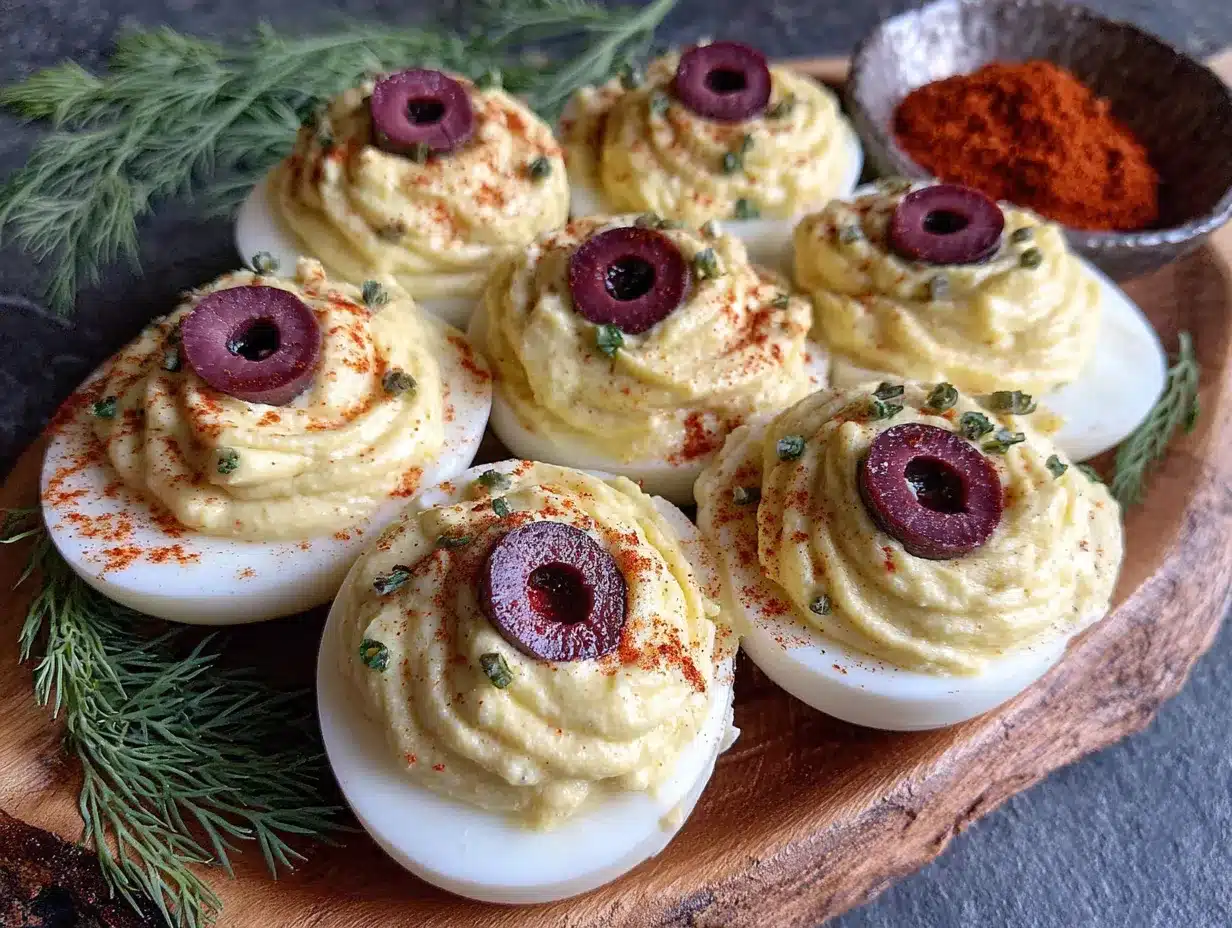
Alright, let’s get spooky! Follow these steps carefully, and you’ll have a platter of terrifyingly delicious eyeballs in no time. The key is to work in stages: boil, fill, assemble.
- Hard-Boil the Eggs (The Perfect Method): Place your eggs in a single layer in your saucepan. Cover them with cold water by about an inch. Bring the water to a full, rolling boil over high heat. Once it’s boiling, immediately cover the pot with a lid, turn off the heat, and let it sit for exactly 12 minutes. While it sits, prepare your ice water bath. After 12 minutes, use your slotted spoon to transfer the eggs to the ice bath. Let them chill for at least 15 minutes. This shock stops the cooking and makes peeling a dream. I used to get so frustrated with peeling, but this method is foolproof.
- Peel and Halve the Eggs: Gently tap each egg on the counter to crack the shell all over, then peel under cool running water. The water helps get under the membrane. Once peeled, cut each egg in half lengthwise with a sharp knife. Gently pop the yolks out into your mixing bowl. Arrange the 24 white halves on your serving platter, cut-side up.
- Make the Filling: Add the mayonnaise, mustard, vinegar, salt, pepper, and paprika to the bowl with the yolks. Use a fork to mash and mix everything together until it’s completely smooth and creamy. You want it to be stiff enough to hold a shape, but not dry. Taste it! Add a pinch more salt or a dash more mustard if you like. This is your moment to adjust.
- Prepare the “Eyeballs” (The Olive Iris): This is the most important step. Take your drained black olives and slice them into thick rounds, about 1/4-inch thick. You want them to look like little discs. You should get about 3-4 slices per olive. Pat them dry with a paper towel. Now, take a small piece of a pimento or roasted red pepper and press it firmly into the center hole of the olive slice. This is the “pupil.” It should fit snugly. Set these aside on a plate.
- Create the Bloodshot Veins: This is where the magic happens. On a small plate, mix one drop of red gel food coloring with one drop of blue gel food coloring. This creates a deep, realistic blood-red. Dip the tip of your clean paintbrush into the color. Gently paint a few thin, wavy lines from the edge of the olive slice toward the center pupil. Don’t overdo it—a few tiny, jagged lines look way more realistic than a solid red ring. Let the painted olives sit for a minute to dry slightly.
- Fill the Egg Whites: Spoon your creamy yolk mixture into a piping bag fitted with a star tip (or your zip-top bag with a corner snipped). Pipe a generous swirl of filling into each egg white half. You want it to mound up nicely, creating a bed for your eyeball.
- Assemble the Monsters: Gently press one painted olive slice (eyeball) into the center of each piped filling swirl. Press down just enough so it sticks. The bloodshot veins should be facing upward. Repeat with all 24 eggs.
- Chill and Serve: Place the platter of Monster Eyeball Deviled Eggs in the refrigerator for at least 30 minutes before serving. This allows the filling to firm up and the flavors to meld. They are best served cold.
A quick warning: When you are painting the olives, the food coloring can stain your fingers. I usually wear a pair of disposable kitchen gloves for this step. It keeps my hands clean and prevents me from accidentally smudging the “veins.”
Cooking Tips & Techniques
I’ve made a lot of mistakes in the kitchen so you don’t have to. Here are the hard-learned lessons that make these monster eggs a guaranteed hit.
The Biggest Mistake: Over-boiling the Eggs. I once boiled eggs for 15 minutes thinking “more is better.” The yolks turned a weird, greenish-gray color and had a chalky, sulfurous smell. Stick to the 12-minute off-heat method. It’s perfect every time. For the record, a green ring around the yolk means it’s overcooked.
Multitasking Strategy: While your eggs are boiling and then sitting in the ice bath, you can prep all your other ingredients. Drain and pat dry your olives and pimentos. Mix your food coloring. Get your piping bag ready. This way, when the eggs are peeled, you can move through the assembly line without stopping. It makes the whole process feel much faster.
Consistency is Key: If your filling is too runny, it won’t hold a nice swirl. The culprit is usually too much mayonnaise or wet yolks. Make sure your yolks are completely dry after peeling. If the filling seems loose, add another yolk or a teaspoon of dry breadcrumbs. If it’s too stiff, add a tiny splash of pickle juice or milk. You want it to be like a thick, spreadable paste.
The Secret to Clean Piping: Don’t overfill your piping bag. Fill it only about halfway to two-thirds full. Twist the top closed and squeeze from the top. If you overfill, the filling will come out the top and make a huge mess. I learned this the hard way while making a batch for a party—my kitchen looked like a yolk explosion.
Variations & Adaptations
Don’t be afraid to make this recipe your own. Here are some ways I’ve adapted it over the years for different diets and tastes.
- Spicy Eyeballs: For a kick, add 1/2 teaspoon of smoked paprika and a pinch of cayenne pepper to the yolk mixture. You can also stuff a tiny sliver of pickled jalapeño inside the olive before adding the pimento pupil. It gives a nice little heat surprise.
- Vegan Monster Eyeballs: Use a block of firm, silken tofu and mash it with kala namak (black salt) for that eggy flavor. Vegan mayo works perfectly. For the filling, add a tablespoon of nutritional yeast for a cheesy, savory note. The olive and pimento assembly stays exactly the same.
- Gluten-Free Adaptation: This recipe is naturally gluten-free! Just double-check your mustard and mayonnaise labels to make sure they are certified gluten-free. Most standard brands are, but it’s always good to check.
- Different “Pupils”: If you can’t find large pitted olives, you can use small caper berries or even a slice of a green olive stuffed with a pimento. For a truly creepy look, use a tiny slice of a black bean for the pupil. It gives a more alien, cat-eye effect.
- Colorful Irises: Instead of just black olives, you can use green olives with pimentos for a different “eye color.” Or, you can dye the olive slices themselves! A quick soak in a little beet juice will turn them pink, while a soak in turmeric water will make them yellow. The possibilities are endless.
Serving & Storage Suggestions
These eggs are best served straight from the fridge. The cold filling is part of the experience. I like to arrange them on a dark-colored platter or a black slate board to really make the “eyes” pop. A garnish of fresh dill or parsley around the edges can look like “monster hair” or “eyelashes,” which is a fun touch.
Complementary Dishes: They pair perfectly with other finger foods like a warm spinach and artichoke dip, a bowl of spicy chili, or a charcuterie board with spooky-themed crackers. For drinks, a crisp lager or a bloody mary is a natural fit. For the kids, serve them with a side of “witches’ brew” (punch).
Storage: Store any leftover eggs in an airtight container in the refrigerator. They will keep well for up to 2 days. I do not recommend freezing them, as the texture of the egg white and filling will become watery and grainy upon thawing.
Reheating: Do not reheat these. They are a cold appetizer. If you are taking them to a party, transport them on a flat platter covered tightly with plastic wrap. Keep them cold with a small ice pack underneath the platter.
Flavor Development: Honestly, these taste even better the next day. The flavors of the mustard and mayonnaise meld together beautifully in the fridge. The olive also softens slightly, creating a better texture. If you can, make them a day ahead of time and let them chill overnight. Your future self will thank you.
Nutritional Information & Benefits
While these are a treat, they aren’t a total nutritional nightmare. Here’s a look at what’s in one serving (one deviled egg).
- Estimated Nutritional Values (per egg): Calories: 85, Fat: 7g, Saturated Fat: 1.5g, Cholesterol: 95mg, Sodium: 180mg, Carbohydrates: 1g, Fiber: 0g, Sugar: 0g, Protein: 5g.
- Health Benefits of Key Ingredients: Eggs are a fantastic source of high-quality protein and choline, which is great for brain health. Olives provide healthy monounsaturated fats and are a good source of vitamin E.
- Dietary Considerations: This recipe is naturally low-carb and keto-friendly. It is also gluten-free. If you are watching your cholesterol or sodium, you may want to enjoy these in moderation.
- Potential Allergens: Contains eggs. The filling contains mayonnaise, which is made with eggs and sometimes soybean oil. Always check labels if you are serving someone with allergies.
I like to think of these as a “fun food” that you can feel good about. They are a protein-packed snack that keeps you full, which is a lot better than a handful of candy corn. It’s all about balance, right?
Conclusion
So there you have it. The secret to the best Halloween appetizer is finally out of the bag. These Monster Eyeball Deviled Eggs are more than just a snack—they are a conversation starter, a memory-maker, and a total crowd-pleaser. They are the kind of dish that makes you the hero of the party without spending all day in the kitchen.
I really hope you give them a try. Don’t be afraid to get a little messy with the food coloring and make them your own. Maybe you’ll add extra veins, or use a different colored pupil. The best part about cooking is making a recipe your own. I’d love to hear how they turn out for you. Did your guests scream with delight? Did they disappear in five minutes? Drop a comment below and let me know. And if you snap a picture, tag me on social media—I live for seeing your spooky creations. Happy haunting, and happy cooking!
Frequently Asked Questions
Can I make these Monster Eyeball Deviled Eggs a day ahead of time?
Absolutely! In fact, I recommend it. The flavors meld together beautifully overnight. Just assemble them completely, cover the platter tightly with plastic wrap, and store them in the refrigerator. They will be perfect for up to 48 hours.
My food coloring is bleeding into the filling. What did I do wrong?
This usually happens if the olive or pimento is too wet. Make sure you pat the olives and pimentos very dry with a paper towel before painting and assembling. Also, let the painted olives sit for a minute or two to dry before placing them on the filling.
Can I use a different type of olive for the eyeballs?
Yes, you can! Green olives stuffed with pimentos work great, though they will give a different “eye color.” Just make sure they are large enough to create a good-looking iris. Kalamata olives are too soft and will fall apart.
What if I don’t have a piping bag?
No problem at all. A sturdy zip-top plastic bag is your best friend. Spoon the filling into the bag, seal it, and then snip off a small corner. Squeeze gently to pipe. You can also just use a small spoon to carefully fill the egg whites. It will look a little more rustic, but it will taste just as good.
Can I skip the food coloring and just use a red pepper slice?
You can, but the visual impact will be much less dramatic. The food coloring creates those thin, realistic bloodshot veins that make the eggs look truly “monstrous.” A plain red pepper slice on the olive just looks like a red pepper slice. The painting step is what takes these from “cute” to “spooky and impressive.”
Pin This Recipe!
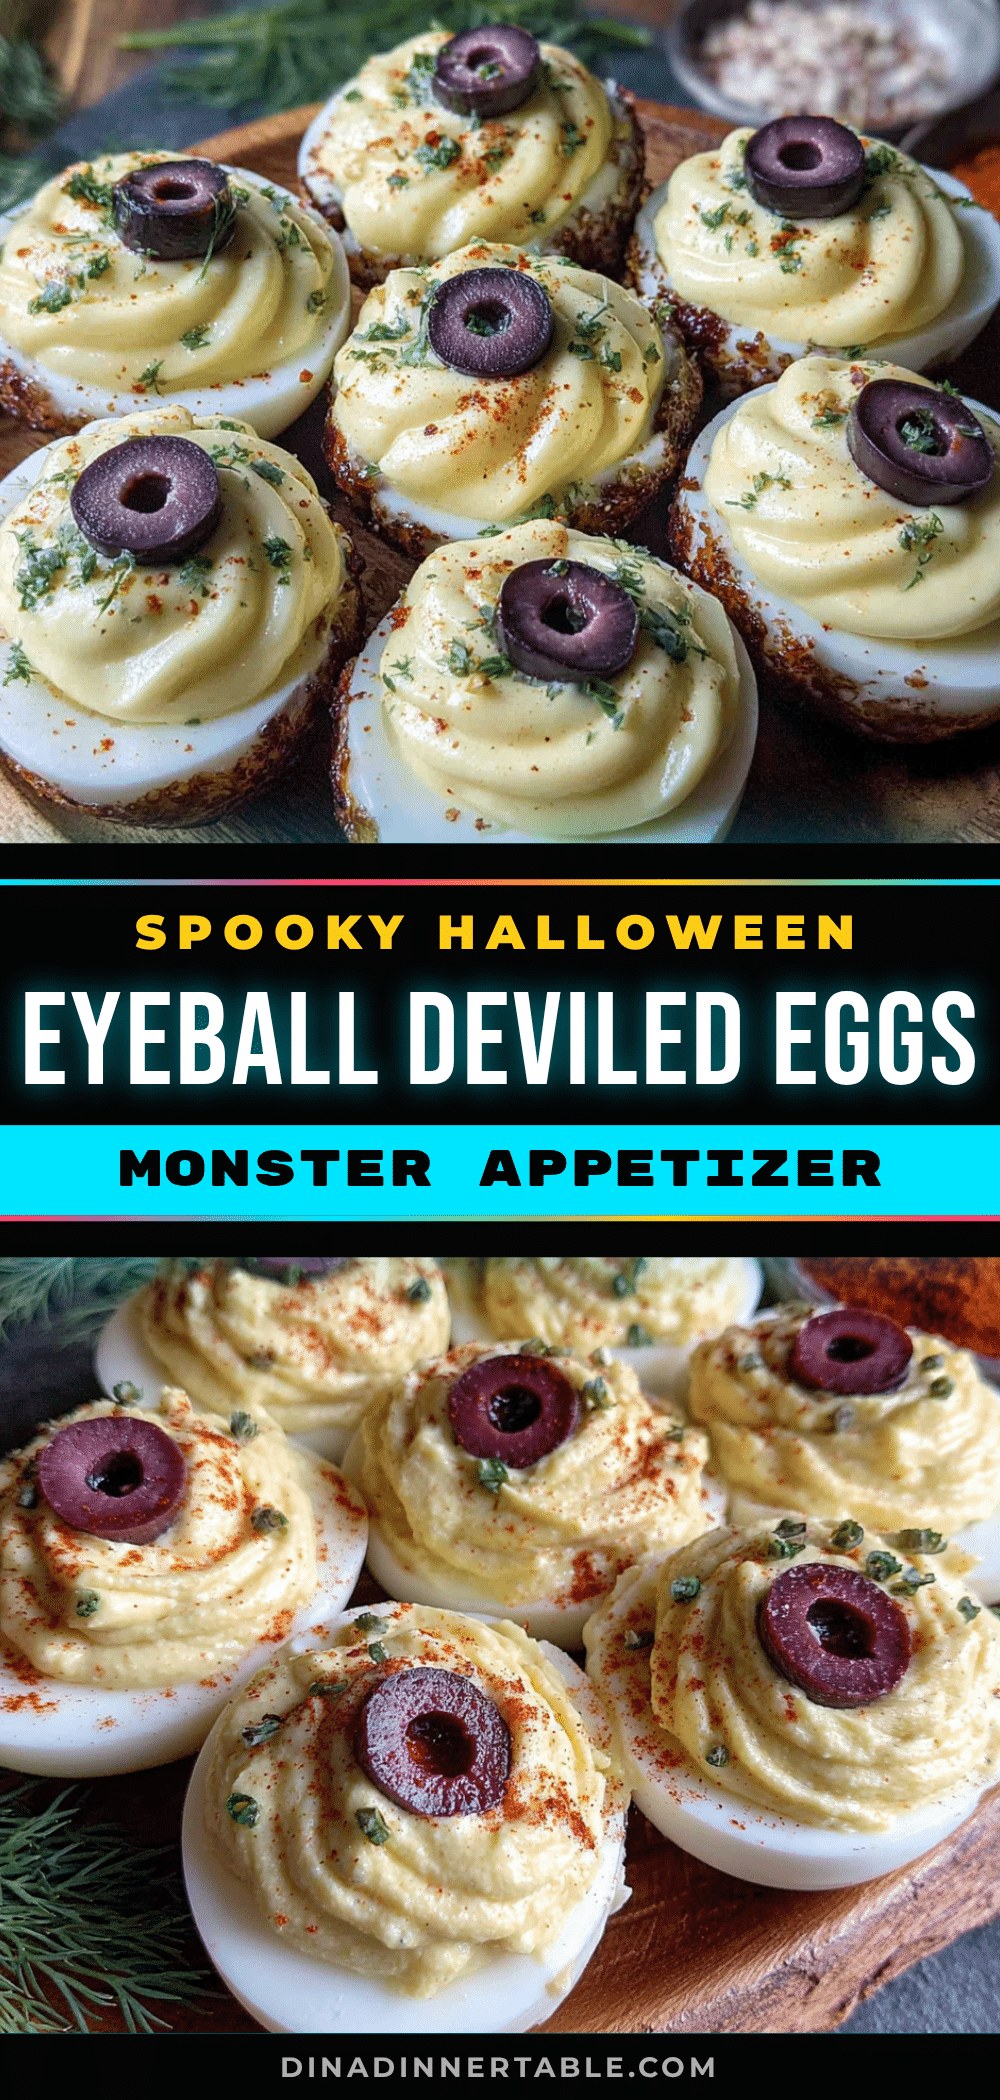
Monster Eyeball Deviled Eggs: Best Easy Halloween Appetizer
These Monster Eyeball Deviled Eggs are the ultimate Halloween appetizer—creepy, delicious, and surprisingly easy to make. With a tangy, creamy filling and realistic bloodshot olive eyeballs, they’re a crowd-pleaser that steals the show at any spooky gathering.
- Prep Time: 20 minutes
- Cook Time: 12 minutes
- Total Time: 1 hour 2 minutes (includes chilling time)
- Yield: 24 deviled eggs (12 servings of 2 eggs each) 1x
- Category: Appetizer
- Cuisine: American
Ingredients
- 12 large eggs, hard-boiled and peeled
- Ice water bath (for shocking the eggs after boiling)
- 1/3 cup mayonnaise (preferably Hellmann’s or Duke’s)
- 1 tablespoon yellow mustard
- 1 teaspoon white vinegar
- 1/4 teaspoon salt
- 1/8 teaspoon black pepper
- 1/4 teaspoon paprika (plus more for garnish, optional)
- 1 can (6 oz) large pitted black olives, drained
- 1 jar (4 oz) sliced pimentos or roasted red peppers, drained and patted dry
- Red and blue gel food coloring (e.g., Americolor brand)
- A small, clean paintbrush or a toothpick (for painting the ‘veins’)
Instructions
- Hard-Boil the Eggs: Place eggs in a single layer in a saucepan. Cover with cold water by about an inch. Bring to a full, rolling boil over high heat. Immediately cover with a lid, turn off heat, and let sit for exactly 12 minutes. Meanwhile, prepare an ice water bath. After 12 minutes, transfer eggs to the ice bath and chill for at least 15 minutes.
- Peel and Halve the Eggs: Gently tap each egg to crack the shell, then peel under cool running water. Cut each egg in half lengthwise. Pop yolks into a mixing bowl. Arrange 24 white halves on a serving platter, cut-side up.
- Make the Filling: Add mayonnaise, mustard, vinegar, salt, pepper, and paprika to the yolks. Mash and mix until smooth and creamy. Adjust seasoning to taste.
- Prepare the ‘Eyeballs’: Slice black olives into thick rounds (about 1/4-inch thick). Pat dry. Press a small piece of pimento or roasted red pepper into the center hole of each olive slice to form the ‘pupil’. Set aside.
- Create Bloodshot Veins: Mix one drop red and one drop blue gel food coloring on a small plate. Dip a clean paintbrush into the color and paint thin, wavy lines from the edge of each olive slice toward the center pupil. Let dry slightly.
- Fill the Egg Whites: Spoon filling into a piping bag fitted with a star tip (or a zip-top bag with a corner snipped). Pipe a generous swirl into each egg white half.
- Assemble the Monsters: Gently press one painted olive slice (eyeball) into the center of each piped filling swirl, bloodshot veins facing upward.
- Chill and Serve: Refrigerate the platter for at least 30 minutes before serving. Serve cold.
Notes
For easier peeling, use eggs that are a week or two old. Pat olives and pimentos very dry to prevent food coloring from bleeding. Wear disposable gloves when painting olives to avoid staining fingers. These taste even better the next day; store in an airtight container in the refrigerator for up to 2 days. Do not freeze or reheat.
Nutrition
- Serving Size: 2 deviled eggs
- Calories: 170
- Sodium: 360
- Fat: 14
- Saturated Fat: 3
- Carbohydrates: 2
- Protein: 10
Keywords: Halloween deviled eggs, monster eyeball deviled eggs, spooky appetizer, easy Halloween recipe, deviled eggs with olives, bloodshot deviled eggs, party appetizer, creepy food