This was supposed to be a proper layer cake. I had it all planned out—three tiers of red velvet with cream cheese frosting, the kind of showstopper you bring to a holiday party and watch people photograph before they even cut into it. But somewhere between the grocery store and my kitchen, my brain short-circuited. I grabbed a box of cake mix instead of the usual flour and cocoa powder. I didn’t realize it until I was standing there, butter softening on the counter, staring at this bright red box that was definitely not what I needed. And honestly? I almost cried. I was already running late, the kitchen was a mess, and I had exactly zero patience left to run back to the store.
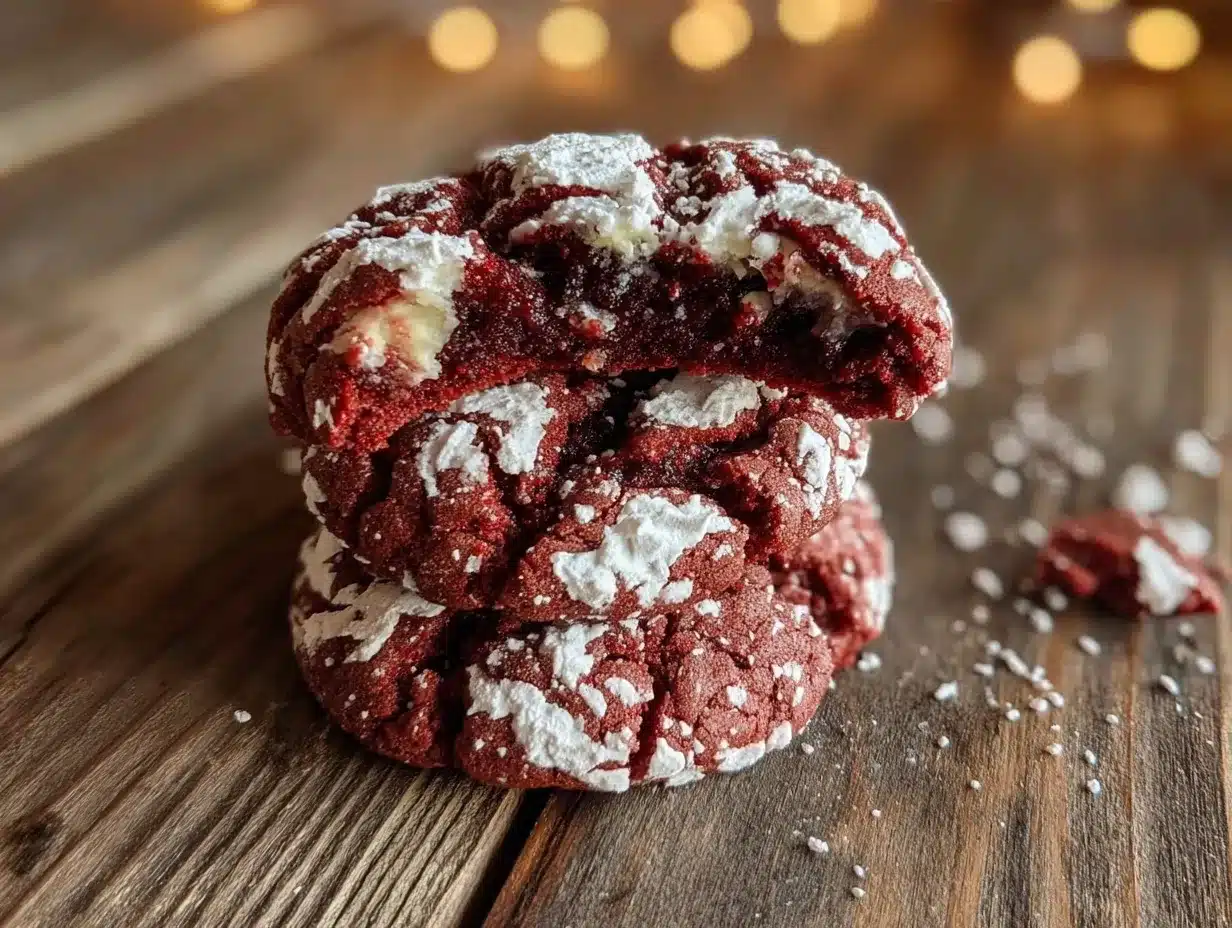
So I did what any reasonable person would do when their plans fall apart: I improvised. I dumped the cake mix into a bowl, added a few extra things I had lying around, and decided to make cookies instead. Because cookies are faster, right? Less fuss, less drama, less chance of a frosting catastrophe. I figured they’d be fine—edible, at least. What I didn’t expect was that these quick red velvet crinkle cookies would turn out better than the cake I had originally planned. I mean, the cake was going to be good, sure. But these cookies? They were something else entirely. The edges came out slightly crisp, the centers stayed soft and fudgy, and that powdered sugar coating gave them this gorgeous crackled look that made them look like I actually knew what I was doing.
Maybe you’ve been there—staring down a kitchen disaster and wondering if you should just order pizza instead. I get it. But sometimes the best recipes come from those moments when everything goes wrong. These cookies are proof of that. They’re quick, they’re easy, and they taste like you spent way more effort than you actually did. I keep making them because they remind me that it’s okay when things don’t go according to plan. Sometimes the happy accidents are the ones worth repeating.
Why You’ll Love This Recipe
Let me tell you why these cookies have become my go-to for last-minute cravings and unexpected guests. They’re not just another cookie recipe—they’re the kind of cookie that makes people ask for the recipe before they’ve even finished the first one.
- Quick & Easy : From start to finish, these cookies take about 25 minutes. No chilling, no complicated steps, no waiting around. Mix, scoop, bake, done. Perfect for those evenings when you need something sweet but don’t have the energy for a project.
- Simple Ingredients : You probably have most of this stuff in your pantry already. A box of red velvet cake mix, some eggs, oil, and powdered sugar. That’s it. No special trips to the store, no hunting down obscure ingredients.
- Perfect for Weeknights : These cookies are ideal for busy weeknights when you want a little treat without spending an hour in the kitchen. They come together so fast that you can have warm cookies in hand before the oven even finishes preheating.
- Crowd-Pleaser : I’ve brought these to potlucks, family gatherings, and office parties, and they always disappear first. Kids love the bright red color, adults love the rich chocolate flavor, and everyone loves how soft and chewy they are.
- Unbelievably Delicious : The texture is where these cookies really shine. The outside gets this delicate crackled crust from the powdered sugar, while the inside stays soft and almost fudgy. It’s like eating a red velvet cupcake in cookie form, but better because there’s no frosting to mess with.
What makes this version different from other red velvet cookie recipes? It’s the technique. By using a cake mix as the base, you get a consistently tender crumb every single time. No overmixing, no dry cookies, no guessing games. Plus, the powdered sugar coating isn’t just for looks—it adds a subtle sweetness and that signature crinkle effect that makes these cookies so visually striking. I’ve tested this recipe more times than I can count, and this is the version I keep coming back to. It’s not just good—it’s the kind of cookie that makes you close your eyes after the first bite.
What Ingredients You Will Need
This recipe uses simple ingredients that work together to create something special. Here’s what you’ll need and why each one matters.
- 1 box (15.25 oz) red velvet cake mix : This is the shortcut that makes everything so easy. I prefer Duncan Hines or Betty Crocker for the most consistent results. The cake mix already has the right balance of flour, sugar, cocoa powder, and leavening agents, so you don’t have to measure out a dozen different ingredients. Plus, it gives the cookies that signature red color without needing food coloring.
- 2 large eggs, room temperature : Eggs bind everything together and add structure. Make sure they’re at room temperature so they mix in smoothly. If you forgot to take them out of the fridge, just place them in a bowl of warm water for 5 minutes.
- 1/3 cup vegetable oil : Oil keeps the cookies moist and tender. You can use canola or any neutral-flavored oil. I’ve tried using melted butter instead, and while it adds a nice flavor, the cookies come out slightly flatter. Oil gives you that perfect puffy, soft texture.
- 1 teaspoon vanilla extract : A little vanilla rounds out the chocolate flavor and adds warmth. Pure vanilla extract is best, but imitation works fine too.
- 1/2 cup powdered sugar, for rolling : This is what creates the beautiful crinkle effect. The sugar absorbs some moisture from the dough as the cookies bake, creating those cracks and crevices. It also adds a light sweetness to the outside.
Optional additions I sometimes throw in:
- 1/4 cup white chocolate chips : Adds little pockets of creamy sweetness that contrast nicely with the rich chocolate. Toss them in with the dough before rolling.
- 1/4 cup chopped pecans or walnuts : For some crunch. Toast them first for extra flavor.
- A pinch of cinnamon : Sounds weird, but it brings out the chocolate flavor in a subtle way.
For substitutions, here’s what I’ve learned through trial and error. If you want a gluten-free version, use a gluten-free red velvet cake mix—they work just as well. For a dairy-free option, most cake mixes are already dairy-free, but double-check the label. And if you’re out of vegetable oil, melted coconut oil works, though it adds a slight coconut flavor that actually pairs nicely with the chocolate.
Equipment Needed
You don’t need much for this recipe, which is part of the beauty. Here’s what you’ll need:
- Large mixing bowl : Any medium-to-large bowl will do. I use a glass one so I can see if everything is mixed evenly.
- Whisk or wooden spoon : For mixing the dough. A whisk works great for breaking up any lumps in the cake mix.
- Measuring cups and spoons : For the oil, vanilla, and powdered sugar. Nothing fancy needed.
- Baking sheets : Two standard baking sheets work best so you can bake all the cookies at once. If you only have one, just bake in batches.
- Parchment paper or silicone baking mat : This prevents sticking and makes cleanup a breeze. I’ve forgotten parchment before and ended up scraping cookies off the pan—not fun.
- Small bowl : For the powdered sugar. A shallow bowl or plate works too.
- Cookie scoop or tablespoon : For consistent-sized cookies. A 1.5-tablespoon scoop is perfect. If you don’t have one, just use a regular spoon and try to make them roughly the same size.
- Cooling rack : Optional but helpful for letting the cookies cool evenly. A plate works in a pinch.
That’s it. No stand mixer, no hand mixer, no special gadgets. Just basic kitchen tools you probably already own.
Preparation Method
Let me walk you through this step by step. It’s simpler than you think, and I’ll include all the little details I’ve learned from making these cookies dozens of times.
- Preheat your oven to 350°F (175°C). Line two baking sheets with parchment paper or silicone mats. This is important—don’t skip the parchment. The cookies will spread slightly, and parchment makes them easy to remove without breaking.
- In a large mixing bowl, combine the cake mix, eggs, oil, and vanilla extract. Stir everything together with a whisk or wooden spoon until a soft dough forms. It will be thick and slightly sticky—that’s exactly what you want. Don’t overmix. Just stir until you don’t see any dry spots of cake mix. Overmixing can make the cookies tough.
- Let the dough rest for 5 minutes. This is a trick I learned after my first batch spread too much. Giving the dough a few minutes allows the flour in the cake mix to absorb the liquid, which helps the cookies hold their shape better. You’ll notice the dough gets slightly firmer.
- Pour the powdered sugar into a small bowl. Use about 1/2 cup to start—you might need a little more if the sugar gets clumpy. I like to sift it first to remove any lumps, but that’s totally optional.
- Scoop the dough into 1.5-tablespoon-sized balls. A cookie scoop makes this easy, but you can use a spoon. The dough should be slightly sticky but manageable. If it’s too sticky to handle, refrigerate it for 10 minutes.
- Roll each dough ball in the powdered sugar. Coat it generously, making sure every surface is covered. Don’t be shy with the sugar—the more you use, the better the crinkle effect. Gently shake off any excess, but leave a good coating on there.
- Place the coated dough balls on the prepared baking sheets, spacing them about 2 inches apart. They’ll spread a bit, so give them room. I usually fit 12 cookies per sheet.
- Bake for 10-12 minutes. The cookies should look set around the edges but still slightly soft in the center. They’ll continue to cook on the hot pan after you take them out. For softer, fudgier cookies, bake for 10 minutes. For slightly crisper edges, go for 12. I usually aim for 11 minutes—that’s my sweet spot.
- Let the cookies cool on the baking sheet for 5 minutes. This is crucial. If you try to move them right away, they’ll fall apart. The powdered sugar will also set during this time, creating that beautiful crackled look.
- Transfer to a cooling rack to cool completely. Or eat them warm—I won’t judge. Warm cookies with a glass of cold milk? That’s living.
A few things to watch for: If your cookies come out flat, the dough was probably too warm. Pop it in the fridge for 10-15 minutes next time. If they’re too cakey, you might have overmixed the dough. Just stir until combined, no more. And if the powdered sugar disappears during baking, you didn’t coat them heavily enough. Roll them like you mean it.
Cooking Tips & Techniques
After making these cookies more times than I care to admit, I’ve picked up a few tricks that make a real difference. Here’s what I wish someone had told me when I first started.
Don’t skip the rest time. I know it’s tempting to rush through, but letting the dough sit for 5 minutes before rolling is a game-changer. The first time I made these, I went straight from mixing to baking, and the cookies spread into flat, ugly puddles. The rest allows the flour to hydrate, which gives the cookies a better structure and keeps them nice and puffy.
Use a cookie scoop for consistent sizes. This isn’t just about aesthetics—evenly sized cookies bake evenly. If some are bigger than others, the small ones will burn while the big ones are still raw. A simple cookie scoop costs a few dollars and makes a huge difference. If you don’t have one, use a tablespoon measure and level it off.
Roll the dough balls twice in powdered sugar. This is my secret for the best crinkle effect. Roll once, then roll again. The first layer of sugar sticks to the dough, and the second layer creates a thicker coating that cracks beautifully as the cookies bake. Trust me on this one.
Rotate your baking sheets halfway through. Most ovens have hot spots, and rotating the pans ensures even baking. I swap the top and bottom racks and turn the pans around at the 5-minute mark. It takes two seconds and prevents those annoying burnt edges.
Watch the edges, not the center. Cookies continue to bake from the residual heat of the pan after you take them out. So when the edges look set but the center still looks slightly underdone, that’s the perfect time to pull them. If you wait until the center looks done, they’ll be overbaked and dry.
One mistake I still make sometimes? Forgetting to check the expiration date on my cake mix. Old cake mix can make the cookies taste stale or not rise properly. Always give it a quick sniff test before you start.
Variations & Adaptations
These cookies are great as-is, but they’re also a fantastic base for experimenting. Here are some variations I’ve tried and loved.
White Chocolate Chunk Version : Fold in 1/2 cup of white chocolate chips or chopped white chocolate before rolling. The creamy sweetness pairs perfectly with the red velvet flavor. I made these for a Valentine’s Day party once, and they were gone in minutes. The white chocolate adds little pockets of melty goodness that make every bite exciting.
Cream Cheese Frosting Sandwich : Bake the cookies slightly larger (use a 2-tablespoon scoop) and let them cool completely. Then spread a thin layer of cream cheese frosting on the bottom of one cookie and sandwich it with another. It’s basically a red velvet whoopie pie, and it’s incredible. Just be warned—they’re messier to eat, but totally worth it.
Gluten-Free Adaptation : Use a gluten-free red velvet cake mix. Most major brands make one now, and they work beautifully in this recipe. The texture might be slightly different—a little more delicate—but the flavor is spot-on. I’ve served these to gluten-free friends who had no idea they were eating a gluten-free cookie.
Peppermint Red Velvet Crinkles : Add 1/2 teaspoon of peppermint extract to the dough along with the vanilla. Then crush some candy canes and sprinkle them on top of the cookies right after they come out of the oven. This is my go-to Christmas cookie. The mint and chocolate combination is classic, and the crushed candy canes add a festive crunch.
Spiced Red Velvet Version : Add 1 teaspoon of cinnamon and 1/4 teaspoon of nutmeg to the dough. The warm spices complement the chocolate and give the cookies a cozy, fall-inspired flavor. I made these for Thanksgiving one year, and they were a hit alongside the pumpkin pie.
If you want to make these dairy-free, just check that your cake mix doesn’t contain milk powder (most don’t), and use a dairy-free white chocolate if you’re adding chips. For an egg-free version, I’ve used a flax egg (1 tablespoon ground flaxseed mixed with 3 tablespoons water) with decent results. The cookies come out slightly less puffy, but they’re still delicious.
Serving & Storage Suggestions
These cookies are best served slightly warm, when the centers are still soft and the edges have that slight crunch. I like to let them cool for about 5 minutes on the baking sheet, then transfer them to a plate and serve right away. A cold glass of milk is the obvious pairing, but they’re also fantastic with a hot cup of coffee or a tall glass of iced tea.
For a pretty presentation, arrange the cookies on a white platter or a wooden board. The red color pops beautifully against neutral backgrounds. I sometimes dust them with a little extra powdered sugar right before serving—it makes them look even more bakery-worthy.
These cookies also make great gifts. I’ve packed them in little cellophane bags tied with ribbon for holiday gifts, and they always get compliments. Just make sure they’re completely cool before you package them, or the sugar will get sticky and the cookies will lose their crinkle.
Storage: Keep the cookies in an airtight container at room temperature for up to 5 days. Place a piece of bread in the container to keep them soft—the cookies will absorb moisture from the bread, staying fresh longer. Just replace the bread every couple of days.
Freezing: These cookies freeze beautifully. You can freeze the baked cookies in a freezer-safe bag for up to 3 months. Thaw at room temperature for about 30 minutes before serving. Or, even better, freeze the unbaked dough balls. Roll them in powdered sugar, place them on a baking sheet, and freeze until solid. Then transfer to a freezer bag. When you’re ready to bake, just pop them on a lined baking sheet and add 2-3 minutes to the baking time. Fresh cookies on demand!
Reheating: If you want that just-baked warmth, pop a cookie in the microwave for 10-15 seconds. It softens the center and makes it taste fresh out of the oven. For a crispier texture, reheat in a 300°F oven for 3-5 minutes.
One thing I’ve noticed: these cookies actually taste better the next day. The flavors meld together, and the texture becomes even more tender. So don’t worry if you can’t finish them all in one sitting—they’ll still be amazing tomorrow.
Nutritional Information & Benefits
Let’s be real—these are cookies, not health food. But I believe in enjoying treats in moderation, and these are worth every bite. Here’s the approximate nutritional breakdown per cookie (based on 24 cookies):
| Nutrient | Amount Per Cookie |
|---|---|
| Calories | 145 |
| Total Fat | 7g |
| Saturated Fat | 1.5g |
| Cholesterol | 15mg |
| Sodium | 220mg |
| Total Carbohydrates | 20g |
| Sugars | 13g |
| Protein | 2g |
These cookies contain eggs and wheat (from the cake mix), so they’re not suitable for those with allergies to those ingredients. The cake mix may also contain soy lecithin and milk derivatives, so check the label if you have sensitivities.
On the bright side, red velvet cake mix typically contains cocoa powder, which is rich in antioxidants called flavonoids. Cocoa has been linked to improved heart health and reduced inflammation. Plus, the eggs provide a small amount of protein and essential nutrients like vitamin B12 and selenium.
I like to think of these cookies as a treat to be enjoyed mindfully. One or two with a cup of tea after a long day? That’s self-care. A whole batch in one sitting? That’s a different story. Balance is key, and these cookies fit perfectly into a balanced approach to eating.
Conclusion
These quick red velvet crinkle cookies started as a kitchen accident, but they’ve become one of my most-requested recipes. They’re proof that you don’t need fancy techniques or complicated ingredients to make something truly delicious. Sometimes the best things come from the moments when everything goes wrong and you just have to make it work.
I love these cookies because they’re forgiving. They don’t care if you’re in a rush or if your kitchen is a mess. They come together in minutes, bake up beautifully every time, and make people smile. That’s the kind of recipe worth keeping in your back pocket.
So go ahead and give them a try. Customize them however you like—add white chocolate, throw in some spices, or keep them classic. However you make them, I think you’ll love them. And when you do, come back and let me know how they turned out. I’d love to hear about your own happy accidents in the kitchen.
Happy baking, friends!
Frequently Asked Questions
Can I use a different flavor of cake mix?
Absolutely! While red velvet is the star here, you can use chocolate, vanilla, or even strawberry cake mix. Just adjust the powdered sugar color if you want a different look—use cocoa powder mixed with powdered sugar for chocolate cookies, or leave it plain white for vanilla.
Why did my cookies not crinkle?
This usually happens when the dough balls aren’t coated heavily enough in powdered sugar. Make sure you roll them generously, and let the dough rest for 5 minutes before rolling so the sugar sticks better. Also, check that your oven is at the right temperature—if it’s too cool, the cookies will spread before the sugar sets.
Can I make these cookies ahead of time?
Yes! You can make the dough up to 2 days ahead and keep it in the fridge. When you’re ready to bake, let the dough sit at room temperature for 10 minutes, then roll in powdered sugar and bake as directed. You can also freeze the baked cookies for up to 3 months.
How do I keep the cookies from spreading too much?
If your cookies are spreading into flat discs, the dough might be too warm. Try refrigerating it for 15-20 minutes before rolling. Also, make sure your baking sheets are cool before placing the dough on them—hot pans will cause the butter in the cake mix to melt too quickly.
Can I double this recipe?
Definitely! This recipe doubles easily. Just use two boxes of cake mix and double all the other ingredients. You might need to bake in batches, but the cookies will turn out just as good. I’ve made double batches for holiday parties and they always disappear fast.
Pin This Recipe!

Easy Red Velvet Crinkle Cookies: Best Quick Recipe

These quick red velvet crinkle cookies are a happy accident turned into a beloved recipe. Made with a box of cake mix, they come together in minutes with a soft, fudgy center and a beautiful crackled powdered sugar coating.
- Prep Time: 10 minutes
- Cook Time: 10-12 minutes
- Total Time: 25 minutes
- Yield: 24 cookies 1x
- Category: Dessert
- Cuisine: American
Ingredients
- 1 box (15.25 oz) red velvet cake mix (preferably Duncan Hines or Betty Crocker)
- 2 large eggs, room temperature
- 1/3 cup vegetable oil
- 1 teaspoon vanilla extract
- 1/2 cup powdered sugar, for rolling
- Optional: 1/4 cup white chocolate chips
- Optional: 1/4 cup chopped pecans or walnuts
- Optional: A pinch of cinnamon
Instructions
- Preheat your oven to 350°F (175°C). Line two baking sheets with parchment paper or silicone mats.
- In a large mixing bowl, combine the cake mix, eggs, oil, and vanilla extract. Stir with a whisk or wooden spoon until a soft, slightly sticky dough forms. Do not overmix.
- Let the dough rest for 5 minutes to allow the flour to absorb the liquid.
- Pour the powdered sugar into a small bowl. Optionally, sift to remove lumps.
- Scoop the dough into 1.5-tablespoon-sized balls using a cookie scoop or spoon.
- Roll each dough ball generously in the powdered sugar, coating every surface. For best results, roll twice.
- Place the coated dough balls on the prepared baking sheets, spacing them about 2 inches apart.
- Bake for 10-12 minutes, until the edges are set but the centers still look slightly soft. Rotate the baking sheets halfway through for even baking.
- Let the cookies cool on the baking sheet for 5 minutes to allow the crinkle effect to set.
- Transfer to a cooling rack to cool completely, or serve warm.
Notes
For best crinkle effect, roll dough balls twice in powdered sugar. Let dough rest 5 minutes before rolling to prevent spreading. Cookies taste even better the next day. Store in an airtight container at room temperature for up to 5 days. Freeze baked cookies for up to 3 months or unbaked dough balls for fresh cookies on demand.
Nutrition
- Serving Size: 1 cookie
- Calories: 145
- Sugar: 13
- Sodium: 220
- Fat: 7
- Saturated Fat: 1.5
- Carbohydrates: 20
- Protein: 2
Keywords: red velvet crinkle cookies, easy cookie recipe, cake mix cookies, quick dessert, holiday cookies, red velvet


