My neighbor across the hall, a retired pastry chef named Rosa, watched me struggle with a wobbly, gluten-free pie crust one October afternoon. She didn’t say anything at first, just leaned against her doorframe with a cup of tea, a small smile on her face. Then she disappeared back into her apartment and returned with a Pyrex dish, still warm, filled with the most incredible smelling pumpkin bars I had ever encountered. “No crust to fight with,” she said simply. “Just the good part.” That was three years ago, and I haven’t made a traditional pumpkin pie since. Rosa’s recipe wasn’t a formal lesson or a guarded family secret—it was a gift born from watching a neighbor struggle with something silly. That conversation, that shared moment of understanding, is baked right into every batch of these gluten-free pumpkin pie bars. They are the good part, without the fight.
Why You’ll Love This Recipe
Let’s be honest—hosting a fall gathering is stressful enough without wrestling with a finicky gluten-free crust. You want a dessert that looks impressive, tastes incredible, and lets you actually enjoy your own party. These bars are that dessert. I’ve tested this recipe more times than I can count, tweaking the spice blend and the baking time until it was absolutely foolproof. Here’s why this will be your new go-to for every autumn get-together:
- No Crust Stress: This is a press-in crust made from simple gluten-free cookies. No rolling, no cracking, no patching. It’s forgiving and delicious.
- Make-Ahead Magic: You can bake these bars a full day before your party. The flavors actually get better overnight, and you free up precious oven space on the day of.
- Perfect for a Crowd: A 9×13 pan yields 16 generous bars. No one is fighting over the last sliver of a pie. Everyone gets a beautiful, satisfying square.
- Naturally Gluten-Free: No weird flours or starches here. The crust uses store-bought gluten-free cookies, so it’s accessible and trustworthy for your guests with dietary needs.
- That Silky Texture: The filling is unbelievably smooth and creamy—no graininess, no cracking. It’s the kind of dessert that makes people close their eyes after the first bite.
This isn’t just another pumpkin dessert. It’s the one that gets requested year after year. It’s the dessert that makes your gluten-eating friends say, “Wait, this is gluten-free?” It’s comfort food, reimagined for a table full of people you love, without the stress.
What Ingredients You Will Need
This recipe relies on simple, wholesome ingredients to build deep, warming flavor and that signature creamy texture. Most of these are pantry staples, especially if you’re a regular fall baker. Let’s break down what you need and why each one matters.
For the Press-In Crust:
- 1 ½ cups (180g) gluten-free shortbread cookie crumbs (about 8 oz of cookies, like Simple Mills or Kinnikinnick). You can pulse them in a food processor or crush them in a bag with a rolling pin. The buttery flavor is key.
- 5 tablespoons (70g) unsalted butter, melted. Use a good quality butter here—it’s the backbone of the crust. If you’re dairy-free, a high-quality plant-based butter works perfectly.
- 2 tablespoons (25g) granulated sugar. Just a touch to help the crust hold together and add a little sweetness.
- ¼ teaspoon fine sea salt. This balances the sweetness of the cookies and the filling.
For the Pumpkin Filling:
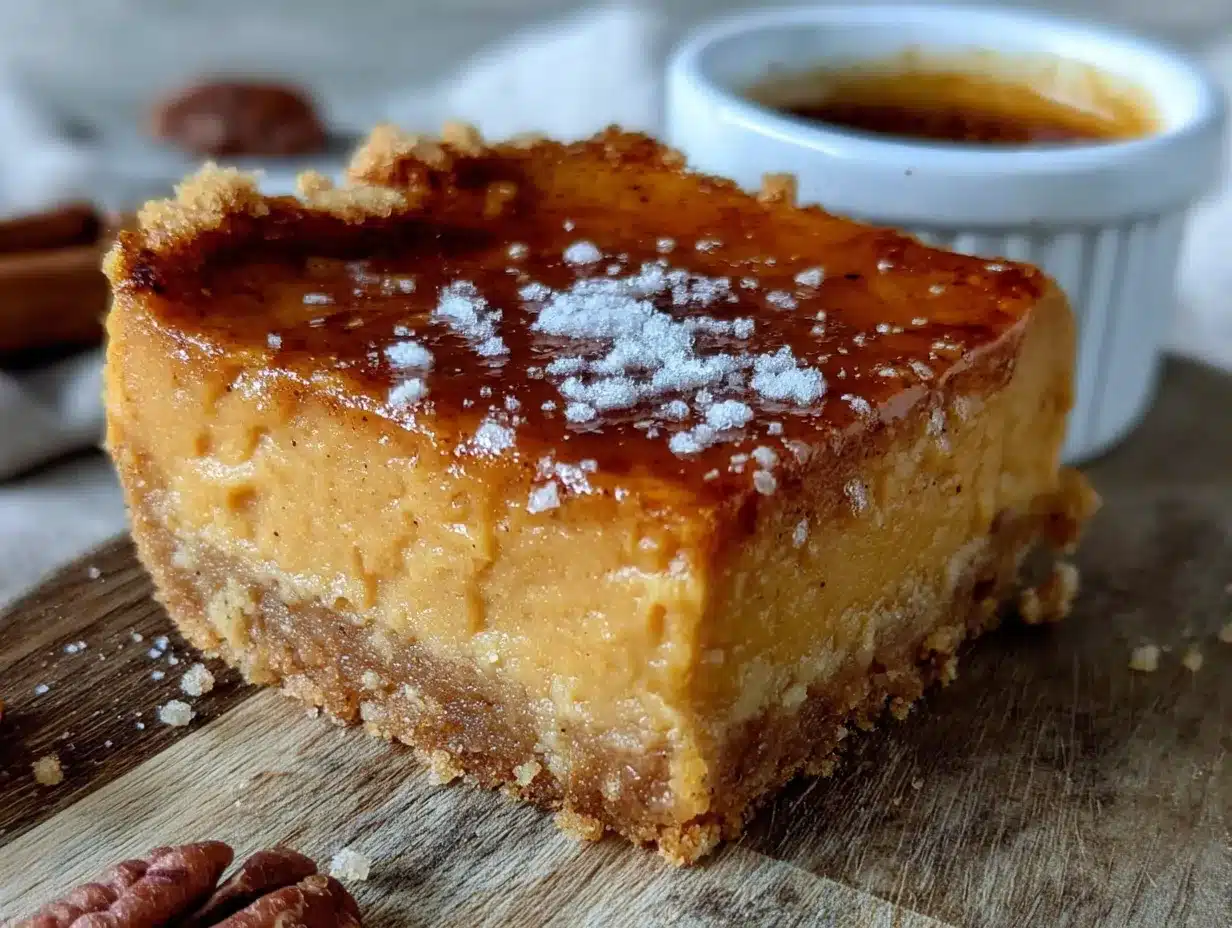
- 1 can (15 oz or 425g) pure pumpkin purée. Make sure you grab pumpkin purée, not pumpkin pie filling. I personally prefer Libby’s for its consistent texture and deep color.
- 1 can (14 oz or 396g) sweetened condensed milk. This is the secret to the silky, custard-like texture. It also adds sweetness and richness without any extra work. For a dairy-free option, use a canned coconut sweetened condensed milk.
- 2 large eggs, at room temperature. Room temperature eggs blend more smoothly into the filling, preventing lumps and ensuring a uniform bake.
- 1 teaspoon vanilla extract. It deepens the warm spice flavors.
- 1 ½ teaspoons ground cinnamon. The star of the show. Use a fresh jar for the best punch.
- ½ teaspoon ground ginger. Adds a little warmth and zing.
- ½ teaspoon ground nutmeg. Freshly grated is incredible here, but pre-ground works beautifully.
- ¼ teaspoon ground cloves. A little goes a long way, but it’s essential for that classic pumpkin pie spice profile.
- ¼ teaspoon fine sea salt. Salt makes the sweetness and spices sing.
For the Topping (Optional but Highly Recommended):
- 1 ½ cups (360ml) heavy whipping cream, cold. For the most luscious, billowy whipped cream.
- 2 tablespoons powdered sugar. Just enough to sweeten without being cloying.
- ½ teaspoon vanilla extract.
- Ground cinnamon or nutmeg, for dusting.
I always recommend using full-fat sweetened condensed milk for the best texture. The low-fat versions can sometimes make the filling a bit watery. If you’re in a pinch, you can substitute the crust with crushed gluten-free graham crackers or even gluten-free gingersnaps for a spicier base.
Equipment Needed
You don’t need a professional pastry kitchen for this one. Most of these tools are things you probably already have. Here’s what you’ll need:
- 9×13-inch baking pan. A metal pan is best for even heat distribution. Glass works too, but you may need to add 5-10 minutes to the baking time.
- Parchment paper. A lifesaver for easy bar removal. Let it hang over the long sides of the pan for “handles.”
- Food processor (or a zip-top bag and a rolling pin). For crushing the cookies into fine crumbs.
- Medium mixing bowls (one for the crust, one for the filling).
- Whisk. A sturdy whisk is all you need for the filling—no electric mixer required for this step.
- Rubber spatula. For scraping every last bit of filling into the pan.
- Cooling rack. Essential for letting the bars cool completely before slicing.
- Electric mixer (handheld or stand). Only if you’re making the whipped cream topping. You can also whip it by hand if you’re feeling ambitious!
I’ve made this recipe with a cheap $10 food processor and a fancy one, and honestly, the results are the same. Don’t overthink the tools. The most important thing is a good, sharp knife for clean slices.
Preparation Method
Let’s get baking! This is a straightforward process, but I’ll walk you through each step with the little details that make a big difference. Remember, we’re making this for a gathering, so we want it to be perfect.
- Preheat and Prep: Preheat your oven to 350°F (175°C). Line your 9×13-inch baking pan with a long sheet of parchment paper, leaving about 2 inches overhanging on the two long sides. This creates your handles for lifting the bars out later. Lightly spray the parchment with non-stick spray for extra insurance.
- Make the Crust: Place the gluten-free shortbread cookies in your food processor and pulse until you have fine, even crumbs. You should have about 1 ½ cups. If you don’t have a food processor, put the cookies in a sturdy zip-top bag and crush them with a rolling pin—it’s a great way to let out some pre-party stress! Pour the crumbs into a medium bowl. Add the melted butter, sugar, and salt. Stir with a fork until the mixture looks like wet sand and holds together when you squeeze it.
- Press the Crust: Dump the crumb mixture into your prepared pan. Use the bottom of a flat measuring cup or a glass to press it down firmly and evenly. Don’t just pat it with your fingers—you want it compact so it holds together after baking. Make sure to press it all the way into the corners. Bake the crust for 10 minutes, until it’s fragrant and just starting to turn a light golden brown at the edges. Set it on a cooling rack while you make the filling.
- Whisk the Filling: In a large bowl, whisk together the pumpkin purée and the sweetened condensed milk until completely smooth. There should be no streaks of white. Add the eggs, one at a time, whisking well after each addition. Then whisk in the vanilla, cinnamon, ginger, nutmeg, cloves, and salt. Whisk until everything is fully incorporated and the mixture is a uniform, beautiful orange color. Don’t over-whisk once the eggs are in—you don’t want to incorporate too much air, which can cause cracks.
- Pour and Bake: Pour the pumpkin filling over the warm crust. Gently tilt the pan or use a spatula to spread it into an even layer. Tap the pan on the counter a few times to release any air bubbles. Bake for 35-40 minutes. The edges should be set and the center should still have a slight jiggle—like Jell-O, not like soup. A knife inserted an inch from the center should come out mostly clean. The center will continue to set as it cools.
- Cool Completely: This is the hardest part! Place the pan on a wire rack and let it cool to room temperature, about 1 ½ to 2 hours. Then, cover the pan with plastic wrap or foil and refrigerate for at least 4 hours, or overnight. I cannot stress this enough—chilling is non-negotiable for clean, beautiful slices. The bars need time to fully set.
- Slice and Serve: Once fully chilled, use the parchment handles to lift the entire block of bars out of the pan. Place it on a cutting board. Use a long, sharp knife to slice into 16 squares. For the cleanest cuts, wipe the knife clean between each slice. Serve cold or at room temperature with a dollop of whipped cream and a dusting of cinnamon.
Cooking Tips & Techniques
I’ve made this recipe at least a dozen times, and I’ve made every mistake in the book so you don’t have to. Here are my best tips for absolute success:
- Don’t Overbake: This is the number one mistake. The center should still jiggle slightly when you pull it out of the oven. It will look underdone, but trust the process. Overbaking is what causes cracks and a dry, mealy texture. Your kitchen will smell like heaven, and that’s your cue to check it.
- Room Temperature Eggs: I know it’s tempting to use cold eggs straight from the fridge, but they don’t emulsify as well. Place your eggs in a bowl of warm water for 5 minutes before you start. Your filling will be smoother and more stable.
- The Crust Edge Trick: Sometimes the edges of the crust can get a little dark while the center bakes. If you see the edges browning too quickly, loosely tent the pan with aluminum foil for the last 10 minutes of baking.
- Chill is Your Friend: I once tried to cut these bars after only 2 hours in the fridge. It was a mess. They were delicious, but they looked like a toddler served them. Give them the full 4 hours, or even better, overnight. The filling sets into a perfect, sliceable custard.
- Multitasking Strategy: While the crust is baking, clean up your food processor and get your filling ingredients measured out. While the bars are cooling, you can make your whipped cream. This keeps your kitchen from looking like a disaster zone when your guests arrive.
Honestly, the biggest lesson I learned was to stop fussing. This is a forgiving recipe. If you get a tiny crack, the whipped cream covers it. If the crust crumbles a little at the edge, no one will notice. We’re here to enjoy the party, not to stress over a perfect slice.
Variations & Adaptations
One of the best things about this recipe is how flexible it is. You can truly make it your own, depending on your guests or your mood.
- Spice It Up: For a more complex flavor, add ¼ teaspoon of cardamom or allspice to the filling. I did this once on a whim, and it was a huge hit. It gives the bars a slightly more sophisticated, chai-like profile.
- Dairy-Free Version: This is easier than you think. Use a high-quality plant-based butter (like Miyoko’s) for the crust. Swap the sweetened condensed milk for a canned coconut milk version (Nature’s Charm makes a great one). For the topping, use a chilled can of full-fat coconut cream, whipped with a little powdered sugar.
- Pecan Praline Topping: Before serving, drizzle the bars with a simple pecan praline sauce. Melt ¼ cup of butter with ½ cup of brown sugar and ¼ cup of heavy cream. Stir in ½ cup of chopped pecans and pour over the sliced bars. It’s over-the-top in the best way.
- Chocolate Twist: For the crust, try using gluten-free chocolate wafer cookies instead of shortbread. The chocolate and pumpkin spice combo is surprisingly wonderful. It’s like a pumpkin pie and a brownie had a beautiful baby.
- Mini Bars for a Buffet: If you’re serving a big crowd, cut the bars into 32 smaller squares. They’re perfect for a dessert buffet where people want to try a little bit of everything. Just reduce the baking time by about 5 minutes.
I personally love the pecan praline variation for a really festive fall gathering. It feels extra special, and the crunch is a lovely contrast to the creamy filling.
Serving & Storage Suggestions
These bars are incredibly versatile when it comes to serving. Here’s how to make them shine at your gathering.
Serving: Serve the bars cold, straight from the fridge, or let them sit at room temperature for about 20 minutes for a softer texture. I prefer them cold because the slices are cleaner. Place them on a beautiful platter or a wooden board. A generous dollop of lightly sweetened whipped cream is mandatory in my book. Dust the whole platter with a fine sprinkle of cinnamon or nutmeg for a gorgeous presentation. For a really elegant touch, add a few candied pecans or a small rosemary sprig next to each bar.
What to Serve Alongside: These bars are rich and satisfying on their own, but they pair beautifully with a cup of hot apple cider, a spiced chai latte, or a strong cup of coffee. If you’re serving a full dessert table, they go wonderfully with a simple apple crisp or a plate of crispy garlic chicken (okay, maybe not for dessert, but you get the idea of pairing textures!). For a fall brunch, serve them alongside a savory egg bake.
Storage: Store any leftover bars in an airtight container in the refrigerator. They will stay fresh for up to 5 days, though I doubt they’ll last that long. The flavors actually meld and deepen over the first 24 hours, so they might taste even better on day two.
Freezing: These bars freeze like a dream. Once they are fully chilled and set, slice them into individual bars. Place them on a baking sheet in a single layer and freeze for 1 hour, until solid. Then transfer the frozen bars to a freezer-safe bag or container, separating layers with parchment paper. They will keep for up to 3 months. To serve, thaw them in the refrigerator overnight. The texture remains perfect.
Reheating: I don’t recommend reheating these bars. They are meant to be served cold or at room temperature. The custard texture is best when it hasn’t been re-warmed. If you absolutely must, you can microwave a single bar for 10 seconds, but the texture will be softer and less defined.
Nutritional Information & Benefits
Let’s be real—this is a dessert, and it’s meant to be enjoyed. But there are some lovely nutritional benefits hidden in that creamy pumpkin filling.
One serving (1 bar, without whipped cream) contains approximately:
- Calories: 285
- Fat: 14g
- Carbohydrates: 36g
- Fiber: 2g
- Sugar: 24g
- Protein: 5g
Health Highlights: Pumpkin is a powerhouse of vitamin A, which is fantastic for eye health and your immune system. It’s also packed with fiber, which helps with digestion and keeps you feeling full (so you don’t eat six bars!). The eggs and milk in the filling provide a good dose of protein and calcium. The warm spices—cinnamon, ginger, and cloves—are all known for their anti-inflammatory properties.
Dietary Considerations: This recipe is naturally gluten-free (when using certified gluten-free cookies) and can easily be made dairy-free and refined sugar-free with the substitutions mentioned above. It contains eggs and dairy (in the standard version), so please keep that in mind for your guests with allergies.
I always tell my friends that this is a dessert that makes you feel good—not just because it’s delicious, but because you know exactly what’s in it. It’s a real food treat, not a science experiment.
Conclusion
This recipe is more than just a dessert. It’s a little bit of that moment Rosa shared with me—a reminder that the best things in life are often the simplest, and that sharing food is one of the most genuine ways to connect with people. These gluten-free pumpkin pie bars are forgiving, they’re beautiful, and they taste like autumn in the best possible way. They let you focus on your guests, not on a fussy crust.
I really hope you give these a try for your next fall gathering. Don’t be afraid to play with the spices or add your own twist. That’s what cooking is all about. When you make them, I’d love to hear how it went. Leave a comment below and tell me about your party, or tag me in your photos on social media. Your success story might just inspire someone else to get in the kitchen.
Now go on, get baking. Your guests are going to be so impressed—and you get to enjoy the party, too. Happy fall, friends!
Frequently Asked Questions
Can I use a different type of cookie for the crust?
Absolutely! Gluten-free graham crackers, gingersnaps, or even vanilla wafers all work beautifully. The flavor of the crust will change, so choose a cookie you love. Gingersnaps will give you a spicier base, while vanilla wafers will be a little sweeter.
Why did my filling crack?
Cracks usually happen from overbaking. The center should still have a slight jiggle when you pull the pan out of the oven. Over-whisking the filling can also introduce too much air, which can lead to cracks. Don’t worry—a little whipped cream covers any imperfections!
Can I make this recipe in a different size pan?
Yes, but you’ll need to adjust the baking time. For an 8×8 pan, the bars will be much thicker and will need about 50-60 minutes of baking time. For a 9-inch pie plate, the baking time is similar to the original recipe, about 35-40 minutes. Keep an eye on the edges and the jiggle test.
How far in advance can I make these bars?
You can make them up to 2 days in advance. In fact, they taste even better on day two! Just keep them tightly covered in the refrigerator. If you’re making them for a party, I recommend baking them the day before so you have one less thing to worry about.
Can I use fresh pumpkin instead of canned?
You can, but the texture might be a little different. Canned pumpkin is very consistent in its moisture content. If you use fresh pumpkin purée, you may need to cook it down on the stove for a bit to remove excess water, or the filling could be too loose. I stick with canned for reliability, especially when I’m hosting.
Pin This Recipe!
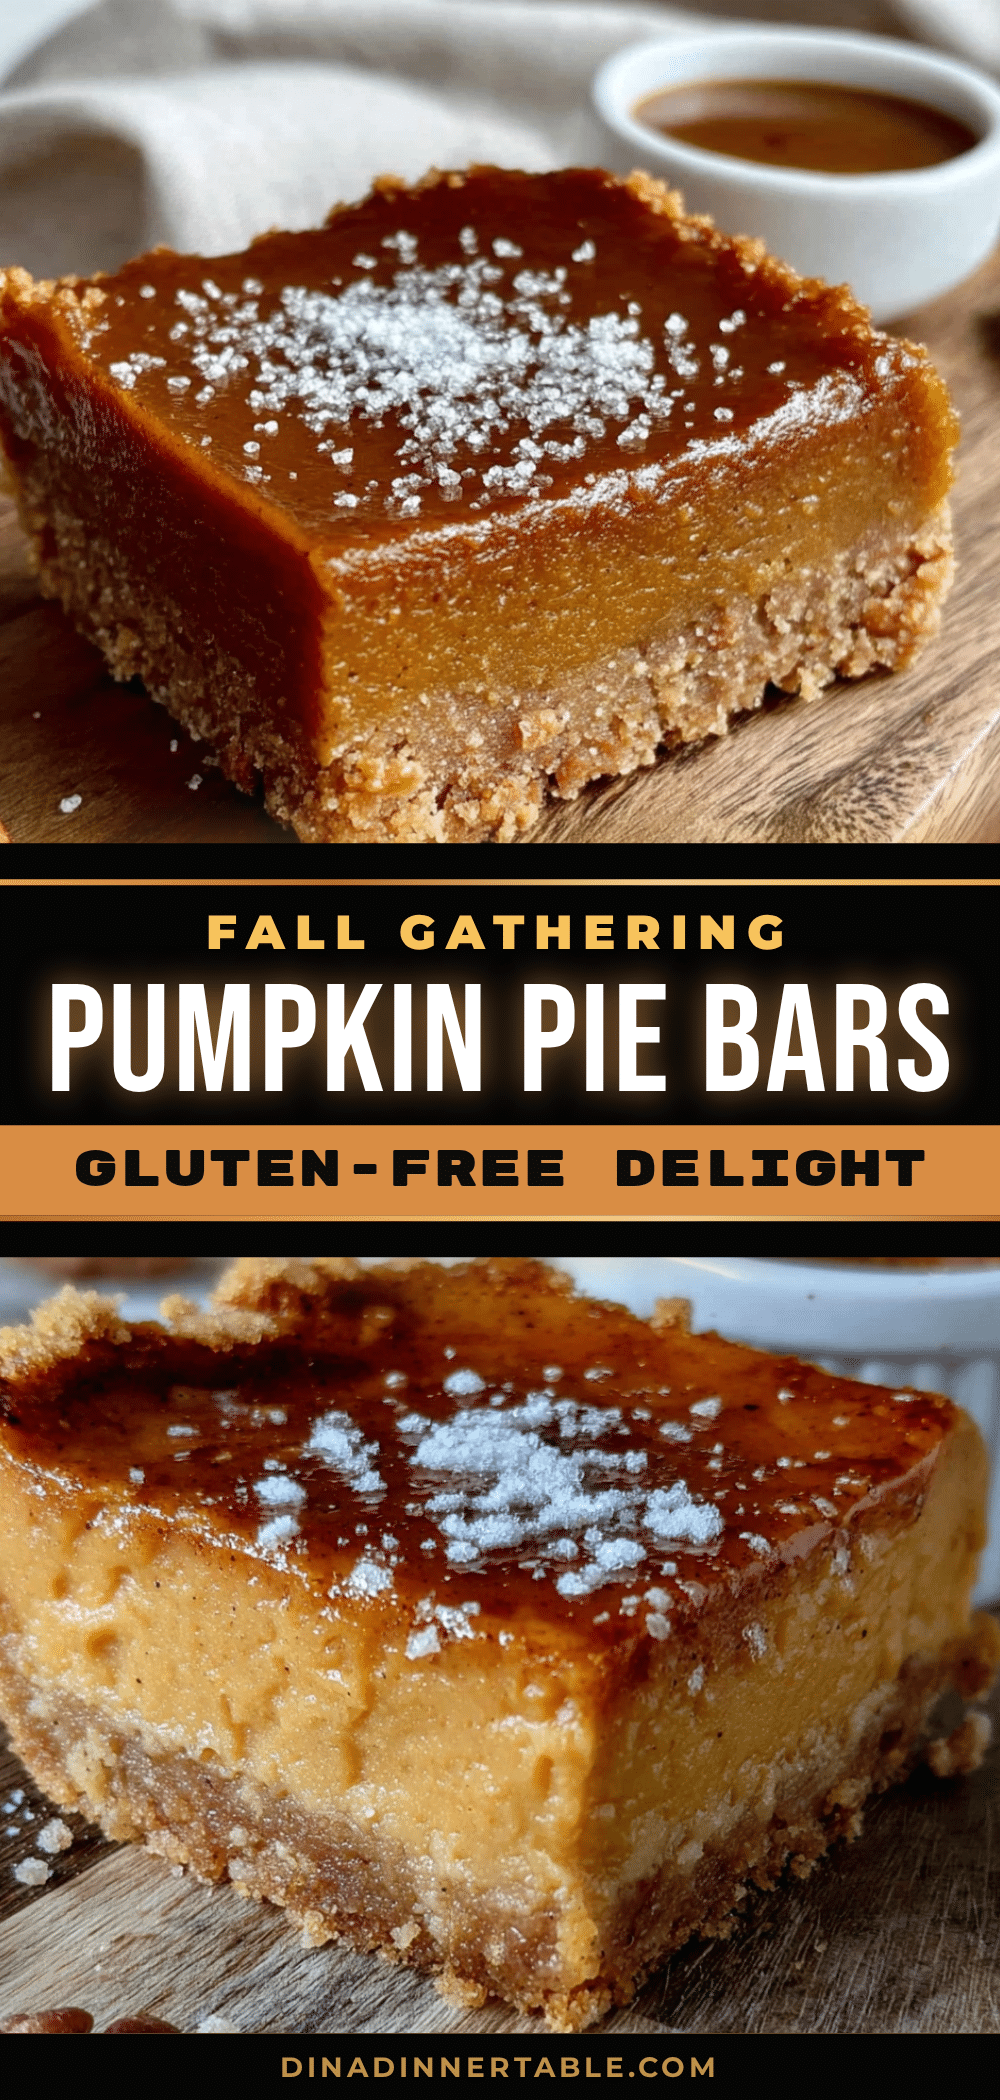
The Best Gluten-Free Pumpkin Pie Bars for Fall
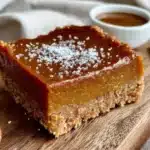
These gluten-free pumpkin pie bars feature a press-in shortbread crust and a silky, spiced pumpkin filling. They’re the perfect make-ahead dessert for fall gatherings, offering all the flavor of pumpkin pie without the stress of a finicky crust.
- Prep Time: 20 minutes
- Cook Time: 40 minutes
- Total Time: 5 hours (includes cooling and chilling time)
- Yield: 16 bars 1x
- Category: Dessert
- Cuisine: American
Ingredients
- 1 ½ cups (180g) gluten-free shortbread cookie crumbs (about 8 oz of cookies, like Simple Mills or Kinnikinnick)
- 5 tablespoons (70g) unsalted butter, melted
- 2 tablespoons (25g) granulated sugar
- ¼ teaspoon fine sea salt
- 1 can (15 oz or 425g) pure pumpkin purée
- 1 can (14 oz or 396g) sweetened condensed milk
- 2 large eggs, at room temperature
- 1 teaspoon vanilla extract
- 1 ½ teaspoons ground cinnamon
- ½ teaspoon ground ginger
- ½ teaspoon ground nutmeg
- ¼ teaspoon ground cloves
- ¼ teaspoon fine sea salt
- 1 ½ cups (360ml) heavy whipping cream, cold (for topping)
- 2 tablespoons powdered sugar (for topping)
- ½ teaspoon vanilla extract (for topping)
- Ground cinnamon or nutmeg, for dusting (for topping)
Instructions
- Preheat your oven to 350°F (175°C). Line a 9×13-inch baking pan with parchment paper, leaving about 2 inches overhanging on the two long sides. Lightly spray the parchment with non-stick spray.
- Make the crust: Place the gluten-free shortbread cookies in a food processor and pulse until you have fine, even crumbs (about 1 ½ cups). Pour the crumbs into a medium bowl. Add the melted butter, sugar, and salt. Stir with a fork until the mixture looks like wet sand and holds together when squeezed.
- Press the crust: Dump the crumb mixture into the prepared pan. Use the bottom of a flat measuring cup or a glass to press it down firmly and evenly, making sure to press it into the corners. Bake the crust for 10 minutes, until fragrant and just starting to turn light golden brown at the edges. Set on a cooling rack.
- Whisk the filling: In a large bowl, whisk together the pumpkin purée and sweetened condensed milk until completely smooth. Add the eggs, one at a time, whisking well after each addition. Then whisk in the vanilla, cinnamon, ginger, nutmeg, cloves, and salt until fully incorporated and the mixture is a uniform orange color. Do not over-whisk.
- Pour and bake: Pour the pumpkin filling over the warm crust. Gently tilt the pan or use a spatula to spread it into an even layer. Tap the pan on the counter a few times to release air bubbles. Bake for 35-40 minutes. The edges should be set and the center should still have a slight jiggle. A knife inserted an inch from the center should come out mostly clean.
- Cool completely: Place the pan on a wire rack and let it cool to room temperature, about 1 ½ to 2 hours. Then, cover the pan with plastic wrap or foil and refrigerate for at least 4 hours, or overnight.
- Slice and serve: Once fully chilled, use the parchment handles to lift the entire block of bars out of the pan. Place on a cutting board. Use a long, sharp knife to slice into 16 squares, wiping the knife clean between each slice. Serve cold or at room temperature with a dollop of whipped cream and a dusting of cinnamon.
Notes
Don’t overbake—the center should still jiggle slightly when you pull it out of the oven. Chilling for at least 4 hours (or overnight) is essential for clean slices. For a dairy-free version, use plant-based butter and coconut sweetened condensed milk. The bars can be made up to 2 days in advance and freeze well for up to 3 months.
Nutrition
- Serving Size: 1 bar (without whipp
- Calories: 285
- Sugar: 24
- Sodium: 210
- Fat: 14
- Saturated Fat: 8
- Carbohydrates: 36
- Fiber: 2
- Protein: 5
Keywords: gluten-free pumpkin bars, pumpkin pie bars, gluten-free dessert, fall dessert, pumpkin dessert, easy pumpkin bars, gluten-free pumpkin pie