I was standing in the baking aisle of a grocery store last October, staring at a display of orange sprinkles and candy eyeballs, when this dusty, almost smoky smell drifted over from the bulk bin section. It hit me so hard I had to grab the cart handle—and suddenly I was seven years old at my Aunt Lena’s tiny kitchen table on a rainy Tuesday afternoon. She was pulling a sheet of black-as-night cupcakes out of her ancient oven, and the whole room smelled like dark chocolate and dirt and magic all mixed together. I can still see the flour on her cheek and the way her hands moved when she swirled that white frosting into perfect webs. She passed away a few years ago, and I never got her exact recipe. So I’ve spent the last five autumns trying to recreate that exact feeling, not just the taste. These Perfect Black Cocoa Spiderweb Cupcakes for Halloween Parties are the closest I’ve come—and honestly, they might even be a little better.
The thing about black cocoa is that it’s not just regular cocoa powder. It’s this deeply alkalized, almost Oreo-cookie flavored powder that turns your batter the color of a moonless night. The first time I tried it, I forgot to sift it first and ended up with these weird black lumps in my batter. Let me tell you, nothing makes you feel more like a mad scientist than fishing cocoa clumps out of cupcake batter with a fork. But I learned. And now these cupcakes are the ones I bring to every Halloween party, every spooky movie night, every gathering where I want people to stop mid-conversation and say, “Wait, what is this?”
Maybe you’ve been there—standing in your kitchen, trying to make something that feels special for a party, but everything looks like it came from a box. These spiderweb cupcakes look like you spent hours in a professional bakery, but I’m going to show you exactly how to pull it off. You know that feeling when you bring a dish to a party and people crowd around asking for the recipe? That’s what we’re going for here. And the best part? The black cocoa makes them taste like the best chocolate cupcake you’ve ever had, with this mysterious, almost nostalgic flavor that nobody can quite place. That’s the memory I was chasing. And now it’s yours too.
Why You’ll Love This Recipe
Let me be real with you for a second. I’ve tested this recipe at least a dozen times across three different ovens, two different brands of black cocoa, and one particularly disastrous batch where I confused salt with sugar. (Don’t ask. We don’t talk about that batch.) What I’m saying is, this recipe has been through the wringer so you don’t have to. Here’s why you’re going to fall head over heels for these Perfect Black Cocoa Spiderweb Cupcakes for Halloween Parties:
- Bold, Unique Flavor : Black cocoa powder gives these cupcakes that signature Oreo-cookie taste with a mysterious depth you just can’t get from regular cocoa. People will be asking what your secret is.
- Stunning Visual Impact : The contrast between the jet-black cupcake and the white spiderweb frosting is pure Halloween magic. These are the cupcakes that win costume contests without even trying.
- Surprisingly Simple Technique : That spiderweb design looks like it requires a pastry degree, but I promise you can nail it with a toothpick and some patience. I’ll show you exactly how.
- Perfect for Parties : These cupcakes travel beautifully, hold up for days, and are designed to feed a crowd. Make a double batch and watch them disappear.
- Customizable for Any Spooky Occasion : Halloween party, Dia de los Muertos celebration, horror movie marathon—these cupcakes fit right in with minimal adjustments.
- Kid-Friendly to Make : The decorating part is actually really fun for little hands. My neighbor’s daughter helped me pipe webs last weekend, and she was so proud of the results she took photos for her school show-and-tell.
What makes these different from every other black cupcake recipe floating around the internet? It’s the balance. I’ve tested ratios of black cocoa to regular cocoa until I found the sweet spot where the black color is intense but the flavor isn’t bitter. So many black cocoa recipes taste like ash or leave a weird dry feeling in your mouth. Not these. These are moist, tender, and deeply chocolatey with that signature dark cocoa tang that makes you go back for another bite. Plus, I’ve included a buttermilk hack that keeps them soft for days—because nobody wants a dry cupcake at their Halloween party.
This recipe isn’t just good—it’s the kind that makes you close your eyes after the first bite. I’ve seen it happen at three separate parties now. People take a bite, their eyes go wide, and they just stop talking for a second. That’s the power of black cocoa done right. It’s comfort food reimagined for the spooky season—darker, more mysterious, but with the same soul-soothing satisfaction as your favorite chocolate cake. Perfect for impressing guests without stress, or turning a simple Halloween gathering into something people talk about all year.
What Ingredients You Will Need
This recipe uses simple, mostly pantry-stable ingredients to deliver that dramatic black color and rich flavor without any weird additives or hard-to-find items. The star of the show is the black cocoa powder, which you can find at most well-stocked grocery stores or online. Here’s everything you’ll need:
For the Cupcakes
- 1 ½ cups all-purpose flour (measured correctly—spoon and level, don’t scoop!)
- ½ cup black cocoa powder (I prefer the brand from King Arthur Baking for the deepest color, but any brand works)
- ¼ cup Dutch-process cocoa powder (this helps balance the flavor and adds richness)
- 1 teaspoon baking soda (make sure it’s fresh—test it by dropping a pinch in vinegar; it should fizz)
- ½ teaspoon baking powder
- ½ teaspoon salt (I use fine sea salt, but table salt works too)
- 1 cup granulated sugar
- ½ cup packed light brown sugar (adds moisture and a hint of molasses depth)
- 2 large eggs, at room temperature (room temp is crucial for proper emulsification)
- ½ cup vegetable oil (or any neutral oil like canola or grapeseed)
- 1 cup buttermilk, at room temperature (here’s my hack: if you don’t have buttermilk, add 1 tablespoon of lemon juice or white vinegar to a cup of whole milk and let it sit for 5 minutes)
- 2 teaspoons vanilla extract (use real vanilla, not imitation—it makes a difference with the black cocoa)
- ½ cup hot coffee (this doesn’t make them taste like coffee—it deepens the chocolate flavor. Trust me on this one)
For the Spiderweb Frosting
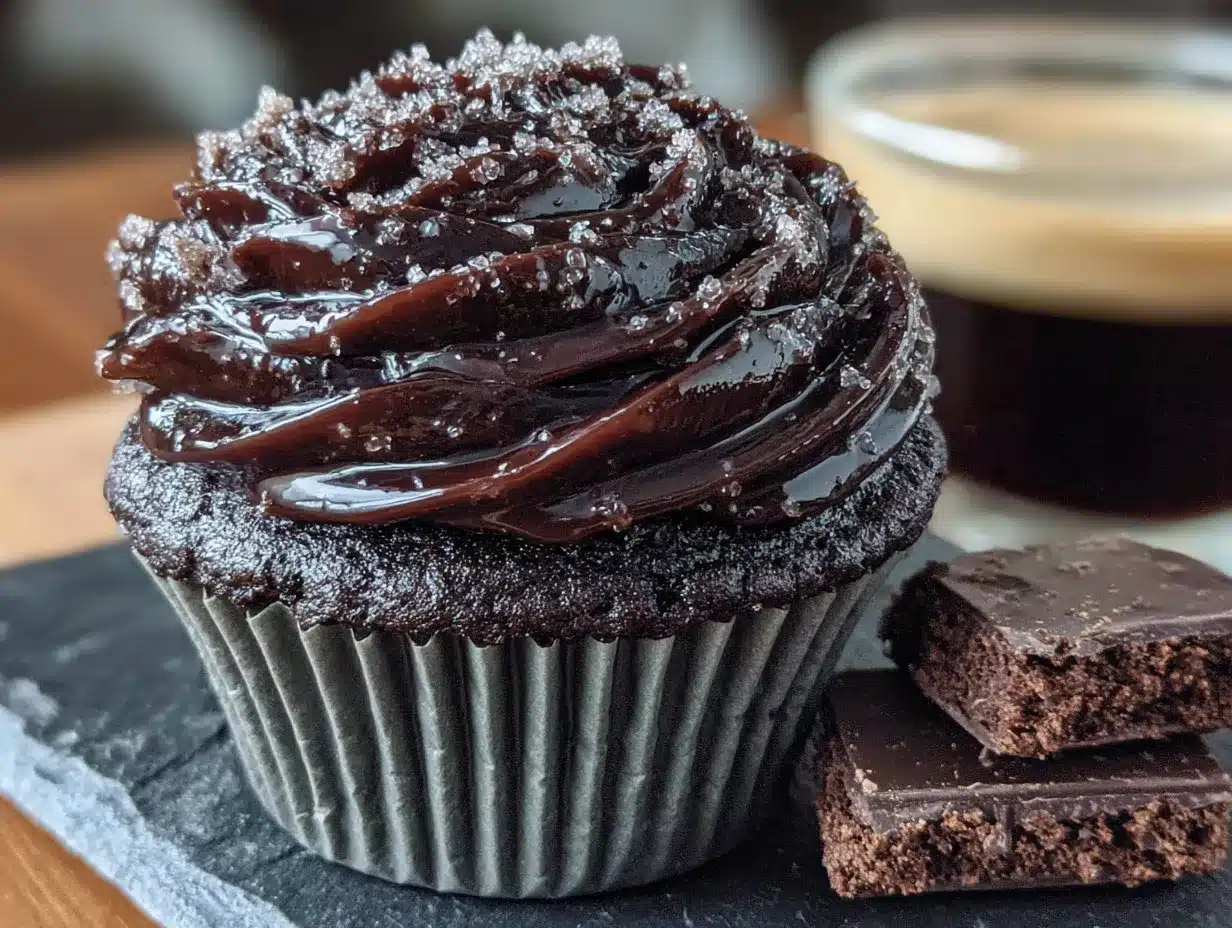
- 1 cup unsalted butter, softened to room temperature (I recommend using a good-quality butter like Kerrygold for the best flavor)
- 3 ½ cups powdered sugar, sifted (sifting prevents lumps and gives you that silky smooth frosting)
- 2 teaspoons vanilla extract
- 2-3 tablespoons heavy cream (or whole milk if that’s what you have)
- Pinch of salt (to balance the sweetness)
- Black decorating gel OR melted dark chocolate for the spider details (optional but fun!)
Ingredient Selection Tips
When it comes to black cocoa powder, I’ve tested several brands and here’s what I’ve found: The King Arthur brand gives the most dramatic black color with the smoothest flavor. Hershey’s makes a version that’s a little more bitter but still works great if you can’t find the specialty stuff. If you’re ordering online, look for “black cocoa powder” specifically—regular dark cocoa powder won’t give you that same jet-black color. And whatever you do, don’t substitute regular cocoa powder for the black cocoa. You’ll end up with brown cupcakes, and that’s just not the vibe we’re going for here.
For the buttermilk, I’ve used both store-bought and homemade versions, and honestly, they both work great. The homemade version with lemon juice actually gives a slightly tangier flavor that I personally love with the black cocoa. Just make sure whatever you use is at room temperature before you start mixing—cold buttermilk can make your butter seize up and give you a lumpy batter.
Equipment Needed
You don’t need a professional bakery setup to make these Perfect Black Cocoa Spiderweb Cupcakes for Halloween Parties, but having the right tools makes everything smoother. Here’s what I use:
- Standard 12-cup muffin tin (I prefer the non-stick kind, but any metal pan works with paper liners)
- Paper cupcake liners (black or orange ones look amazing, but white shows off the spiderweb design best—your call)
- Large mixing bowls (at least two—one for dry ingredients, one for wet)
- Whisk (for combining dry ingredients)
- Hand mixer or stand mixer (you can do this by hand if you have strong arms, but a mixer makes the frosting much easier)
- Rubber spatula (for scraping down the bowl and folding ingredients)
- Cooling rack (absolutely essential—don’t skip this or your cupcakes will get soggy bottoms)
- Piping bag with a round tip (or a zip-top bag with the corner snipped off for the spiderweb design)
- Toothpick (this is your secret weapon for creating the web pattern)
- Small offset spatula (for smoothing frosting if you want a cleaner look)
If you don’t have a piping bag, don’t worry. I’ve made these with a zip-top bag and a pair of scissors more times than I can count. Just fill the bag, snip a tiny corner, and you’re good to go. The first time I tried this, I cut the hole too big and ended up with these giant blobs of frosting. Learn from my mistake—start with a tiny hole and make it bigger if you need to. You can always cut more, but you can’t uncut a too-big hole.
For the muffin tin, I’ve used both non-stick and regular metal pans, and honestly, as long as you use paper liners, it doesn’t matter much. If you’re worried about sticking, give the inside of the liners a quick spray with non-stick cooking spray. I learned that trick after a particularly disastrous batch where the cupcakes stuck to the liners and I had to peel them off in sad little pieces.
Preparation Method
Alright, let’s get into the actual making of these gorgeous black cocoa spiderweb cupcakes. I’m going to walk you through every step with all the little details I wish someone had told me the first time I tried this. Take your time, read through each step before you start, and you’ll be fine.
Step 1: Preheat and Prep
Preheat your oven to 350°F (175°C). Line your muffin tin with 12 paper liners. I like to use black or orange liners for Halloween, but white ones really make the spiderweb design pop. Your call. While the oven is heating, take your eggs and buttermilk out of the fridge so they can come to room temperature. This step matters more than you think—room temperature ingredients emulsify better and give you a more tender crumb.
Step 2: Mix the Dry Ingredients
In a large bowl, whisk together the all-purpose flour, black cocoa powder, Dutch-process cocoa powder, baking soda, baking powder, and salt. I cannot stress this enough: sift your cocoa powders first if they look clumpy. Black cocoa is notorious for forming little hard lumps that don’t break up easily. I learned this the hard way when I bit into a finished cupcake and got a mouthful of bitter black powder. Not fun. Whisk everything together until it’s uniform in color—it should look like dark, dark gray sand.
Step 3: Combine the Wet Ingredients
In a separate large bowl, whisk together the granulated sugar, brown sugar, eggs, vegetable oil, buttermilk, and vanilla extract. Whisk until everything is smooth and well combined, about 1 minute. The mixture should look like a pale brown liquid with a slightly thick consistency. Don’t overmix here—you just want everything incorporated.
Step 4: Combine Wet and Dry
Pour the dry ingredients into the wet ingredients and fold together with a rubber spatula until just combined. You’ll see some streaks of flour—that’s fine. Now pour in the hot coffee and gently fold it in. The batter will be very thin and liquidy, which is exactly what you want. Don’t panic if it looks more like chocolate soup than cake batter. That coffee is going to react with the baking soda and give you the most tender, moist cupcakes you’ve ever had. Scrape the bottom of the bowl to make sure there are no hidden pockets of dry ingredients.
Step 5: Fill the Liners
Divide the batter evenly among the 12 liners. I use a ¼-cup measuring cup or a cookie scoop for this. Fill each liner about ⅔ to ¾ full—any more and they’ll overflow, any less and you’ll get flat tops. The batter is thin, so it will spread out on its own. If you want perfectly even cupcakes, you can use a kitchen scale to weigh each portion (about 65-70 grams per cupcake is perfect).
Step 6: Bake
Bake at 350°F (175°C) for 18-22 minutes. Start checking at 18 minutes by inserting a toothpick into the center of a cupcake. If it comes out with a few moist crumbs (not wet batter), they’re done. The tops should look slightly domed and feel springy when you gently press them. Don’t overbake—black cocoa cupcakes can dry out quickly because of the alkalized cocoa. When they’re done, transfer the pan to a cooling rack and let the cupcakes cool in the pan for 5 minutes, then carefully remove them and let them cool completely on the rack. This is important—if you try to frost them while they’re still warm, your frosting will turn into a melty mess.
Step 7: Make the Frosting
While the cupcakes are cooling, make the frosting. In a large bowl (or the bowl of a stand mixer fitted with the paddle attachment), beat the softened butter on medium speed until it’s smooth and creamy, about 2 minutes. Add the sifted powdered sugar one cup at a time, beating on low speed after each addition until incorporated. This keeps the powdered sugar from flying everywhere. Add the vanilla extract, a pinch of salt, and 2 tablespoons of heavy cream. Beat on medium-high speed for 3-4 minutes until the frosting is light, fluffy, and spreadable. If it’s too thick, add the remaining tablespoon of cream. If it’s too thin, add a little more powdered sugar. The frosting should hold its shape when you lift the beater.
Step 8: Frost the Cupcakes
Once the cupcakes are completely cool, it’s time to frost. You can either spread the frosting with an offset spatula for a rustic look, or pipe it on for a more polished appearance. For the spiderweb design, I recommend piping a generous swirl of frosting on each cupcake. Don’t worry about making it perfect—the web pattern will cover any imperfections. Make sure the frosting layer is thick enough that the black cupcake doesn’t show through.
Step 9: Create the Spiderweb Design
This is where the magic happens. Take about ¼ cup of the white frosting and place it in a small piping bag or zip-top bag with a tiny hole snipped in the corner. Pipe 3-4 concentric circles on top of each frosted cupcake, starting from the center and working outward. Then, take a toothpick and gently drag it from the center of the cupcake outward through all the circles. Do this 6-8 times around the cupcake, spacing the lines evenly. You’ll see the web pattern emerge instantly. For a spookier look, you can add a small plastic spider on top of each cupcake, or pipe a tiny spider using black decorating gel.
Cooking Tips & Techniques
Over the years, I’ve made every mistake you can imagine with these Perfect Black Cocoa Spiderweb Cupcakes for Halloween Parties. Let me save you from my own failures. Here are the tips that make the difference between good cupcakes and show-stopping ones:
Temperature is everything. I cannot tell you how many times I’ve tried to rush this recipe by using cold eggs and cold buttermilk. The result is always the same—dense, flat cupcakes with a weird texture. Room temperature ingredients emulsify together properly, trapping air that makes your cupcakes light and tender. Set your eggs and buttermilk out on the counter at least 30 minutes before you start. If you’re in a hurry, you can warm the buttermilk gently in the microwave for 10-15 seconds and place the eggs in a bowl of warm water for 5 minutes.
Don’t overmix the batter. I know it’s tempting to keep stirring until everything is perfectly smooth, but overmixing develops the gluten in the flour and gives you tough, rubbery cupcakes. Mix just until the streaks of flour disappear, then stop. A few small lumps are totally fine—they’ll bake out. The first time I made these, I was so worried about lumps that I beat the batter for a full 2 minutes. The cupcakes came out so dense they could have been used as doorstops.
The coffee is not optional. I’ve had readers tell me they skipped the hot coffee because they don’t drink coffee or because they thought it would make the cupcakes taste like a latte. Here’s the truth: the coffee doesn’t make them taste like coffee at all. What it does is enhance the chocolate flavor, making it deeper and more complex. The hot liquid also helps bloom the cocoa powder, which brings out its full flavor potential. If you absolutely cannot use coffee for dietary reasons, substitute hot water mixed with 1 teaspoon of instant espresso powder, or just use hot water alone. But trust me—the coffee version is better.
Chill the frosted cupcakes before serving. If you’re making these for a party, frost them a few hours ahead and pop them in the fridge. The cold sets the frosting and makes the spiderweb design hold its shape better. Plus, the cupcakes taste amazing cold—the black cocoa flavor actually intensifies as they chill. I’ve served these straight from the fridge at parties and people go crazy for them.
Practice the spiderweb technique on a plate first. Before you try it on actual cupcakes, grab a small plate and pipe a practice web. This lets you get a feel for how much pressure to use and how fast to drag the toothpick. I spent about 10 minutes practicing before my first batch, and it saved me from ruining a whole tray of cupcakes. The key is to drag the toothpick in one smooth motion from center to edge—if you hesitate or go too slow, the lines get wobbly.
Variations & Adaptations
One of the best things about these Perfect Black Cocoa Spiderweb Cupcakes for Halloween Parties is how adaptable they are. I’ve experimented with all sorts of variations over the years, and here are my favorites:
Gluten-Free Version : Substitute the all-purpose flour with a high-quality gluten-free flour blend that contains xanthan gum. I’ve had great results with Bob’s Red Mill 1-to-1 Baking Flour. The texture will be slightly more tender and a little crumblier, but the flavor is still amazing. Make sure to check your black cocoa powder—some brands process it in facilities that also process wheat.
Dairy-Free Version : Replace the buttermilk with a dairy-free buttermilk made by adding 1 tablespoon of lemon juice to 1 cup of unsweetened almond milk or oat milk. Use a high-quality vegan butter for the frosting (I like Miyoko’s) and substitute the heavy cream with full-fat coconut cream from a can. The coconut flavor is subtle and actually pairs beautifully with the black cocoa.
Mint Chocolate Spiderweb Cupcakes : Add ½ teaspoon of peppermint extract to the cupcake batter along with the vanilla, and use a few drops of peppermint oil in the frosting instead of vanilla. The combination of dark chocolate and mint is absolutely killer for Halloween. Top each cupcake with a small piece of crushed peppermint candy for extra crunch.
Pumpkin Spice Spiderweb Cupcakes : Reduce the buttermilk to ¾ cup and add ½ cup of pumpkin puree to the wet ingredients. Add 1 teaspoon of pumpkin pie spice to the dry ingredients. The pumpkin adds moisture and a subtle earthy flavor that works surprisingly well with the black cocoa. These are perfect for fall parties where you want something a little different from the usual pumpkin spice everything.
Blood-Red Velvet Variation : Add 1 tablespoon of red gel food coloring to the wet ingredients along with the coffee. The black cocoa will still give you a dark base, but the red will peek through in a way that looks like something out of a horror movie. It’s dramatic and creepy and perfect for Halloween. Just be careful with the food coloring—it stains everything, including your hands.
Nutella Swirl Spiderweb Cupcakes : Before baking, drop a teaspoon of Nutella into the center of each filled liner and gently swirl it with a toothpick. The Nutella sinks slightly during baking and creates a gooey, fudgy center that’s absolutely decadent. I made these for a Halloween party last year and they were the first ones to disappear.
Serving & Storage Suggestions
These Perfect Black Cocoa Spiderweb Cupcakes for Halloween Parties are designed to be the star of your dessert table, but a little planning goes a long way. Here’s how to serve and store them for maximum impact:
Serving Temperature : I prefer these cupcakes served slightly chilled or at cool room temperature. The black cocoa flavor is more pronounced when they’re cold, and the frosting holds its shape better. If you’re serving them at a party, take them out of the fridge about 15-20 minutes before guests arrive so they lose the chill but stay firm. Arrange them on a black or dark purple cake stand for maximum spooky effect. Add some fake cobwebs or plastic spiders around the base for extra Halloween flair.
What to Serve Alongside : These cupcakes pair beautifully with a cold glass of milk, a hot cup of coffee, or a spooky Halloween punch. For a full dessert spread, serve them alongside pumpkin cheesecake bars, caramel apples, or a bowl of candy corn. If you’re hosting a Halloween party, consider setting up a cupcake decorating station where guests can add their own spiderwebs and decorations—it’s a fun activity that doubles as dessert.
Storage Instructions : Store unfrosted cupcakes in an airtight container at room temperature for up to 3 days. Once frosted, they should be stored in the refrigerator in a single layer in an airtight container for up to 5 days. The frosting will firm up in the fridge, which actually helps the spiderweb design hold its shape. If you’re stacking them, place a sheet of wax paper between layers to prevent the frosting from smudging.
Freezer Instructions : These cupcakes freeze beautifully. Freeze unfrosted cupcakes in a single layer on a baking sheet until solid, then transfer to a freezer-safe bag or container for up to 3 months. When you’re ready to serve, thaw them at room temperature for about an hour, then frost and decorate. You can also freeze the frosting separately in a piping bag—just thaw it in the refrigerator overnight and give it a quick whip before using. I always keep a batch of unfrosted cupcakes in my freezer during October for last-minute Halloween parties.
Flavor Development : Here’s a little secret—these cupcakes actually taste better the next day. The black cocoa flavor mellows and deepens as it sits, and the texture becomes even more tender. If you have the time, make the cupcakes a day ahead and frost them the morning of your party. The flavors will be more complex and the cupcakes will be easier to decorate since they’ll be fully set.
Nutritional Information & Benefits
Let’s be honest—these are Halloween party cupcakes, not health food. But that doesn’t mean they can’t have some redeeming qualities. Here’s what you need to know about the nutritional profile of these Perfect Black Cocoa Spiderweb Cupcakes for Halloween Parties:
Estimated Nutritional Values (per cupcake, with frosting) : Approximately 380-420 calories, 18g fat, 55g carbohydrates, 4g protein, 2g fiber, 35g sugar. These numbers will vary based on your specific ingredients and how much frosting you use. If you’re watching your sugar intake, you can reduce the sugar in the frosting by using a sugar-free powdered sugar alternative, but I’ll warn you—the texture won’t be quite as silky.
Health Benefits of Key Ingredients : Black cocoa powder is rich in antioxidants called flavonoids, which have been linked to heart health and reduced inflammation. It also contains iron, magnesium, and zinc. The buttermilk provides calcium and probiotics (if you use cultured buttermilk), and the eggs offer high-quality protein. The coffee in the recipe adds a small amount of caffeine and additional antioxidants. So while these aren’t health food by any stretch, they’re not completely devoid of nutritional value either.
Dietary Considerations : This recipe contains gluten, dairy, and eggs, so it’s not suitable for those with allergies to these ingredients. However, as mentioned in the variations section, it can be adapted for gluten-free and dairy-free diets. The cupcakes are nut-free as written (unless you add the Nutella variation), which makes them a good option for school parties where nut allergies are a concern. Always check your specific ingredient labels to confirm.
My Personal Wellness Perspective : I believe in the power of balance. These cupcakes are a treat, meant for special occasions and celebrations. I don’t think there’s anything wrong with indulging in something decadent every now and then, especially when it brings people together. The joy of sharing these spiderweb cupcakes with friends and family at a Halloween party is worth every calorie. Life’s too short to skip the frosting, you know?
Conclusion
These Perfect Black Cocoa Spiderweb Cupcakes for Halloween Parties have become my signature fall recipe, and I think they’re about to become yours too. There’s something deeply satisfying about pulling a tray of jet-black cupcakes out of the oven, swirling that white frosting into delicate webs, and watching people’s faces light up when they see (and taste) what you’ve created. It’s the kind of recipe that makes you feel like a kitchen magician, even if you’re just following directions like the rest of us.
What I love most about these cupcakes is how they capture the spirit of Halloween—a little dark, a little mysterious, but ultimately sweet and joyful. They’re the perfect centerpiece for any spooky gathering, whether you’re hosting a costume party, attending a potluck, or just making something special for your family on October 31st. And the best part? They’re forgiving enough for beginners but impressive enough to wow even the most experienced bakers.
I want to hear about your spiderweb creations! Drop a comment below and tell me how your cupcakes turned out, what variations you tried, or if you came up with a decorating technique I haven’t thought of. Share your photos on social media and tag me—I love seeing your versions of this recipe. And if you’re looking for more Halloween baking inspiration, check out our spooky Halloween cupcakes collection for even more creepy-cute ideas. Happy Halloween, and happy baking!
Frequently Asked Questions
Can I use regular cocoa powder instead of black cocoa powder?
You can, but the cupcakes won’t be black. They’ll be a dark brown color, and the flavor will be more like a standard chocolate cupcake. If you want that dramatic black color and the distinctive Oreo-like flavor, you really need black cocoa powder. It’s available at most baking supply stores and online, and a little goes a long way—one bag will last you through several batches.
Why did my spiderweb design turn out messy?
This usually happens for one of three reasons: the frosting was too thin, you dragged the toothpick too slowly, or the frosting on the cupcake wasn’t set enough. Make sure your frosting is thick enough to hold its shape (add more powdered sugar if needed), and practice your toothpick drag on a plate first. The motion should be quick and confident—one smooth line from center to edge without stopping.
Can I make these cupcakes ahead of time for a party?
Absolutely! In fact, I recommend it. You can bake the cupcakes up to 3 days ahead and store them unfrosted in an airtight container at room temperature. Frost and decorate them the day of your party for the best presentation. Or you can freeze the unfrosted cupcakes for up to 3 months—just thaw them at room temperature before decorating.
My cupcakes came out dry. What went wrong?
Dry cupcakes are usually the result of overbaking or overmixing. Black cocoa powder is more absorbent than regular cocoa, so it’s easy to overbake these cupcakes. Start checking for doneness at 18 minutes, and pull them out as soon as a toothpick comes out with moist crumbs (not wet batter). Also, make sure you’re measuring your flour correctly—spoon it into the measuring cup and level it off, don’t scoop directly from the bag.
Can I make these cupcakes into a cake instead?
Yes! This recipe can easily be adapted into a two-layer 8-inch cake. Divide the batter evenly between two greased and floured 8-inch round cake pans and bake at 350°F (175°C) for 25-30 minutes. The baking time will be longer, so start checking at 25 minutes. You’ll need to double the frosting recipe to have enough for filling and covering the cake. The spiderweb design works beautifully on a cake too—just pipe concentric circles on the top and drag the toothpick through them the same way.
Pin This Recipe!
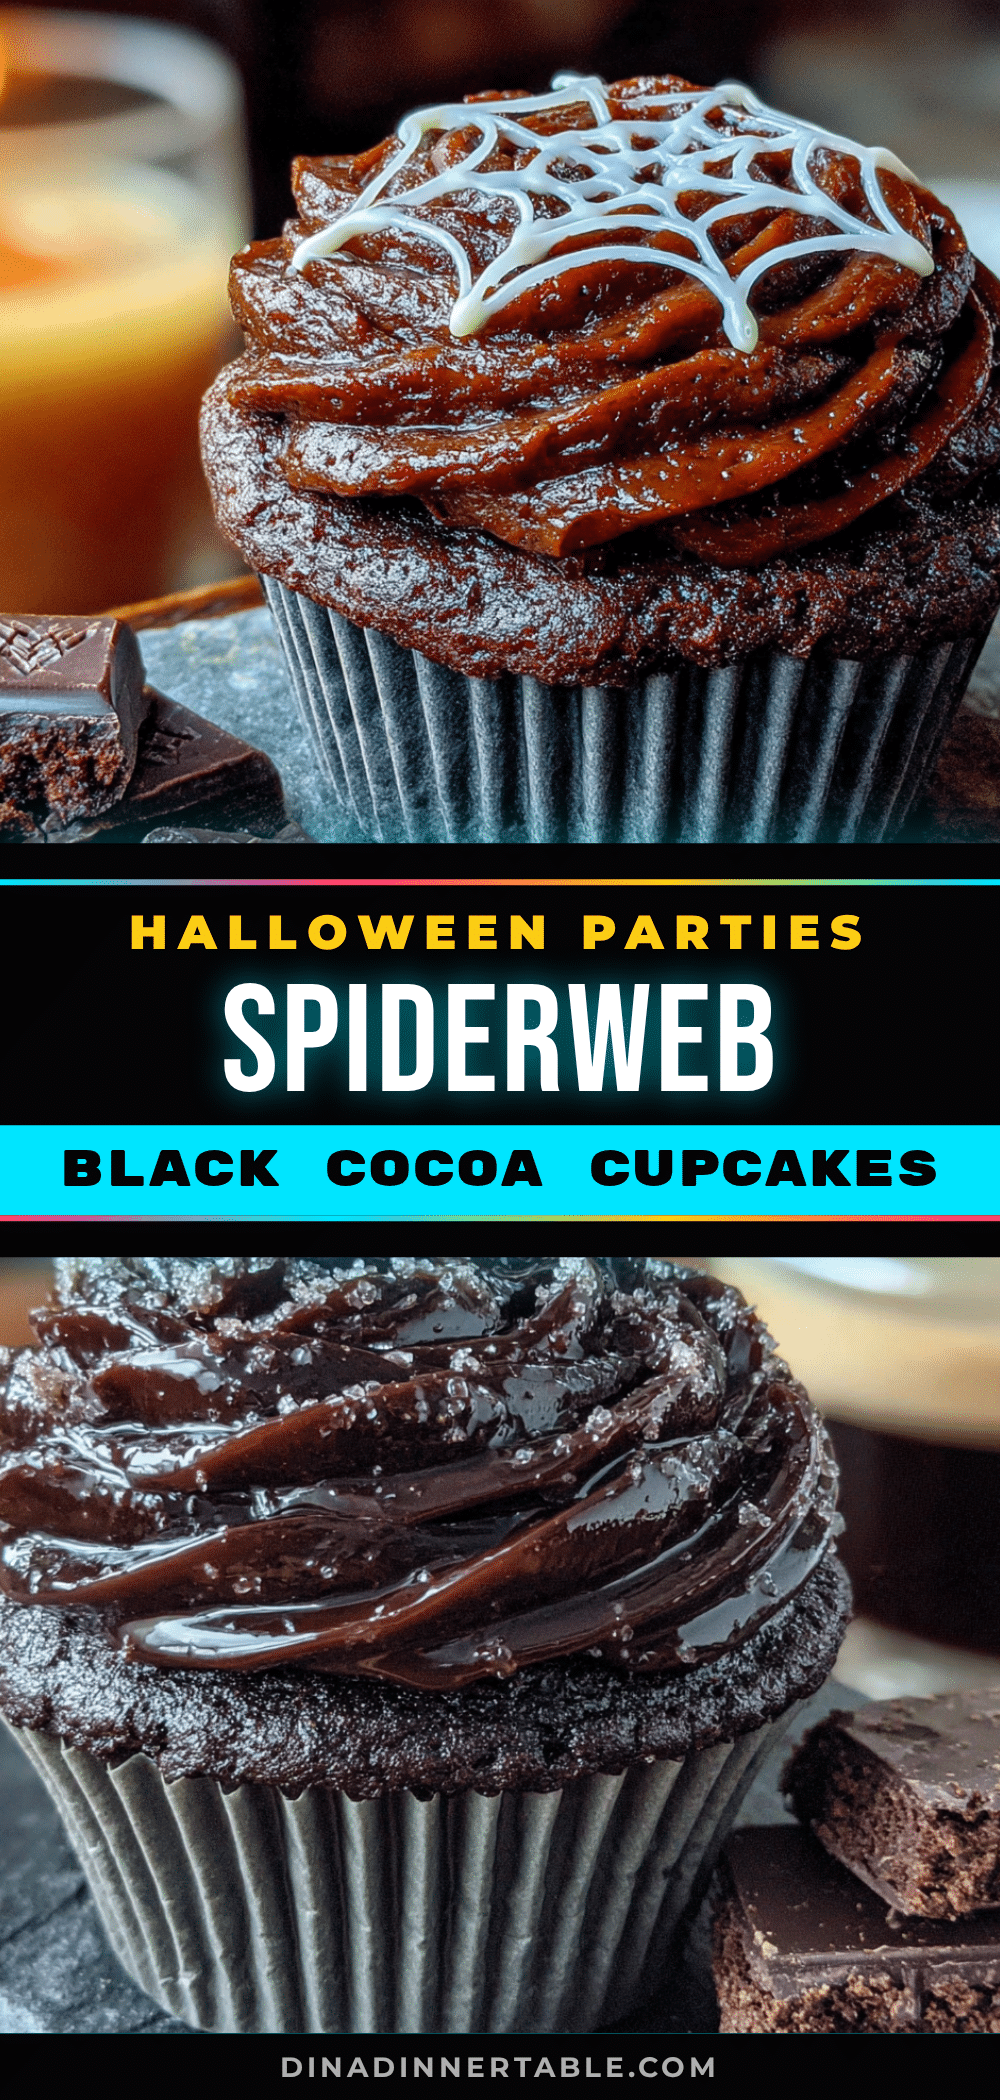
Perfect Black Cocoa Spiderweb Cupcakes Easy Halloween Recipe
Deeply chocolate black cocoa cupcakes with a mysterious Oreo-like flavor, topped with a stunning white spiderweb frosting. This easy Halloween recipe creates dramatic, party-worthy cupcakes that taste as amazing as they look.
- Prep Time: 20 minutes
- Cook Time: 20 minutes
- Total Time: 40 minutes
- Yield: 12 cupcakes 1x
- Category: Dessert
- Cuisine: American
Ingredients
- 1 ½ cups all-purpose flour
- ½ cup black cocoa powder
- ¼ cup Dutch-process cocoa powder
- 1 teaspoon baking soda
- ½ teaspoon baking powder
- ½ teaspoon salt
- 1 cup granulated sugar
- ½ cup packed light brown sugar
- 2 large eggs, at room temperature
- ½ cup vegetable oil
- 1 cup buttermilk, at room temperature
- 2 teaspoons vanilla extract
- ½ cup hot coffee
- 1 cup unsalted butter, softened
- 3 ½ cups powdered sugar, sifted
- 2 teaspoons vanilla extract
- 2–3 tablespoons heavy cream
- Pinch of salt
- Black decorating gel or melted dark chocolate (optional)
Instructions
- Preheat oven to 350°F (175°C). Line a 12-cup muffin tin with paper liners. Bring eggs and buttermilk to room temperature.
- In a large bowl, whisk together flour, black cocoa powder, Dutch-process cocoa powder, baking soda, baking powder, and salt. Sift cocoa powders first if clumpy.
- In a separate large bowl, whisk together granulated sugar, brown sugar, eggs, vegetable oil, buttermilk, and vanilla extract until smooth, about 1 minute.
- Pour dry ingredients into wet ingredients and fold with a rubber spatula until just combined. Add hot coffee and gently fold until incorporated. Batter will be thin.
- Divide batter evenly among the 12 liners, filling each about ⅔ to ¾ full (about 65-70 grams per cupcake).
- Bake for 18-22 minutes, until a toothpick inserted in the center comes out with moist crumbs. Cool in pan for 5 minutes, then transfer to a wire rack to cool completely.
- For frosting: Beat softened butter on medium speed until smooth and creamy, about 2 minutes. Add sifted powdered sugar one cup at a time, beating on low. Add vanilla, salt, and 2 tablespoons heavy cream. Beat on medium-high for 3-4 minutes until light and fluffy. Adjust consistency with remaining cream or more powdered sugar as needed.
- Once cupcakes are completely cool, frost with a generous swirl of frosting using a piping bag or offset spatula.
- For spiderweb design: Place about ¼ cup of frosting in a small piping bag with a tiny hole. Pipe 3-4 concentric circles on each frosted cupcake. Use a toothpick to gently drag from the center outward through all circles, repeating 6-8 times around the cupcake. Optionally add a plastic spider or pipe a spider with black decorating gel.
Notes
Room temperature ingredients are crucial for proper emulsification. Don’t overmix the batter. The coffee enhances chocolate flavor without making cupcakes taste like coffee. Chill frosted cupcakes before serving for best results. Practice spiderweb technique on a plate first. Cupcakes taste even better the next day.
Nutrition
- Serving Size: 1 cupcake
- Calories: 400
- Sugar: 35
- Sodium: 280
- Fat: 18
- Saturated Fat: 8
- Carbohydrates: 55
- Fiber: 2
- Protein: 4
Keywords: black cocoa cupcakes, spiderweb cupcakes, Halloween cupcakes, easy Halloween recipe, chocolate cupcakes, spooky cupcakes, party dessert