Introduction
I swore I hated apple desserts. For years. The whole category felt like a betrayal of a perfectly good piece of fruit—mushy, overly spiced, and usually hiding under a sad blanket of soggy pastry. Then last October, my neighbor Carla showed up at my door with a baking sheet covered in what looked like a glorious, chaotic pile of fall confetti. “Just try one chip,” she said, shoving the pan toward me. I took a single, hesitant apple slice, dragged it through a puddle of warm caramel, and felt my entire dessert philosophy crumble in real time.
Honestly, I was annoyed at how good it was. I stood there in my doorway, fork in hand, eating what I later learned were caramel apple nachos, while pretending I was just being polite. Carla knew. She had that knowing smirk people get when they’ve just proven you wrong about something you were very loud about. And let me tell you—I was loud about my apple dessert boycott.
The thing is, these nachos aren’t really an apple dessert in the traditional, sad sense. They’re a crunchy, gooey, salty-sweet situation that happens to involve apples. The texture is everything—crisp slices that stay firm because you don’t bake them into submission, warm caramel that pools in all the right places, and toppings that add crunch without turning to mush. Maybe you’ve been there, standing in your own kitchen, convinced that a certain food category just isn’t for you, only to have a single bite rewrite your entire history with it. That was me, with a baking sheet full of apples and a very smug neighbor.
I’ve been making these every fall since that night, and they’ve become my go-to for gatherings when I want something that feels special but takes about ten minutes of actual effort. They disappeared at my Friendsgiving last year before the main course even hit the table. People stood around the pan, picking at it with forks and fingers, and nobody said a word about the texture. They were too busy eating.
Why You’ll Love This Recipe
I’ve tested this recipe about a dozen times across different gatherings, and here’s what I’ve learned: it works every single time, and it works because it’s built on a few simple principles that don’t fail.
- Quick & Easy: This comes together in under 15 minutes. No baking, no complicated steps, no waiting for things to cool. You can literally make this between the time your guests text you “on our way” and the time they actually arrive.
- Simple Ingredients: You probably have most of this stuff already. Apples, caramel sauce, chocolate chips, nuts—these are pantry staples for anyone who’s ever hosted a fall gathering.
- Perfect for Fall Gatherings: This is the kind of dessert that works for everything—tailgates, potlucks, Thanksgiving dessert tables, or just a random Tuesday night when you want something that tastes like October.
- Crowd-Pleaser: I’ve watched kids, grandparents, and that one friend who’s “not really into sweets” all go back for seconds. The salty-sweet combo is basically irresistible.
- Unbelievably Delicious: The contrast between cold, crisp apple slices and warm, gooey caramel is next-level. Add crunchy nuts and melty chocolate, and you’ve got a dessert that makes people close their eyes after the first bite.
What makes this different from other apple desserts is the texture. Most apple recipes require cooking the fruit, which turns it soft and releases all that juice. Here, the apples stay raw and crisp, which means you get that satisfying crunch with every bite. The caramel does the heavy lifting on flavor while the apples keep their integrity. It’s comfort food reimagined—faster, fresher, and somehow more satisfying than anything you’d bake for an hour.
This isn’t just good. It’s the kind of dessert that makes you look like a hero with almost no effort. Perfect for impressing guests without the stress, or turning a simple fall evening into something memorable.
What Ingredients You Will Need
This recipe uses simple, wholesome ingredients that come together to create something that tastes way more complicated than it is. Most of these are fall pantry staples, and everything is easy to find at any grocery store.
- 4 medium apples (I prefer Honeycrisp or Fuji for their sweetness and crunch—Granny Smith works too if you like a tart contrast to the caramel)
- 1/2 cup caramel sauce (homemade or store-bought—I use the jarred kind from the baking aisle; just warm it up so it pours easily)
- 1/2 cup semi-sweet chocolate chips (melted, for drizzling—dark chocolate works beautifully here too)
- 1/4 cup chopped pecans (toasted if you have time, but raw works fine—walnuts are a great substitute)
- 1/4 cup white chocolate chips (optional but highly recommended for that bakery-style look)
- 2 tablespoons salted butter (for the caramel drizzle if you’re making it extra rich)
- 1 teaspoon flaky sea salt (this is non-negotiable—it makes the flavors pop)
- 1/4 cup dried cranberries (optional, but adds a nice tart pop and looks pretty for fall)
For the caramel sauce (if making from scratch):
- 1 cup brown sugar (packed—light or dark both work)
- 1/2 cup heavy cream
- 4 tablespoons salted butter
- 1 teaspoon vanilla extract
- Pinch of salt
A few notes on ingredients. I recommend using Honeycrisp apples if you can find them—they’re sweet enough that you don’t need to add extra sugar, and they stay crisp for hours after slicing. If you’re using Granny Smith, you might want a slightly sweeter caramel to balance the tartness. For the caramel sauce, I’ve tried both homemade and store-bought, and honestly, the jarred stuff from the baking aisle works perfectly. Just warm it up in the microwave for about 20 seconds so it pours smoothly. If you’re making it from scratch, the recipe above is my go-to—it’s foolproof and takes about 10 minutes.
For the chocolate, I prefer semi-sweet because it balances the sweetness of the caramel without being overwhelming. But if you’re a milk chocolate person, go for it. And the flaky sea salt—don’t skip it. It sounds like a small thing, but that salty hit against the sweet caramel is what makes these addictive.
Equipment Needed

You don’t need much for this recipe, which is part of why I love it. Here’s what you’ll want to have on hand:
- Large baking sheet or serving platter (a rimmed baking sheet works best to catch any drips)
- Parchment paper (for easy cleanup—trust me on this)
- Sharp knife and cutting board (a good chef’s knife makes slicing apples much easier)
- Small microwave-safe bowls (for melting chocolate and warming caramel)
- Spoon or squeeze bottle (for drizzling—a spoon works fine, but a squeeze bottle gives you more control)
- Apple corer (optional but helpful—I use a paring knife most of the time)
If you don’t have a squeeze bottle, don’t worry. I’ve drizzled caramel with a spoon for years and it works perfectly. Just dip and drizzle. For the chocolate melting, you can use the microwave in 20-second bursts, stirring between each one. If you have a double boiler, that works too, but honestly, the microwave is faster and less cleanup.
One tip I learned the hard way: use a baking sheet with sides. The first time I made these, I used a flat platter and caramel dripped all over my counter. The rimmed sheet catches everything and makes cleanup a breeze.
Preparation Method
This comes together fast, so I recommend having all your toppings ready before you start slicing the apples. Here’s the step-by-step:
- Prep your apples. Wash and dry your apples thoroughly. Core them using an apple corer or a paring knife. Slice them into thin rounds, about 1/4-inch thick. You want them thin enough to pick up easily but thick enough that they don’t break when you dip them. Remove any seeds you see. Place the slices on your parchment-lined baking sheet in a single layer, slightly overlapping if needed.
- Warm the caramel. If using store-bought caramel sauce, transfer it to a microwave-safe bowl and heat for 20-30 seconds until it’s pourable. If you’re making homemade caramel, cook the brown sugar, heavy cream, and butter in a saucepan over medium heat, stirring constantly, until it thickens—about 5-7 minutes. Remove from heat and stir in vanilla and salt. Let it cool slightly—it will thicken as it cools.
- Melt the chocolate. Place your semi-sweet chocolate chips in a small microwave-safe bowl. Microwave in 20-second bursts, stirring after each, until smooth and fully melted. Be careful not to overheat—chocolate burns easily. If you’re using white chocolate, do the same in a separate bowl.
- Toast the nuts (optional but recommended). If you have time, toast your pecans in a dry skillet over medium heat for 2-3 minutes until fragrant. This brings out their flavor and adds extra crunch. Watch them closely—they burn fast.
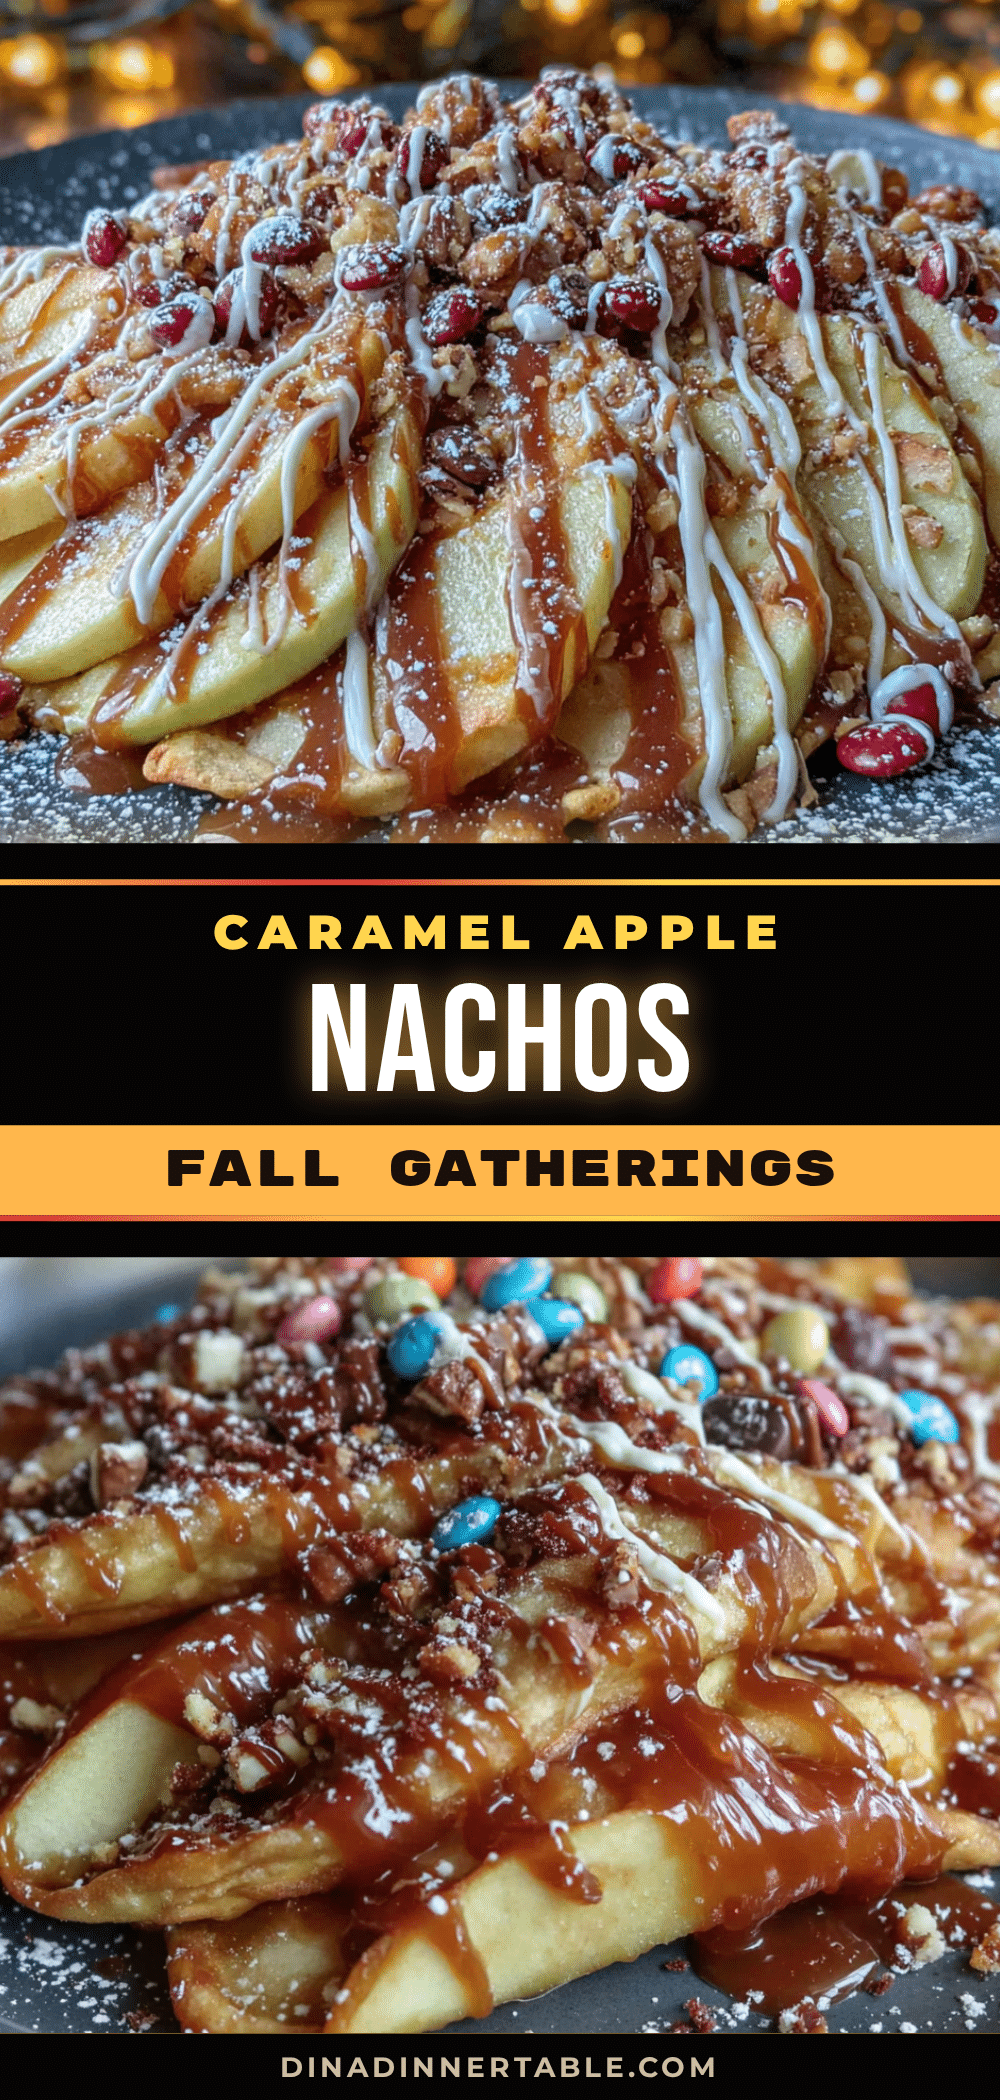
- Assemble the nachos. Arrange your apple slices on the serving platter or baking sheet. Drizzle the warm caramel generously over the top—don’t be shy here. Then drizzle the melted chocolate in zigzag patterns. Sprinkle the toasted pecans, dried cranberries, and flaky sea salt evenly over everything.
- Add the finishing touches. If you’re using white chocolate, drizzle that on top last for a beautiful contrast. Serve immediately while the caramel and chocolate are still warm and gooey.
A few timing notes: the whole process takes about 15 minutes from start to finish. The apples will start to brown after about 30 minutes, so this is really best served right away. If you’re making it for a party, prep all your toppings ahead of time and slice the apples just before serving.
One thing I learned from a particularly disastrous first attempt: don’t slice your apples too thin. I went for paper-thin slices once, thinking it would look elegant, and they just turned into floppy messes under the caramel. Stick with 1/4-inch—it’s the sweet spot for structural integrity.
Cooking Tips & Techniques
I’ve made this recipe enough times to have learned a few things the hard way. Here are my best tips for getting it right every time:
Choose the right apples. This is the most important decision you’ll make. Honeycrisp and Fuji are my top picks because they’re sweet, crisp, and don’t brown quickly. Granny Smith works if you want a tart contrast, but slice them right before serving to minimize browning. Avoid Red Delicious—they’re too soft and mealy.
Keep the caramel warm. Caramel thickens as it cools, so if you’re serving these at a party, keep the caramel in a small bowl on the side and warm it up as needed. You can also set the baking sheet on a warming tray if you have one. I once let my caramel cool completely before drizzling, and it turned into a sticky mess that was impossible to spread.
Don’t drown the apples. It’s tempting to go heavy on the caramel, but too much will make the apples soggy. Aim for a generous drizzle that coats the slices without pooling underneath. You want every bite to have some caramel, but you also want to taste the apple.
Work fast once you start drizzling. The caramel and chocolate will start to set as soon as they hit the cold apples, so have everything ready before you begin. I learned this the hard way when I stopped to answer a text and came back to a congealed mess.
Use a squeeze bottle for precision. If you have one, a squeeze bottle gives you way more control over your drizzles. If not, a spoon works fine—just dip and drizzle in a back-and-forth motion.
Toast your nuts. This is a small step that makes a big difference. Raw nuts are fine, but toasted nuts add a depth of flavor that elevates the whole dish. Just keep an eye on them—they go from toasted to burnt in about 30 seconds.
Variations & Adaptations
This recipe is incredibly flexible, and I’ve tried several variations over the years. Here are some of my favorites:
Dairy-Free Version: Use a dairy-free caramel sauce (many store-bought options are available) and dairy-free chocolate chips. The rest of the ingredients are naturally dairy-free. I’ve made this for a friend with lactose intolerance, and she couldn’t tell the difference.
Nut-Free Version: Skip the pecans and add crushed pretzels or granola for crunch instead. You can also use sunflower seeds or pumpkin seeds for a similar texture. I’ve done the pretzel version several times, and honestly, the salty crunch is even better than nuts.
Seasonal Variations: In the fall, stick with the classic caramel apple combo. But in winter, try adding crushed candy canes and white chocolate for a peppermint version. In summer, swap the caramel for melted peanut butter and add fresh berries. I made a summer version with strawberries and dark chocolate last July, and it was a hit at a backyard barbecue.
Spiced Version: Add a pinch of cinnamon or pumpkin pie spice to your caramel sauce for extra fall flavor. You can also sprinkle a little cinnamon directly over the assembled nachos. This is my go-to for Thanksgiving—it just feels right.
Protein-Packed Version: Add a drizzle of peanut butter or almond butter along with the caramel for extra protein and richness. I’ve done this for post-workout snacks, and it’s surprisingly satisfying.
Low-Sugar Version: Use a sugar-free caramel sauce and dark chocolate with at least 70% cocoa. The apples are naturally sweet, so you won’t miss the extra sugar. I’ve tested this for a friend who’s watching her sugar intake, and she said it was just as good as the original.
Serving & Storage Suggestions
These are best served immediately, while the caramel and chocolate are still warm and the apples are crisp. Here’s how to make the most of them:
Serving Temperature: Serve at room temperature or slightly warm. If the caramel has cooled and thickened, you can pop the whole baking sheet in a 300°F oven for 2-3 minutes to rewarm it. Just watch it closely so the apples don’t cook.
Presentation: Arrange the apple slices in a single layer on a large platter or baking sheet. Drizzle the toppings in a zigzag pattern for visual appeal. Garnish with a few extra whole pecans and a sprinkle of flaky salt. I like to serve them with small forks or toothpicks for easy grabbing.
Complementary Dishes: These pair beautifully with a scoop of vanilla ice cream or a dollop of whipped cream. For a drink, try hot apple cider, a spiced chai latte, or a caramel coffee. They also work great alongside other fall desserts like pumpkin pie or apple crisp.
Storage: These don’t store well—the apples will brown and the caramel will harden. If you have leftovers, store them in an airtight container in the refrigerator for up to 24 hours. They won’t be as crisp, but they’ll still taste good. To revive them, let them come to room temperature for about 15 minutes before serving.
Reheating: If you’re reheating leftovers, spread them on a baking sheet and warm in a 300°F oven for 3-4 minutes. Don’t use the microwave—it will turn the apples to mush. I’ve made this mistake, and trust me, it’s not worth it.
Make-Ahead Tips: You can prep all the toppings ahead of time—chop the nuts, melt the chocolate, warm the caramel—and store them separately. Slice the apples just before serving to prevent browning. This makes party hosting much less stressful.
Nutritional Information & Benefits
Here’s the approximate nutritional breakdown for one serving (about 1/4 of the recipe):
| Nutrient | Amount |
|---|---|
| Calories | 280 |
| Total Fat | 14g |
| Saturated Fat | 6g |
| Cholesterol | 15mg |
| Sodium | 180mg |
| Total Carbohydrates | 38g |
| Dietary Fiber | 4g |
| Sugars | 28g |
| Protein | 3g |
Health Benefits: Apples are packed with fiber and vitamin C, and they’re great for heart health and digestion. The pecans add healthy fats and antioxidants. Dark chocolate (if you use it) is rich in flavonoids that support brain health. While this is definitely a treat, it’s not completely devoid of nutritional value—the fiber from the apples helps balance out the sugar.
Dietary Considerations: This recipe can be made gluten-free (just check your caramel sauce label), dairy-free (with substitutions), and nut-free (skip the pecans). It’s naturally vegetarian. If you’re watching your sugar intake, use a sugar-free caramel sauce and dark chocolate.
Potential Allergens: This recipe contains dairy (caramel, butter, chocolate) and tree nuts (pecans). The white chocolate may contain soy lecithin. Always check labels if you’re serving someone with allergies.
From a wellness perspective, I see this as a balanced treat. It’s made with real ingredients, you control the portions, and it’s way better than anything you’d get from a package. Plus, the act of sharing food with people you care about has its own health benefits.
Conclusion
These caramel apple nachos have become my fall signature, and I’m honestly a little embarrassed by how often I make them. They’re the dessert that converted me from an apple dessert skeptic to someone who actively looks forward to apple season. There’s something about that combination of crisp apples, warm caramel, and crunchy toppings that just works on a fundamental level.
I hope you’ll try them and make them your own. Maybe you’ll add a different nut, or swap in your favorite chocolate, or go heavy on the sea salt like I do. That’s the beauty of this recipe—it’s forgiving, flexible, and always delicious. Don’t be afraid to experiment based on what you have in your pantry or what’s in season.
If you make these, I’d love to hear about it. Drop a comment below and tell me how they turned out, what variations you tried, or if you managed to convert any apple dessert skeptics of your own. And if you’re looking for more fall dessert ideas, check out my easy apple crisp recipe or my pumpkin cheesecake bars—they’re both crowd-pleasers that come together with minimal fuss.
Until next time, happy cooking—and don’t forget the flaky salt.
Frequently Asked Questions
Can I make these ahead of time for a party?
I don’t recommend making them fully ahead, as the apples will brown and the caramel will harden. But you can prep all the toppings—chop nuts, melt chocolate, warm caramel—and store them separately. Slice the apples and assemble just before serving. It takes about 10 minutes, and your guests will be impressed by the fresh presentation.
What are the best apples for caramel apple nachos?
Honeycrisp and Fuji are my top picks because they’re sweet, crisp, and resist browning. Granny Smith works if you want a tart contrast. Avoid Red Delicious, Gala, and McIntosh—they’re too soft and will turn mushy under the toppings. The key is finding apples that stay crunchy even after being coated in warm caramel.
How do I keep the caramel from hardening too quickly?
Keep the caramel warm while you’re assembling. You can set the bowl in a pan of warm water or microwave it in 10-second bursts as needed. If you’re serving these at a party, consider keeping the caramel in a small slow cooker on warm, or serve it on the side so people can add their own.
Can I use a different fruit instead of apples?
Absolutely! Pears work beautifully in this recipe—just slice them thin and follow the same instructions. You can also try firm peaches or nectarines in summer. Bananas work too, but they’re softer and won’t hold up as well. If you’re feeling adventurous, try a mix of apples and pears for a unique flavor combination.
How do I prevent the apples from browning?
The best way to prevent browning is to slice the apples right before serving. If you need to slice them ahead, toss them in a little lemon juice or pineapple juice—about 1 tablespoon per apple. This will keep them looking fresh for about an hour. Don’t use too much juice, or it will make the apples too wet for the toppings to stick.
Pin This Recipe!
Perfect Caramel Apple Nachos: Easy Fall Dessert

Crisp apple slices topped with warm caramel, melted chocolate, crunchy pecans, and a sprinkle of flaky sea salt. This quick and easy no-bake dessert is perfect for fall gatherings and comes together in under 15 minutes.
- Prep Time: 10 minutes
- Cook Time: 5 minutes
- Total Time: 15 minutes
- Yield: 4 servings 1x
- Category: Dessert
- Cuisine: American
Ingredients
- 4 medium apples (Honeycrisp or Fuji recommended)
- 1/2 cup caramel sauce (homemade or store-bought)
- 1/2 cup semi-sweet chocolate chips
- 1/4 cup chopped pecans (toasted if desired)
- 1/4 cup white chocolate chips (optional)
- 2 tablespoons salted butter (for extra rich caramel drizzle)
- 1 teaspoon flaky sea salt
- 1/4 cup dried cranberries (optional)
- For homemade caramel sauce:
- 1 cup packed brown sugar (light or dark)
- 1/2 cup heavy cream
- 4 tablespoons salted butter
- 1 teaspoon vanilla extract
- Pinch of salt
Instructions
- Wash and dry apples. Core and slice into 1/4-inch thick rounds. Remove seeds. Arrange slices in a single layer on a parchment-lined baking sheet.
- Warm caramel sauce in a microwave-safe bowl for 20-30 seconds until pourable. If making homemade, cook brown sugar, heavy cream, and butter in a saucepan over medium heat, stirring constantly, until thickened (5-7 minutes). Remove from heat, stir in vanilla and salt, and let cool slightly.
- Melt semi-sweet chocolate chips in a microwave-safe bowl in 20-second bursts, stirring after each, until smooth. Repeat with white chocolate chips if using.
- Optional: Toast pecans in a dry skillet over medium heat for 2-3 minutes until fragrant.
- Arrange apple slices on serving platter or baking sheet. Drizzle warm caramel generously over apples. Drizzle melted chocolate in zigzag patterns. Sprinkle toasted pecans, dried cranberries, and flaky sea salt evenly over everything.
- If using white chocolate, drizzle on top last. Serve immediately while warm and gooey.
Notes
Best served immediately. Apples will brown after about 30 minutes. For make-ahead, prep toppings separately and slice apples just before serving. Keep caramel warm for best consistency. Don’t slice apples too thin—1/4-inch is ideal for structural integrity.
Nutrition
- Serving Size: 1/4 of recipe
- Calories: 280
- Sugar: 28
- Sodium: 180
- Fat: 14
- Saturated Fat: 6
- Carbohydrates: 38
- Fiber: 4
- Protein: 3
Keywords: caramel apple nachos, easy fall dessert, no-bake dessert, apple dessert, caramel apples, quick dessert, fall recipe