There used to be a tiny bakery tucked behind a vintage shop on Grand Avenue that made the most hauntingly adorable black cat cookies I had ever seen. When they closed three years ago, I actually stood outside their shuttered door feeling genuinely bereft. After twelve attempts — including one batch that looked like sooty blobs and another where the royal icing ran clear off the edges like a sugar flood — I finally got it. These black cat sugar cookies are the exact replica of those bakery beauties, and let me tell you, the satisfaction of piping that first perfect whisker was borderline embarrassing.
The first time I tried, I used a standard sugar cookie recipe and ended up with cookies that spread into shapeless puddles. Honestly, I almost gave up right there. But then I remembered the way those cookies looked in the bakery case — crisp edges, perfect cat faces, that glossy black icing with just a hint of shine. I knew there had to be a way to get that precision at home. Maybe you have been there, staring at a Pinterest board full of perfect cookies and wondering how anyone gets royal icing to behave.
These cookies are the answer to that frustration. The dough holds its shape beautifully during baking, and the royal icing recipe is practically foolproof once you know the trick about consistency. I tested this on my skeptical neighbor Maria, who claimed she “doesn’t do decorated cookies,” and she ate three before admitting they were better than the bakery originals. That is the kind of win that keeps me testing recipes in my tiny kitchen at 10 PM on a Tuesday.
Why You Will Love This Recipe
Let me be honest with you — I have made a lot of sugar cookies in my day, and most of them end up tasting like cardboard with extra steps. These black cat cookies are different. After testing this recipe with my friend who runs a small baking business, we both agreed this is the perfect balance of buttery flavor and sturdy structure. The dough chills beautifully, rolls out without sticking, and holds the cat shape with zero spreading.
- No Special Skills Needed — If you can roll dough and stir icing, you can make these. I promise, my first cat looked more like a potato, and I still got compliments.
- Simple Pantry Ingredients — Butter, sugar, flour, eggs, and vanilla. That is it. No weird stabilizers or expensive extracts hiding in the ingredient list.
- Perfect for Halloween or Any Spooky Season — These work for Halloween parties, October birthday treats, or just because you want something adorable on your counter. I have even made them for a cat-themed baby shower.
- Crowd-Pleasing Cuteness — Kids go wild for them, adults pretend to be sophisticated while sneaking seconds, and everyone wants a photo before taking a bite.
- Unbelievably Delicious — The texture is crisp on the edges, slightly soft in the center, and the royal icing adds that perfect sweet crunch. It is the kind of cookie that makes you close your eyes after the first bite.
What makes this recipe different from every other sugar cookie out there is the technique. I use a combination of powdered sugar and granulated sugar that gives the dough stability without making it tough. The chilling method is specific — not too long, not too short — and I will walk you through exactly why that matters. This is not just another cookie recipe; it is the one I have tweaked over three years of obsessive testing to get that bakery-quality result every single time.
These cookies are comfort food reimagined — nostalgic and cute, but with the same soul-soothing satisfaction as a classic sugar cookie. Perfect for impressing guests without stress, or turning a simple Tuesday into something memorable.
What Ingredients You Will Need
This recipe uses simple, wholesome ingredients that you probably already have in your kitchen. The magic is in how they work together to create a cookie that holds its shape while still tasting buttery and delicious.
For the Sugar Cookies
- Unsalted butter, 1 cup (226 grams), softened to room temperature — I prefer using Kerrygold for the rich flavor, but any good quality butter works
- Granulated sugar, 1 cup (200 grams) — this gives the cookies their structure and sweetness
- Powdered sugar, 1/2 cup (60 grams) — this is my secret ingredient for tenderness without spreading
- Large egg, 1, at room temperature — if you forget to take it out early, place it in warm water for 5 minutes
- Vanilla extract, 2 teaspoons — pure vanilla makes a difference here, trust me
- All-purpose flour, 2 and 3/4 cups (345 grams), spooned and leveled — do not scoop directly from the bag or you will get too much
- Baking powder, 1 teaspoon — for just a little lift without spreading
- Salt, 1/2 teaspoon — balances the sweetness perfectly
For the Royal Icing
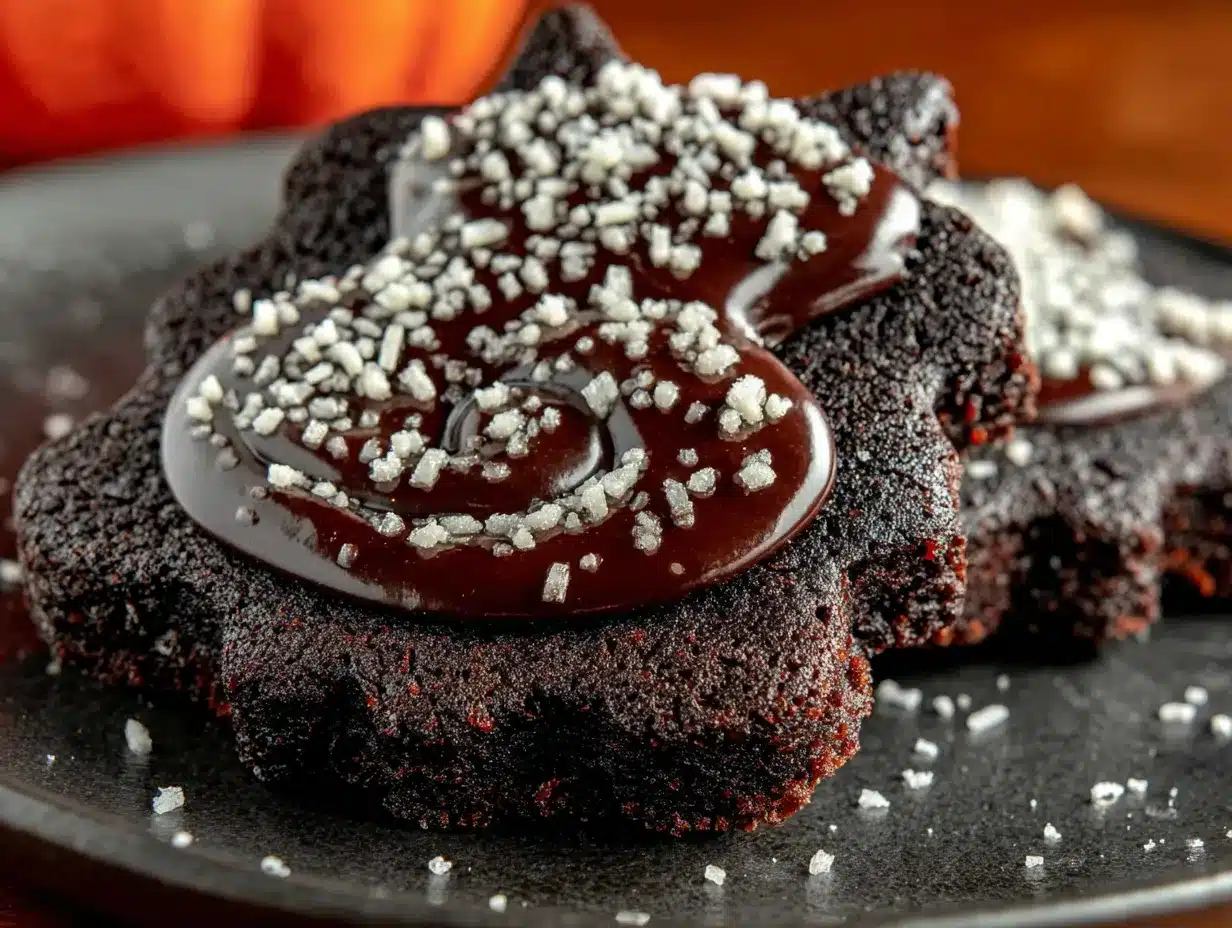
- Powdered sugar, 4 cups (480 grams), sifted — sifting is non-negotiable here, lumps will ruin your piping
- Meringue powder, 3 tablespoons — I recommend Wilton brand for consistent results
- Warm water, 5 to 6 tablespoons — start with less and add more as needed
- Black gel food coloring, 1 to 2 teaspoons — liquid coloring will thin the icing too much, use gel
- Vanilla extract, 1/2 teaspoon — optional but adds nice flavor
For Decorating
- White royal icing, a small batch for eyes and details — or use white candy melts for a quicker option
- Pink gel food coloring, a tiny dab for noses and inner ears
- Piping bags or zip-top bags with the corner snipped off
- Small round piping tips, size 2 or 3 for details
For the black food coloring, I have tried several brands and Americolor Super Black is my absolute favorite. It gives a true deep black without needing a ton of coloring, which can affect the taste. If you only have regular black gel, you might need a bit more, and the icing might taste slightly bitter. Add a tiny drop of lemon juice if that happens — it balances the flavor.
Equipment Needed
You do not need a professional bakery setup for these cookies, but having the right tools makes everything easier. I have learned this the hard way after trying to pipe royal icing with a broken zip-top bag at midnight.
- Cat-shaped cookie cutter — I use a 3-inch cat face cutter from Amazon, but any size works. You can also use a simple round cutter and add ears by hand.
- Rolling pin with thickness guides — I love my Joseph Joseph rolling pin because the adjustable rings take the guesswork out of thickness. If you do not have one, use two wooden spoons on either side of the dough as guides.
- Parchment paper or silicone baking mats — Silpat mats are worth the investment; they prevent sticking and help cookies bake evenly.
- Baking sheets — light-colored metal sheets work best. Dark sheets can cause over-browning on the bottom.
- Electric mixer — handheld or stand mixer both work. I use my KitchenAid for the dough and a hand mixer for the royal icing to avoid over-mixing.
- Piping bags and tips — disposable piping bags are cheap and save on cleanup. If you are just starting, Wilton tips in sizes 2 and 3 are perfect.
- Toothpicks — essential for popping air bubbles in royal icing and fixing small mistakes
- Cooling rack — wire racks allow air to circulate so cookies cool evenly without soggy bottoms
If you are on a budget, skip the fancy piping bags and use sturdy zip-top bags with a tiny corner snipped off. I have done this more times than I want to admit, and it works fine for simple designs. Just be careful not to squeeze too hard or the bag might split at the seam.
Preparation Method
Making these black cat cookies takes a little time, but the process is satisfying and the results are worth every minute. Here is how to do it step by step.
-
Cream the butter and sugars — In a large bowl, beat the softened butter, granulated sugar, and powdered sugar together on medium speed until light and fluffy, about 3 minutes. Scrape down the sides of the bowl halfway through. The mixture should look pale and airy, almost like whipped frosting. If it looks greasy or separated, your butter was too soft. Pop the bowl in the fridge for 10 minutes and try again.
-
Add the egg and vanilla — Beat in the egg and vanilla extract until fully combined, about 30 seconds. The mixture might look slightly curdled at this point — do not panic, that is normal. It will come together once you add the flour.
-
Mix the dry ingredients — In a separate bowl, whisk together the flour, baking powder, and salt. This ensures the baking powder is evenly distributed so your cookies rise uniformly.
-
Combine wet and dry — Gradually add the flour mixture to the butter mixture, mixing on low speed until just combined. The dough will look shaggy and crumbly at first, but keep mixing gently. When it starts clumping together, stop. Over-mixing at this stage will make tough cookies.
-
Chill the dough — Divide the dough in half, flatten each half into a disc about 1 inch thick, wrap tightly in plastic wrap, and refrigerate for at least 2 hours. I have made the mistake of skipping this step and ended up with cookies that spread into amorphous blobs. The chill time allows the gluten to relax and the butter to firm up, which is crucial for shape retention. You can chill the dough up to 3 days.
-
Preheat and prepare — When ready to bake, preheat your oven to 350°F (175°C). Line two baking sheets with parchment paper or silicone mats.
-
Roll the dough — On a lightly floured surface, roll one disc of dough to 1/4-inch thickness. I cannot stress this enough — use thickness guides if you have them. Uneven thickness leads to uneven baking. If the dough cracks at the edges, let it sit at room temperature for 5 minutes to soften slightly.
-
Cut the shapes — Dip your cat cutter in flour before each cut to prevent sticking. Press straight down without twisting — twisting seals the edges and prevents clean cuts. Place cookies 2 inches apart on the prepared baking sheets. Gather scraps, re-roll, and cut again. The second roll might produce slightly tougher cookies, so use those for practice decorating.
-
Bake — Bake for 8 to 10 minutes, rotating the pan halfway through. The cookies should look set around the edges but still pale on top. They will not look golden brown — that is correct. Over-baking leads to dry cookies that crumble when you bite them. Let them cool on the baking sheet for 5 minutes, then transfer to a wire rack to cool completely. Do not even think about icing warm cookies; the royal icing will slide right off.
-
Make the royal icing — In a clean bowl, combine the sifted powdered sugar and meringue powder. Add 5 tablespoons of warm water and beat on low speed until combined, then increase to medium-high and beat for 5 minutes. The icing should be thick and glossy, with stiff peaks that hold their shape. Add the black gel coloring and beat until uniform. If the icing is too thick, add water a few drops at a time. If it is too thin, add more sifted powdered sugar.
-
Prepare for decorating — Transfer the black icing to a piping bag fitted with a small round tip. For the white and pink details, tint small portions of royal icing with the appropriate colors and place in separate piping bags.
-
Outline and flood — Pipe an outline around the edge of each cookie with the black icing. Then thin the remaining black icing with a few drops of water until it reaches a consistency that flows like honey. This is called flood consistency. Fill a squeeze bottle or a new piping bag with the thinned icing and flood the inside of each cookie. Use a toothpick to spread the icing into corners and pop any air bubbles. Let the flooded cookies dry for at least 4 hours or overnight.
-
Add the details — Once the black icing is completely dry, pipe white dots for eyes, pink dots for noses, and tiny pink triangles for inner ears. Add whiskers using white icing in thin, curved lines. Let the details dry for another 2 hours before stacking or packaging.
Cooking Tips & Techniques
After making these cookies more times than I care to count, I have learned a few tricks that make the process smoother and the results more consistent. Let me save you some of the frustration I went through.
The biggest mistake people make is not chilling the dough long enough. I once tried to rush the process and ended up with cat cookies that looked more like abstract art. The butter needs to be fully cold when the dough hits the oven. If your kitchen is warm, pop the cut-out cookies in the fridge for 15 minutes before baking. This little step prevents spreading and keeps those cat ears pointy.
For the royal icing consistency, I use what I call the 10-second rule. Drag a knife through the icing — if the line disappears in 10 seconds, the consistency is perfect for flooding. If it disappears faster, it is too thin. If it takes longer, it is too thick. Adjust accordingly. This rule has saved me more batches than I can count.
When adding black gel coloring, do it gradually. I once dumped in a full teaspoon at once and ended up with grey icing that took another full teaspoon to turn black. The extra liquid threw off my consistency and I had to add more powdered sugar, which changed the flavor slightly. Add a few drops at a time, mix thoroughly, and check the color before adding more.
Here is a lesson I learned the hard way — do not stack decorated cookies until the icing is completely dry. I got impatient once and stacked three cookies, thinking they were dry enough. Two hours later, I had a pile of cookies with smudged faces and one very sad baker. Give them the full drying time. Overnight is best if you can wait.
For perfect piping, hold the piping bag at a 45-degree angle and let the icing flow naturally. Do not squeeze too hard or the icing will blob. Practice on a piece of parchment paper before you start on the actual cookies. I still do this every time, even after years of practice.
Variations & Adaptations
These black cat cookies are wonderfully adaptable, and I have tried several variations over the years. Here are some of my favorites.
Gluten-Free Version — Swap the all-purpose flour with a good quality gluten-free flour blend that contains xanthan gum. I have had excellent results with Bob’s Red Mill 1-to-1 Baking Flour. The dough will be slightly more fragile, so handle it gently and chill it for an extra 30 minutes. The texture is slightly more crumbly but still delicious.
Vegan Adaptation — Use vegan butter sticks (not spreadable margarine) and replace the egg with a flax egg (1 tablespoon ground flaxseed mixed with 3 tablespoons water, let sit for 5 minutes). For the royal icing, use aquafaba (the liquid from a can of chickpeas) instead of meringue powder. Beat it until frothy before adding the powdered sugar. The texture is slightly different but works beautifully.
Flavor Variations — Add 1 teaspoon of almond extract along with the vanilla for a subtle nutty flavor. Or add the zest of one lemon to the dough for a bright citrus note that pairs surprisingly well with the black icing. I made a batch with orange zest last October and they were gone before Halloween even arrived.
Different Shapes — If you cannot find a cat-shaped cutter, use a round cutter and add triangle ears by pinching the dough before baking. Or make pumpkin-shaped cookies using a pumpkin cutter and orange icing. The dough works with any shape, so feel free to mix it up for different holidays.
Simplified Decorating — If royal icing feels intimidating, skip the flooding step and just pipe simple outlines. Use black sanding sugar sprinkled over a thin layer of corn syrup for a sparkly finish. Or dip the tops of the baked cookies in melted dark chocolate and add candy eyes. I have done this for last-minute parties and nobody complained.
Serving & Storage Suggestions
These cookies are best served at room temperature, and they look absolutely stunning arranged on a platter with a few cobwebs or fake spiders for a Halloween vibe. I like to place them on a white cake stand to make the black icing pop. They also make fantastic gifts — package them in clear cellophane bags tied with orange or purple ribbon.
For storage, keep undecorated cookies in an airtight container at room temperature for up to 2 weeks. Decorated cookies need more careful handling. Layer them between sheets of parchment paper in a single layer, then place another layer of parchment and cookies on top. Do not stack more than three layers high or the weight might crack the icing. They will stay fresh for up to 2 weeks, though the icing might soften slightly after the first week.
Freezing instructions — You can freeze the unbaked dough discs for up to 3 months. Wrap them tightly in plastic wrap and then foil. Thaw overnight in the refrigerator before rolling and cutting. Baked, undecorated cookies also freeze beautifully for up to 3 months. Thaw at room temperature before decorating. I have a stash of baked cat cookies in my freezer right now, ready for emergency cookie needs.
Reheating tip — These cookies do not need reheating, but if you want that fresh-from-the-oven warmth, pop them in a 300°F oven for 3 minutes. Let them cool slightly before serving. The royal icing will soften a bit but will re-set as they cool.
The flavors actually develop over time. The cookies taste slightly more buttery on day two, and the royal icing sets into that perfect snappy texture. If you can resist eating them all immediately, they are even better the next day.
Nutritional Information & Benefits
Let me be real with you — these are sugar cookies with royal icing, so they are a treat, not a health food. But I believe in enjoying life’s little pleasures without guilt. One cookie (using the recipe as written) contains approximately 180 calories, 8 grams of fat, 26 grams of carbohydrates, and 2 grams of protein. The exact numbers depend on your specific ingredients and how thick you roll the dough.
The good stuff — These cookies do contain butter, which provides vitamin A and healthy fats. The egg adds protein and B vitamins. And honestly? The mental health benefits of spending an afternoon creating something cute and edible are real. I have had some of my best thinking time while piping royal icing.
Dietary considerations — This recipe contains gluten, dairy, and eggs. For the gluten-free version mentioned above, the nutritional profile changes slightly. The vegan version is lower in saturated fat but higher in carbohydrates from the flax. If you are watching your sugar intake, you can reduce the sugar in the dough by 1/4 cup, though the texture will be slightly different.
Allergen note — Always check your specific ingredients for potential allergens. Some brands of meringue powder contain cornstarch, and some food colorings contain common allergens. When I serve these at parties, I always label them clearly and keep a list of ingredients handy.
Conclusion
These black cat sugar cookies have become my signature treat, and I am honestly a little proud of that. They represent three years of testing, failing, learning, and finally succeeding. Every time I pipe those tiny whiskers and see the faces come to life, I think about that little bakery on Grand Avenue and how their closing pushed me to become a better baker. Sometimes the best things come from loss, you know?
I hope you give these cookies a try. They are not difficult, I promise. The dough is forgiving, the royal icing is manageable, and the decorating is genuinely fun. Make them your own — add different colors, try different expressions on the cat faces, or experiment with sprinkles. That is the beauty of baking. There are no rules, only delicious possibilities.
When you make these, I would love to hear how they turn out. Drop a comment below and tell me about your decorating adventures. Did your cats come out perfect on the first try? Did you create a whole army of black cats? Share your photos and tag me — I want to see your adorable creations. Happy baking, friends!
Frequently Asked Questions
Can I make the dough ahead of time?
Absolutely! The dough can be refrigerated for up to 3 days or frozen for up to 3 months. Just wrap it tightly in plastic wrap and then foil. Thaw frozen dough overnight in the refrigerator before rolling.
Why did my cookies spread in the oven?
This usually happens when the dough is not chilled enough or the butter was too soft. Make sure your dough chills for at least 2 hours, and if your kitchen is warm, pop the cut-out cookies in the fridge for 15 minutes before baking.
How do I get the royal icing to be perfectly black?
Use gel food coloring, not liquid. Start with a few drops and add more gradually. Americolor Super Black is my favorite because it gives a deep black without needing too much coloring. Let the icing sit for 10 minutes after mixing — the color deepens as it rests.
Can I use a different type of icing?
Yes! If royal icing feels intimidating, try a simple glaze made from powdered sugar and milk. It will not be as crisp, but it tastes delicious. You can also use melted dark chocolate for a rich, fudgy coating.
How far in advance can I decorate these cookies?
Decorated cookies can be made up to 2 weeks in advance if stored properly. Keep them in an airtight container at room temperature, layered between parchment paper. Do not refrigerate them, as moisture can cause the icing to become sticky.
Pin This Recipe!
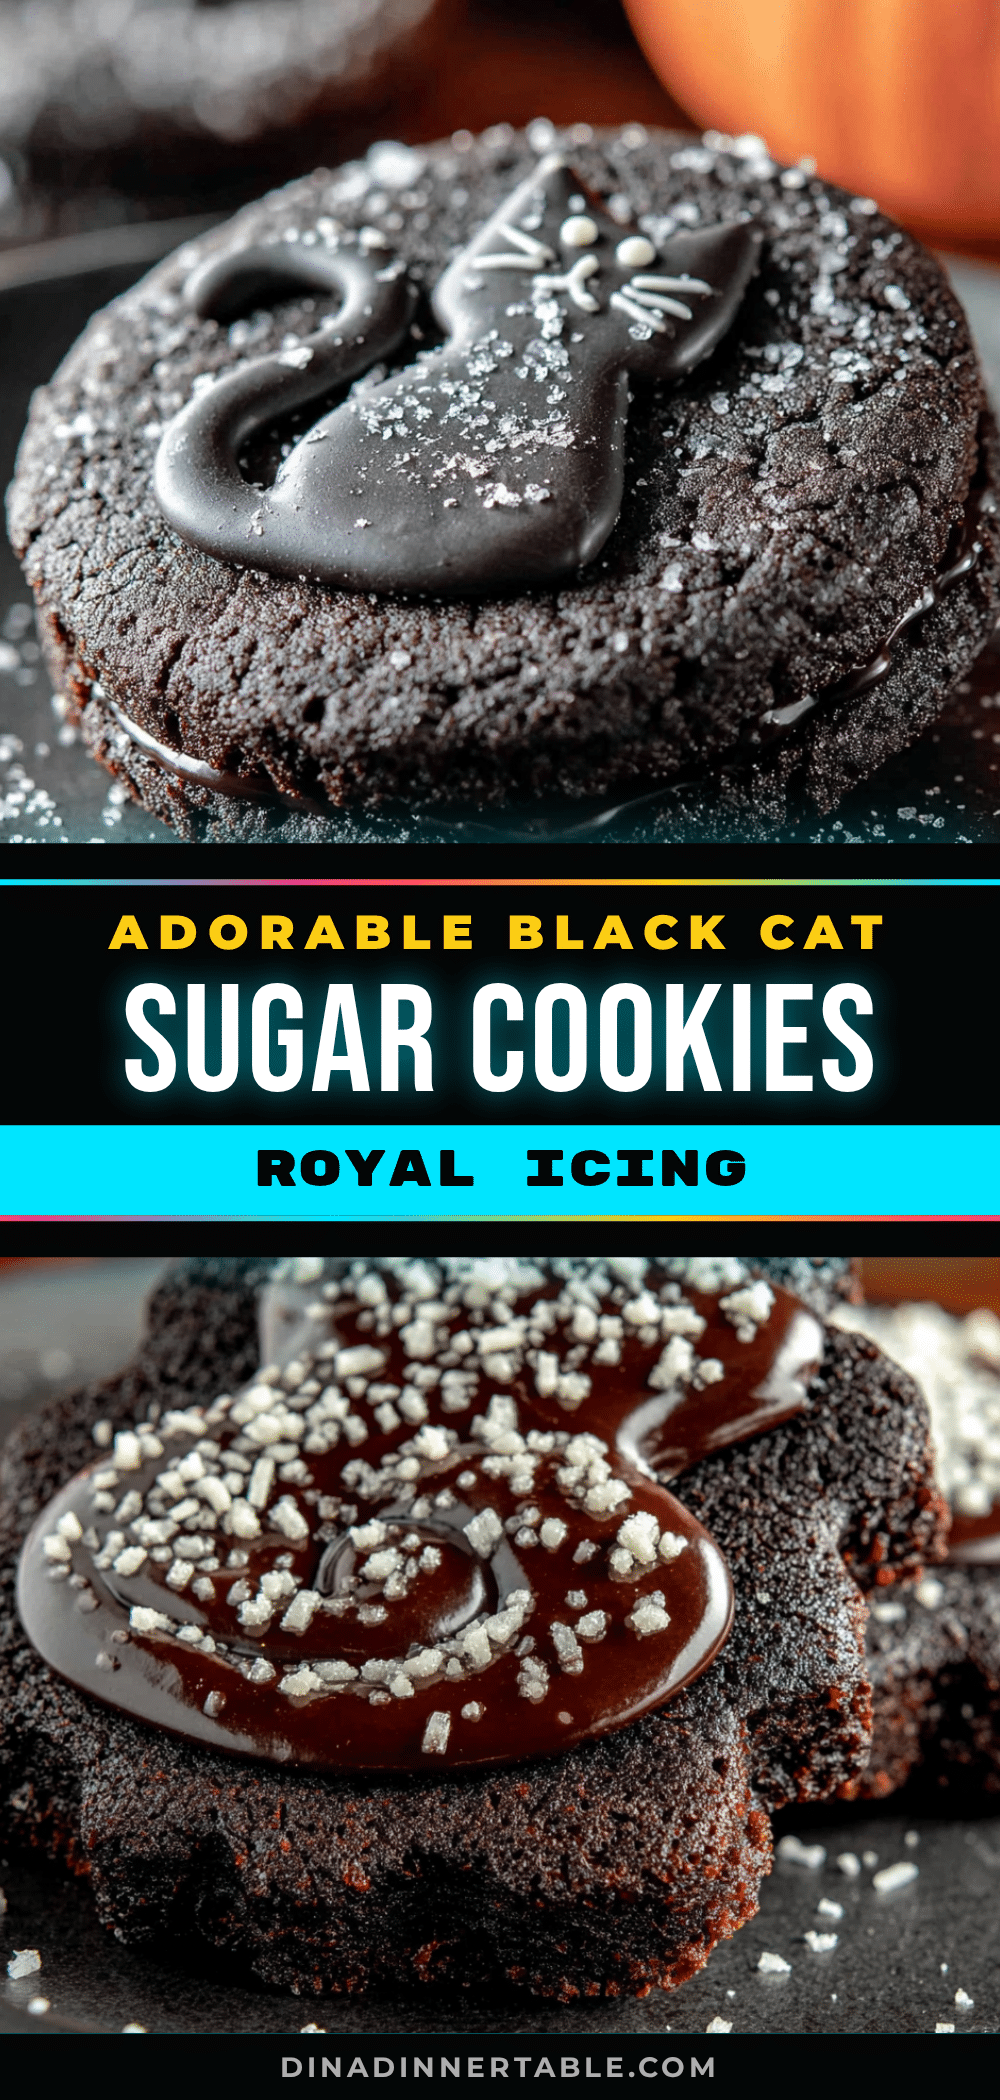
Adorable Black Cat Sugar Cookies – Easy Royal Icing Recipe

These black cat sugar cookies are the perfect replica of bakery beauties, with crisp edges, perfect cat faces, and glossy black icing. The dough holds its shape beautifully during baking, and the royal icing recipe is practically foolproof.
- Prep Time: 30 minutes
- Cook Time: 10 minutes
- Total Time: 2 hours 40 minutes (includes 2 hours chilling and 4 hours drying)
- Yield: 24 servings 1x
- Category: Dessert
- Cuisine: American
Ingredients
- 1 cup (226 grams) unsalted butter, softened to room temperature
- 1 cup (200 grams) granulated sugar
- 1/2 cup (60 grams) powdered sugar
- 1 large egg, at room temperature
- 2 teaspoons vanilla extract
- 2 and 3/4 cups (345 grams) all-purpose flour, spooned and leveled
- 1 teaspoon baking powder
- 1/2 teaspoon salt
- 4 cups (480 grams) powdered sugar, sifted
- 3 tablespoons meringue powder
- 5 to 6 tablespoons warm water
- 1 to 2 teaspoons black gel food coloring
- 1/2 teaspoon vanilla extract (optional)
- White royal icing (small batch for eyes and details)
- Pink gel food coloring (tiny dab for noses and inner ears)
- Piping bags or zip-top bags with corner snipped off
- Small round piping tips, size 2 or 3
Instructions
- Cream the butter and sugars: In a large bowl, beat the softened butter, granulated sugar, and powdered sugar together on medium speed until light and fluffy, about 3 minutes. Scrape down the sides of the bowl halfway through.
- Add the egg and vanilla: Beat in the egg and vanilla extract until fully combined, about 30 seconds.
- Mix the dry ingredients: In a separate bowl, whisk together the flour, baking powder, and salt.
- Combine wet and dry: Gradually add the flour mixture to the butter mixture, mixing on low speed until just combined. The dough will look shaggy and crumbly at first, but keep mixing gently until it starts clumping together. Stop mixing at that point.
- Chill the dough: Divide the dough in half, flatten each half into a disc about 1 inch thick, wrap tightly in plastic wrap, and refrigerate for at least 2 hours (up to 3 days).
- Preheat and prepare: When ready to bake, preheat your oven to 350°F (175°C). Line two baking sheets with parchment paper or silicone mats.
- Roll the dough: On a lightly floured surface, roll one disc of dough to 1/4-inch thickness. Use thickness guides if available.
- Cut the shapes: Dip your cat cutter in flour before each cut to prevent sticking. Press straight down without twisting. Place cookies 2 inches apart on the prepared baking sheets. Gather scraps, re-roll, and cut again.
- Bake: Bake for 8 to 10 minutes, rotating the pan halfway through. The cookies should look set around the edges but still pale on top. Let them cool on the baking sheet for 5 minutes, then transfer to a wire rack to cool completely.
- Make the royal icing: In a clean bowl, combine the sifted powdered sugar and meringue powder. Add 5 tablespoons of warm water and beat on low speed until combined, then increase to medium-high and beat for 5 minutes. The icing should be thick and glossy, with stiff peaks. Add the black gel coloring and beat until uniform. Adjust consistency as needed.
- Prepare for decorating: Transfer the black icing to a piping bag fitted with a small round tip. For the white and pink details, tint small portions of royal icing with the appropriate colors and place in separate piping bags.
- Outline and flood: Pipe an outline around the edge of each cookie with the black icing. Then thin the remaining black icing with a few drops of water until it reaches a honey-like consistency. Fill a squeeze bottle or a new piping bag with the thinned icing and flood the inside of each cookie. Use a toothpick to spread the icing into corners and pop any air bubbles. Let the flooded cookies dry for at least 4 hours or overnight.
- Add the details: Once the black icing is completely dry, pipe white dots for eyes, pink dots for noses, and tiny pink triangles for inner ears. Add whiskers using white icing in thin, curved lines. Let the details dry for another 2 hours before stacking or packaging.
Notes
The biggest mistake is not chilling the dough long enough. For royal icing consistency, use the 10-second rule: drag a knife through the icing; if the line disappears in 10 seconds, it’s perfect for flooding. Add black gel coloring gradually to avoid grey icing. Do not stack decorated cookies until icing is completely dry. For perfect piping, hold the piping bag at a 45-degree angle and let the icing flow naturally.
Nutrition
- Serving Size: 1 cookie
- Calories: 180
- Sugar: 18
- Sodium: 80
- Fat: 8
- Saturated Fat: 5
- Carbohydrates: 26
- Protein: 2
Keywords: black cat cookies, sugar cookies, royal icing, Halloween cookies, decorated cookies, cat cookies, spooky cookies