This was supposed to be a simple apple crisp. I had the apples peeled, the cinnamon measured, and a clear vision of a crumbly, buttery topping. But somewhere between answering the door for a package delivery and trying to find my good peeler (which, let me tell you, had apparently walked off), the whole plan went sideways. I grabbed a bottle of apple cider instead of apple juice, dumped it into the cake batter I was mentally still planning, and realized my oven was preheating to the wrong temperature—I had it set for a pie. I was already running late for my own dinner party, and I stood there staring at this weird, liquidy batter thinking, “Well, this is going to be a story I tell while serving takeout.”
What came out of the oven was nothing like the plan. It was better. The cake rose into this tall, tender, beautifully spiced thing that smelled like autumn had moved into my kitchen. The glaze—which I threw together in a panic with some maple syrup I found in the back of the fridge—dripped down the sides like it was meant to be there all along. Honestly, I didn’t even know what to call it. I just sliced it, put it on a plate, and walked it out to my friends with a sheepish grin. They didn’t ask questions. They just ate it. And then they asked for the recipe, which I had to scribble down from memory because I hadn’t written anything down.
This Cinnamon Apple Cider Cake has become my go-to for every gathering since. It’s the kind of recipe that makes you look like you planned the whole thing, even when you’re just making it up as you go. Maybe you’ve been there—staring at a kitchen disaster that somehow turns into a triumph. That’s this cake. It’s forgiving, it’s impressive, and it’s the reason I stopped panicking when things go wrong. Sometimes the best dishes come from the biggest messes.
Why You’ll Love This Recipe
I’ve tested this cake at least a dozen times since that first accidental batch, and I can tell you with confidence—it works every single time. Here’s why this one stands out from every other apple cake you’ve seen:
- Made for a Crowd: This cake is tall, sturdy, and slices beautifully. It serves 12 generous pieces, making it perfect for dinner parties, potlucks, or holiday brunches. You can even bake it the night before—it gets better as it sits.
- Simple Pantry Ingredients: No weird extracts or hard-to-find flours. You probably have everything except maybe the apple cider, which is everywhere in the fall. I’ve even used store-brand cider with great results.
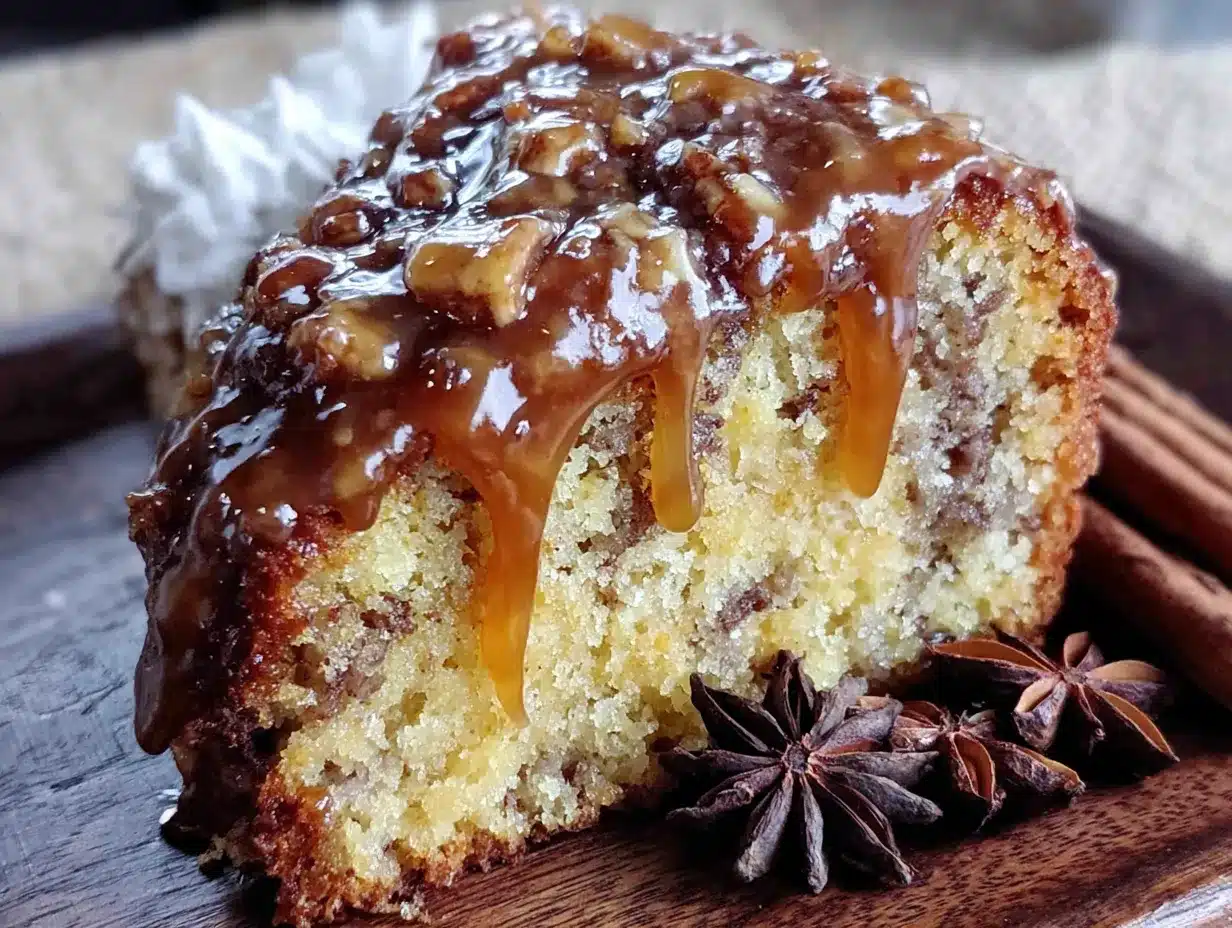
- That Maple Glaze: It’s not just a drizzle. It’s a thick, glossy, maple-forward glaze that soaks into the top of the cake just enough. I’ve had guests lick their plates. Not kidding.
- Foolproof Technique: The method is forgiving. Overmix a little? Fine. Forget to bring the eggs to room temperature? Still works. This is not a finicky bakery cake—it’s a home baker’s dream.
- Always Gets Rave Reviews: I’ve brought this to three different gatherings this fall alone, and each time, someone asks for the recipe before they’ve finished their first slice. It’s that kind of cake.
What makes this recipe different is the apple cider reduction. You simmer the cider down until it’s thick and concentrated, which gives the cake an intense apple flavor without making it soggy. Most apple cakes rely on chunks of fruit or juice that water things down. This one stays perfectly moist but never wet, with a tight, tender crumb that holds up to the glaze.
This is the cake you bring when you want to impress without stress. It’s comfort food reimagined—familiar enough to feel like home, but special enough to feel like an occasion. The first bite always gets a moment of silence. That’s the sign of a good recipe.
What Ingredients You Will Need
This recipe uses simple, wholesome ingredients that come together to create something truly special. Most of these are pantry staples, especially during apple season. Here’s what you’ll need and why each one matters:
For the Cake
- 2 cups apple cider (not apple juice—cider has more depth and body). You’ll reduce this on the stove to concentrate the flavor.
- 2 ½ cups all-purpose flour (I use King Arthur for consistent results, but any brand works). Spoon and level it for accuracy.
- 1 ½ teaspoons baking powder (make sure it’s fresh—test it in water if you’re unsure).
- 1 teaspoon baking soda (helps the cake rise and gives a tender crumb).
- 1 tablespoon ground cinnamon (this is the star spice—don’t skimp). I prefer Saigon cinnamon for its warmth.
- ½ teaspoon ground nutmeg (freshly grated if you have it, but pre-ground works fine).
- ½ teaspoon salt (balances the sweetness and enhances the spices).
- ¾ cup unsalted butter, softened (salted butter will work, just omit the added salt).
- 1 cup packed light brown sugar (adds moisture and a subtle molasses note).
- ½ cup granulated sugar (for sweetness and structure).
- 3 large eggs, room temperature (cold eggs can seize the batter—set them out 30 minutes ahead).
- 1 teaspoon vanilla extract (pure, not imitation, for the best flavor).
- ½ cup buttermilk, room temperature (adds tang and tenderness). You can make your own by adding 1 tablespoon lemon juice to ½ cup milk and letting it sit for 5 minutes.
For the Maple Glaze
- 1 ½ cups powdered sugar, sifted (no lumps allowed—this is the base of a smooth glaze).
- 3 tablespoons pure maple syrup (not pancake syrup—the real stuff makes a difference). I recommend Grade A dark amber for a stronger maple flavor.
- 1–2 tablespoons milk or heavy cream (adjust for desired consistency).
- Pinch of salt (optional, but it cuts the sweetness beautifully).
Substitution Notes: For a dairy-free version, use vegan butter and oat milk with a splash of lemon juice for the buttermilk. The glaze can be made with oat milk too—it sets up a little softer but still tastes great. If you’re gluten-sensitive, a 1:1 gluten-free baking flour blend works well, though the crumb will be slightly more delicate.
Equipment Needed
You don’t need a professional bakery setup for this cake, but a few key tools make the process smoother. Here’s what I use:
- 10-cup bundt pan (or a 9×13-inch baking pan—the bake time changes, so watch it closely). I prefer a nonstick bundt pan for easy release.
- Medium saucepan for reducing the apple cider. A heavy-bottomed one prevents scorching.
- Stand mixer or hand mixer with paddle attachment. A hand mixer works fine, but you’ll need to cream the butter and sugar for a full 3 minutes.
- Large mixing bowls (one for dry ingredients, one for wet).
- Whisk for combining dry ingredients and smoothing the glaze.
- Rubber spatula for scraping down the bowl and folding in the cider.
- Cooling rack (essential for even cooling—don’t skip this).
- Toothpick or cake tester for checking doneness.
If you don’t have a bundt pan, don’t worry. A standard 9×13 pan works beautifully—just reduce the bake time to 35–40 minutes and check with a toothpick. I’ve also made this as a loaf cake (two 9×5 pans, bake for 45–50 minutes) for smaller gatherings. The glaze is generous enough to cover any shape.
Preparation Method
Let’s walk through this step by step. I’ve included all the little details I wish someone had told me the first time I made it.
- Reduce the apple cider. Pour 2 cups of apple cider into a medium saucepan and bring it to a boil over medium-high heat. Then lower the heat to a simmer and let it cook for 15–20 minutes, stirring occasionally, until it’s reduced to about ½ cup. It should be thick, syrupy, and deeply fragrant. Watch it toward the end—it can burn quickly. Remove from heat and let it cool completely. You can do this step a day ahead and store the reduction in the fridge.
- Preheat and prepare your pan. Set your oven to 350°F (175°C). Grease your bundt pan thoroughly with butter or baking spray—don’t miss the center tube. I use a pastry brush to get into all the crevices, then dust with a light coating of flour. Tap out the excess. This is the most important step for a clean release.
- Whisk the dry ingredients. In a large bowl, combine 2 ½ cups flour, 1 ½ teaspoons baking powder, 1 teaspoon baking soda, 1 tablespoon cinnamon, ½ teaspoon nutmeg, and ½ teaspoon salt. Whisk them together until evenly distributed. Set aside.
- Cream the butter and sugars. In your mixer bowl, beat ¾ cup softened butter with 1 cup brown sugar and ½ cup granulated sugar on medium speed for 3 minutes. It should look light, fluffy, and pale. Scrape down the sides and bottom of the bowl halfway through. Don’t rush this step—proper creaming gives the cake its structure.
- Add the eggs and vanilla. Add 3 eggs one at a time, beating well after each addition. Scrape the bowl again. Then add 1 teaspoon vanilla extract and beat until combined. The mixture might look slightly curdled at this point—that’s normal if your eggs were cold. It’ll come together when you add the flour.
- Alternate the dry ingredients and buttermilk. With the mixer on low speed, add about a third of the flour mixture, then half of the ½ cup buttermilk. Repeat with another third of flour, the remaining buttermilk, and finish with the last third of flour. Mix just until combined—overmixing at this stage can make the cake tough. Fold in the cooled cider reduction with a spatula. The batter will be thick and smell incredible.
- Pour and bake. Spoon the batter into your prepared pan and spread it evenly. Tap the pan on the counter a few times to release air bubbles. Bake for 45–55 minutes, until a toothpick inserted near the center comes out clean or with a few moist crumbs. The top should be golden brown and spring back when lightly touched.
- Cool in the pan. Place the pan on a cooling rack for 15 minutes. Don’t skip this—the cake needs time to set. Then invert it onto the rack and let it cool completely, about 1 hour. If it sticks, gently tap the sides of the pan and try again. Patience is key here.
- Make the glaze. While the cake cools, whisk together 1 ½ cups sifted powdered sugar, 3 tablespoons maple syrup, and 1 tablespoon milk. Add more milk a teaspoon at a time until it reaches a pourable consistency—thick but not stiff. Stir in a pinch of salt if you like. Drizzle it over the cooled cake, letting it drip down the sides.
Sensory cues: When the cider is reducing, your kitchen should smell like a caramel apple stand. The batter will be thick and glossy, like a cinnamon-scented cloud. The baked cake should feel firm but springy, and the glaze should set to a matte finish after about 20 minutes.
Cooking Tips & Techniques
I’ve made this cake enough times to know where things can go wrong. Here are the lessons I learned the hard way so you don’t have to:
Don’t rush the cider reduction. The first time I made this, I tried to speed it up by cranking the heat. It burned. The second time, I didn’t reduce it enough, and the cake was too wet. Aim for a syrupy consistency—it should coat the back of a spoon. If you overshoot and it gets too thick, just add a tablespoon of water to thin it back down.
Room temperature ingredients matter. I know it’s annoying, but cold butter doesn’t cream properly, and cold eggs can make the batter curdle. Set everything out on the counter 30–45 minutes before you start. If you forget, place the eggs in a bowl of warm water for 5 minutes and microwave the buttermilk for 10 seconds.
Grease that pan like you mean it. I once used a “nonstick” spray and ended up with half the cake stuck in the pan. Use butter or baking spray with flour, and get into every nook and cranny. A pastry brush is your best friend here.
Check for doneness early. Ovens vary wildly. Start checking at 45 minutes, even if your recipe says 50. A toothpick should come out clean, but a few moist crumbs are fine—better to be slightly under than overbaked, which dries it out.
Glaze while the cake is completely cool. If the cake is even slightly warm, the glaze will melt and run right off. I learned this when I ended up with a puddle of glaze on my serving plate and a naked cake. Patience pays off.
Variations & Adaptations
This cake is a fantastic base for experimentation. Here are some variations I’ve tried and loved:
- Apple chunks: Fold in 1 cup of finely diced fresh apples (Granny Smith or Honeycrisp work best) along with the cider reduction. It adds little pockets of soft fruit throughout the cake.
- Spice it up: Add ½ teaspoon ground ginger and ¼ teaspoon ground cloves to the flour mixture for a warmer, more complex spice profile. I do this for holiday gatherings.
- Nutty twist: Toast ½ cup of chopped pecans or walnuts and fold them into the batter. The crunch contrasts beautifully with the tender crumb. Sprinkle extra on top of the glaze.
- Dairy-free version: Use vegan butter and oat milk with lemon juice for the buttermilk. The glaze works with oat milk too—it sets a bit softer but tastes just as good.
- Gluten-free option: Substitute a 1:1 gluten-free baking flour blend. The crumb will be slightly more delicate, so handle the cake gently when removing it from the pan.
- Bourbon maple glaze: Replace 1 tablespoon of the milk with bourbon for an adult twist. It’s incredible with the apple and cinnamon flavors.
My personal favorite variation is the bourbon glaze. I tried it on a whim one Thanksgiving, and it was the first thing to disappear from the dessert table. Just don’t tell the kids.
Serving & Storage Suggestions
This cake is a showstopper at room temperature. Here’s how to serve and store it for the best experience:
Serving: Let the glaze set for at least 20 minutes before slicing. Use a serrated knife for clean cuts—wipe it clean between slices. Serve on a cake stand or a wooden board for a rustic look. A dollop of lightly sweetened whipped cream or a scoop of vanilla ice cream takes it over the top.
What to serve alongside: This cake pairs beautifully with a hot cup of coffee, spiced chai, or a glass of cold milk. For a brunch spread, serve it alongside crispy bacon cheddar scones for a sweet-savory balance. If you’re hosting a fall dinner, a roasted butternut squash soup makes a perfect starter before dessert.
Storage: Store the cake in an airtight container at room temperature for up to 3 days. The glaze will stay glossy and the cake will remain moist. If your kitchen is warm, refrigerate it—just let it come to room temperature before serving.
Freezing: This cake freezes beautifully. Wrap it tightly in plastic wrap, then in foil, and freeze for up to 3 months. Thaw overnight in the refrigerator, then bring to room temperature before glazing. I’ve done this for holiday prep, and it tastes just as fresh.
Flavor development: Honestly, this cake tastes even better on day two. The spices mellow and meld together, and the crumb becomes even more tender. If you can resist eating it all on day one, you’re in for a treat.
Nutritional Information & Benefits
Here’s the approximate nutritional breakdown per slice (based on 12 servings with glaze):
- Calories: 385
- Fat: 14g
- Saturated Fat: 8g
- Carbohydrates: 62g
- Sugar: 42g
- Fiber: 1g
- Protein: 5g
- Sodium: 280mg
Health benefits: While this is definitely a treat, the apple cider provides a small dose of antioxidants and vitamin C. Cinnamon has anti-inflammatory properties and can help regulate blood sugar. The buttermilk adds calcium and probiotics. It’s not health food, but it’s made with real ingredients—no preservatives or artificial flavors.
Dietary considerations: This recipe contains gluten, dairy, and eggs. For allergen-friendly options, see the variations section above. It’s nut-free as written, making it safe for school events or gatherings with nut allergies.
I believe in balance. This cake is for celebrations, for gatherings, for the moments when you want something special. Enjoy it without guilt—just maybe not every day.
Conclusion
This Cinnamon Apple Cider Cake is the recipe that keeps on giving. It started as a happy accident, but it’s become my most-requested dessert for gatherings. The tender crumb, the warm spices, the glossy maple glaze—every element works together to create something that feels both familiar and special.
I love this recipe because it’s forgiving. It doesn’t demand perfection. It welcomes substitutions, adapts to what you have on hand, and still turns out beautifully. That’s the kind of recipe I want in my collection—and I hope it becomes one of yours too.
Try it for your next dinner party, potluck, or holiday brunch. Customize it with your favorite mix-ins, adjust the spices to your taste, and make it your own. I’d love to hear how it turns out—drop a comment below and tell me about your version. Did you add nuts? Try a different glaze? Share your story. And if you loved it, pass it along to a friend. Good recipes deserve to travel.
Happy baking, friends. You’ve got this.
Frequently Asked Questions
Can I use apple juice instead of apple cider?
You can, but the flavor will be milder and less complex. Apple cider has a deeper, more robust apple taste that really shines in this cake. If you use juice, consider adding an extra teaspoon of cinnamon to compensate.
How do I know when the cider is reduced enough?
It should be thick and syrupy, coating the back of a spoon, and reduced to about ½ cup. You’ll notice it’s much darker and smells intensely of apples. If you’re unsure, measure it—it should be about a quarter of the original volume.
Can I make this cake ahead of time?
Absolutely. Bake the cake a day ahead, cool it completely, and store it wrapped tightly at room temperature. Glaze it the day you plan to serve it for the prettiest presentation. The cake actually tastes better on day two.
Why did my cake stick to the pan?
This usually happens when the pan isn’t greased thoroughly. Make sure you get into all the crevices, especially the center tube. Use butter or baking spray with flour, and let the cake cool in the pan for exactly 15 minutes before inverting.
Can I skip the glaze?
You can, but the glaze really makes this cake special. If you want a lighter option, dust the cooled cake with powdered sugar instead. It won’t have the same maple flavor, but it’ll still be delicious.
Pin This Recipe!
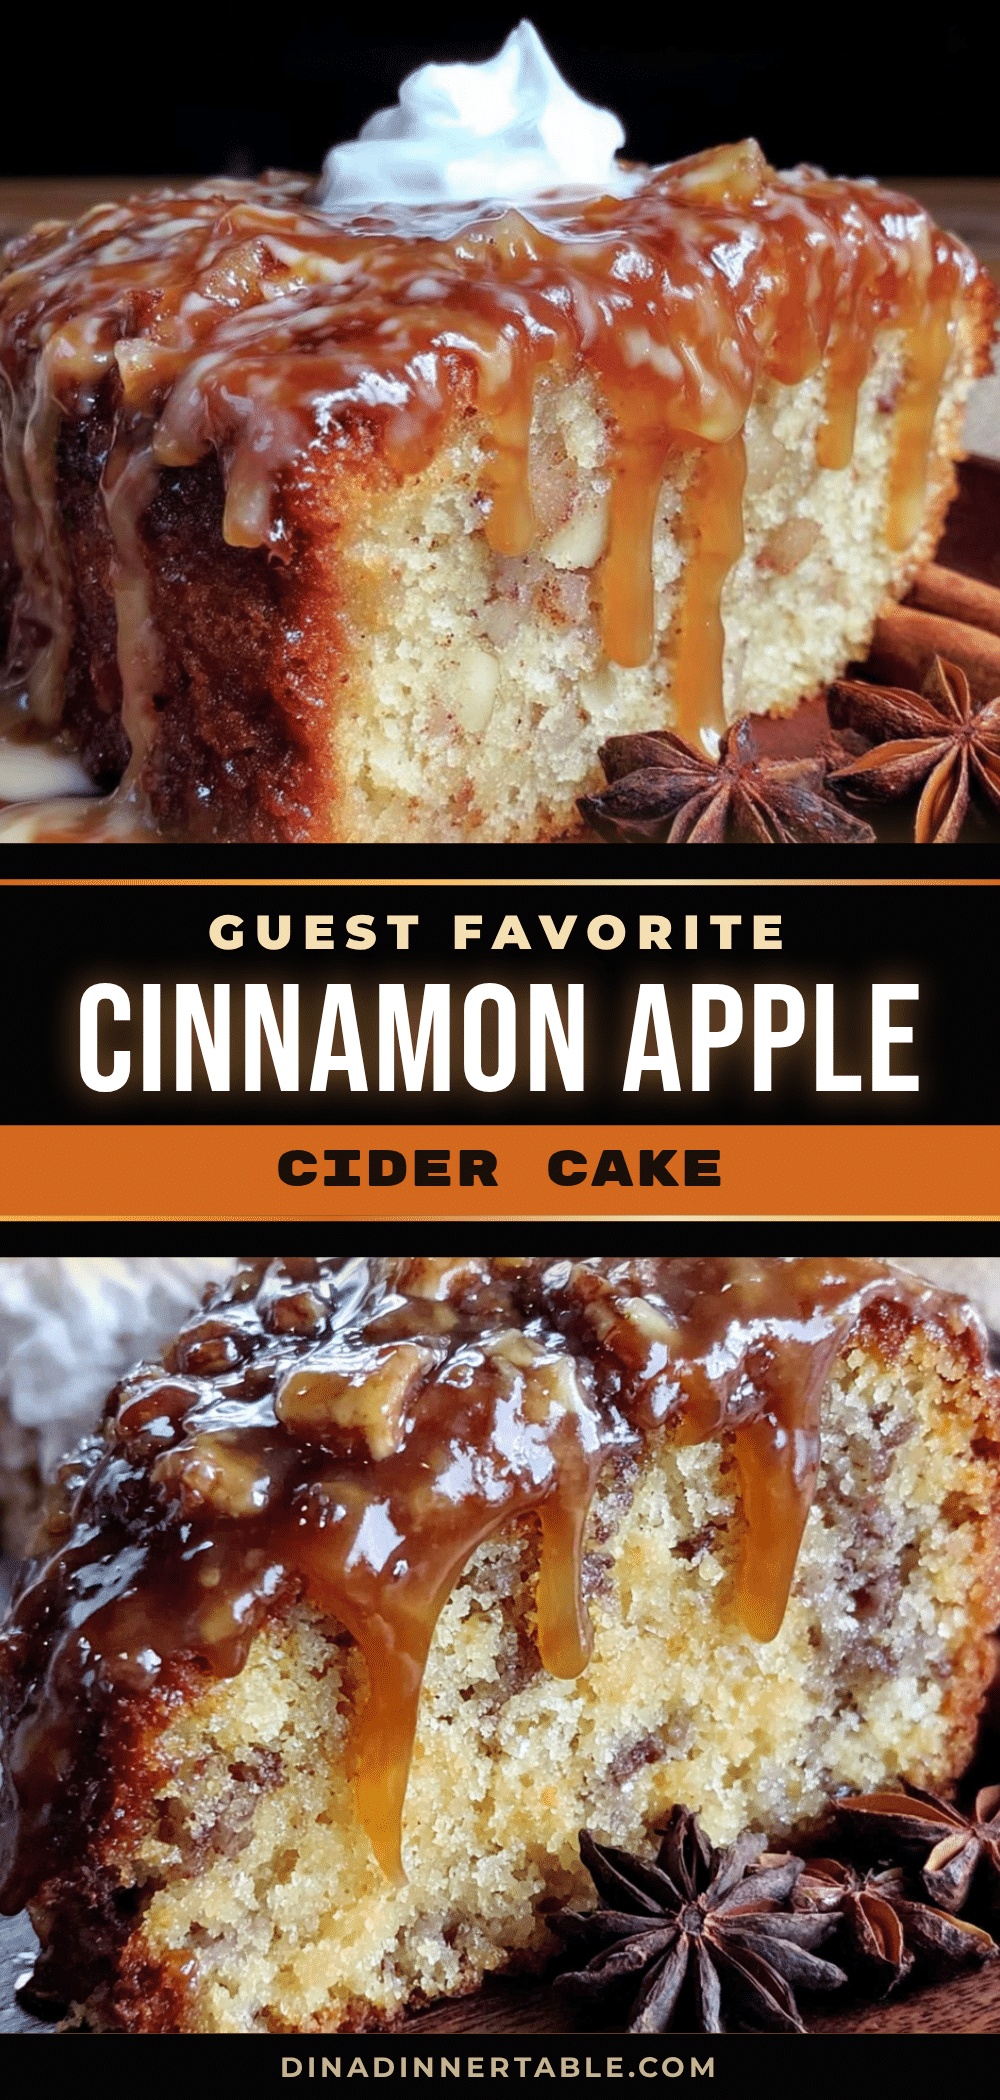
Best Cinnamon Apple Cider Cake with Easy Maple Glaze
A tender, beautifully spiced apple cider cake with a thick, glossy maple glaze. This forgiving recipe is perfect for gatherings and always gets rave reviews.
- Prep Time: 20 minutes
- Cook Time: 50 minutes
- Total Time: 1 hour 10 minutes
- Yield: 12 servings 1x
- Category: Dessert
- Cuisine: American
Ingredients
- 2 cups apple cider
- 2 ½ cups all-purpose flour
- 1 ½ teaspoons baking powder
- 1 teaspoon baking soda
- 1 tablespoon ground cinnamon
- ½ teaspoon ground nutmeg
- ½ teaspoon salt
- ¾ cup unsalted butter, softened
- 1 cup packed light brown sugar
- ½ cup granulated sugar
- 3 large eggs, room temperature
- 1 teaspoon vanilla extract
- ½ cup buttermilk, room temperature
- 1 ½ cups powdered sugar, sifted
- 3 tablespoons pure maple syrup
- 1–2 tablespoons milk or heavy cream
- Pinch of salt (optional)
Instructions
- Reduce the apple cider: Pour 2 cups of apple cider into a medium saucepan and bring to a boil over medium-high heat. Lower heat to a simmer and cook for 15–20 minutes, stirring occasionally, until reduced to about ½ cup. It should be thick, syrupy, and deeply fragrant. Remove from heat and let cool completely.
- Preheat and prepare your pan: Set oven to 350°F (175°C). Grease a 10-cup bundt pan thoroughly with butter or baking spray, dust with flour, and tap out excess.
- Whisk the dry ingredients: In a large bowl, combine 2 ½ cups flour, 1 ½ teaspoons baking powder, 1 teaspoon baking soda, 1 tablespoon cinnamon, ½ teaspoon nutmeg, and ½ teaspoon salt. Whisk until evenly distributed. Set aside.
- Cream the butter and sugars: In a mixer bowl, beat ¾ cup softened butter with 1 cup brown sugar and ½ cup granulated sugar on medium speed for 3 minutes until light, fluffy, and pale. Scrape down the sides and bottom of the bowl halfway through.
- Add the eggs and vanilla: Add 3 eggs one at a time, beating well after each addition. Scrape the bowl again. Add 1 teaspoon vanilla extract and beat until combined.
- Alternate the dry ingredients and buttermilk: With mixer on low speed, add about a third of the flour mixture, then half of the ½ cup buttermilk. Repeat with another third of flour, remaining buttermilk, and finish with the last third of flour. Mix just until combined. Fold in the cooled cider reduction with a spatula.
- Pour and bake: Spoon batter into prepared pan and spread evenly. Tap pan on counter a few times to release air bubbles. Bake for 45–55 minutes until a toothpick inserted near the center comes out clean or with a few moist crumbs. The top should be golden brown and spring back when lightly touched.
- Cool in the pan: Place pan on a cooling rack for 15 minutes. Then invert onto rack and let cool completely, about 1 hour.
- Make the glaze: Whisk together 1 ½ cups sifted powdered sugar, 3 tablespoons maple syrup, and 1 tablespoon milk. Add more milk a teaspoon at a time until pourable but thick. Stir in a pinch of salt if desired. Drizzle over cooled cake, letting it drip down the sides.
Notes
Don’t rush the cider reduction; it should be syrupy. Room temperature ingredients matter for proper creaming. Grease the pan thoroughly for easy release. Check for doneness early (at 45 minutes). Glaze only when cake is completely cool. The cake tastes even better on day two.
Nutrition
- Serving Size: 1 slice
- Calories: 385
- Sugar: 42
- Sodium: 280
- Fat: 14
- Saturated Fat: 8
- Carbohydrates: 62
- Fiber: 1
- Protein: 5
Keywords: cinnamon apple cider cake, maple glaze, apple cake, fall dessert, bundt cake, easy cake recipe