This was supposed to be a batch of my grandmother’s classic butter cookies. You know, the ones that melt in your mouth and taste like pure nostalgia. I had the butter softening on the counter, the vanilla extract measured out, and I was feeling pretty good about myself. Then I grabbed the wrong jar from the spice cabinet. Instead of vanilla, I dumped a generous splash of peppermint extract into the creamed butter and sugar. I stood there, staring at the bowl, smelling the unmistakable scent of candy canes and winter holidays. My first thought was panic. My second thought was, well, this is going to taste like toothpaste cookies. But I was already late picking up my daughter from school, and there was no time to start over. So I just kept going, adding the flour, rolling out the dough, and cutting out little circles, all while muttering to myself about what a mess I’d made.
The cookies came out of the oven looking perfect, golden around the edges and soft in the center. But they smelled like Christmas morning in July. I almost threw them away, honestly. But my neighbor, a woman named Rosa who has never steered me wrong about food, knocked on my door right then. She saw the cookies cooling on the rack and asked if she could try one. I warned her about the peppermint disaster, but she just shrugged and took a bite. Her eyes went wide. “These are amazing,” she said. “But they need chocolate.” So I melted some dark chocolate chips, sandwiched the cookies together with a thick layer of chocolate ganache, and suddenly, this happy little accident became the best thing I’d made all year. Now I make these every Halloween, and they’ve become the cookie that everyone asks for. Maybe you’ve had one of those kitchen moments where everything goes wrong, but somehow, it turns out even better than the plan.
Why You’ll Love This Recipe
These Cozy Chocolate Mint Halloween Sandwich Cookies are the kind of treat that makes people stop mid-conversation and just savor the bite. I’ve tested this recipe at least six times to get the texture and flavor just right, and I can tell you with confidence that it works every single time.
- Quick & Easy: From start to finish, these cookies come together in about 45 minutes. No complicated techniques, no fancy equipment. Just simple steps that anyone can follow.
- Simple Ingredients: You probably have most of these in your pantry already. Butter, sugar, flour, eggs, cocoa powder, and peppermint extract. No weird specialty items required.
- Perfect for Halloween: The minty chocolate flavor feels festive and cozy, like curling up with a good scary movie and a warm blanket. Plus, the black cocoa powder gives them that spooky dark color.
- Crowd-Pleaser: I brought these to a Halloween potluck last year, and three different people asked for the recipe before the night was over. Kids love the minty kick, and adults appreciate the sophisticated chocolate flavor.
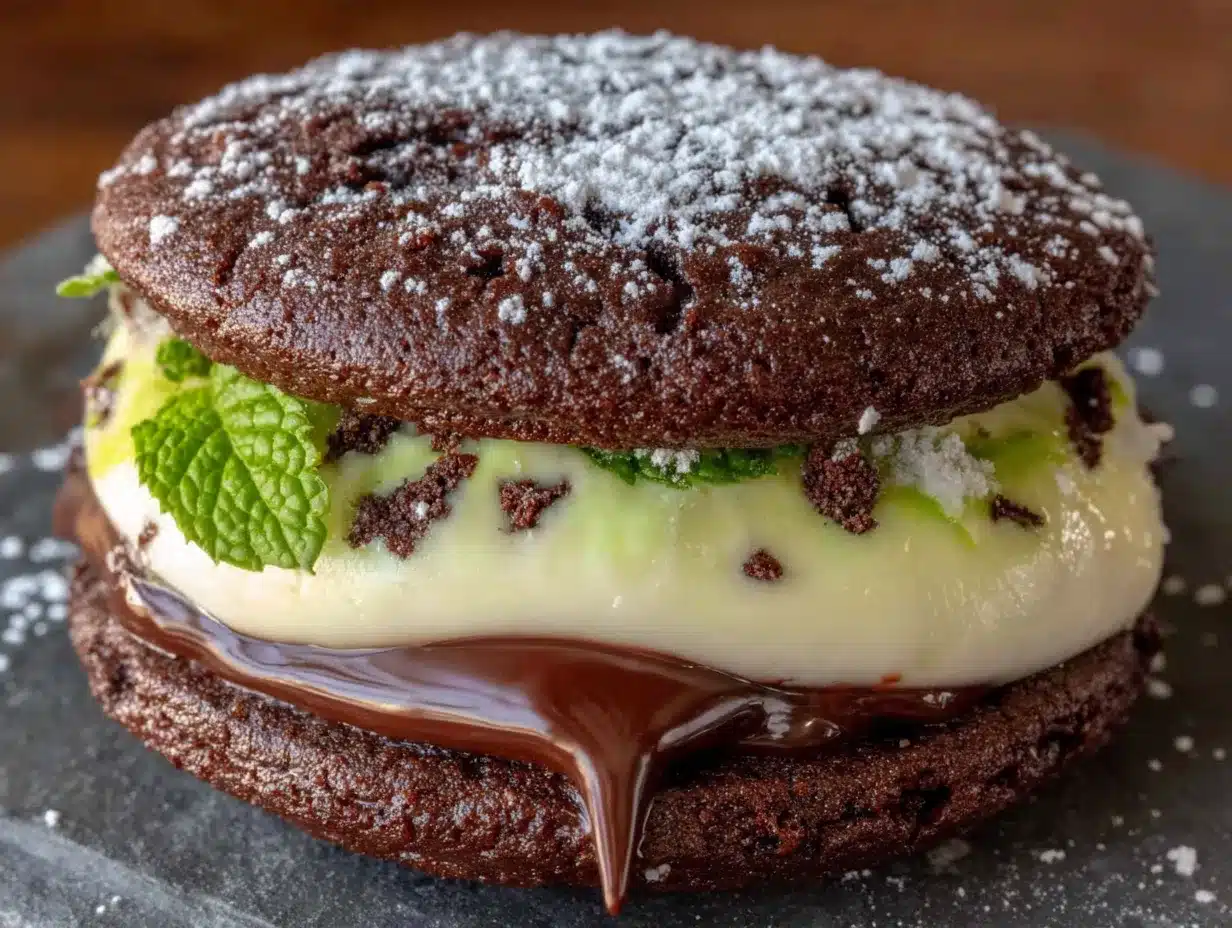
- Unbelievably Delicious: The combination of soft, dark chocolate cookies with a creamy mint filling is next-level comfort food. The texture is tender but sturdy enough to hold together, and the flavor is perfectly balanced between sweet and cool.
What makes this recipe different from all the other chocolate mint cookies out there is the technique. I use black cocoa powder for that deep, dark color and rich flavor, and I add a tiny pinch of salt to the filling to make the mint pop. It’s not just another version of a sandwich cookie. It’s the best version, the one you’ll come back to year after year.
This recipe isn’t just good. It’s the kind that makes you close your eyes after the first bite. It’s comfort food reimagined for the spooky season, with all the soul-soothing satisfaction of a classic treat. Perfect for impressing guests at your Halloween party without any stress, or for turning a simple Tuesday night into something memorable.
What Ingredients You Will Need
This recipe uses simple, wholesome ingredients to deliver bold flavor and satisfying texture without the fuss. Most of these are pantry staples, but a few are worth seeking out for the best results.
For the Chocolate Cookies
- 1 cup (2 sticks) unsalted butter, softened (I always use Kerrygold for the richest flavor, but any good-quality butter works)
- 1 cup granulated sugar (adds sweetness and helps with that soft, chewy texture)
- 1 large egg, room temperature (cold eggs can seize the butter mixture, so let it sit out for 30 minutes)
- 1 teaspoon vanilla extract (pure, not imitation, for the best flavor)
- 1/2 teaspoon peppermint extract (adjust to taste, but don’t go overboard or it’ll taste like toothpaste)
- 1 3/4 cups all-purpose flour (spoon and level it for accuracy)
- 1/2 cup black cocoa powder (this is the secret to that dark, Halloween-perfect color. I recommend Rodelle or King Arthur brands)
- 1/2 teaspoon baking soda (helps the cookies spread just a little)
- 1/4 teaspoon salt (balances the sweetness and enhances the chocolate)
For the Mint Filling
- 1/2 cup unsalted butter, softened (the base of the creamy filling)
- 2 cups powdered sugar (sifted to avoid lumps)
- 1 tablespoon milk (use whole milk for richness, or any dairy-free alternative)
- 1/2 teaspoon peppermint extract (add more or less depending on how minty you want it)
- A few drops of green food coloring (optional, but it gives that classic mint cookie look)
- Pinch of salt (trust me on this one, it makes the mint flavor sing)
If you can’t find black cocoa powder, you can substitute regular unsweetened cocoa powder, but the cookies will be a lighter brown color. For a gluten-free version, swap the all-purpose flour with a 1:1 gluten-free baking blend. I’ve tried it with Bob’s Red Mill, and it works beautifully.
Equipment Needed
You don’t need a professional bakery setup to make these cookies, but a few key tools will make your life easier.
- Electric mixer (handheld or stand mixer both work; I’ve used my trusty KitchenAid for years, but a hand mixer is perfectly fine)
- Mixing bowls (at least two, one for wet ingredients and one for dry)
- Baking sheets (I prefer light-colored aluminum sheets for even baking)
- Parchment paper (non-stick and makes cleanup a breeze)
- Cooling rack (essential for letting the cookies cool completely before filling)
- Small cookie scoop (about 1 tablespoon size, for uniform cookies. I got mine at a thrift store for a dollar)
- Spatula (for scraping down the bowl and transferring cookies)
- Small offset spatula (for spreading the filling, though a butter knife works in a pinch)
If you don’t have a cookie scoop, just use a regular tablespoon and roll the dough into balls with your hands. It takes a little longer, but the cookies will still turn out great.
Preparation Method
Let’s get baking. I’ve broken this down into clear steps so you can follow along without any confusion.
-
Preheat your oven to 350°F (175°C). Line two baking sheets with parchment paper. This is one of those steps that seems small but makes a huge difference. Cold oven, sad cookies.
-
Cream the butter and sugar. In a large mixing bowl, beat the softened butter and granulated sugar together on medium speed until light and fluffy. This takes about 3 to 4 minutes. You want it to look pale and airy. Scrape down the sides of the bowl with a spatula halfway through. I once skipped this step because I was in a hurry, and the cookies came out flat and greasy. Don’t be like me.
-
Add the wet ingredients. Beat in the egg, vanilla extract, and peppermint extract until well combined. The mixture might look a little curdled at this point, and that’s totally normal. Don’t panic. It will come together when you add the dry ingredients.
-
Whisk the dry ingredients. In a separate bowl, whisk together the flour, black cocoa powder, baking soda, and salt. This ensures everything is evenly distributed. No one wants a pocket of baking soda in their cookie.
-
Combine wet and dry. Gradually add the dry ingredients to the wet mixture, mixing on low speed until just combined. Be careful not to overmix. Stop as soon as you don’t see any more streaks of flour. Overmixing develops gluten and makes the cookies tough.
-
Chill the dough. This is an important step that I learned the hard way. Cover the bowl with plastic wrap and refrigerate the dough for at least 30 minutes. Chilling prevents the cookies from spreading too much in the oven and gives them a thicker, softer texture. If you skip this, you’ll end up with flat, crispy cookies.
-
Scoop and bake. Use your cookie scoop or a tablespoon to scoop rounded balls of dough, about 1 tablespoon each. Place them 2 inches apart on the prepared baking sheets. Bake for 8 to 10 minutes. The cookies should look set around the edges but still soft in the center. They will continue to cook on the hot baking sheet after you take them out. Let them cool on the baking sheet for 5 minutes, then transfer to a cooling rack to cool completely.
-
Make the filling. While the cookies are cooling, make the mint filling. In a medium bowl, beat the softened butter until smooth. Gradually add the powdered sugar, beating on low speed to avoid a sugar cloud. Add the milk, peppermint extract, green food coloring (if using), and a pinch of salt. Beat on medium speed until light and fluffy, about 2 minutes. Taste it and adjust the mint level if needed.
-
Assemble the sandwich cookies. Once the cookies are completely cool, pair them up by size. Using a small offset spatula or butter knife, spread about 1 tablespoon of filling onto the flat side of one cookie. Top with another cookie, flat side down, and gently press to sandwich them together. The filling should come all the way to the edges. Repeat with the remaining cookies.
That’s it. You’ve just made a batch of the most delicious Halloween cookies you’ll ever taste. The whole process takes about 45 minutes, including chilling time.
Cooking Tips & Techniques
Over the years, I’ve made every mistake you can imagine with these cookies, so let me save you some trouble.
Don’t overbake. This is the number one mistake people make. These cookies are meant to be soft and tender. The second you see the edges looking set, pull them out. They will look underdone in the center, and that’s exactly what you want. I once left them in for an extra two minutes because I was distracted by a phone call, and they came out dry and crumbly. Learn from my distraction.
Use room temperature ingredients. Cold butter doesn’t cream properly, and cold eggs can cause the mixture to seize. Set your butter and egg out on the counter about 30 minutes before you start baking. If you forget, you can soften the butter in the microwave for 10 seconds at a time, but be careful not to melt it.
Chill the dough. I know I mentioned this already, but it bears repeating. Chilled dough spreads less and bakes up thicker and softer. If you’re in a real rush, you can pop the dough in the freezer for 15 minutes instead of the fridge for 30. But don’t skip this step entirely.
Measure your flour correctly. Scooping flour directly from the bag with your measuring cup packs it down and gives you too much flour, which leads to dry cookies. Instead, use a spoon to fluff the flour in the bag, then spoon it into your measuring cup and level it off with a knife. This simple technique changed my baking life.
Let the cookies cool completely before filling. If the cookies are even slightly warm, the filling will melt and slide right off. Patience is hard, I know, but it’s worth it. I usually make the cookies one day and fill them the next, storing the unfilled cookies in an airtight container overnight.
Variations & Adaptations
One of the best things about this recipe is how adaptable it is. Here are a few ways to make it your own.
Dark Chocolate Mint Sandwich Cookies: If you want an even richer chocolate flavor, replace the black cocoa powder with Dutch-process cocoa powder. The cookies will be a little lighter in color but intensely chocolatey. I tried this version last Christmas, and my brother-in-law said they were the best cookies he’d ever eaten.
Gluten-Free Version: Substitute the all-purpose flour with a 1:1 gluten-free baking blend that contains xanthan gum. I’ve tested this with King Arthur’s Measure for Measure flour, and the texture is remarkably close to the original. Just make sure to chill the dough for a full 30 minutes, as gluten-free dough can be stickier.
Vegan Option: Use vegan butter sticks (like Earth Balance) and a flax egg (1 tablespoon ground flaxseed mixed with 3 tablespoons water, let sit for 5 minutes). The cookies will be slightly less tender, but still delicious. For the filling, use vegan butter and a splash of oat milk instead of dairy milk.
Spooky Halloween Variation: Add 1/4 cup of mini chocolate chips to the cookie dough for extra texture. You can also press a candy eyeball into the top of each cookie before baking for a fun, spooky look. My kids go absolutely wild for this version.
Mint Chocolate Chip Filling: Stir 1/4 cup of finely chopped dark chocolate or mini chocolate chips into the mint filling before assembling. It adds a lovely crunch and extra chocolate flavor. This is my personal favorite variation, and I make it every year for our Halloween movie night.
Serving & Storage Suggestions
These sandwich cookies are best served at room temperature, when the filling is soft and creamy and the cookies are tender. I like to arrange them on a dark platter for Halloween parties, with a few candy pumpkins scattered around for color.
They pair beautifully with a glass of cold milk, a hot cup of coffee, or a warm mug of spiced apple cider. For an adult twist, try them with a peppermint mocha or a dark stout beer. The mint and chocolate flavors complement the richness of the stout perfectly.
Storage: Store the assembled cookies in an airtight container at room temperature for up to 5 days. Place a sheet of parchment paper between layers to prevent them from sticking together. The cookies actually get better after a day or two, as the filling softens the cookies slightly and the flavors meld together.
Freezing: You can freeze the unfilled cookies for up to 3 months. Place them in a single layer on a baking sheet and freeze until solid, then transfer to a freezer-safe bag or container. When you’re ready to enjoy them, thaw the cookies at room temperature, make the filling, and assemble. You can also freeze the filled cookies, but the texture of the filling might change slightly. I prefer to freeze them unfilled for the best results.
Reheating: These cookies are meant to be eaten at room temperature, but if you want a warm treat, pop one in the microwave for 10 seconds. The filling will get slightly melty, and the cookie will be soft and warm. It’s a completely different experience, but a good one.
Nutritional Information & Benefits
Let’s be real, these are cookies, not health food. But that doesn’t mean they can’t have a few redeeming qualities.
Each sandwich cookie (based on 24 cookies) contains approximately:
- Calories: 220
- Fat: 12g
- Carbohydrates: 28g
- Protein: 2g
- Sugar: 18g
Dark cocoa powder is rich in antioxidants called flavonoids, which can help reduce inflammation and support heart health. Peppermint extract has been shown to aid digestion and even help with headaches. And butter, well, butter makes everything better, and it’s a good source of fat-soluble vitamins like A, D, and E.
These cookies are not gluten-free (unless you use the substitution), and they contain dairy and eggs. If you have allergies, please check the substitution section above for alternatives. I personally believe that treats like this are meant to be enjoyed in moderation, as part of a balanced diet. Life is too short to skip the cookies.
Conclusion
These Cozy Chocolate Mint Halloween Sandwich Cookies started as a complete accident, but they’ve become one of my most treasured recipes. They’re the cookie I make when I want to feel connected to the season, when I want to share something special with the people I love, and when I want to remind myself that sometimes the best things in life come from the moments when things don’t go according to plan.
I hope you’ll try this recipe and make it your own. Maybe you’ll add extra mint, or swap in white chocolate for the dark cocoa, or press a candy corn into the top of each cookie. Whatever you do, I’d love to hear about it. Drop a comment below and tell me how your cookies turned out, or share a photo on Pinterest and tag me. Your kitchen adventures inspire me every day.
Happy Halloween, and happy baking. Remember, the best recipes are the ones you make with love, even if they start with a mistake.
Frequently Asked Questions
Can I use regular cocoa powder instead of black cocoa powder?
Yes, you absolutely can. The cookies will be a lighter brown color instead of that deep, dark black, but the flavor will still be delicious. Regular cocoa powder is slightly more acidic, so the cookies might spread a tiny bit more. Just make sure to chill the dough well.
How do I make these cookies less minty?
If you’re not a huge fan of mint, reduce the peppermint extract to 1/4 teaspoon in both the cookie dough and the filling. You’ll still get a hint of mint, but it won’t be overpowering. You can also use vanilla extract instead of peppermint in the filling for a completely different flavor.
Can I make the dough ahead of time?
Definitely. You can prepare the cookie dough up to 3 days in advance and keep it covered in the refrigerator. When you’re ready to bake, let the dough sit at room temperature for about 10 minutes so it’s soft enough to scoop. You can also freeze the dough balls for up to 3 months and bake them straight from the freezer, adding an extra minute or two to the baking time.
Why did my cookies spread too much?
This usually happens for one of three reasons: the butter was too soft or melted, the dough wasn’t chilled long enough, or too much sugar was used. Make sure your butter is softened but not melted, and always chill the dough for at least 30 minutes. If your kitchen is particularly warm, pop the baking sheet with the scooped dough in the fridge for 10 minutes before baking.
Can I use a different filling?
Absolutely. These cookies are versatile. Try a dark chocolate ganache filling (melt 1 cup of dark chocolate chips with 1/2 cup of heavy cream and let it cool until spreadable), a cream cheese frosting, or even a peanut butter filling. The chocolate cookie pairs well with almost any creamy filling you can dream up.
Pin This Recipe!

Best Easy Chocolate Mint Halloween Sandwich Cookies

These Cozy Chocolate Mint Halloween Sandwich Cookies started as a complete accident but have become a treasured recipe. Soft, dark chocolate cookies with a creamy mint filling, perfect for Halloween or any time you want a minty chocolate treat.
- Prep Time: 15 minutes
- Cook Time: 10 minutes
- Total Time: 45 minutes
- Yield: 24 sandwich cookies 1x
- Category: Dessert
- Cuisine: American
Ingredients
- 1 cup (2 sticks) unsalted butter, softened
- 1 cup granulated sugar
- 1 large egg, room temperature
- 1 teaspoon vanilla extract
- 1/2 teaspoon peppermint extract
- 1 3/4 cups all-purpose flour
- 1/2 cup black cocoa powder
- 1/2 teaspoon baking soda
- 1/4 teaspoon salt
- 1/2 cup unsalted butter, softened (for filling)
- 2 cups powdered sugar, sifted
- 1 tablespoon milk
- 1/2 teaspoon peppermint extract (for filling)
- A few drops of green food coloring (optional)
- Pinch of salt (for filling)
Instructions
- Preheat your oven to 350°F (175°C). Line two baking sheets with parchment paper.
- In a large mixing bowl, beat the softened butter and granulated sugar together on medium speed until light and fluffy, about 3 to 4 minutes. Scrape down the sides of the bowl halfway through.
- Beat in the egg, vanilla extract, and peppermint extract until well combined.
- In a separate bowl, whisk together the flour, black cocoa powder, baking soda, and salt.
- Gradually add the dry ingredients to the wet mixture, mixing on low speed until just combined. Do not overmix.
- Cover the bowl with plastic wrap and refrigerate the dough for at least 30 minutes.
- Use a cookie scoop or tablespoon to scoop rounded balls of dough, about 1 tablespoon each. Place them 2 inches apart on the prepared baking sheets.
- Bake for 8 to 10 minutes. The cookies should look set around the edges but still soft in the center. Let them cool on the baking sheet for 5 minutes, then transfer to a cooling rack to cool completely.
- While the cookies are cooling, make the mint filling. In a medium bowl, beat the softened butter until smooth. Gradually add the powdered sugar, beating on low speed. Add the milk, peppermint extract, green food coloring (if using), and a pinch of salt. Beat on medium speed until light and fluffy, about 2 minutes.
- Once the cookies are completely cool, pair them up by size. Using a small offset spatula or butter knife, spread about 1 tablespoon of filling onto the flat side of one cookie. Top with another cookie, flat side down, and gently press to sandwich them together. Repeat with the remaining cookies.
Notes
Don’t overbake the cookies; they should be soft and tender. Use room temperature ingredients for best results. Chilling the dough is essential to prevent spreading. Let cookies cool completely before filling. Store assembled cookies in an airtight container at room temperature for up to 5 days. Unfilled cookies can be frozen for up to 3 months.
Nutrition
- Serving Size: 1 sandwich cookie
- Calories: 220
- Sugar: 18
- Sodium: 95
- Fat: 12
- Saturated Fat: 7
- Carbohydrates: 28
- Fiber: 1
- Protein: 2
Keywords: chocolate mint cookies, Halloween cookies, sandwich cookies, mint cookies, chocolate cookies, easy cookies, holiday cookies


