I swore I hated beef stew. For years, I did. The version I grew up with was a sad, grayish affair—mushy carrots floating in a thin, salty broth that tasted more like regret than comfort. I’d push the chunks of meat around my bowl, hoping they’d somehow disappear. I told anyone who would listen that stew was for people who had given up on flavor. Then, last October, a cold snap hit the city so hard my apartment’s old radiators just gave up. I was shivering in three layers, staring at a sad, empty fridge, when my neighbor, a retired butcher named Sal, knocked on my door holding a heavy, cast-iron Dutch oven. “You look like you need this more than I do,” he said, shoving it into my hands. The lid was still warm.
I was skeptical, honestly. I lifted the lid, expecting that familiar, sad smell. Instead, this incredible wave of deep, savory, almost sweet aroma hit me. The broth was a dark, glossy mahogany, not watery at all. The beef was so tender it was practically falling apart, and the carrots—they were soft but still held their shape, glistening with a rich, beefy glaze. I stood there in my doorway, steam fogging up my glasses, and ate the whole bowl standing up. I didn’t even grab a spoon at first; I just used a hunk of crusty bread to soak up every last drop. Let me tell you, that moment changed everything. I had to figure out how to make it myself, and after a few (okay, many) burnt batches and one particularly memorable onion-chopping incident that had me crying for twenty minutes, this recipe is the one that finally cracked the code. It’s the stew that turned a hater into a believer, and honestly, maybe you’ve been there with a dish you thought you knew.
Why You’ll Love This Recipe
This isn’t just another beef stew recipe. This is the one that will have you licking the bowl clean and texting your friends about it the next day. It’s the result of a lot of trial and error, a few burned pots, and one very honest conversation with a retired butcher. It’s built on tested techniques that ensure perfect results every single time, even if you’re a beginner.
- Deep, Rich Flavor, Zero Fuss: We’re not browning the meat in batches; we’re using a smart technique that builds a deep, complex flavor without dirtying every pan in your kitchen. It’s a game-changer.
- Melt-in-Your-Mouth Beef: The secret is low and slow cooking in the Dutch oven. This breaks down the tough connective tissue in the chuck roast, turning it into buttery, fork-tender perfection.
- Simple Pantry Ingredients: You probably have most of this in your kitchen right now. No fancy cuts of meat or hard-to-find spices. Just honest, good food.
- The Ultimate Comfort Food for Chilly Nights: This is the definition of a hug in a bowl. It’s warming, filling, and soul-satisfying—perfect for a snowy day, a rainy Sunday, or any night you need to feel cozy.
- A True Crowd-Pleaser: I’ve served this to everyone from my picky nephew to my in-laws, and it gets rave reviews every time. It’s the kind of meal that makes people close their eyes after the first bite.
This recipe is different because we’re taking the time to properly caramelize the tomato paste and use a splash of red wine (or extra broth) to deglaze the pan, which lifts up all those delicious browned bits from the bottom. That’s where the real flavor magic happens. It’s comfort food reimagined—richer, deeper, and more satisfying, but still the same soul-soothing classic you crave.
What Ingredients You Will Need
This recipe relies on simple, wholesome ingredients that work together to create something truly special. The beauty is in the technique, not a long list of exotic items. Most of these are likely pantry staples or easily found at your local grocery store.
- For the Beef:
- 2 lbs (900g) beef chuck roast, cut into 1.5-inch cubes: This is the star. Chuck roast has the perfect amount of marbling and connective tissue that breaks down during braising, making it incredibly tender. Don’t use stew meat from the store, which is often a mix of tougher cuts; buying a whole chuck roast and cubing it yourself is the best way to go. I prefer getting mine from a local butcher when I can.
- 1 teaspoon kosher salt: Don’t skimp here. Salt is essential for seasoning the meat and drawing out moisture for a better sear.
- 1/2 teaspoon black pepper: Freshly ground is always best for a more aromatic flavor.
- 2 tablespoons (30ml) olive oil: For searing the beef. Use a neutral oil with a high smoke point like avocado or canola oil if you prefer.
- For the Aromatics & Vegetables:
- 1 large yellow onion, chopped (about 2 cups): The base of our flavor. Yellow onions are perfect for this as they become sweet and mellow as they cook.
- 3 cloves garlic, minced: Adds a pungent, savory depth. Fresh is always better than jarred.
- 4 medium carrots, peeled and cut into 1-inch chunks: They add sweetness and a pop of color. I like to cut them on a bias for a nicer look.
- 3 stalks celery, cut into 1-inch pieces: Adds a subtle, earthy flavor and texture.
- 1 lb (450g) Yukon Gold potatoes, cut into 1.5-inch chunks: These hold their shape beautifully and get perfectly creamy. Russets will break down too much and become mushy.
- For the Broth & Flavor Base:
- 3 tablespoons (45g) tomato paste: This is a key ingredient. We’ll cook it down until it’s a deep brick-red color to concentrate its umami flavor. I recommend a double-concentrated tube of tomato paste for the best flavor.
- 1/2 cup (120ml) dry red wine (like Cabernet Sauvignon or Merlot): This adds incredible depth and acidity. If you don’t cook with wine, you can substitute with an equal amount of low-sodium beef broth. (Use a wine you’d actually drink!)
- 4 cups (960ml) low-sodium beef broth: The liquid that becomes our rich gravy. Low-sodium is crucial so you can control the salt level. I like Better Than Bouillon for a more intense beef flavor.
- 2 tablespoons (16g) all-purpose flour: This helps thicken the stew. For a gluten-free option, use a 1:1 gluten-free flour blend or 1 tablespoon of cornstarch mixed with 2 tablespoons of cold water (added at the end).
- 2 bay leaves: For a subtle, herbal note. Remove them before serving.
- 1 teaspoon dried thyme: A classic herb that pairs beautifully with beef. Fresh thyme is even better—use 3-4 sprigs.
- 1 teaspoon Worcestershire sauce: Adds a savory, umami punch.
- Optional Garnish:
- Fresh parsley, chopped: For a bright, fresh finish right before serving.
Equipment Needed
You don’t need a lot of fancy tools to make this stew, but a few key pieces will make the process much smoother. The most important tool is a good Dutch oven.
- Dutch Oven (5-6 quart): This is non-negotiable for the best results. Its heavy bottom and tight-fitting lid create the perfect environment for slow, even braising. I use a Lodge cast iron one that I’ve had for years, and it just gets better with age. If you don’t have one, a large, heavy-bottomed pot with a lid will work, but you’ll need to watch the heat more carefully to prevent burning.
- Sharp Chef’s Knife: For cubing the beef and chopping the vegetables. A dull knife is more dangerous than a sharp one!
- Cutting Board: A large, sturdy board is essential for prep work.
- Wooden Spoon or Silicone Spatula: For stirring and scraping up the browned bits from the bottom of the pot.
- Measuring Cups and Spoons: For accuracy. I keep a set of dry and wet measuring cups handy.
- Paper Towels: For patting the beef dry—this is a crucial step for a good sear.
- Tongs: For turning the beef cubes while searing.
- Small Bowl: For mixing the flour and a little broth to make a slurry, if needed.
If you don’t have a Dutch oven, don’t let that stop you! A large, heavy-bottomed stockpot or an oven-safe pot will work. Just be aware that you might need to stir a bit more often to prevent the bottom from scorching. The key is even heat distribution.
Preparation Method
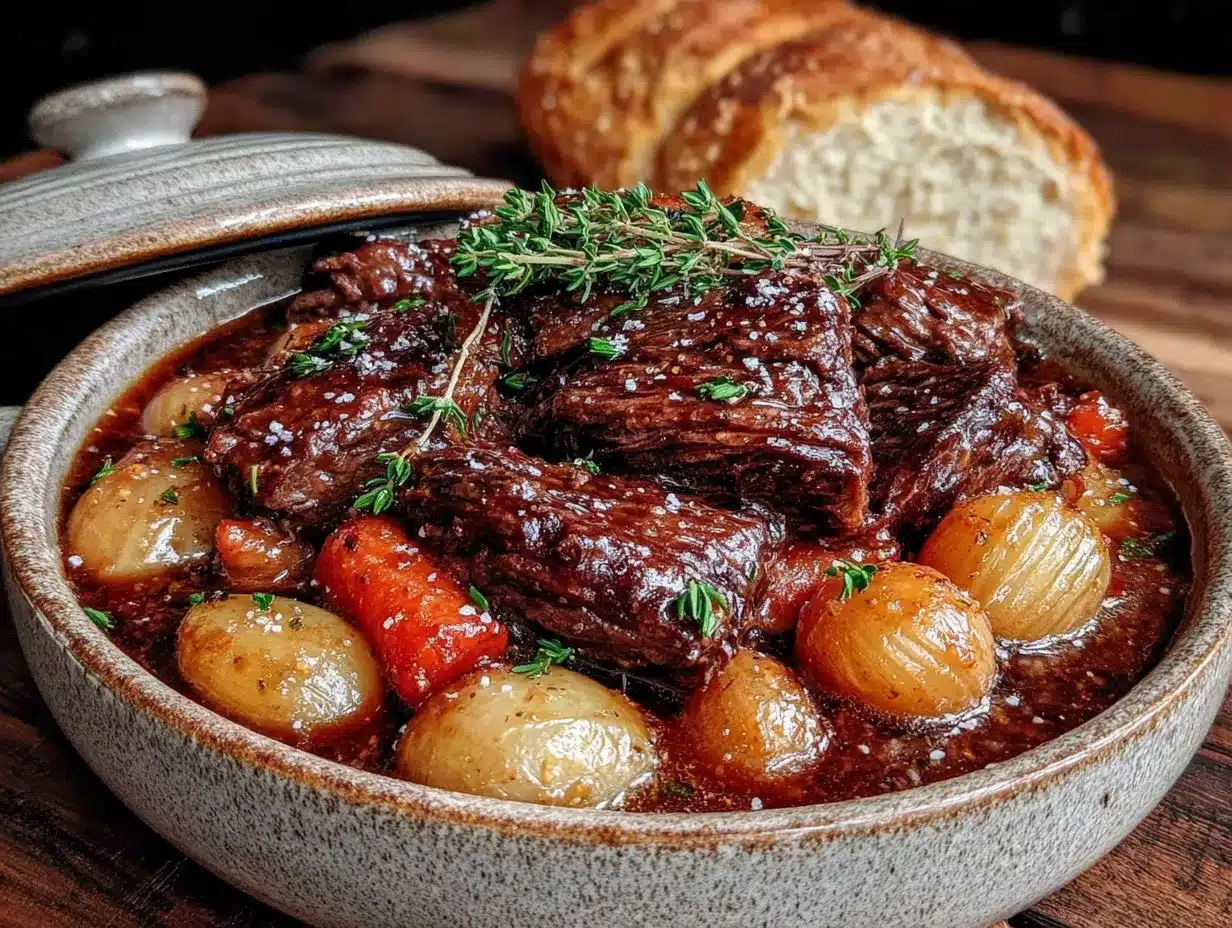
Alright, let’s get cooking! This recipe takes a bit of time, but most of it is hands-off. The active work is about 30 minutes, and then your oven does the heavy lifting. Trust the process—your patience will be rewarded.
- Prep the Beef (10 minutes): Pat the beef cubes dry with paper towels. This is the most important step for a good sear. If the meat is wet, it will steam instead of brown. Season them generously with 1 teaspoon of salt and 1/2 teaspoon of black pepper. Let them sit at room temperature while you prep the vegetables.
- Preheat and Sear (15 minutes): Preheat your oven to 325°F (160°C). Place your Dutch oven over medium-high heat and add 2 tablespoons of olive oil. Once the oil is shimmering (almost smoking), carefully add half of the beef cubes in a single layer. Don’t overcrowd the pot! If you add too much meat at once, the temperature drops and they won’t brown. Sear for 3-4 minutes per side, until a deep, dark brown crust forms. Use tongs to turn them. Transfer the seared beef to a plate. Repeat with the remaining beef. Don’t rush this step—the brown bits (called fond) on the bottom of the pot are pure flavor gold.
- Cook the Aromatics (5 minutes): Reduce the heat to medium. Add the chopped onion to the pot (don’t worry if there are a few little brown bits stuck to the bottom). Cook, stirring occasionally, for 4-5 minutes, until the onion is softened and translucent. Scrape up any browned bits from the bottom of the pot with your wooden spoon. Add the minced garlic and cook for another 30 seconds until fragrant.
- Build the Flavor Base (5 minutes): Add the 3 tablespoons of tomato paste to the pot. Stir it constantly for 2-3 minutes. You want it to darken to a deep, brick-red color and smell rich and sweet. This step is crucial for developing that deep, complex flavor. It will look a bit like it’s sticking to the bottom, but that’s exactly what we want.
- Deglaze the Pot (1 minute): Pour in the 1/2 cup of red wine (or extra broth). Use your wooden spoon to vigorously scrape up all the browned bits from the bottom of the pot. This is called deglazing, and it incorporates all that flavor back into the stew. Let the wine bubble and reduce for about 1 minute.
- Combine Everything (5 minutes): Sprinkle the 2 tablespoons of flour over the onion mixture and stir well. Cook for 1 minute to cook out the raw flour taste. Slowly pour in the 4 cups of beef broth while stirring constantly to prevent lumps. Add the 2 bay leaves, 1 teaspoon of dried thyme, and 1 teaspoon of Worcestershire sauce. Return the seared beef (and any juices that have collected on the plate) to the pot. Add the carrots and celery. Give everything a good stir.
- Braise in the Oven (2 hours): Bring the stew to a gentle simmer on the stovetop. Then, cover the Dutch oven with its lid and transfer it to the preheated oven. Let it braise for 1 hour and 30 minutes. The liquid should be gently bubbling, not boiling rapidly.
- Add the Potatoes (30 minutes): After 1 hour and 30 minutes, carefully remove the pot from the oven. Stir in the Yukon Gold potatoes. The potatoes will absorb a lot of the liquid and thicken the stew beautifully. Return the pot to the oven, covered, for another 30-45 minutes, or until the potatoes are fork-tender and the beef is incredibly tender.
- Finish and Serve (5 minutes): Remove the pot from the oven. Discard the bay leaves. Taste the stew and adjust the seasoning with more salt and pepper if needed. If you want a thicker stew, you can mash a few of the potatoes against the side of the pot with a fork. Let it rest for 10-15 minutes before serving. This allows the flavors to meld even further. Ladle into bowls and garnish with fresh chopped parsley.
Your kitchen will smell absolutely incredible at this point. I’m not kidding—it’s like a warm, savory hug filling your whole house.
Cooking Tips & Techniques
Over the years, I’ve made a few mistakes so you don’t have to. Here are my best tips for perfect beef stew every time.
- Don’t Skip the Searing: This is the number one mistake people make. Browning the beef isn’t just about color; it’s about creating that deep, savory flavor through the Maillard reaction. It’s the difference between a good stew and a great one. I once tried to save time by skipping this step, and the stew was so bland I ended up adding a whole tube of tomato paste to try and fix it. It didn’t work.
- Pat the Beef Really Dry: I cannot stress this enough. Wet meat will steam, not sear. Take the extra minute to pat each cube dry with a paper towel. Your future self will thank you.
- Use the Right Cut of Beef: Chuck roast is your best friend here. Don’t be tempted by “stew meat” from the grocery store, which can be a mix of different, often tougher, cuts. A whole chuck roast, cubed by you, guarantees that lovely, fork-tender result.
- Low and Slow is the Way to Go: Don’t rush the braising. The low, gentle heat of the oven is what breaks down the connective tissue in the beef, making it melt-in-your-mouth tender. If you boil it on the stovetop, the meat will be tough and dry. Trust the oven.
- Caramelize the Tomato Paste: This is a little trick that makes a huge difference. Don’t just dump the tomato paste in. Cook it for a few minutes until it darkens and smells sweet. It deepens the entire flavor profile of the stew.
- Let It Rest: The hardest part of this recipe is waiting. But letting the stew rest for 10-15 minutes after it comes out of the oven allows the flavors to settle and meld together. It will taste even better than when it first comes out.
Variations & Adaptations
This recipe is a fantastic base, and it’s easy to adapt to your own tastes or what you have on hand. Here are a few of my favorite ways to switch it up.
- Make it a Mushroom & Guinness Stew: This is my personal favorite winter variation. Swap half the beef broth for a bottle of Guinness stout. Add 8 oz (225g) of quartered cremini mushrooms along with the carrots and celery. The stout adds a deep, roasty, slightly bitter note that’s incredible with the rich beef. You might want to add a teaspoon of brown sugar to balance the bitterness.
- Go Herbaceous: Instead of thyme, try adding a couple of sprigs of fresh rosemary and a sprig of fresh sage along with the bay leaves. The piney, earthy flavor of rosemary is a classic pairing with beef.
- Add Some Heat: For a little kick, add a pinch of red pepper flakes along with the garlic. Or, stir in a teaspoon of smoked paprika for a warm, smoky depth.
- Root Vegetable Swap: Not a fan of potatoes? Swap them for an equal amount of parsnips, turnips, or sweet potatoes. Parsnips add a wonderful, slightly sweet and earthy flavor. Just cut them into similar-sized chunks.
- Make it Dairy-Free / Gluten-Free: This recipe is naturally dairy-free. To make it gluten-free, simply swap the all-purpose flour for a 1:1 gluten-free flour blend. Alternatively, you can skip the flour altogether and thicken the stew at the end by mashing a few of the potatoes or stirring in a slurry of 1 tablespoon of cornstarch mixed with 2 tablespoons of cold water. Simmer for a few minutes until thickened.
Serving & Storage Suggestions
This stew is a meal in itself, but the right sides can take it from wonderful to unforgettable. Here’s how to serve it and keep it for later.
Serving Suggestions: Ladle the stew into deep bowls. The best way to enjoy it is with a thick, crusty piece of bread for sopping up all that incredible gravy. A slice of sourdough or a warm, buttery dinner roll is perfect. For a lighter side, a simple green salad with a bright vinaigrette cuts through the richness of the stew beautifully. I also love serving it over a bed of creamy mashed potatoes or egg noodles for an extra hearty meal.
Storage: This stew tastes even better the next day! The flavors have time to meld and deepen. Let the stew cool completely to room temperature before storing. Transfer it to an airtight container and refrigerate for up to 4-5 days. The stew will thicken as it sits, which is totally normal.
Freezing: This stew freezes like a dream. Once cooled, transfer it to a freezer-safe container or a zip-top bag (lay it flat to save space). It can be frozen for up to 3 months. Thaw it overnight in the refrigerator before reheating.
Reheating: The best way to reheat the stew is gently on the stovetop over medium-low heat. Add a splash of beef broth or water if it has thickened too much. You can also reheat individual portions in the microwave for a quick lunch. The flavors will be just as wonderful.
Nutritional Information & Benefits
While this stew is pure comfort food, it also packs a surprising nutritional punch. Please note that these are estimates and can vary based on specific ingredients and serving sizes.
- Calories: ~450-550 per serving (1.5 cups)
- Protein: ~35-40g (from the beef)
- Fiber: ~5-7g (from the carrots, celery, and potatoes)
- Key Vitamins: Excellent source of Vitamin A (from carrots), Vitamin C (from potatoes), and B vitamins (from beef).
- Dietary Considerations: This recipe is naturally dairy-free and can be easily made gluten-free. It’s also a great source of iron and zinc from the beef.
The beef provides high-quality protein and essential minerals. The vegetables contribute fiber, vitamins, and antioxidants. It’s a hearty, balanced meal that fills you up and warms you from the inside out. I love that I can feel good about serving something so satisfying and nourishing to my family.
Frequently Asked Questions (FAQs)
Can I make this in a slow cooker or Instant Pot?
Absolutely! For a slow cooker, follow steps 1-5 on the stovetop, then transfer everything to the slow cooker. Cook on low for 8 hours or high for 4-5 hours, adding the potatoes in the last 2 hours. For an Instant Pot, use the sauté function for steps 1-5, then pressure cook on high for 35 minutes with a natural release. Add the potatoes and cook for another 5 minutes.
Why is my beef tough?
The most common reason is that the stew wasn’t cooked long enough. Beef chuck needs time for its connective tissue to break down. If it’s tough, it needs more time in the oven. Also, make sure you’re using the right cut of meat. Chuck roast is ideal; sirloin or round will be leaner and tougher.
Can I use frozen vegetables?
You can, but I really recommend fresh for the best texture. Frozen vegetables will release a lot of water and can make the stew watery. If you’re in a pinch, you can add frozen peas or corn in the last 10 minutes of cooking for a pop of color and sweetness.
My stew is too thin. How do I thicken it?
This is an easy fix! The easiest way is to mash a few of the cooked potatoes against the side of the pot. Their starch will naturally thicken the broth. You can also make a slurry by whisking 1 tablespoon of cornstarch with 2 tablespoons of cold water, then stir it into the simmering stew and cook for a few minutes until it thickens.
Can I make this stew ahead of time for a party?
Oh, yes. This is the perfect make-ahead dish. In fact, it tastes even better the next day. Make it a day or two in advance, let it cool, and store it in the refrigerator. When you’re ready to serve, gently reheat it on the stovetop. It’s a lifesaver for entertaining.
Conclusion
This Cozy Dutch Oven Beef Stew is more than just a recipe; it’s an experience. It’s the smell that fills your home on a cold day, the warmth that spreads through you with every spoonful, and the feeling of accomplishment when you pull that perfect, deeply flavorful pot from the oven. It turned me from a skeptic into a believer, and I have a feeling it will do the same for you.
Don’t be afraid to make it your own. Swap in your favorite root vegetables, add a splash of your favorite beer, or pile on the herbs. The best recipes are the ones you make your own. I truly hope this stew brings you as much comfort and joy as it has brought me. It’s become my go-to for chilly nights, lazy Sundays, and any time I need a little bit of edible warmth.
I’d love to hear how it turns out for you! Drop a comment below and let me know your favorite variation. Did you add mushrooms? A little extra garlic? Share your creation with us! And if you loved it, please share this recipe with a friend who needs a warm hug in a bowl. Happy cooking!
Pin This Recipe!
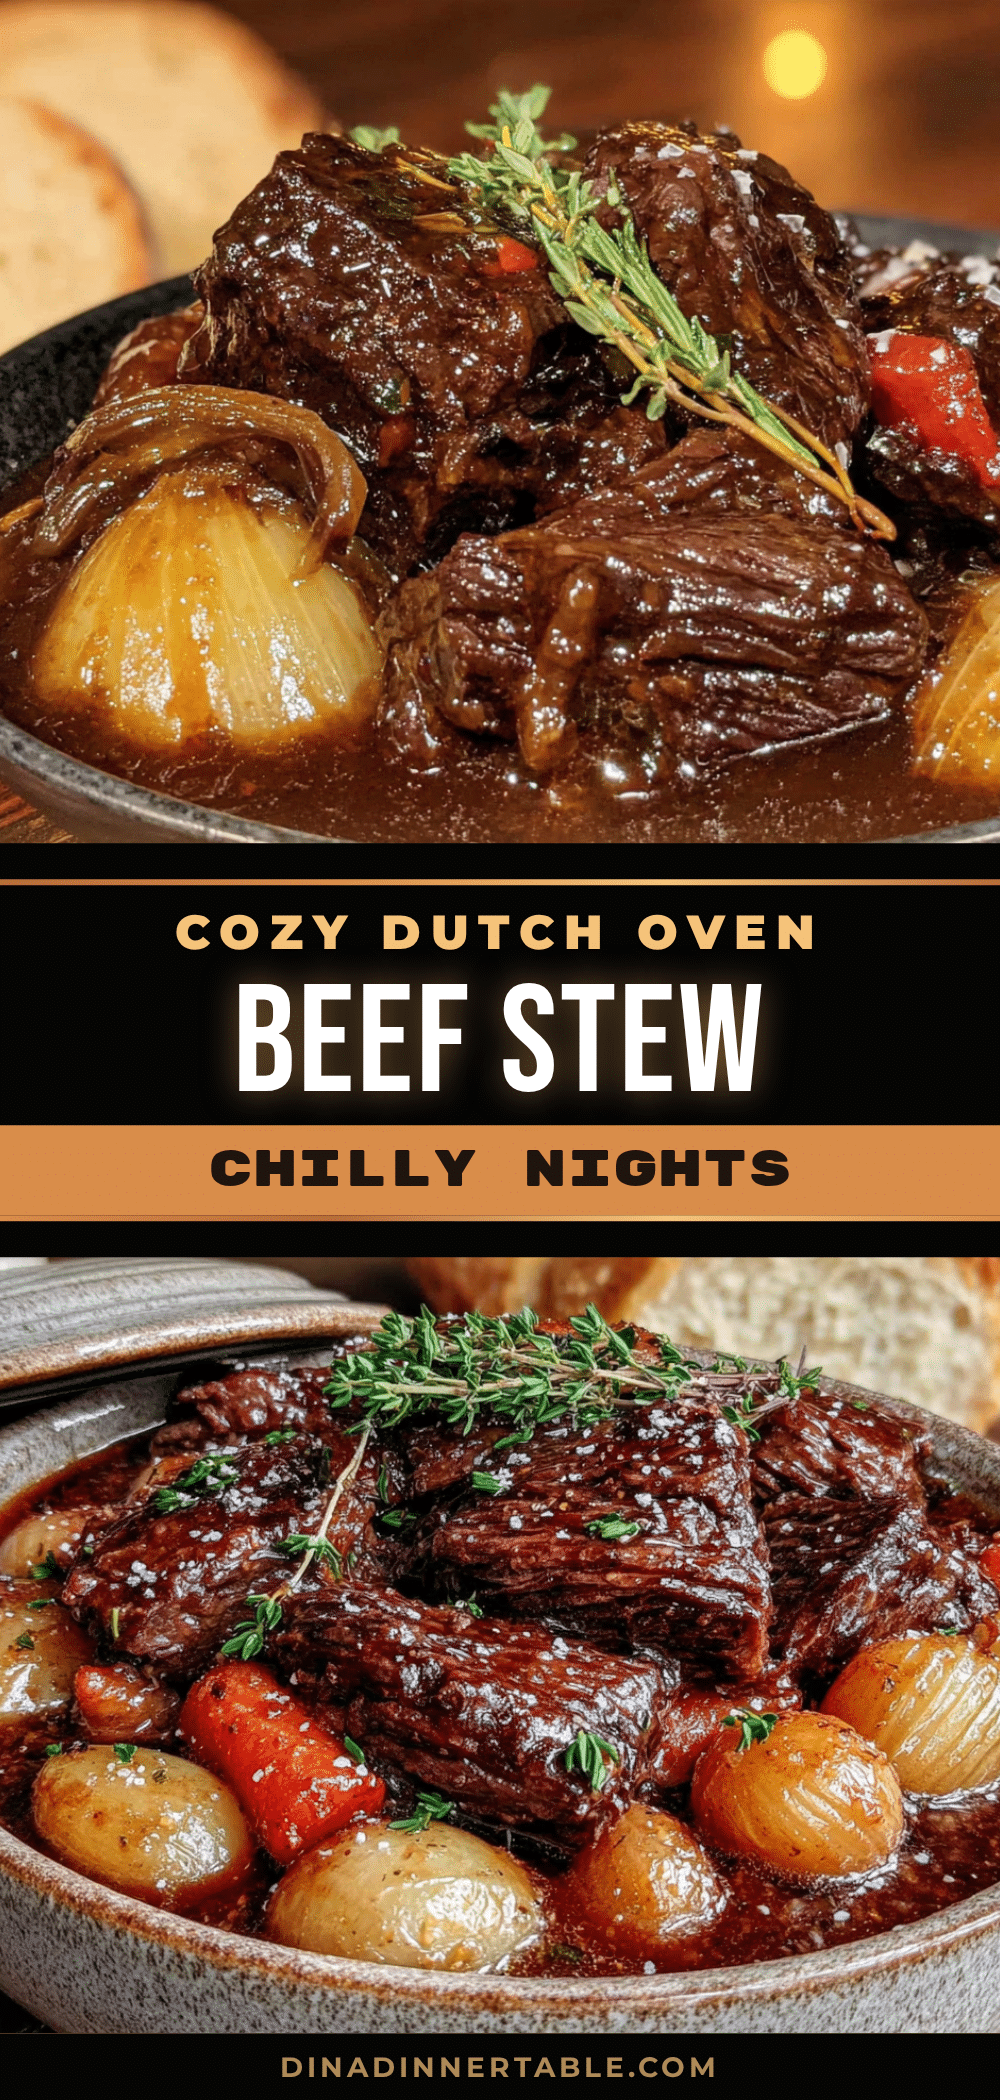
Cozy Dutch Oven Beef Stew for Chilly Nights – Easy One-Pot Recipe
This hearty beef stew is the ultimate comfort food for cold nights, featuring melt-in-your-mouth beef, tender vegetables, and a rich, deeply flavorful broth. It’s a one-pot wonder that turns a hater into a believer.
- Prep Time: 15 minutes
- Cook Time: 2 hours 30 minutes
- Total Time: 2 hours 45 minutes
- Yield: 6 servings 1x
- Category: Main Course
- Cuisine: American
Ingredients
- 2 lbs (900g) beef chuck roast, cut into 1.5-inch cubes
- 1 teaspoon kosher salt
- 1/2 teaspoon black pepper
- 2 tablespoons (30ml) olive oil
- 1 large yellow onion, chopped (about 2 cups)
- 3 cloves garlic, minced
- 4 medium carrots, peeled and cut into 1-inch chunks
- 3 stalks celery, cut into 1-inch pieces
- 1 lb (450g) Yukon Gold potatoes, cut into 1.5-inch chunks
- 3 tablespoons (45g) tomato paste
- 1/2 cup (120ml) dry red wine (like Cabernet Sauvignon or Merlot)
- 4 cups (960ml) low-sodium beef broth
- 2 tablespoons (16g) all-purpose flour
- 2 bay leaves
- 1 teaspoon dried thyme
- 1 teaspoon Worcestershire sauce
- Fresh parsley, chopped (for garnish)
Instructions
- Prep the Beef: Pat the beef cubes dry with paper towels. Season them generously with 1 teaspoon of salt and 1/2 teaspoon of black pepper. Let them sit at room temperature while you prep the vegetables.
- Preheat and Sear: Preheat your oven to 325°F (160°C). Place your Dutch oven over medium-high heat and add 2 tablespoons of olive oil. Once the oil is shimmering, carefully add half of the beef cubes in a single layer. Sear for 3-4 minutes per side, until a deep, dark brown crust forms. Transfer the seared beef to a plate. Repeat with the remaining beef.
- Cook the Aromatics: Reduce the heat to medium. Add the chopped onion to the pot. Cook, stirring occasionally, for 4-5 minutes, until the onion is softened and translucent. Add the minced garlic and cook for another 30 seconds until fragrant.
- Build the Flavor Base: Add the 3 tablespoons of tomato paste to the pot. Stir it constantly for 2-3 minutes until it darkens to a deep, brick-red color and smells rich and sweet.
- Deglaze the Pot: Pour in the 1/2 cup of red wine (or extra broth). Use your wooden spoon to vigorously scrape up all the browned bits from the bottom of the pot. Let the wine bubble and reduce for about 1 minute.
- Combine Everything: Sprinkle the 2 tablespoons of flour over the onion mixture and stir well. Cook for 1 minute. Slowly pour in the 4 cups of beef broth while stirring constantly to prevent lumps. Add the 2 bay leaves, 1 teaspoon of dried thyme, and 1 teaspoon of Worcestershire sauce. Return the seared beef (and any juices) to the pot. Add the carrots and celery. Give everything a good stir.
- Braise in the Oven: Bring the stew to a gentle simmer on the stovetop. Then, cover the Dutch oven with its lid and transfer it to the preheated oven. Let it braise for 1 hour and 30 minutes.
- Add the Potatoes: After 1 hour and 30 minutes, carefully remove the pot from the oven. Stir in the Yukon Gold potatoes. Return the pot to the oven, covered, for another 30-45 minutes, or until the potatoes are fork-tender and the beef is incredibly tender.
- Finish and Serve: Remove the pot from the oven. Discard the bay leaves. Taste the stew and adjust the seasoning with more salt and pepper if needed. Let it rest for 10-15 minutes before serving. Ladle into bowls and garnish with fresh chopped parsley.
Notes
For a gluten-free version, use a 1:1 gluten-free flour blend or thicken with a cornstarch slurry at the end. The stew tastes even better the next day. Let it rest before serving for best flavor.
Nutrition
- Serving Size: 1.5 cups
- Calories: 500
- Sugar: 8
- Sodium: 800
- Fat: 20
- Saturated Fat: 7
- Carbohydrates: 30
- Fiber: 6
- Protein: 38
Keywords: beef stew, Dutch oven, comfort food, one-pot meal, winter recipe, hearty stew, beef chuck, braised beef