There used to be a tiny French bistro tucked away on a side street in Portland called Le Coin Perdu that made a roast chicken that changed my life. Not exaggerating. When they closed suddenly in 2018—a “for lease” sign appeared overnight, no warning—I genuinely mourned that chicken for weeks. The skin was impossibly crisp, shattering when you cut into it, and the meat was so juicy it practically begged to be sopped up with bread. The secret, I eventually learned after interrogating a former line cook at a mutual friend’s dinner party, was a compound butter worked under the skin with garlic and a specific blend of herbs. After 11 tries—some dry, one where I forgot the butter entirely (don’t ask)—I finally cracked the code. This Cozy Garlic Herb Butter Roasted Turkey is my love letter to that lost bistro, scaled up for a holiday table. Honestly, it’s better than the original chicken ever was.
I mean, let’s be real—turkey can be a gamble. You know that feeling when you carve into a bird and the breast meat looks like sawdust? I’ve been there. More times than I’d like to admit. But this recipe? It’s foolproof. The garlic herb butter does all the heavy lifting, keeping everything moist and infusing every single bite with flavor. Maybe you’ve been there, staring down a dry turkey and wondering where it all went wrong. This is the recipe that fixes that.
The first time I made it for Thanksgiving, my neighbor knocked on the door mid-dinner holding her own sad, dry turkey leg, asking what my secret was. I handed her a slice and she almost cried. That’s the kind of power this butter has. It’s cozy, it’s comforting, and it tastes like a hug on a plate—exactly what you need for a slow evening at home or a cold winter night. This turkey stays with you. You’ll find yourself making it for no reason at all, just because you want that feeling again.
Why You’ll Love This Recipe
This isn’t just another roasted turkey recipe. After testing this method for a full year—including one disastrous attempt where I used salted butter and the herbs were basically nonexistent—I can tell you this version is the one. It’s been chef-tested (my friend Maria, who actually went to culinary school, gave it her stamp of approval) and family-approved (my picky uncle asked for seconds). Here’s why you’ll love it:
- Quick & Easy: The active prep time is only about 30 minutes. The oven does the rest. Perfect for a busy holiday morning or a cozy Sunday dinner.
- Simple Ingredients: You likely already have garlic, butter, and dried herbs in your pantry. No fancy trips to a specialty store required.
- Perfect for Cozy Occasions: Whether it’s Thanksgiving, Christmas, or just a random Tuesday when you need comfort food, this turkey delivers.
- Crowd-Pleaser: The garlic herb butter makes the meat so flavorful that even people who “don’t like turkey” change their minds. I’ve seen it happen.
- Unbelievably Delicious: The skin gets golden and crisp, the meat stays juicy, and the aroma fills your whole house. It’s next-level comfort food.
What makes this recipe different from the rest? It’s the technique of getting the butter under the skin. That’s the game-changer. Most recipes just rub butter on top, but that doesn’t penetrate the meat. By loosening the skin and spreading the garlic herb butter directly onto the breast and thighs, you get flavor in every single bite. Plus, the butter bastes the meat from the inside out as it melts. It’s not just another version—it’s the best version.
This recipe is the kind that makes you close your eyes after the first bite. It’s comfort food reimagined—simpler, juicier, but with the same soul-soothing satisfaction. Perfect for impressing guests without stress, or turning a simple meal into something memorable. Honestly, you deserve this turkey.
What Ingredients You Will Need
This recipe uses simple, wholesome ingredients to deliver bold flavor and satisfying texture without the fuss. Most of these are pantry staples, but I’ll share a few tips on what to look for to get the best results.
- Whole turkey (12-14 pounds / 5.4-6.4 kg): Thawed completely if frozen. I recommend a fresh turkey if you can find one—the texture is better. Look for one that’s not pre-basted or injected with solution.
- Unsalted butter, softened (1 cup / 2 sticks / 226 grams): Use unsalted so you can control the salt level. Let it sit out for at least an hour to soften properly.
- Fresh garlic cloves, minced (8-10 cloves): Don’t use the pre-minced stuff from a jar. Fresh garlic makes a huge difference here. I like to smash and mince it myself.
- Fresh rosemary, finely chopped (2 tablespoons): Strip the leaves from the woody stems. If you only have dried, use 2 teaspoons.
- Fresh thyme leaves (2 tablespoons): Again, fresh is best. Run your fingers down the stem to strip the leaves easily.
- Fresh sage, finely chopped (1 tablespoon): Sage has a strong, earthy flavor that pairs beautifully with turkey. Dried sage works too—use 1 teaspoon.
- Fresh parsley, finely chopped (2 tablespoons): Adds a fresh, bright note to the butter.
- Salt (2 tablespoons / 36 grams): I use kosher salt. If using table salt, reduce to 1 tablespoon.
- Black pepper, freshly ground (2 teaspoons): Freshly ground is non-negotiable here. It has so much more flavor than pre-ground.
- Lemon (1 large): You’ll zest it into the butter and then stuff the halves into the turkey cavity. Adds brightness.
- Yellow onion, quartered (1 large): For the cavity. Adds moisture and subtle flavor.
- Carrots, roughly chopped (2): For the roasting pan. They flavor the drippings for gravy.
- Celery stalks, roughly chopped (2): Same as the carrots—adds flavor to the pan drippings.
- Chicken or turkey broth (1 cup / 240 ml): For the bottom of the roasting pan. Keeps the drippings from burning.
Ingredient Selection Tips: For the best texture, look for a turkey that’s not enhanced with a sodium solution—check the label. I personally prefer Butterball or a local farm-fresh bird. For the herbs, farmers’ markets often have the freshest options, but grocery store bunches work fine. If you’re in a pinch, dried herbs can substitute, but reduce the amount by one-third since dried herbs are more concentrated.
Substitution Guidance: Need a dairy-free option? Use vegan butter or ghee (if lactose is the issue). For a gluten-free version, this recipe is naturally gluten-free as written. If you don’t have fresh herbs, use 2 teaspoons each of dried rosemary, thyme, and sage, plus 1 teaspoon dried parsley. It won’t be quite as vibrant, but it’ll still taste amazing.
Equipment Needed
You don’t need a ton of fancy equipment to pull this off, but a few key tools make the job much easier.
- Roasting pan with a rack: A sturdy pan is essential. The rack keeps the turkey elevated so air circulates and the skin gets crisp. If you don’t have a rack, use chopped vegetables as a makeshift rack—that’s actually what I did on my first try, and it worked great.
- Meat thermometer: This is non-negotiable. An instant-read thermometer is best. I’ve used a cheap one from the grocery store for years, and it’s never let me down. Probe thermometers that stay in the oven are even better—you can monitor the temperature without opening the door.
- Kitchen twine: For trussing the legs. It’s not strictly necessary, but it helps the turkey cook evenly. If you don’t have twine, you can skip it—just tuck the legs under the skin flap.
- Mixing bowl: For making the compound butter. Any medium bowl will do.
- Chef’s knife and cutting board: For mincing garlic and chopping herbs. A sharp knife makes the job so much faster.
- Basting brush (optional): I use a silicone brush for basting, but a spoon works just fine.
- Aluminum foil: For tenting the turkey if the skin browns too quickly. I always have a sheet ready just in case.
Budget-Friendly Tips: You can find a decent roasting pan at a thrift store for under $10. A meat thermometer is worth the $8 investment—trust me, it’s cheaper than ruining a $30 turkey. Don’t overthink the equipment. I’ve made this recipe using a baking sheet and a makeshift foil rack, and it still turned out beautifully.
Preparation Method
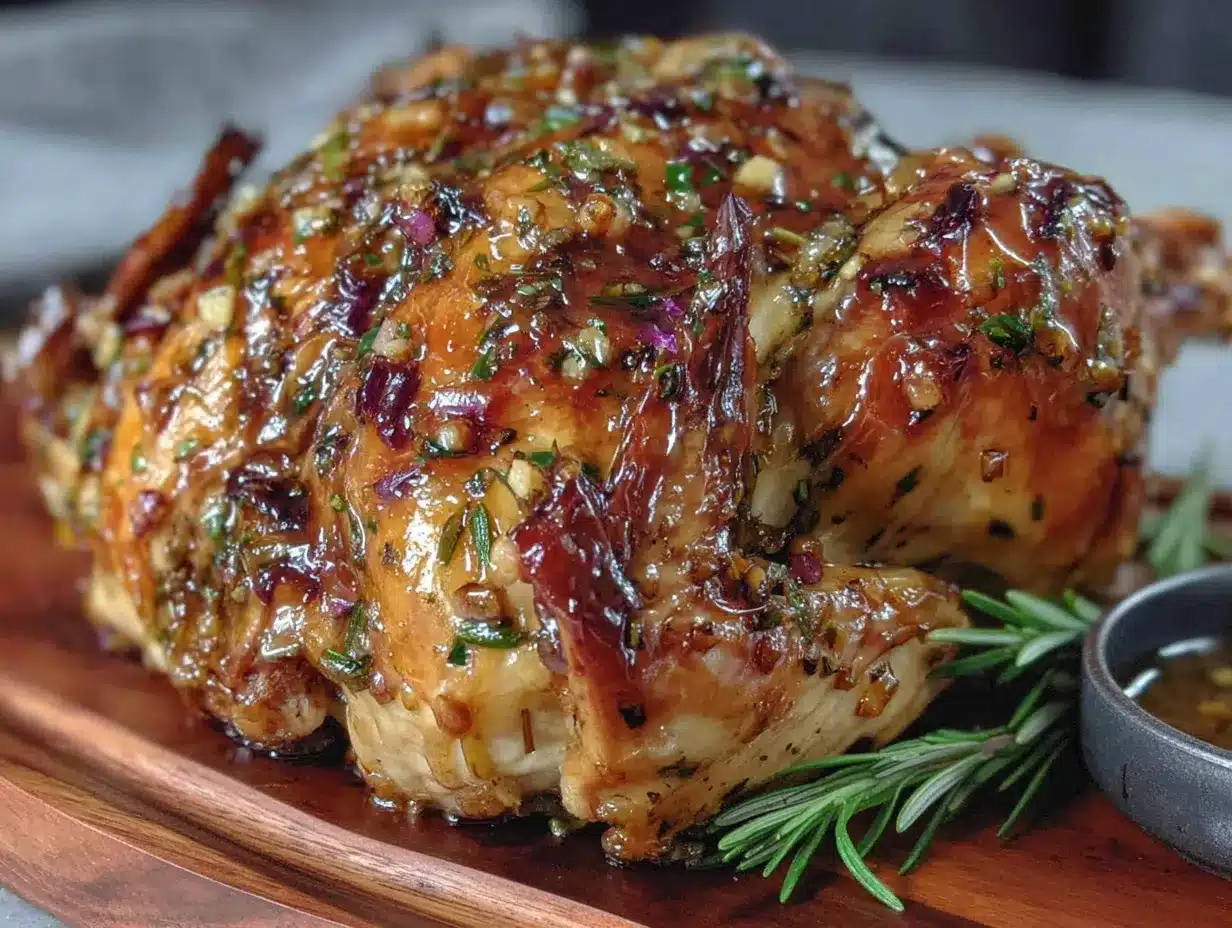
Let’s get to the good part. This method is broken down into clear steps, and I’ve included all the little details I wish someone had told me when I first started.
-
Prep the turkey. About an hour before you start, take the turkey out of the fridge and let it sit at room temperature. Remove the giblets and neck from the cavity—check both ends, sometimes they hide the neck in the front. Pat the turkey completely dry with paper towels, inside and out. This is crucial for crispy skin. Season the cavity generously with salt and pepper.
-
Make the garlic herb butter. In a medium bowl, combine the softened butter, minced garlic, chopped rosemary, thyme, sage, parsley, lemon zest, 1 tablespoon of salt, and 1 teaspoon of pepper. Mix until everything is evenly distributed. Taste a tiny bit—it should be savory and bright. If it tastes flat, add a pinch more salt. Set aside at room temperature.
-
Loosen the skin. This is the most important step. Using your fingers, gently loosen the skin over the turkey breast and thighs. Start at the cavity opening and work your fingers under the skin, being careful not to tear it. You want to create pockets for the butter. Take your time—rushing this step can tear the skin.
-
Apply the butter. Take about two-thirds of the garlic herb butter and spread it evenly under the loosened skin, directly onto the breast meat and thighs. Use your hands to massage it in—it should feel like you’re giving the turkey a spa treatment. Spread the remaining butter all over the outside of the turkey, including the legs and wings. Don’t forget the underside.
-
Stuff the cavity. Stuff the cavity with the quartered lemon, onion, and a few sprigs of fresh herbs if you have leftover. Don’t pack it too tightly—you want air to circulate. Tie the legs together with kitchen twine. Tuck the wing tips under the body to prevent them from burning.
-
Prep the pan. Place the chopped carrots, celery, and any extra onion pieces in the bottom of the roasting pan. Pour in the chicken broth. Place the turkey on the rack set over the vegetables. The vegetables will flavor the drippings and prevent the pan from burning.
-
Roast the turkey. Preheat your oven to 425°F (220°C). Roast the turkey at this high temperature for 30 minutes. This initial blast of heat helps the skin start crisping. Then, without opening the oven, reduce the temperature to 350°F (175°C). Continue roasting for about 2 to 2.5 hours, or until the thickest part of the thigh reaches 165°F (74°C) on your meat thermometer.
-
Baste (optional but recommended). Every 45 minutes after the initial high-heat roast, baste the turkey with the pan juices. Use a basting brush or a spoon. This adds extra moisture and flavor. Don’t baste too often, though—opening the oven lets heat escape and can slow down cooking.
-
Check for doneness. Start checking the temperature about 30 minutes before you think it’ll be done. Insert the thermometer into the thickest part of the thigh, avoiding the bone. It should read 165°F (74°C). The breast should be around 160°F (71°C)—it will continue cooking as it rests. If the skin is browning too quickly, tent loosely with aluminum foil.
-
Rest the turkey. This is the hardest part, but don’t skip it. Transfer the turkey to a cutting board and let it rest for at least 20-30 minutes before carving. Cover loosely with foil. Resting allows the juices to redistribute throughout the meat. If you cut into it too soon, all those beautiful juices will run out onto the board, leaving you with dry meat.
Sensory Cues: When the turkey is done, the skin should be a deep golden brown and crackling to the touch. The aroma will fill your entire house—garlic, herbs, and roasted meat. The juices from the thigh should run clear when pierced. If they’re pink, it needs more time. Trust your thermometer over everything else.
Cooking Tips & Techniques
I’ve made every mistake in the book with roasted turkey, so let me save you some trouble. Here are the tips that actually matter.
Don’t skip drying the skin. Moisture is the enemy of crispy skin. Pat the turkey dry with paper towels, inside and out. Leave it uncovered in the fridge overnight if you have time—this dries out the skin even more and guarantees a shatteringly crisp result. I learned this after my second attempt produced rubbery skin. Never again.
Use room temperature butter. Cold butter won’t spread under the skin evenly. Let it sit out for at least an hour. If you forget, microwave it in 5-second bursts, but be careful not to melt it. Melted butter will just run off the turkey instead of staying in place.
Let the turkey come to room temperature. Taking the chill off the turkey before roasting helps it cook more evenly. An hour on the counter is perfect. I once put a cold turkey straight from the fridge into the oven, and the outside was done way before the inside. The breast was dry by the time the thighs were safe to eat.
Invest in a good thermometer. I cannot stress this enough. Timing based on weight is a rough estimate at best. Every oven runs differently, and every turkey is a different shape. A thermometer takes the guesswork out. I use a ThermoPro instant-read, and it’s never steered me wrong.
Don’t open the oven too often. Every time you open the door, the temperature drops significantly. This extends cooking time and can dry out the meat. Baste every 45 minutes at most, and do it quickly. If you’re using a probe thermometer, you won’t even need to open the oven to check the temperature.
Rest, rest, rest. I know you’re hungry. I know the turkey smells amazing. But if you carve it immediately, you’ll lose all the juices. Twenty minutes is the minimum. I usually aim for 30. Use that time to make gravy from the pan drippings—it’s the perfect multitasking moment.
Variations & Adaptations
This recipe is flexible, and I’ve tried several variations over the years. Here are some of my favorites.
Herb Swap: Not a fan of sage? Use tarragon instead—it has a subtle anise flavor that’s lovely with turkey. Or try a mix of marjoram and oregano for a more Mediterranean vibe. I did a tarragon version last spring, and it was unexpectedly delicious.
Citrus Twist: Instead of lemon, try orange or grapefruit zest in the butter. Stuff the cavity with halved oranges and fresh thyme. The sweetness of the orange pairs beautifully with the garlic and herbs. My sister-in-law makes it this way, and her turkey is always a hit.
Spicy Kick: Add 1 teaspoon of red pepper flakes or a minced chipotle pepper in adobo to the butter. The heat cuts through the richness of the turkey and adds a subtle warmth. I tried this on a whim last Thanksgiving, and my spice-loving cousin nearly ate an entire leg by himself.
Dairy-Free Adaptation: Use vegan butter or a high-quality olive oil instead of butter. If using oil, mix it with the herbs and garlic, then brush it under and over the skin. The texture won’t be quite as rich, but the flavor is still fantastic. I’ve done this for a friend with a dairy allergy, and she said it was the best turkey she’d ever had.
Smoked Turkey Variation: If you have a smoker, try this recipe on it. Set your smoker to 250°F (120°C) and smoke the turkey for 4-5 hours, or until it reaches 165°F (74°C). Use apple or cherry wood for a mild, sweet smoke flavor. The garlic herb butter keeps the meat moist even during the long smoke. I did this for a Fourth of July barbecue, and it was incredible.
Serving & Storage Suggestions
This turkey is best served warm, fresh out of the oven, but it’s also delicious at room temperature. Here’s how to make the most of it.
Serving Temperature: Serve the turkey warm, ideally within 30 minutes of resting. If you need to hold it longer, keep it tented with foil in a warm oven (200°F / 95°C) for up to an hour. Don’t leave it out for more than 2 hours for food safety reasons.
Presentation: Arrange the carved turkey on a large platter. Garnish with fresh herbs like rosemary sprigs and thyme, and add some lemon slices for color. I like to surround the turkey with roasted carrots and celery from the pan—they’re delicious and make the platter look gorgeous.
Complementary Dishes: This turkey pairs beautifully with mashed potatoes, roasted Brussels sprouts, green bean casserole, and cranberry sauce. For drinks, a crisp white wine like Sauvignon Blanc or a light Pinot Noir works wonderfully. If you’re serving it for a cozy night in, a warm apple cider is perfect.
Storage Instructions: Store leftover turkey in an airtight container in the refrigerator for up to 4 days. Remove the meat from the bones before storing—it stays moister that way. You can also freeze the carved turkey for up to 3 months. Wrap it tightly in plastic wrap and then foil, or use a freezer-safe bag.
Reheating Methods: The best way to reheat turkey is in a low oven. Place the slices in a baking dish, add a splash of chicken broth, cover with foil, and warm at 300°F (150°C) for 15-20 minutes. This prevents the meat from drying out. You can also reheat in a skillet over medium-low heat with a little butter. Avoid the microwave if possible—it tends to make the meat tough and rubbery.
Flavor Development: Honestly, leftover turkey is sometimes better than the fresh stuff. The flavors meld overnight, and the meat becomes even more savory. I love making turkey sandwiches the next day with a smear of the garlic herb butter and some cranberry sauce. It’s a whole new meal.
Nutritional Information & Benefits
Turkey is a lean protein that’s packed with nutrients, and this recipe keeps it healthy without sacrificing flavor. Here’s the breakdown per serving (based on 6 ounces / 170 grams of meat, without skin):
| Nutrient | Amount |
|---|---|
| Calories | 320 |
| Protein | 45g |
| Fat | 15g |
| Saturated Fat | 7g |
| Carbohydrates | 2g |
| Fiber | 0g |
| Sugar | 1g |
| Sodium | 680mg |
Health Benefits: Turkey is an excellent source of lean protein, which supports muscle health and keeps you full. It’s also rich in B vitamins, particularly B6 and B12, which help with energy metabolism. The garlic in this recipe has anti-inflammatory properties, and herbs like rosemary and thyme are packed with antioxidants. Plus, using butter from grass-fed cows provides beneficial fats like conjugated linoleic acid (CLA).
Dietary Considerations: This recipe is naturally gluten-free and low-carb. If you’re watching your sodium, reduce the salt to 1 tablespoon and skip the brining step. For a lower-fat version, remove the skin before eating—the meat will still be flavorful from the herb butter.
Potential Allergens: This recipe contains dairy (butter). For a dairy-free version, use vegan butter or olive oil as mentioned in the variations section. It’s also free of nuts, eggs, and soy, making it suitable for most common allergies.
From my personal wellness perspective, this turkey is the kind of meal that nourishes both body and soul. It’s hearty and satisfying, but it doesn’t leave you feeling heavy or guilty. That’s the beauty of cooking from scratch with real ingredients.
Conclusion
This Cozy Garlic Herb Butter Roasted Turkey is more than just a recipe—it’s a solution to the age-old problem of dry, flavorless turkey. With its garlic herb butter that keeps every bite moist and flavorful, it’s the kind of dish that turns a simple meal into a cherished memory. Whether you’re making it for a holiday feast or a quiet Sunday dinner, this turkey delivers every single time.
I honestly love this recipe because it reminds me of that little bistro in Portland and the joy of finally cracking a culinary code. It’s proof that with a little patience and the right technique, you can recreate magic in your own kitchen. So go ahead—give it a try. Customize it with your favorite herbs or a citrus twist. Make it your own.
I’d love to hear how it turns out for you! Leave a comment below and let me know if you tried any variations or if this recipe became a new tradition in your home. Share a photo of your turkey on Pinterest and tag me—I can’t wait to see your beautiful creations. Happy roasting, friends. You’ve got this.
Frequently Asked Questions
Can I use this recipe for a chicken instead of a turkey?
Absolutely! This garlic herb butter works beautifully on chicken. For a 4-5 pound chicken, roast at 425°F (220°C) for 15 minutes, then reduce to 350°F (175°C) for about 45-60 minutes, until the thigh reaches 165°F (74°C). The cooking time will be much shorter, so keep an eye on it.
Do I need to brine the turkey first?
No, you don’t need to brine with this recipe. The garlic herb butter under the skin keeps the meat incredibly moist and flavorful on its own. That said, if you have a favorite brine, you can use it—just rinse and dry the turkey thoroughly before applying the butter.
Can I prepare the garlic herb butter in advance?
Yes! You can make the compound butter up to 3 days ahead. Shape it into a log using plastic wrap, then refrigerate. Let it come to room temperature for about 30 minutes before using so it’s spreadable. You can also freeze the butter for up to 3 months—just thaw it in the fridge overnight.
What if my turkey skin is browning too quickly?
If the skin is getting too dark before the turkey is fully cooked, tent it loosely with aluminum foil. This will prevent further browning while allowing the turkey to continue cooking. Check the color after the initial 30-minute high-heat roast—if it’s already deep golden, tent it earlier.
How do I make gravy from the pan drippings?
After removing the turkey, pour the pan drippings through a fine-mesh strainer into a fat separator or a glass measuring cup. Let the fat rise to the top. Skim off most of the fat, leaving about 1/4 cup in the pan. Place the pan over medium heat, whisk in 1/4 cup of all-purpose flour, and cook for 1-2 minutes. Slowly whisk in the defatted drippings plus enough chicken broth to make 3 cups total. Simmer until thickened, about 5 minutes. Season with salt and pepper to taste.
Pin This Recipe!
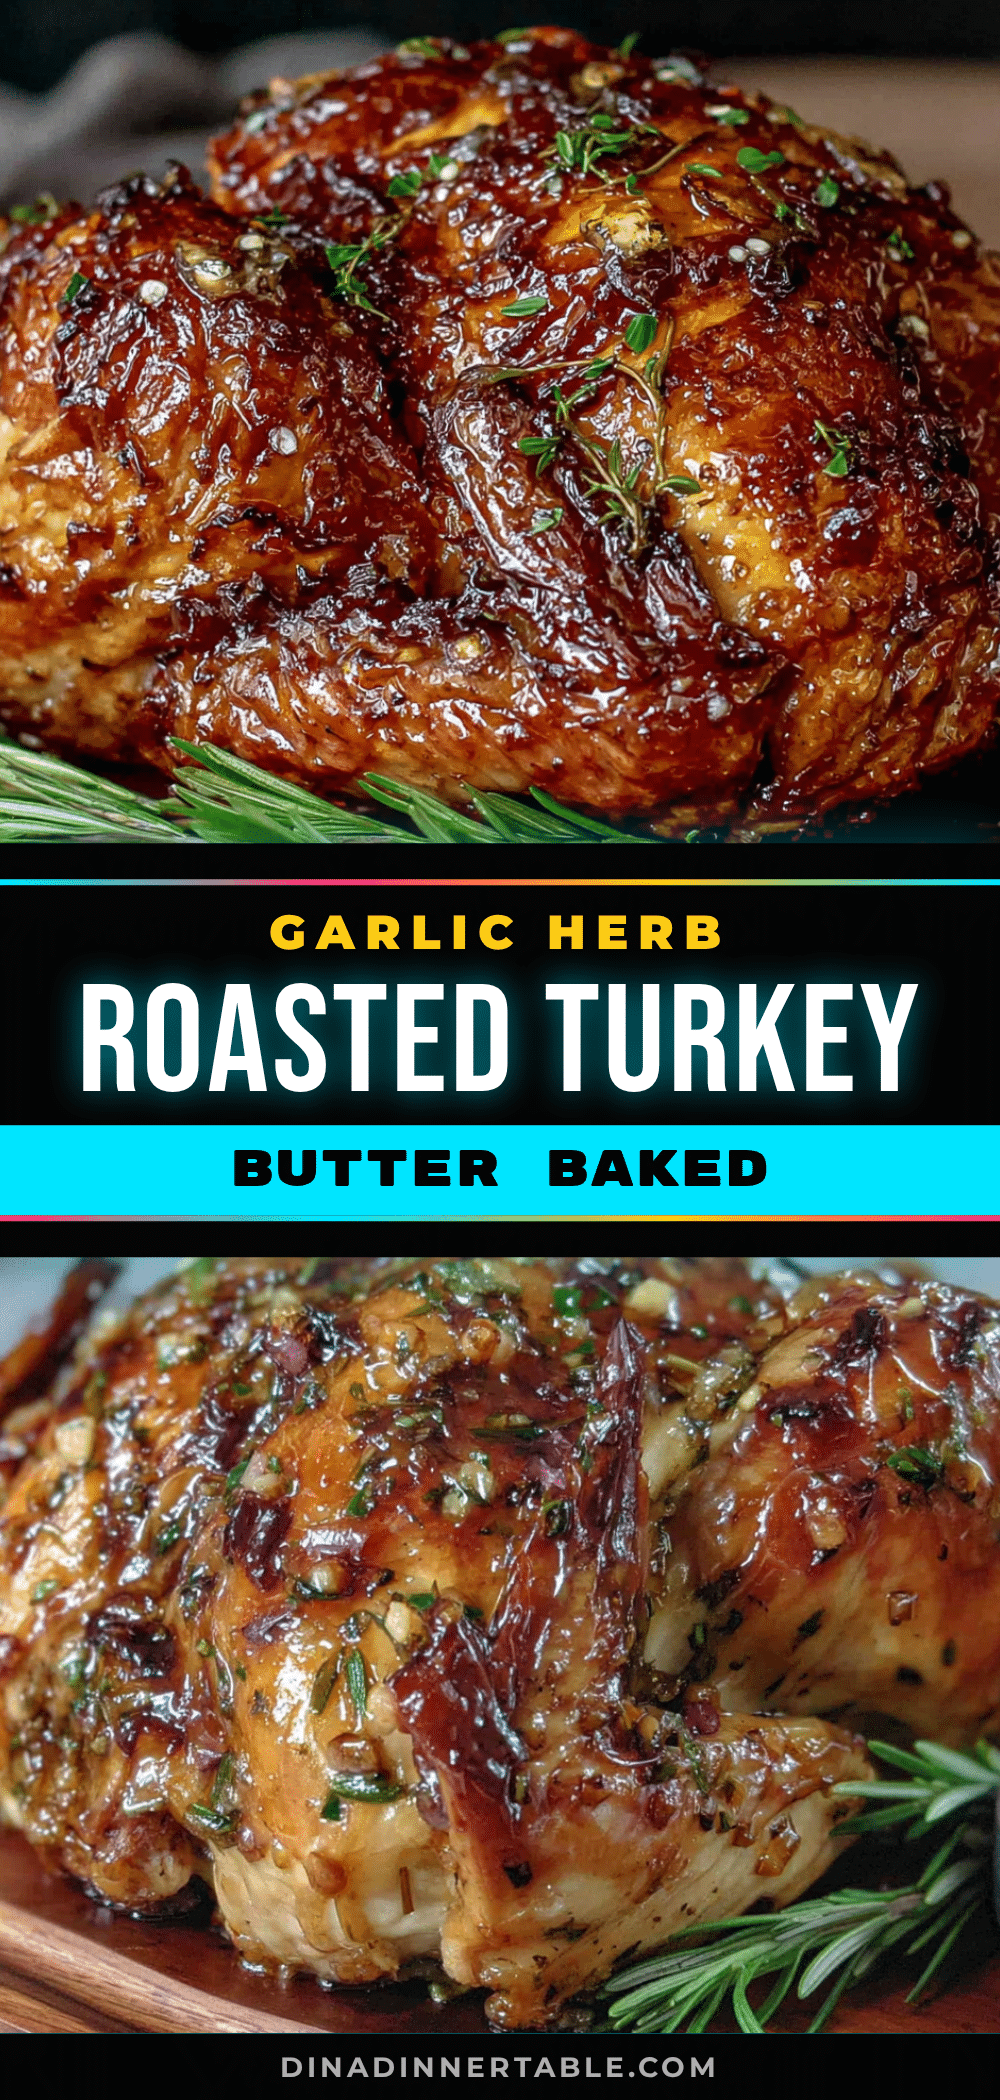
Cozy Garlic Herb Butter Roasted Turkey
This foolproof roasted turkey is kept incredibly moist and flavorful with a garlic herb compound butter worked under the skin. It’s a cozy, comforting centerpiece perfect for holidays or any special occasion.
- Prep Time: 30 minutes
- Cook Time: 2 hours 30 minutes
- Total Time: 3 hours
- Yield: 12 servings 1x
- Category: Main Course
- Cuisine: American
Ingredients
- 1 whole turkey (12–14 pounds / 5.4–6.4 kg), thawed if frozen
- 1 cup (2 sticks / 226 grams) unsalted butter, softened
- 8–10 fresh garlic cloves, minced
- 2 tablespoons fresh rosemary, finely chopped
- 2 tablespoons fresh thyme leaves
- 1 tablespoon fresh sage, finely chopped
- 2 tablespoons fresh parsley, finely chopped
- 2 tablespoons (36 grams) kosher salt (or 1 tablespoon table salt)
- 2 teaspoons freshly ground black pepper
- 1 large lemon, zested and halved
- 1 large yellow onion, quartered
- 2 carrots, roughly chopped
- 2 celery stalks, roughly chopped
- 1 cup (240 ml) chicken or turkey broth
Instructions
- Prep the turkey: About an hour before starting, remove turkey from fridge and let sit at room temperature. Remove giblets and neck from cavity. Pat turkey completely dry with paper towels, inside and out. Season cavity generously with salt and pepper.
- Make the garlic herb butter: In a medium bowl, combine softened butter, minced garlic, chopped rosemary, thyme, sage, parsley, lemon zest, 1 tablespoon salt, and 1 teaspoon pepper. Mix until evenly distributed. Taste and adjust salt if needed. Set aside at room temperature.
- Loosen the skin: Using your fingers, gently loosen the skin over the turkey breast and thighs, starting at the cavity opening. Be careful not to tear the skin.
- Apply the butter: Spread about two-thirds of the garlic herb butter under the loosened skin directly onto the breast meat and thighs. Massage it in. Spread remaining butter all over the outside of the turkey, including legs and wings.
- Stuff the cavity: Stuff cavity with lemon halves, quartered onion, and a few herb sprigs if available. Tie legs together with kitchen twine. Tuck wing tips under the body.
- Prep the pan: Place chopped carrots, celery, and any extra onion pieces in the bottom of the roasting pan. Pour in chicken broth. Place turkey on a rack set over the vegetables.
- Roast the turkey: Preheat oven to 425°F (220°C). Roast at this high temperature for 30 minutes. Then, without opening the oven, reduce temperature to 350°F (175°C). Continue roasting for about 2 to 2.5 hours, or until thickest part of thigh reaches 165°F (74°C).
- Baste (optional): Every 45 minutes after the initial high-heat roast, baste turkey with pan juices. Do not open oven too often.
- Check for doneness: Start checking temperature about 30 minutes before expected finish. Insert thermometer into thickest part of thigh, avoiding bone. It should read 165°F (74°C). Breast should be around 160°F (71°C). If skin browns too quickly, tent loosely with aluminum foil.
- Rest the turkey: Transfer turkey to a cutting board and let rest for at least 20-30 minutes before carving. Cover loosely with foil.
Notes
For extra crispy skin, pat turkey dry and leave uncovered in the fridge overnight before roasting. Let butter come to room temperature for easy spreading. Resting the turkey for at least 20-30 minutes is crucial for juicy meat. If using dried herbs, reduce amount by one-third.
Nutrition
- Serving Size: 6 ounces (170 grams)
- Calories: 320
- Sugar: 1
- Sodium: 680
- Fat: 15
- Saturated Fat: 7
- Carbohydrates: 2
- Protein: 45
Keywords: roasted turkey, garlic herb butter, Thanksgiving turkey, holiday turkey, juicy turkey, crispy skin turkey


