There used to be a tiny bakery tucked between a laundromat and a dusty thrift store on the edge of town that made the most unforgettable dirt cups. When they closed three winters ago—just a handwritten sign on the door saying “Thanks for the memories”—I felt a genuine pang of loss. It sounds silly, maybe, to mourn a dessert. But those little cups of chocolate pudding, crushed cookies, and gummy worms were my go-to comfort on rough days. After seven tries—some too soupy, others with a weird cookie-to-pudding ratio that just felt wrong—I finally got it. This version captures that exact cozy, spooky magic, and honestly, it’s even better than I remembered.
These Cozy Graveyard Dirt Cups with Gummy Worms aren’t just a Halloween treat. They’re the kind of dessert that makes you feel like a kid again, sitting on the floor in your pajamas, watching a scary movie that’s more silly than scary. I mean, there’s something deeply satisfying about digging into a cup of “dirt” and pulling out a wiggly gummy worm. Maybe you’ve been there—craving something that feels like a hug in a cup, something that doesn’t take itself too seriously. That’s exactly what this recipe delivers.
The first time I made these for my book club, I was a little nervous. Would adults actually enjoy eating dirt? Let me tell you, they were gone in five minutes. One friend even asked for the recipe before she finished her first bite. That’s when I knew I had cracked the code. It’s the perfect balance of creamy, crunchy, and chewy, with just a hint of chocolate that satisfies without being overwhelming. And the best part? You don’t need an oven or any fancy skills. Just a little patience and a willingness to get your hands dirty—literally.
Why You’ll Love This Recipe
Let me tell you why these Cozy Graveyard Dirt Cups with Gummy Worms have become my most-requested dessert, even from people who claim they don’t like sweets.
- Quick & Easy: Comes together in under 20 minutes of active prep time. Perfect for last-minute Halloween parties or a Tuesday night craving that just won’t quit.
- Simple Ingredients: No fancy grocery trips needed. You likely already have chocolate pudding mix, milk, and cookies in your pantry. The gummy worms are the only “special” ingredient, and you can find them at any grocery store.
- Perfect for Cozy Nights: Great for movie marathons, book club gatherings, or a fun activity with kids on a rainy afternoon. The cozy factor is off the charts.
- Crowd-Pleaser: Always gets rave reviews from kids and adults alike. I’ve seen grown men fight over the last cup at a potluck. It’s that good.
- Unbelievably Delicious: The texture combo is next-level comfort food. Creamy pudding, crunchy cookie “dirt,” and chewy gummy worms create a party in your mouth with every single bite.
What makes this recipe different from the rest? It’s all about the texture. I tested this about a dozen times to get the perfect pudding-to-cookie ratio. Too much cookie and it’s dry. Too much pudding and it’s a soupy mess. This version uses a specific technique—layering the “dirt” just right and letting the pudding set fully—that makes every spoonful a perfect bite. It’s not just another dirt cup recipe. It’s the best version, crafted through trial and error so you don’t have to go through the same mess I did.
This recipe isn’t just good—it’s the kind that makes you close your eyes after the first bite. It’s comfort food reimagined: faster, easier, but with the same soul-soothing satisfaction that makes you feel like everything is going to be okay. Perfect for impressing guests without stress, or turning a simple evening into something memorable.
What Ingredients You Will Need
This recipe uses simple, wholesome ingredients to deliver bold flavor and satisfying texture without the fuss. Most of these are pantry staples, which means you can whip up a batch of Cozy Graveyard Dirt Cups with Gummy Worms whenever the mood strikes.
For the Pudding Base
- 1 box (3.9 oz) instant chocolate pudding mix (I recommend Jell-O brand for the smoothest texture, but any brand works)
- 2 cups cold whole milk (adds richness; use 2% or oat milk if needed, but whole milk gives the creamiest result)
For the Dirt & Decorations
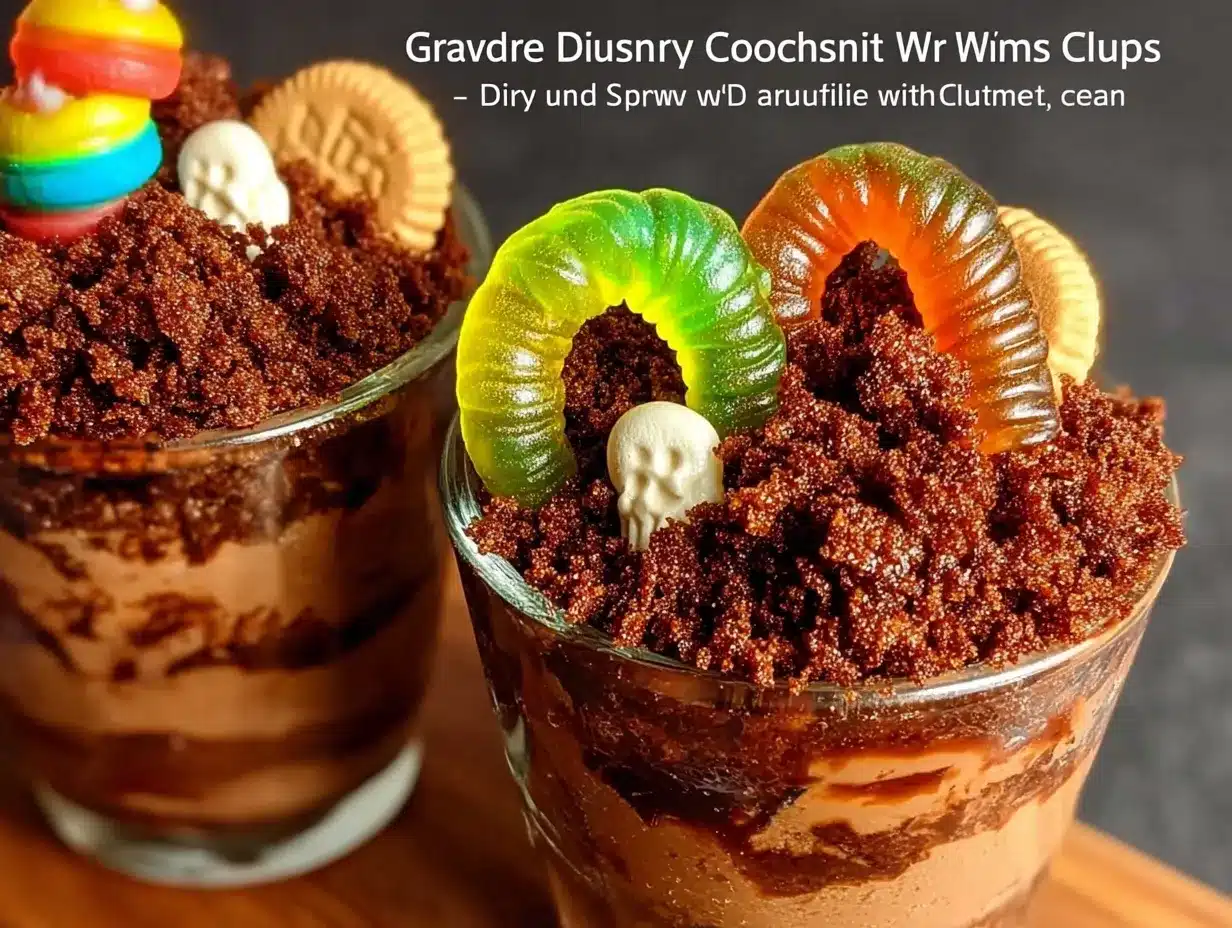
- 1 package (14.3 oz) chocolate sandwich cookies (Oreos are my go-to; you’ll need about 20 cookies for the perfect amount of “dirt”)
- 1 cup gummy worms (look for bright, colorful ones for maximum visual appeal; I prefer the sour variety for a little tang)
- Optional: 1-2 drops green food coloring (for tinting the pudding if you want a swampy, graveyard vibe)
- Optional: 1/4 cup chocolate shavings or cocoa powder (for extra “earthiness” on top)
For the Graveyard Decorations (Optional but Fun)
- 6-8 rectangular graham crackers (for making tombstone shapes)
- 1/2 cup white chocolate chips or candy melts (for writing “RIP” on tombstones)
- Black decorating gel or dark chocolate (for writing on tombstones)
- Small plastic skeletons or candy bones (for extra spooky flair)
Ingredient Selection Tips: For the best texture, use cold milk straight from the fridge. Room temperature milk won’t thicken the pudding properly—I learned this the hard way on my first attempt. Also, look for gummy worms that are soft and chewy, not hard or stale. If you’re making these ahead, check the freshness of your cookies. Stale cookies won’t give you that satisfying crunch.
Substitution Guidance: Use gluten-free chocolate sandwich cookies for a gluten-free option (most are available at major grocery stores). Swap whole milk with unsweetened almond milk or oat milk for a dairy-free version—just note that the pudding might be slightly less thick. For a lower-sugar option, use sugar-free chocolate pudding mix and reduced-fat cookies. The gummy worms can be swapped with gummy spiders or even gummy bones for a different creepy-crawly effect.
Equipment Needed
You don’t need a fancy kitchen to make these Cozy Graveyard Dirt Cups with Gummy Worms. Here’s what you’ll need:
- 6-8 small cups or jars (clear plastic cups work best for showing off the layers; I use 8-ounce mason jars for a cute, rustic look)
- Medium mixing bowl (for making the pudding)
- Whisk (a hand whisk works fine, but an electric mixer makes it even smoother)
- Food processor or zip-top bag and rolling pin (for crushing the cookies into “dirt”)
- Measuring cups and spoons
- Spatula (for scraping every last bit of pudding—waste not!)
- Small piping bag or zip-top bag (for writing on tombstones if you’re making them)
- Baking sheet (if melting chocolate for tombstones)
Personal Experience: I’ve tried making these with both a food processor and the old-fashioned zip-top bag method. Honestly, the food processor gives you a more consistent “dirt” texture—fine and crumbly, like real soil. But if you want a more rustic look with some bigger cookie chunks, the rolling pin method is perfect. Plus, it’s a great way to let kids help without worrying about sharp blades.
Budget-Friendly Options: Don’t have mason jars? Use small paper cups or even cleaned-out yogurt containers. The presentation won’t be as fancy, but the taste is exactly the same. Skip the tombstones if you’re short on time—the gummy worms alone make these cups irresistible.
Preparation Method
Let’s get our hands dirty! Follow these steps carefully, and you’ll have the most adorable Cozy Graveyard Dirt Cups with Gummy Worms in no time.
- Make the pudding: In a medium mixing bowl, whisk together the instant chocolate pudding mix and 2 cups of cold whole milk. Whisk vigorously for about 2 minutes, until the mixture starts to thicken. You’ll notice it go from liquid to a soft, pudding-like consistency. Don’t overmix—stop as soon as it comes together. Let it sit for 5 minutes to set completely. (Pro tip: If you’re in a hurry, use an electric mixer on low speed for 1 minute.)
- Crush the cookies: While the pudding sets, prepare your “dirt.” Place 20 chocolate sandwich cookies in a food processor and pulse until they resemble fine crumbs. You want a mix of fine powder and small pebbly bits—just like real soil. If using the zip-top bag method, place the cookies in a bag, seal it, and crush them with a rolling pin until you get the desired texture. Set aside 1/4 cup of the crumbs for topping.
- Prepare the cups: Grab your 6-8 cups or jars. Spoon about 2 tablespoons of the crushed cookies into the bottom of each cup. This creates the “underground” layer. Gently press it down with the back of a spoon to create a solid base.
- Add the pudding: Divide the prepared chocolate pudding evenly among the cups, spooning it over the cookie layer. Use about 1/4 cup of pudding per cup, depending on the size of your cups. Smooth the top with a spatula or the back of a spoon.
- Insert the gummy worms: This is the fun part! Take 2-3 gummy worms per cup and gently push them into the pudding so they’re partially submerged. Leave some wiggling out of the “dirt” for that creepy-crawly effect. Arrange them at different angles—some peeking out, some fully buried with just a tail showing.
- Top with “dirt”: Sprinkle the remaining crushed cookies over the top of each cup, covering the pudding completely. Make sure to cover the areas where the gummy worms emerge, so it looks like they’re crawling out of the ground. Use the reserved 1/4 cup of crumbs for a final, even layer.
- Add graveyard decorations (optional): If you’re making tombstones, here’s how: Cut graham crackers into small rectangle shapes (about 2 inches tall). Melt white chocolate or candy melts in the microwave in 30-second intervals, stirring between each. Dip the graham cracker rectangles into the melted chocolate, coating one side. Place them on a baking sheet lined with parchment paper. Once the chocolate sets (about 10 minutes in the fridge), use black decorating gel or melted dark chocolate to write “RIP” or spooky messages on each tombstone. Gently press one tombstone into each dirt cup, standing upright in the “dirt.”
- Chill and set: Place the cups in the refrigerator for at least 30 minutes before serving. This allows the pudding to fully set and the flavors to meld together. The cookies will soften slightly, creating a texture that’s closer to real dirt—in the best possible way.
Sensory Cues: When you’re crushing the cookies, you should hear a satisfying crunch. The pudding should be thick enough to hold a gummy worm upright without it sinking to the bottom. When you take your first bite, you’ll feel the creamy pudding, the crunchy cookie “dirt,” and the chewy gummy worm all at once. It’s a textural masterpiece.
Troubleshooting Tips: If your pudding is too runny, you may have used warm milk or not whisked it long enough. Pop it in the fridge for 10 minutes to thicken up. If the gummy worms keep sinking, try inserting them after the pudding has set for 5 minutes in the fridge. And if you run out of cookie crumbs, just crush a few more cookies—better to have extra than not enough.
Cooking Tips & Techniques
After making these Cozy Graveyard Dirt Cups with Gummy Worms more times than I care to admit, I’ve picked up a few tricks that make all the difference. Let me share them with you so you can skip the trial and error.
The Perfect “Dirt” Texture: The biggest mistake I made on my first few attempts was over-processing the cookies. You don’t want powder—you want texture. Pulse the cookies in short bursts, checking after each one. Aim for a mix of fine crumbs and tiny pebble-sized bits. This mimics real soil and gives you that satisfying crunch. If you go too fine, it turns into mud when it touches the pudding. Trust me, I’ve been there.
Layering Like a Pro: Don’t just dump all the cookie crumbs on top at once. Layer them strategically: a base layer at the bottom, then pudding, then more crumbs on top. This creates distinct layers that look gorgeous in a clear cup. For an extra spooky effect, reserve a few crumbs to sprinkle around the gummy worms after they’re inserted, making it look like they’ve just emerged from the ground.
Timing is Everything: These cups are best when they’ve had time to chill, but not too long. I’ve found that 30 minutes to 2 hours in the fridge is the sweet spot. Any longer and the cookies start to get mushy. If you’re making them for a party the next day, wait to add the top layer of cookie crumbs until just before serving. That way, the “dirt” stays crunchy.
My Biggest Failure: The first time I made these for a Halloween party, I used cheap store-brand pudding mix and skim milk. The pudding never set properly, and I ended up with a soupy mess. My gummy worms were swimming in chocolate soup. It was a disaster. Now I always use full-fat milk and a trusted brand of pudding mix. Don’t skimp on the quality—it makes a real difference.
Multitasking Strategy: While the pudding is setting, crush your cookies. While the tombstones are chilling, prepare your cups. This recipe is perfect for multitasking because there’s always something to do while another component sets. I like to put on a spooky podcast or a Halloween playlist while I work—it sets the mood perfectly.
Variations & Adaptations
One of the best things about these Cozy Graveyard Dirt Cups with Gummy Worms is how easy they are to customize. Here are some of my favorite variations:
Spooky Swamp Cups
Add 1-2 drops of green food coloring to the pudding before it sets. This creates a swampy, eerie green base that looks amazing with the brown “dirt” on top. Use gummy frogs or gummy snakes instead of worms for a different creepy-crawly vibe. I tried this for a swamp-themed party, and it was a huge hit.
Peanut Butter Dirt Cups
Swirl 2 tablespoons of creamy peanut butter into the pudding before layering. The peanut butter adds a rich, nutty flavor that pairs beautifully with the chocolate. Use peanut butter sandwich cookies instead of regular ones for double the peanut butter goodness. Just make sure to check for allergies if serving to a crowd.
Vegan & Dairy-Free Version
Use a vegan chocolate pudding mix (many brands offer this) and swap the milk with unsweetened almond milk or oat milk. For the “dirt,” use vegan chocolate sandwich cookies (most are accidentally vegan). Gummy worms are usually vegan, but double-check the label. This version is just as creamy and delicious, and no one will know the difference.
Gluten-Free Option
Use gluten-free chocolate sandwich cookies (available at most grocery stores) and ensure your pudding mix is certified gluten-free. Most instant pudding mixes are gluten-free, but always check the label. This adaptation is perfect for guests with celiac disease or gluten sensitivity.
Birthday Cake Dirt Cups
Swap the chocolate pudding for vanilla or white chocolate pudding. Use golden sandwich cookies or crushed vanilla wafers for the “dirt.” Add rainbow sprinkles to the top for a festive, non-scary version. This is my go-to for kids’ birthday parties—they love the colorful worms peeking out of the “dirt.”
Serving & Storage Suggestions
These Cozy Graveyard Dirt Cups with Gummy Worms are best served cold, straight from the fridge. The contrast between the cool, creamy pudding and the crunchy cookie “dirt” is what makes them so addictive. Serve them in clear cups so everyone can see the spooky layers.
Presentation Ideas: Arrange the cups on a platter lined with fake spiderwebs or autumn leaves. Add a few plastic spiders or skeleton hands for extra creepiness. If you made tombstones, stick one in each cup at a slightly tilted angle—like an old, forgotten graveyard. For a cozy touch, serve them with a side of warm apple cider or hot chocolate.
Complementary Dishes: These dirt cups pair beautifully with other Halloween treats like pumpkin-shaped cookies, caramel apples, or a warm slice of pumpkin bread. For a full spooky spread, serve them alongside a bowl of popcorn tossed with cinnamon sugar and a platter of cheese and crackers shaped like ghosts.
Storage Instructions: Store any leftover cups in the refrigerator, covered with plastic wrap or a lid, for up to 3 days. The texture is best within the first 24 hours, but they’re still delicious after that. If you’re making them for a party, I recommend assembling them no more than 6 hours ahead to keep the “dirt” crunchy.
Freezer Instructions: You can freeze these cups for up to 2 weeks, but the texture will change slightly. The pudding becomes more like a frozen mousse, and the cookies soften completely. If you want to try this, freeze them without the gummy worms (they get icy and weird) and add fresh worms after thawing. Thaw in the refrigerator for about 2 hours before serving.
Reheating Notes: These are meant to be served cold, so no reheating needed! If you’ve frozen them, just let them thaw in the fridge. The flavors actually develop and deepen overnight, so they might taste even better the next day.
Nutritional Information & Benefits
Let’s be real—these Cozy Graveyard Dirt Cups with Gummy Worms are a treat, not a health food. But that doesn’t mean they don’t have some redeeming qualities. Here’s a rough estimate of what’s in each serving (based on 8 servings, using whole milk and regular cookies):
| Nutrient | Amount Per Serving |
|---|---|
| Calories | 285 |
| Total Fat | 11g |
| Saturated Fat | 5g |
| Cholesterol | 15mg |
| Sodium | 320mg |
| Total Carbohydrates | 42g |
| Dietary Fiber | 2g |
| Sugars | 28g |
| Protein | 5g |
Health Benefits of Key Ingredients: Chocolate pudding contains calcium from the milk, which is great for bone health. Cocoa powder is rich in antioxidants called flavonoids, which can help reduce inflammation. And gummy worms? Well, they’re made of gelatin, which provides a small amount of protein. It’s not much, but every little bit counts, right?
Dietary Considerations: This recipe can be made gluten-free, dairy-free, and vegan with simple substitutions (see variations above). It contains dairy and gluten in its standard form, and gummy worms may contain gelatin (not vegetarian/vegan). Always check labels if serving to guests with dietary restrictions.
Personal Wellness Perspective: I believe in balance. These dirt cups are a fun, indulgent treat that brings joy and nostalgia. Life is too short to skip dessert, especially when it’s this adorable. Enjoy them in moderation, savor every bite, and don’t feel guilty about it. That’s my philosophy.
Conclusion
These Cozy Graveyard Dirt Cups with Gummy Worms are more than just a Halloween dessert—they’re a little piece of joy that brings people together. Whether you’re making them for a spooky movie night, a kids’ Halloween party, or just because you need a cozy pick-me-up, they never disappoint.
I love this recipe because it reminds me of that little bakery that closed too soon, but it also reminds me that I can recreate magic in my own kitchen. It’s simple, forgiving, and endlessly customizable. You can make it as spooky or as silly as you want. Add more worms, skip the tombstones, or go all out with the decorations—it’s your graveyard, and you’re in charge.
I’d love to hear how yours turn out! Did you add any fun decorations? Did your kids help make them? Drop a comment below and share your creations. And if you loved this recipe, don’t forget to pin it on Pinterest or share it with a friend who needs a little spooky sweetness in their life. Until next time, happy haunting—and happy eating!
Frequently Asked Questions
Can I make these dirt cups ahead of time?
Absolutely! You can assemble them up to 6 hours in advance. Just wait to add the top layer of cookie crumbs until right before serving to keep the “dirt” crunchy. If you’re making them the night before, store them in the fridge without the gummy worms and add those fresh before serving.
What if I don’t have instant pudding mix?
You can use cook-and-serve pudding mix, but you’ll need to cook it on the stovetop and let it cool completely before layering. This takes more time, but the result is still delicious. Alternatively, you can use pre-made pudding cups from the store—just skip the pudding-making step and go straight to layering.
How do I keep the gummy worms from sinking?
Let the pudding set in the fridge for 5-10 minutes before inserting the gummy worms. The slightly firmer pudding will hold them in place. Also, don’t push them all the way in—leave part of the worm sticking out to create that crawling-out-of-the-dirt effect.
Can I use different types of cookies for the “dirt”?
Definitely! Golden sandwich cookies, chocolate wafer cookies, or even crushed graham crackers work well. For a richer flavor, try chocolate-filled cookies or even brownie crumbs. Just make sure the cookies are dry and crunchy, not soft or cakey, for the best “dirt” texture.
Are these dirt cups suitable for kids to help make?
Yes! This is one of the most kid-friendly recipes I know. Kids can help crush the cookies (using the zip-top bag method), layer the ingredients, and insert the gummy worms. Just supervise the pudding-making step, as it involves mixing. It’s a fantastic activity for Halloween parties or rainy afternoons.
Pin This Recipe!
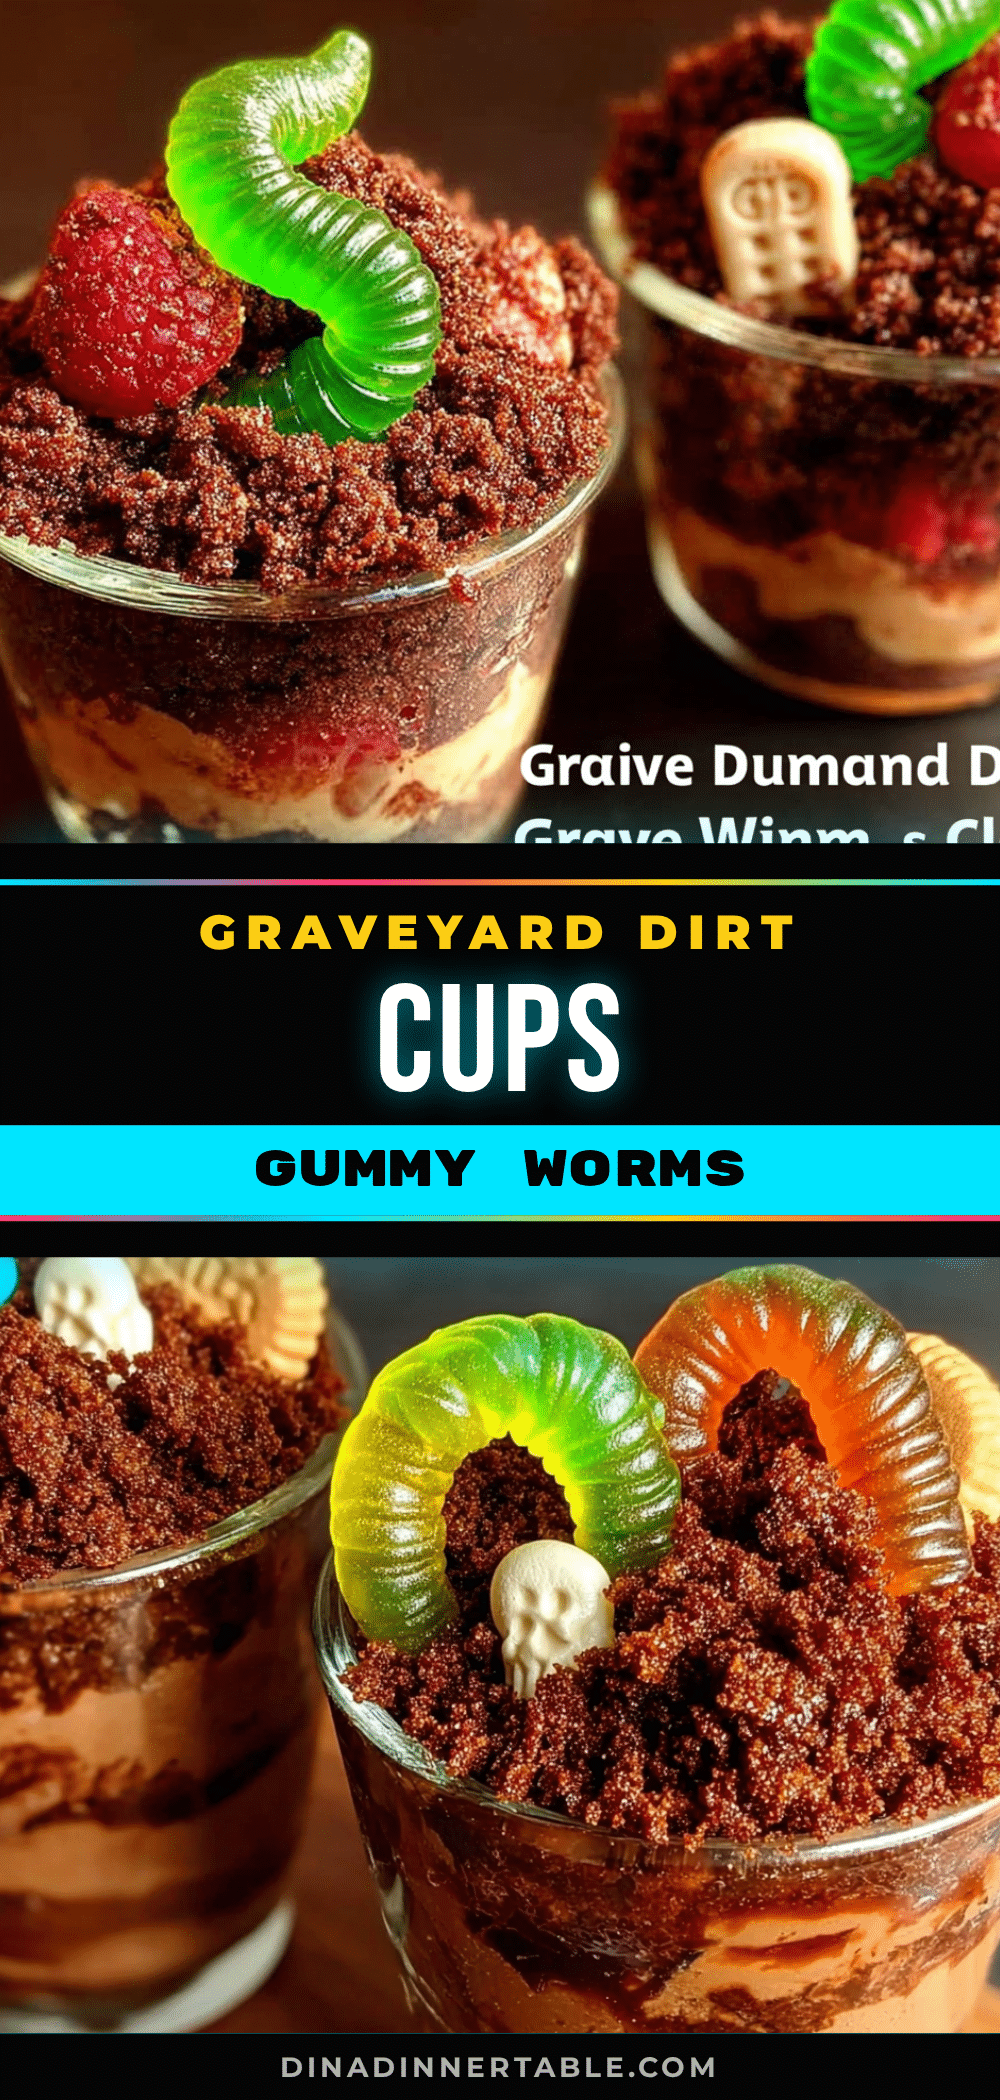
Cozy Graveyard Dirt Cups: Best Easy Gummy Worm Dessert
These Cozy Graveyard Dirt Cups with Gummy Worms are a fun, no-bake Halloween treat featuring layers of creamy chocolate pudding, crunchy cookie ‘dirt,’ and chewy gummy worms. Perfect for spooky movie nights or kids’ parties, this easy dessert comes together in under 20 minutes of active prep time.
- Prep Time: 20 minutes
- Cook Time: 0 minutes
- Total Time: 50 minutes (including chilling time)
- Yield: 6-8 servings 1x
- Category: Dessert
- Cuisine: American
Ingredients
- 1 box (3.9 oz) instant chocolate pudding mix
- 2 cups cold whole milk
- 1 package (14.3 oz) chocolate sandwich cookies (about 20 cookies)
- 1 cup gummy worms
- Optional: 1-2 drops green food coloring
- Optional: 1/4 cup chocolate shavings or cocoa powder
- Optional: 6-8 rectangular graham crackers (for tombstones)
- Optional: 1/2 cup white chocolate chips or candy melts (for tombstones)
- Optional: Black decorating gel or dark chocolate (for writing on tombstones)
- Optional: Small plastic skeletons or candy bones
Instructions
- Make the pudding: In a medium mixing bowl, whisk together the instant chocolate pudding mix and 2 cups of cold whole milk. Whisk vigorously for about 2 minutes, until the mixture starts to thicken. Let it sit for 5 minutes to set completely.
- Crush the cookies: While the pudding sets, place 20 chocolate sandwich cookies in a food processor and pulse until they resemble fine crumbs. Set aside 1/4 cup of the crumbs for topping.
- Prepare the cups: Spoon about 2 tablespoons of the crushed cookies into the bottom of each of 6-8 cups or jars. Gently press it down with the back of a spoon.
- Add the pudding: Divide the prepared chocolate pudding evenly among the cups, spooning about 1/4 cup per cup. Smooth the top with a spatula.
- Insert the gummy worms: Take 2-3 gummy worms per cup and gently push them into the pudding so they’re partially submerged, leaving some wiggling out.
- Top with ‘dirt’: Sprinkle the remaining crushed cookies over the top of each cup, covering the pudding completely. Use the reserved 1/4 cup of crumbs for a final even layer.
- Add graveyard decorations (optional): Cut graham crackers into small rectangles. Melt white chocolate and dip the graham crackers to coat one side. Once set, write ‘RIP’ with black decorating gel. Press one tombstone into each dirt cup.
- Chill and set: Refrigerate for at least 30 minutes before serving.
Notes
For best results, use cold whole milk for the pudding. Let the pudding set for 5-10 minutes in the fridge before inserting gummy worms to prevent them from sinking. For crunchy ‘dirt,’ add the top layer of cookie crumbs just before serving. These cups are best within 24 hours of assembly.
Nutrition
- Serving Size: 1 cup
- Calories: 285
- Sugar: 28
- Sodium: 320
- Fat: 11
- Saturated Fat: 5
- Carbohydrates: 42
- Fiber: 2
- Protein: 5
Keywords: dirt cups, gummy worms, Halloween dessert, no-bake dessert, chocolate pudding, graveyard dessert, easy dessert, kids dessert