I was at the hardware store, of all places, last October. Not exactly where you’d expect a recipe epiphany, right? I was there for a new furnace filter—super exciting stuff—when the woman behind me in line, maybe seventy years old with these incredible silver braids, started talking about apples. Not just any apples, but the particular way she reduces fresh cider down to almost a syrup for her grandmother’s cookie recipe. She wasn’t even talking to me at first—she was telling the cashier about her weekend plans. But I couldn’t help myself. I leaned over and asked, “What kind of cookies?” And she just smiled, this knowing little grin, and said, “The kind that make you forget about the cold coming.”
Honestly, I wasn’t expecting to leave the hardware store with a cookie idea. I was just trying to keep my furnace running. But that conversation stuck with me for days. I mean, there’s something about fall that makes you crave that warm, spiced flavor in everything, isn’t there? I kept thinking about what she described—the intensity of boiled cider, the softness of a snickerdoodle, and the way a simple glaze could tie it all together. I tried a few versions at home that week, and let me tell you, the first batch was a disaster. I used too much cider and ended up with flat, sticky pucks that tasted more like burnt sugar than anything cozy. But I got there eventually.
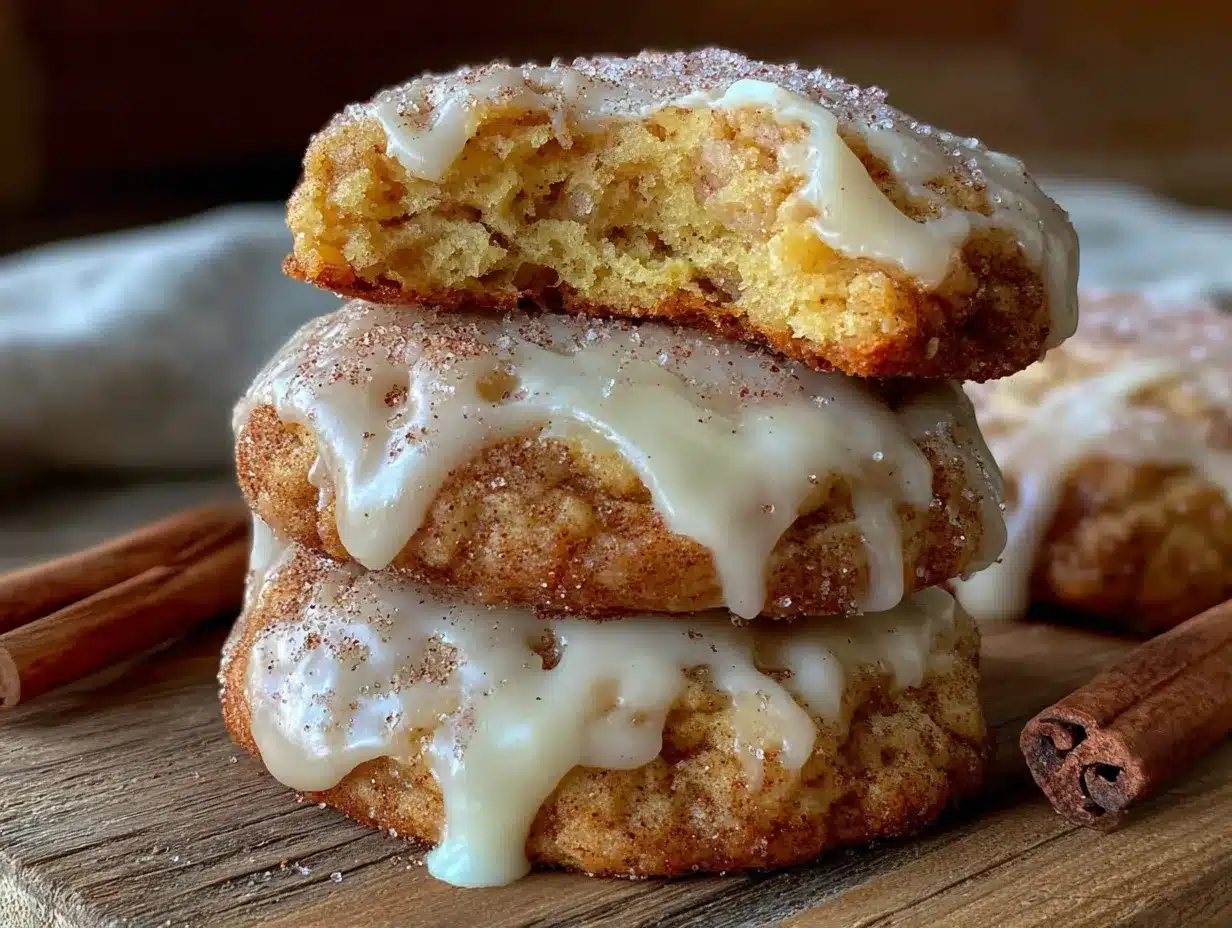
These Cozy Iced Apple Cider Snickerdoodle Cookies are the result of that chance encounter and a few messy afternoons in my kitchen. They’re soft, they’re chewy, and that apple cider glaze on top is honestly the best part. I’ve been making them every fall since, and they always make the house smell like the best kind of warm. Maybe you’ve been there—a recipe that finds you when you’re not even looking for it. That’s this one.
Why You’ll Love This Recipe
Let’s be real for a second. There are a million cookie recipes out there, and most of them are fine. But these Cozy Iced Apple Cider Snickerdoodle Cookies are different. They’re not just another fall cookie—they’re the one you’ll actually want to bake again next weekend. Here’s why they stand out from the crowd:
- Quick & Easy: You can have these cookies on the table in about 30 minutes, not counting chill time. The dough comes together fast, and the hardest part is just waiting for them to cool before you add that glaze.
- Simple Ingredients: No weird specialty items here. You probably have most of this in your pantry right now—flour, butter, sugar, eggs. The only “special” thing is the apple cider, and that’s everywhere in the fall.
- Perfect for Fall Gatherings: These are made for crisp afternoons, apple picking trips, and cozy nights by the fire. They’re the cookie equivalent of a warm sweater.
- Crowd-Pleaser: I brought a batch to my book club last month, and honestly, I thought they’d last the whole evening. They were gone in fifteen minutes. Even the people who said they “weren’t big on sweets” had two.
- Unbelievably Delicious: The texture is what gets me every time. The outside has that classic snickerdoodle cinnamon-sugar crunch, but the inside stays soft and almost pillowy. And the apple cider glaze adds this tart-sweet finish that cuts through the butteriness perfectly.
What makes this recipe different from all the other apple cider cookies out there? It’s the technique. Most recipes just dump apple cider into the dough and call it a day, which leaves you with a wet, spread-out mess. Instead, I reduce the cider first—boiling it down until it’s concentrated and almost syrupy. This gives you that intense apple flavor without throwing off the liquid balance of the dough. I tested this about six times to get it right, and trust me, this version is the one. It’s the kind of cookie that makes you close your eyes after the first bite. Comfort food reimagined for the season.
What Ingredients You Will Need
This recipe uses simple, wholesome ingredients to deliver that cozy fall flavor without any fuss. Most of these are pantry staples, and the fresh ones are easy to find at any grocery store this time of year. Here’s what you’ll need:
For the Cookies
- 2 ¾ cups all-purpose flour (spooned and leveled—don’t scoop straight from the bag, or you’ll end up with dry cookies)
- 1 teaspoon cream of tartar (this is what gives snickerdoodles their signature tangy flavor and soft texture; don’t skip it)
- 1 teaspoon baking soda
- ½ teaspoon salt (I prefer fine sea salt for baking)
- 1 cup unsalted butter, softened to room temperature (leave it out for about an hour; microwaving it will make the cookies spread too much)
- 1 ½ cups granulated sugar
- 2 large eggs, room temperature (if you forgot to take them out, place them in a bowl of warm water for 5 minutes)
- 1 teaspoon vanilla extract (use pure vanilla, not imitation—it makes a difference)
- ⅓ cup apple cider, reduced (see instructions below; this is the secret ingredient)
For the Cinnamon-Sugar Coating
- ¼ cup granulated sugar
- 1 ½ teaspoons ground cinnamon
For the Apple Cider Glaze
- 1 cup powdered sugar, sifted (sifting prevents lumps in your glaze)
- 2-3 tablespoons apple cider (use the same cider you reduced for the cookies)
- ¼ teaspoon ground cinnamon (optional, but I love the extra warmth)
- Pinch of salt (trust me on this—it balances the sweetness)
A few ingredient notes before we get started. For the apple cider, look for fresh, unfiltered cider from the refrigerated section of your grocery store. The cloudy kind has more flavor than the shelf-stable stuff. I personally like using local cider from the farmer’s market when I can find it—it’s usually richer and more aromatic. You’ll need about 1 cup of cider total for the recipe (⅓ cup for the cookies and 2-3 tablespoons for the glaze), but buy a little extra because it reduces significantly. If you’re in a pinch, you can use apple juice instead, but the flavor won’t be as deep or complex. Also, for the butter, I recommend using a high-quality brand like Kerrygold or Plugrà for the best texture. The butter is the backbone of these cookies, so don’t skimp here.
Equipment Needed
You don’t need any fancy gadgets for these cookies, which is part of why I love them. Here’s what you’ll need:
- Large mixing bowls (at least two—one for dry ingredients, one for wet)
- Electric hand mixer or stand mixer (you can do this by hand with a wooden spoon, but your arm will get tired; I’ve been there)
- Small saucepan (for reducing the apple cider; a 1-quart size works perfectly)
- Measuring cups and spoons (dry measuring cups for flour and sugar, liquid measuring cup for the cider)
- Baking sheets (I use light-colored aluminum sheets; dark sheets can make the bottoms burn)
- Parchment paper or silicone baking mats (parchment is cheaper and works just as well)
- Wire cooling rack (essential for getting that glaze to set properly)
- Small bowl (for the cinnamon-sugar coating)
- Whisk (for the glaze)
If you don’t have a stand mixer, don’t worry. A hand mixer works great, and honestly, I sometimes prefer it because it’s easier to scrape down the sides of the bowl. For the baking sheets, avoid using nonstick spray or greasing the pan—the parchment paper is all you need. I learned that the hard way when my first batch stuck to the pan and I had to scrape them off with a spatula. Not pretty.
Preparation Method
Alright, let’s get to the good part. Follow these steps carefully, and you’ll have the best batch of Cozy Iced Apple Cider Snickerdoodle Cookies you’ve ever made.
- Reduce the apple cider: Pour 1 cup of apple cider into a small saucepan. Bring it to a boil over medium-high heat, then reduce the heat to medium-low and let it simmer. You want it to reduce down to about ⅓ cup, which will take roughly 15-20 minutes. It should be thick, syrupy, and smell intensely of apples. Watch it carefully toward the end—it can burn quickly. Once it’s done, pour it into a small bowl and let it cool completely. You’ll need about ⅓ cup for the dough and a little extra for the glaze.
- Preheat your oven: Set your oven to 375°F (190°C). Line two baking sheets with parchment paper. This temperature is key—too hot, and the cookies will brown too fast on the outside while staying raw in the middle.
- Whisk the dry ingredients: In a medium bowl, whisk together the flour, cream of tartar, baking soda, and salt. Set this aside. The cream of tartar is non-negotiable here—it reacts with the baking soda to give the cookies their signature puff and slight tang.
- Cream the butter and sugar: In a large bowl, beat the softened butter and 1 ½ cups of granulated sugar together until light and fluffy. This should take about 3-4 minutes with a hand mixer on medium speed. You want it to look pale and almost doubled in volume. Scrape down the sides of the bowl halfway through.
- Add the wet ingredients: Beat in the eggs one at a time, making sure each is fully incorporated before adding the next. Then mix in the vanilla extract and the cooled, reduced apple cider. The batter might look a little curdled at this point—don’t panic. That’s normal. It will come together once you add the flour.
- Combine wet and dry: Gradually add the dry ingredients to the wet mixture, mixing on low speed just until combined. Do not overmix. You want to stop as soon as you no longer see streaks of flour. Overmixing will make the cookies tough, and nobody wants that.
- Chill the dough: Cover the bowl with plastic wrap and refrigerate for at least 30 minutes. This step is crucial. Chilling the dough prevents the cookies from spreading too much in the oven and gives the flavors time to meld together. If you’re in a hurry, you can skip this, but your cookies will be flatter and less chewy. I speak from experience—I’ve done it both ways.
- Prepare the cinnamon-sugar coating: In a small bowl, mix together the ¼ cup of granulated sugar and 1 ½ teaspoons of ground cinnamon.
- Shape the cookies: Using a cookie scoop or your hands, roll the dough into 1 ½-inch balls (about 2 tablespoons of dough each). Roll each ball in the cinnamon-sugar mixture until fully coated. Place them on the prepared baking sheets, spacing them about 2 inches apart. They will spread, so give them room.
- Bake: Bake for 10-12 minutes, or until the edges are set and lightly golden. The centers will still look soft and slightly puffed—that’s exactly what you want. They will continue to set as they cool. Do not overbake them, or they’ll be dry. I usually pull mine out at the 11-minute mark.
- Cool: Let the cookies cool on the baking sheets for 5 minutes. This allows them to firm up enough to transfer without breaking. Then move them to a wire cooling rack to cool completely before glazing.
- Make the glaze: While the cookies are cooling, whisk together the powdered sugar, 2 tablespoons of apple cider, cinnamon (if using), and a pinch of salt. If the glaze is too thick, add another tablespoon of cider. If it’s too thin, add a little more powdered sugar. You want it to be thick but drizzle-able—think honey consistency.
- Glaze the cookies: Once the cookies are completely cool, drizzle the glaze over the tops using a spoon or a piping bag. Let the glaze set for about 15-20 minutes before serving. If you’re impatient like me, you can eat them right away, but the glaze will be a little messy. Totally worth it, though.
Cooking Tips & Techniques
After making these cookies more times than I care to admit, I’ve picked up a few tricks that make the process smoother and the results more consistent. Here’s what I’ve learned:
Don’t rush the cider reduction. This is the most important step in the whole recipe. If you don’t reduce the cider enough, your dough will be too wet, and the cookies will spread into thin, crispy discs. If you reduce it too much, it can burn and turn bitter. Aim for a syrupy consistency that coats the back of a spoon. I usually start checking mine around the 12-minute mark and watch it closely after that. The smell changes from sweet apple to almost caramel-like when it’s ready.
Room temperature ingredients matter. I know, I know—every recipe says this, and it feels like a hassle. But here’s the thing: cold butter doesn’t cream properly with sugar, and cold eggs can make the batter seize up. If you forgot to take your butter and eggs out ahead of time, here’s a quick fix: cut the butter into small cubes and let it sit for 15 minutes, and place the eggs in a bowl of warm (not hot) water for 5 minutes. It works every time.
Use a cookie scoop for even sizing. I used to just eyeball my dough balls, and my cookies would come out all different sizes—some underbaked, some overbaked. A cookie scoop (a 1 ½-tablespoon size works perfectly) gives you uniform cookies that bake evenly. Plus, it’s faster than rolling by hand.
Chill the dough, seriously. I know I said this already, but I’m saying it again because it’s that important. The first time I made these, I was in a rush and skipped the chilling step. The cookies spread into flat, ugly pancakes that looked nothing like the beautiful photos I had in my head. The second batch, with chilling, came out perfectly thick and chewy. Lesson learned.
Watch the oven temperature. Every oven runs a little differently. If your cookies are browning too fast on the bottom, try baking them on the middle rack with a second baking sheet underneath to diffuse the heat. If they’re pale on top after 12 minutes, your oven might run cool. I keep an oven thermometer inside mine to make sure it’s accurate, and it’s saved me from many baking disasters.
Variations & Adaptations
One of the best things about this recipe is how flexible it is. Here are some ways to make it your own:
Gluten-Free Version: Substitute the all-purpose flour with a 1:1 gluten-free baking flour blend that contains xanthan gum. I’ve tested this with Bob’s Red Mill 1:1 Baking Flour, and the texture was almost identical to the original. Just make sure to chill the dough for at least 45 minutes—gluten-free dough tends to be stickier.
Dairy-Free Adaptation: Use a high-quality vegan butter stick (like Earth Balance or Miyoko’s) in place of the unsalted butter. Make sure it’s softened to room temperature. The cookies will be slightly less tender, but they’ll still be delicious. For the glaze, you can use the same apple cider without any dairy substitutions needed.
Spiced-Up Version: If you want even more fall flavor, add ½ teaspoon of ground ginger and ¼ teaspoon of ground cloves to the dry ingredients. I tried this last year when I was feeling adventurous, and it gave the cookies a chai-like warmth that was absolutely incredible. You could also add a pinch of nutmeg to the cinnamon-sugar coating.
Apple Chunk Variation: Finely dice one small apple (Honeycrisp or Fuji work well) and fold it into the dough after mixing. The apple pieces add little bursts of moisture and texture. Just be aware that this makes the dough a bit wetter, so you’ll need to chill it for a full hour before baking.
Maple Glaze Swap: Replace the apple cider in the glaze with 2 tablespoons of pure maple syrup plus 1 tablespoon of milk or cream. The maple flavor pairs beautifully with the apple cider in the cookies. I did this for a Thanksgiving dessert once, and everyone asked for the recipe.
Serving & Storage Suggestions
These Cozy Iced Apple Cider Snickerdoodle Cookies are best served at room temperature, with the glaze fully set. I love pairing them with a hot cup of spiced chai or a mug of warm apple cider—double the apple flavor, you know? They’re also fantastic with a scoop of vanilla ice cream for a simple dessert that feels a little fancy.
For storage, place the cookies in an airtight container at room temperature. They’ll stay fresh for up to 5 days, though honestly, they never last that long in my house. If you stack them, put a layer of parchment paper between the layers to prevent the glaze from sticking. The cookies actually get a little softer and more tender on day two, as the flavors meld together. I kind of prefer them that way.
You can also freeze these cookies, with or without the glaze. To freeze unglazed cookies, let them cool completely, then place them in a single layer in a freezer-safe bag or container. They’ll keep for up to 3 months. When you’re ready to serve, thaw them at room temperature and then add the glaze fresh. If you freeze them with the glaze already on, the glaze can get a little sticky when thawed, so I recommend freezing them plain.
To reheat, pop a cookie in the microwave for about 10 seconds. It’ll come out warm and soft, almost like it just came out of the oven. Just be careful not to overheat it, or the glaze will melt into a puddle.
Nutritional Information & Benefits
Here’s a rough estimate of the nutritional values per cookie (based on 24 cookies):
- Calories: 185
- Fat: 8g
- Carbohydrates: 27g
- Protein: 2g
- Fiber: 0.5g
- Sugar: 17g
Now, these are cookies, so they’re not exactly health food. But there are a few bright spots. The apple cider provides a small amount of vitamin C and antioxidants, especially if you use fresh, unfiltered cider. The cinnamon in the coating has anti-inflammatory properties and can help regulate blood sugar levels—though let’s be real, the sugar in these cookies probably cancels that out. Still, it’s nice to know you’re getting a little something extra.
If you’re watching your sugar intake, you could try reducing the sugar in the dough by ¼ cup, but the texture will be slightly less tender. For a lower-carb option, these aren’t really the right recipe—you’d be better off with a keto-friendly cookie instead. These are meant to be a treat, and I think that’s okay. Life needs a little sweetness sometimes.
Conclusion
So there you have it—the story of a cookie that started with a random conversation at a hardware store and ended up becoming a fall tradition in my kitchen. These Cozy Iced Apple Cider Snickerdoodle Cookies are everything I want in a seasonal treat: soft, chewy, spiced just right, and topped with a glaze that makes them feel special without being fussy.
I really hope you give them a try. And don’t be afraid to make them your own—swap in different spices, try the maple glaze, or add those little apple chunks if you’re feeling adventurous. The best recipes are the ones that evolve with you. If you make a batch, I’d love to hear how they turned out. Leave a comment below, or tag me in your photos on social media. There’s nothing better than seeing these cookies bring a little warmth to someone else’s kitchen.
Happy baking, friend. And remember—sometimes the best recipes come from the most unexpected places.
Frequently Asked Questions
Can I use apple juice instead of apple cider?
You can, but the flavor won’t be as rich or deep. Apple juice is thinner and less concentrated, so you’ll lose some of that intense apple taste. If you’re in a pinch, go ahead and use it, but I highly recommend sticking with fresh, unfiltered apple cider for the best results.
Why did my cookies spread too much?
This usually happens for one of three reasons: the butter was too soft or melted, the dough wasn’t chilled long enough, or you used too much liquid. Make sure your butter is softened but not melted, and don’t skip the chilling step. Also, double-check that you reduced the apple cider properly—it should be syrupy, not watery.
Can I make the dough ahead of time?
Absolutely. You can prepare the dough up to 3 days in advance and keep it covered in the refrigerator. When you’re ready to bake, let it sit at room temperature for about 10 minutes so it’s soft enough to scoop. You can also freeze the dough balls for up to 3 months—just bake them straight from frozen, adding 1-2 minutes to the baking time.
How do I know when the cookies are done?
Look for set edges that are lightly golden, while the centers still look soft and slightly puffed. They will continue to cook on the hot baking sheet after you take them out of the oven. If you wait until the centers look fully baked, they’ll be overdone and dry. Trust the process—they’ll firm up as they cool.
Can I skip the glaze?
Sure, but you’ll be missing out on the best part! The glaze adds a sweet-tart finish that really makes these cookies special. If you want to skip it, you can dust the cookies with extra powdered sugar or just eat them plain—they’re still delicious. But honestly, the glaze is what takes them from good to unforgettable.
Pin This Recipe!

Cozy Iced Apple Cider Snickerdoodle Cookies: Easy Fall Recipe

Soft, chewy snickerdoodle cookies infused with reduced apple cider and topped with a sweet-tart apple cider glaze. A perfect fall treat that’s quick and easy to make.
- Prep Time: 15 minutes
- Cook Time: 12 minutes
- Total Time: 1 hour 2 minutes (including 30 minutes chill time)
- Yield: 24 cookies 1x
- Category: Dessert
- Cuisine: American
Ingredients
- 2 ¾ cups all-purpose flour (spooned and leveled)
- 1 teaspoon cream of tartar
- 1 teaspoon baking soda
- ½ teaspoon fine sea salt
- 1 cup unsalted butter, softened to room temperature
- 1 ½ cups granulated sugar
- 2 large eggs, room temperature
- 1 teaspoon pure vanilla extract
- ⅓ cup reduced apple cider (from 1 cup fresh cider)
- ¼ cup granulated sugar (for coating)
- 1 ½ teaspoons ground cinnamon (for coating)
- 1 cup powdered sugar, sifted (for glaze)
- 2–3 tablespoons apple cider (for glaze)
- ¼ teaspoon ground cinnamon (optional, for glaze)
- Pinch of salt (for glaze)
Instructions
- Reduce the apple cider: Pour 1 cup of apple cider into a small saucepan. Bring to a boil over medium-high heat, then reduce heat to medium-low and simmer until reduced to about ⅓ cup, roughly 15-20 minutes. It should be thick and syrupy. Pour into a small bowl and let cool completely.
- Preheat your oven to 375°F (190°C). Line two baking sheets with parchment paper.
- Whisk the dry ingredients: In a medium bowl, whisk together flour, cream of tartar, baking soda, and salt. Set aside.
- Cream the butter and sugar: In a large bowl, beat the softened butter and 1 ½ cups granulated sugar together until light and fluffy, about 3-4 minutes with a hand mixer on medium speed. Scrape down the sides halfway through.
- Add the wet ingredients: Beat in the eggs one at a time, fully incorporating each. Then mix in the vanilla extract and the cooled, reduced apple cider. The batter may look slightly curdled.
- Combine wet and dry: Gradually add the dry ingredients to the wet mixture, mixing on low speed just until combined. Do not overmix.
- Chill the dough: Cover the bowl with plastic wrap and refrigerate for at least 30 minutes.
- Prepare the cinnamon-sugar coating: In a small bowl, mix together ¼ cup granulated sugar and 1 ½ teaspoons ground cinnamon.
- Shape the cookies: Using a cookie scoop or your hands, roll the dough into 1 ½-inch balls (about 2 tablespoons each). Roll each ball in the cinnamon-sugar mixture until fully coated. Place on prepared baking sheets, spacing about 2 inches apart.
- Bake: Bake for 10-12 minutes, or until edges are set and lightly golden. Centers will still look soft and slightly puffed. Do not overbake.
- Cool: Let cookies cool on baking sheets for 5 minutes, then transfer to a wire cooling rack to cool completely before glazing.
- Make the glaze: While cookies cool, whisk together powdered sugar, 2 tablespoons apple cider, cinnamon (if using), and a pinch of salt. Add more cider if too thick, or more powdered sugar if too thin. Aim for honey consistency.
- Glaze the cookies: Once cookies are completely cool, drizzle glaze over tops using a spoon or piping bag. Let glaze set for 15-20 minutes before serving.
Notes
Don’t rush the cider reduction; it should be syrupy. Room temperature ingredients are important for proper creaming. Chilling the dough is crucial to prevent spreading. Use a cookie scoop for even sizing. Watch oven temperature closely.
Nutrition
- Serving Size: 1 cookie
- Calories: 185
- Sugar: 17
- Sodium: 120
- Fat: 8
- Saturated Fat: 5
- Carbohydrates: 27
- Fiber: 0.5
- Protein: 2
Keywords: apple cider, snickerdoodle, fall cookies, iced cookies, easy fall recipe