Megan wasn’t trying to impress anyone. I’d stopped by her place last October to pick up a book I’d lent her—one of those quick, in-and-out errands where you don’t even bother taking your shoes off at the door. But then the smell hit me. It was warm and spicy, like walking into a kitchen two days before Thanksgiving, but with something brighter underneath. Cinnamon, definitely. Nutmeg too. And something that made my brain say “pumpkin” before I could even see the counter.
She had her back to me, scooping something into a bowl with her hands—just pressing and rolling, not even looking down. Like she’d done it a thousand times. “Oh, these?” she said when I asked, barely glancing over her shoulder. “Just some energy bites. I make them when I’m craving pie but don’t want to turn on the oven.” She tossed one to me, still warm from her palms, and I caught it like a fool. Honestly, I almost dropped it. But that first bite? Let me tell you—I stood there in her doorway for another twenty minutes, eating three more, pretending I was still interested in the book.
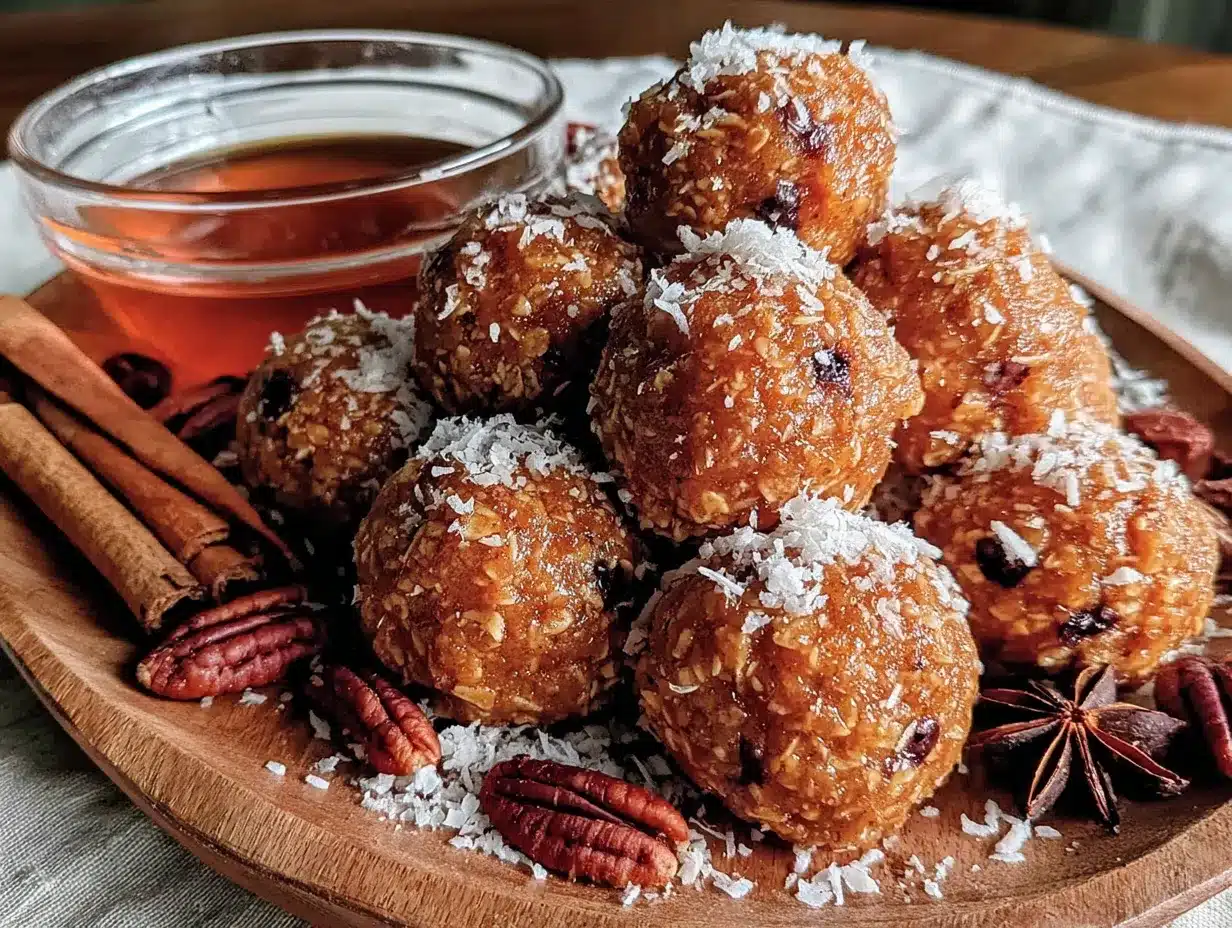
These little bites have that effect on people. They’re not trying to be fancy. They’re not pretending to be a full pumpkin pie with whipped cream and a fluted crust. But somehow, they capture everything we love about fall in a single, no-bake, five-minute handful. The oats give them chew. The pumpkin puree keeps them soft without being sticky. And the spices—well, the spices are the whole point. They taste like October in your mouth.
Maybe you’ve been there too—standing in someone else’s kitchen, eating something they threw together without a recipe card, wondering why yours never turns out that good. I asked Megan for the rough idea before I left, and I’ve been tweaking it ever since. This version is the one I keep coming back to. It’s the one that makes my own kitchen smell like her doorway, and honestly, that’s a pretty good reason to make them every single week.
Why You’ll Love This Recipe
I’ve tested these little bites about seven times now—not because they’re hard, but because I kept trying to improve something that was already perfect. Spoiler alert: I didn’t improve them. I just learned to trust the simplicity. Here’s what makes this recipe stand out from the dozens of other energy ball recipes floating around the internet.
- Quick & Easy: From start to finish, you’re looking at about five minutes of active work. No oven, no stovetop, no waiting for anything to cool. Mix, roll, eat. That’s it.
- Simple Ingredients: You probably have most of these in your pantry right now. Oats, peanut butter, maple syrup, pumpkin puree, and a few spices. No weird health food store finds required.
- Perfect for Fall: These are made for cozy sweater weather, apple picking season, and those evenings when you want something sweet but don’t want to commit to a whole dessert.
- Crowd-Pleaser: I brought a batch to a potluck last month, and three different people asked for the recipe before the night was over. Kids love them. Adults love them. Even my brother-in-law who “doesn’t do healthy snacks” ate half the container.
- Unbelievably Delicious: There’s something about the texture that gets me every time. They’re soft but not mushy, chewy but not dry. The pumpkin keeps everything moist, and the oats give it that satisfying bite. It’s comfort food that doesn’t weigh you down.
What makes this version different from the rest? It’s the ratio. I spent a lot of time getting the wet-to-dry balance just right so the bites hold together without being sticky or falling apart. Plus, I use a little trick—chilling the pumpkin puree beforehand—that makes the dough easier to handle without adding extra flour or oats. It’s a small thing, but it makes a big difference.
This recipe isn’t just good—it’s the kind that makes you close your eyes after the first bite. It’s fall in a portable form, ready whenever you need a little seasonal pick-me-up.
What Ingredients You Will Need
This recipe uses simple, wholesome ingredients that work together to create that cozy pumpkin pie flavor without any of the fuss. Most of these are pantry staples, especially if you keep a well-stocked baking cupboard during the fall months.
For the Energy Bites
- 1 cup old-fashioned rolled oats (not quick oats—they get too mushy. I prefer Bob’s Red Mill for consistent texture)
- 1/2 cup creamy peanut butter (natural, no-stir style works best. If your peanut butter is oily, stir it well before measuring)
- 1/3 cup pumpkin puree (not pumpkin pie filling—make sure you grab the 100% pure pumpkin. Libby’s is my go-to)
- 1/4 cup maple syrup (pure maple syrup, not pancake syrup. The real stuff adds a deeper flavor that complements the pumpkin)
- 1/4 cup ground flaxseed (this helps bind everything together and adds a nice nutty flavor. Golden flaxseed is milder if you’re new to it)
- 1 teaspoon vanilla extract (pure vanilla extract makes a difference here—the imitation stuff can taste a bit artificial with the pumpkin)
- 1 teaspoon pumpkin pie spice (or make your own: 1/2 teaspoon cinnamon, 1/4 teaspoon nutmeg, 1/4 teaspoon ginger, pinch of cloves)
- 1/2 teaspoon ground cinnamon (I add extra because I’m a cinnamon fanatic. Saigon cinnamon is stronger and sweeter if you can find it)
- 1/4 teaspoon salt (just a pinch to balance the sweetness and bring out the pumpkin flavor)
- 1/3 cup mini chocolate chips (optional but highly recommended—the little bursts of chocolate against the spiced pumpkin are incredible. Enjoy Life makes great dairy-free ones if needed)
- 2 tablespoons shredded coconut (optional, for rolling. Adds a nice texture and makes them look prettier)
A few notes on ingredients: If you’re using a thicker natural peanut butter, you might need to add an extra tablespoon of maple syrup or a splash of water to get the right consistency. The dough should feel like soft play dough—not crumbly, not sticky. Also, make sure your pumpkin puree is at room temperature or slightly chilled. If it’s straight from the fridge, the coconut oil in some peanut butters can seize up and make the dough hard to mix.
For substitutions, almond butter or sun butter work great if you have a peanut allergy. Just keep in mind that sun butter can turn a weird green color when combined with baking soda or other ingredients—it’s totally safe, just not pretty. Coconut oil can replace the peanut butter if needed, but the texture will be a bit firmer when chilled.
Equipment Needed
You don’t need much for this recipe, which is honestly my favorite thing about it. Here’s what you’ll need:
- Large mixing bowl (any size works, but bigger is better for mixing without spillage)
- Measuring cups and spoons (a standard set for dry and liquid ingredients)
- Rubber spatula or wooden spoon (for initial mixing—the dough gets thick, so a sturdy spatula helps)
- Clean hands (I’m serious—you’ll need to get in there with your hands to bring the dough together. It’s the best tool you have)
- Baking sheet or plate (for holding the rolled bites while they chill)
- Parchment paper (optional but helpful for easy cleanup)
- Small bowl (for shredded coconut or other coatings if you’re using them)
- Cookie scoop (optional—a 1-tablespoon scoop makes perfectly uniform bites, but you can totally eyeball it)
- Food processor (optional—you can absolutely mix by hand, but a quick pulse in the food processor gives a more uniform texture if that’s your thing)
I’ve made these in a tiny apartment kitchen with nothing but a bowl and a spoon, and they turned out just as good as when I use my fancy equipment. The only thing I’d recommend splurging on is a good cookie scoop—it makes the rolling process so much faster and gives you consistent-sized bites that all chill at the same rate.
Preparation Method
This is the part where the magic happens. Follow these steps, and you’ll have a batch of cozy pumpkin pie energy bites ready in no time. I’ve included all the little details that took me a few tries to figure out, so you don’t have to learn the hard way.
- Chill your pumpkin puree first. This is my secret trick. About 15 minutes before you start, scoop your pumpkin puree into a small bowl and pop it in the fridge. Cold pumpkin puree makes the dough much easier to handle—it firms up the peanut butter and keeps everything from getting too sticky. I learned this after my first batch turned into a gooey mess that stuck to my hands like glue.
- Mix the wet ingredients. In your large mixing bowl, combine the peanut butter, pumpkin puree, maple syrup, and vanilla extract. Stir them together with your spatula until they’re fully incorporated. The mixture will look a little streaky at first—that’s normal. Keep stirring until it’s a uniform orange-tan color. It should smell amazing already. If your peanut butter was cold, the mixture might look a bit stiff. That’s fine—it’ll loosen up as you work it.
- Add the dry ingredients. Sprinkle the oats, flaxseed, pumpkin pie spice, cinnamon, and salt over the wet mixture. Don’t dump them all in one pile—spreading them out makes mixing easier. Stir everything together with your spatula until it forms a thick, chunky dough. At this point, it will look like it’ll never come together. Trust the process. Keep folding and pressing until there are no dry patches left.
- Get your hands in there. Here’s where the spatula stops being useful. Wash your hands thoroughly, then use them to knead the dough right in the bowl. Squeeze and press the mixture together. You’re looking for a texture that holds together when you squeeze a handful—like damp sand. If it’s too dry and crumbly, add a teaspoon of maple syrup or water. If it’s too wet and sticky, add a tablespoon of oats. The dough should feel soft and pliable, not sticky or dry.
- Fold in the chocolate chips. If you’re using them (and you really should), sprinkle the mini chocolate chips over the dough and knead them in with your hands. Make sure they’re evenly distributed—nobody wants a bite with no chocolate and another one with five chips. I like to save a few chips to press onto the tops of the bites after rolling, just for looks.
- Chill the dough. This step is optional but highly recommended. Cover the bowl and pop it in the fridge for 15-20 minutes. Chilled dough is much easier to roll into balls without everything sticking to your fingers. If you’re in a hurry, you can skip this, but your hands will get messy. I speak from experience—I once tried to rush this step and ended up with pumpkin-colored fingerprints all over my kitchen counter.
- Roll into bites. Line a baking sheet or large plate with parchment paper. Scoop out about 1 tablespoon of dough and roll it between your palms to form a smooth ball. Place it on the parchment paper. Repeat until all the dough is used up. You should get about 18-20 bites, depending on how generous your tablespoons are. If the dough starts getting too warm and sticky, pop it back in the fridge for a few minutes.
- Coat if desired. If you’re using shredded coconut, pour it into a small bowl and roll each bite in it right after shaping. The coconut sticks better when the bites are still slightly tacky. You can also use crushed nuts, cocoa powder, or even a dusting of cinnamon sugar for a sweeter finish.
- Final chill. Place the baking sheet in the fridge for at least 30 minutes to let the bites firm up. This step is non-negotiable—without it, they’ll be too soft to hold their shape. After they’ve chilled, transfer them to an airtight container for storage.
Cooking Tips & Techniques
I’ve made these energy bites more times than I care to count, and I’ve learned a few things along the way. Here are the tips that actually matter:
Don’t overmix the dough. I know it’s tempting to keep stirring until everything looks perfectly uniform, but overmixing can make the oats break down too much, resulting in a gummy texture. Mix just until everything comes together, then stop. A few visible oat flakes are a good thing—they add texture.
Use a cookie scoop for consistency. The first few times I made these, I just eyeballed the portions. Some bites were tiny, some were huge, and they chilled at different rates. A 1-tablespoon cookie scoop gives you perfectly uniform bites that all firm up at the same time. It’s a small investment that makes a big difference.
Keep your hands slightly damp. If the dough is sticking to your hands while rolling, try wetting your palms with a little cold water. Not soaking wet—just a light mist. The water creates a barrier between the dough and your skin, making the rolling process much smoother. I discovered this trick after a particularly sticky batch left me frustrated and covered in dough.
Chill between batches if needed. If you’re making a double batch, keep the unused dough in the fridge while you roll the first batch. Warm dough is sticky dough. Cold dough is cooperative dough. This is one of those simple truths that makes cooking so much easier once you embrace it.
Taste and adjust. Before you roll all the bites, grab a tiny piece of dough and taste it. Does it need more cinnamon? A pinch more salt? Another drizzle of maple syrup? This is your chance to adjust before everything is set. I once made a batch that was way too bland because I forgot the salt—tasting first would have saved me a lot of disappointment.
Let them rest overnight. Here’s something I discovered completely by accident: these energy bites taste even better the next day. The flavors meld together overnight, and the texture softens just slightly. If you can resist the urge to eat them all right away, make them the night before you plan to serve them. Your taste buds will thank you.
Variations & Adaptations
One of the best things about this recipe is how easily it adapts to different tastes and dietary needs. Here are a few variations I’ve tried and loved:
Vegan Option
This recipe is already vegan if you use maple syrup instead of honey. Just make sure your chocolate chips are dairy-free—Enjoy Life and Pascha both make great options. The rest of the ingredients are plant-based, so you’re good to go.
Gluten-Free Version
Use certified gluten-free oats to make these safe for celiacs or anyone with gluten sensitivity. Bob’s Red Mill makes a great gluten-free rolled oat. Everything else in the recipe is naturally gluten-free, so this is an easy swap.
Nut-Free Alternative
Replace the peanut butter with sunflower seed butter or tahini. Sunflower seed butter gives a slightly different flavor—earthier, less sweet—but it works beautifully with the pumpkin and spices. Just be aware that sunflower seeds can react with baking soda if you ever add that to the recipe, but since we’re not using any leavening agents here, you’re safe.
Protein-Packed Version
Add a scoop of vanilla or unflavored protein powder to the dry ingredients. You’ll need to adjust the moisture—add an extra tablespoon of maple syrup or a splash of almond milk to compensate for the dry powder. I’ve done this with a plant-based vanilla protein powder, and it turned out great for post-workout snacks.
Pumpkin Seed Crunch
Instead of rolling the bites in coconut, try crushed pumpkin seeds (pepitas). They add a nice crunch and reinforce the pumpkin theme. Toast them lightly in a dry pan first for extra flavor—just watch them closely, they burn fast.
Chocolate Lover’s Twist
Increase the chocolate chips to 1/2 cup and add a tablespoon of cocoa powder to the dry ingredients. The chocolate-pumpkin combination is surprisingly good—like a healthier version of those chocolate pumpkin muffins everyone loves in the fall.
Serving & Storage Suggestions
These energy bites are incredibly versatile when it comes to serving. Here’s how I like to enjoy them:
Serving temperature: I prefer them straight from the fridge, especially on a warm day. The cool temperature keeps them firm and refreshing. But they’re also delicious at room temperature—the texture softens slightly, and the flavors become more pronounced. If you’re serving them at a party or potluck, let them sit out for about 10 minutes before serving so they’re not ice-cold.
Presentation ideas: Arrange them on a wooden board with some fresh apple slices, a few cinnamon sticks, and maybe a small bowl of extra chocolate chips for dipping. They look beautiful in a mason jar tied with a piece of twine—makes a great hostess gift or holiday treat. For a fall-themed party, nestle them in a bed of dried leaves or place them on a mini pumpkin stand.
What to serve with them: These bites pair wonderfully with a hot cup of chai tea, spiced apple cider, or a pumpkin spice latte. They also work great alongside a bowl of yogurt for breakfast or as part of a lunchbox snack pack. For a cozy dessert board, serve them with dark chocolate chunks, dried cranberries, and roasted almonds.
Storage instructions: Keep the energy bites in an airtight container in the refrigerator for up to 2 weeks. I like to layer them between sheets of parchment paper so they don’t stick together. They also freeze beautifully—place them in a single layer on a baking sheet, freeze until solid, then transfer to a freezer-safe bag or container. They’ll keep in the freezer for up to 3 months.
Reheating tips: You don’t really need to reheat these, but if you want a softer texture, let them sit at room temperature for 10-15 minutes before eating. You can also pop one in the microwave for about 10 seconds—just enough to take the chill off without melting the chocolate chips.
Flavor development: Here’s something interesting—these bites actually get better after a day or two in the fridge. The oats absorb some of the moisture from the pumpkin and maple syrup, creating a softer, more cohesive texture. The spices also meld together, so the flavor becomes more balanced. If you can plan ahead, make them a day before you need them.
Nutritional Information & Benefits
These energy bites are packed with good-for-you ingredients that make them a smart choice for a snack or light breakfast. Here’s a rough breakdown per bite (based on 20 bites per batch):
- Calories: Approximately 110-120 per bite
- Protein: 4-5 grams
- Fiber: 3-4 grams
- Healthy Fats: 6-7 grams (from peanut butter and flaxseed)
- Carbohydrates: 12-14 grams
- Sugar: 6-7 grams (mostly natural from maple syrup and pumpkin)
Health benefits of key ingredients: Pumpkin puree is loaded with vitamin A and antioxidants—great for eye health and immune support. Flaxseed provides omega-3 fatty acids and extra fiber, which helps with digestion and keeps you feeling full longer. Oats are a great source of complex carbohydrates for sustained energy, and peanut butter adds protein and healthy monounsaturated fats. The cinnamon and nutmeg aren’t just for flavor—they have anti-inflammatory properties and can help regulate blood sugar.
Dietary considerations: This recipe is naturally vegetarian, vegan (with maple syrup), and can be made gluten-free and nut-free with simple substitutions. It’s also free from refined sugar if you use pure maple syrup. The only potential allergen is peanuts (from the peanut butter), but that’s easily swapped.
My personal take: I love that these bites give me a little energy boost without the crash that comes from processed snacks. They’re substantial enough to hold me over between meals but light enough that I don’t feel weighed down. Plus, knowing I’m getting a dose of vegetables (pumpkin counts!) in a dessert-like treat makes me feel pretty good about my snack choices.
Conclusion
These cozy no-bake pumpkin pie energy bites are everything I want in a fall snack—easy, delicious, and full of those warm spices that make this season so special. They came from a friend’s casual kitchen moment, and I’ve been grateful for that accidental discovery ever since.
What I love most about this recipe is how forgiving it is. You can tweak the spices, swap the nut butter, add or skip the chocolate—it’s hard to go wrong. The base recipe is solid, but it welcomes your personal touch. That’s the kind of recipe I want in my rotation: one that works every time but leaves room for creativity.
I’d love to hear how these turn out for you. Did you add anything extra? Did you try a different coating? Drop a comment below and let me know—I read every single one, and I’m always looking for new variations to try. And if you loved them as much as I do, share this recipe with someone who needs a little cozy vibes in their life right now.
Go ahead, make a batch. Your kitchen is about to smell incredible.
Frequently Asked Questions
Can I use canned pumpkin pie filling instead of pumpkin puree?
I wouldn’t recommend it. Pumpkin pie filling is pre-sweetened and spiced, which throws off the balance of this recipe. It’s also usually thicker and contains added sugars and preservatives. Stick with 100% pure pumpkin puree for the best results. If you accidentally bought pie filling, you can still use it—just reduce or eliminate the maple syrup and spices, and be prepared for a sweeter, softer bite.
My dough is too dry and crumbly. What did I do wrong?
This usually happens when the peanut butter is too thick or the pumpkin puree wasn’t measured accurately. Don’t panic—just add a tablespoon of maple syrup or a splash of water (or almond milk) and mix again. The dough should come together easily when squeezed. If it’s still too dry, add another tablespoon of liquid until it reaches the right consistency. Remember, different brands of peanut butter have different moisture levels, so you might need to adjust slightly.
How long do these energy bites last?
In the refrigerator, they’ll stay fresh for up to 2 weeks in an airtight container. In the freezer, they last up to 3 months. I like to make a double batch and keep half in the freezer for busy weeks. Just thaw them in the fridge overnight or let them sit at room temperature for 15 minutes before eating.
Can I make these without oats?
Absolutely. You can substitute the oats with an equal amount of unsweetened shredded coconut, almond flour, or crushed nuts (like pecans or walnuts). Keep in mind that the texture will change—almond flour makes them softer, while nuts make them crunchier. If using nut flour, you might need to adjust the liquid slightly since nuts absorb moisture differently than oats.
My energy bites are too sticky to roll. Help!
This usually means the dough is too warm or has too much moisture. Pop the bowl in the fridge for 20-30 minutes to firm up the dough. If they’re still sticky after chilling, add a tablespoon of oats or flaxseed and mix again. Also, try wetting your hands with cold water before rolling—it creates a barrier that prevents sticking. If all else fails, just press the dough into a lined dish and cut into bars instead of rolling into balls.
Pin This Recipe!
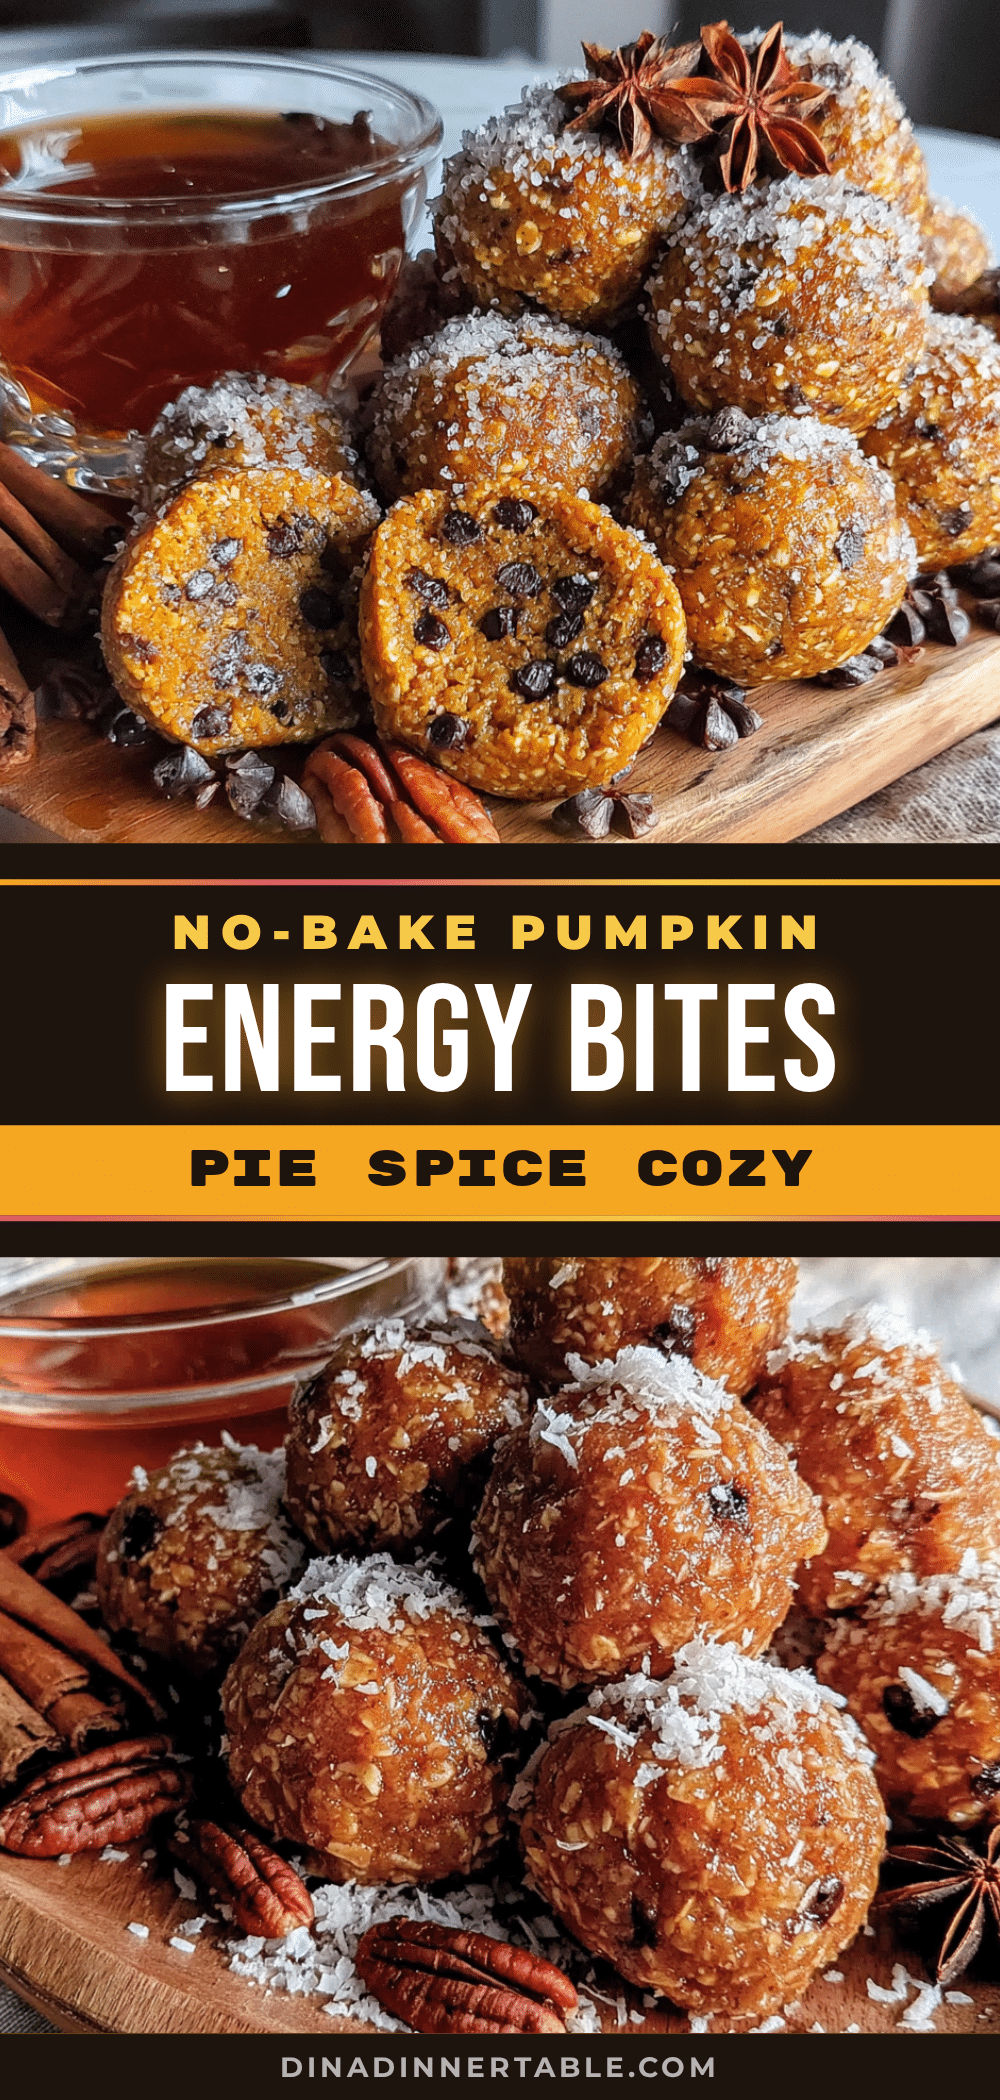
Cozy No-Bake Pumpkin Pie Energy Bites: Easy 5-Minute Recipe

These no-bake pumpkin pie energy bites are quick, easy, and packed with fall flavors. Made with simple ingredients like oats, peanut butter, pumpkin puree, and warm spices, they’re perfect for a healthy snack or dessert.
- Prep Time: 5 minutes
- Cook Time: 0 minutes
- Total Time: 5 minutes (plus 30 minutes chilling)
- Yield: 18-20 bites 1x
- Category: Snack
- Cuisine: American
Ingredients
- 1 cup old-fashioned rolled oats
- 1/2 cup creamy peanut butter (natural, no-stir style)
- 1/3 cup pumpkin puree (100% pure pumpkin)
- 1/4 cup maple syrup (pure maple syrup)
- 1/4 cup ground flaxseed
- 1 teaspoon vanilla extract (pure vanilla extract)
- 1 teaspoon pumpkin pie spice
- 1/2 teaspoon ground cinnamon
- 1/4 teaspoon salt
- 1/3 cup mini chocolate chips (optional)
- 2 tablespoons shredded coconut (optional, for rolling)
Instructions
- Chill your pumpkin puree first: About 15 minutes before you start, scoop your pumpkin puree into a small bowl and pop it in the fridge. Cold pumpkin puree makes the dough much easier to handle.
- Mix the wet ingredients: In a large mixing bowl, combine the peanut butter, pumpkin puree, maple syrup, and vanilla extract. Stir together until fully incorporated and uniform in color.
- Add the dry ingredients: Sprinkle the oats, flaxseed, pumpkin pie spice, cinnamon, and salt over the wet mixture. Stir until a thick, chunky dough forms with no dry patches.
- Get your hands in there: Wash your hands thoroughly, then knead the dough right in the bowl. Squeeze and press until the texture holds together when squeezed—like damp sand. Adjust with a teaspoon of maple syrup or water if too dry, or a tablespoon of oats if too wet.
- Fold in the chocolate chips: If using, sprinkle the mini chocolate chips over the dough and knead them in with your hands until evenly distributed.
- Chill the dough: Cover the bowl and refrigerate for 15-20 minutes. This step is optional but makes rolling easier.
- Roll into bites: Line a baking sheet or plate with parchment paper. Scoop out about 1 tablespoon of dough and roll between your palms to form a smooth ball. Place on parchment. Repeat until all dough is used (about 18-20 bites).
- Coat if desired: If using shredded coconut, pour into a small bowl and roll each bite in it right after shaping.
- Final chill: Place the baking sheet in the fridge for at least 30 minutes to firm up. After chilling, transfer to an airtight container for storage.
Notes
Chill the pumpkin puree beforehand for easier handling. If dough is too sticky, chill it before rolling. These bites taste even better the next day as flavors meld. Store in an airtight container in the refrigerator for up to 2 weeks or freeze for up to 3 months.
Nutrition
- Serving Size: 1 bite
- Calories: 110120
- Sugar: 67
- Sodium: 5070
- Fat: 67
- Saturated Fat: 12
- Carbohydrates: 1214
- Fiber: 34
- Protein: 45
Keywords: pumpkin pie energy bites, no-bake energy balls, fall snack, healthy pumpkin bites, vegan energy bites, gluten-free energy bites