It was 11:47 PM on a random Wednesday in October, and I had a very specific craving for something that looked like it belonged in a Tim Burton movie but tasted like a cloud. I didn’t have any fancy piping bags or gel food coloring, but I had a carton of eggs, a bag of sugar, and the half-baked idea that maybe—just maybe—I could make meringue ghosts that didn’t look like sad, deflated blobs. Let me tell you, the late-night kitchen experiments are where the magic (or the mess) happens, and this was one of those rare nights where both showed up.
The craving was weirdly specific. I wanted something crisp on the outside, chewy on the inside, and so light it practically floated off the plate. The kind of cookie that makes you close your eyes after the first bite and forget you’re standing in your kitchen in fuzzy slippers at midnight. I mean, who needs a full night’s sleep when you can have ghost-shaped meringue cookies, right?
Honestly, I’d been scrolling through Halloween dessert ideas earlier that week, and everything felt either too complicated (looking at you, multi-layer cakes) or too predictable (cupcakes with store-bought frosting, anyone?). But these little ghost meringues? They called to me. Maybe you’ve been there—that moment when a recipe idea just clicks, and you know you have to try it immediately, even if it means cleaning egg whites off the counter at 1 AM.
The first batch was a disaster. My ghosts looked like they’d been through a haunted house and come out the other side melted. But the second batch? That’s when things got spooky-good. The peaks held, the faces came out perfectly crooked, and I knew I’d stumbled onto something worth sharing. This is that recipe—the one that started as a late-night whim and turned into my go-to Halloween party trick.
Why You’ll Love This Recipe
Let me tell you why these spooky crispy ghost meringue cookies are about to become your new Halloween obsession. I’ve tested this recipe more times than I care to admit, tweaking everything from the oven temperature to the size of the ghosts, and what I’ve landed on is pure magic.
- Quick & Easy: These come together in about 30 minutes of active prep time, and the oven does the rest. Perfect for when you’re juggling last-minute Halloween party prep or just want something impressive without the stress.
- Simple Ingredients: You likely have everything in your kitchen right now. Eggs, sugar, vanilla, and maybe some black gel food coloring for the faces. No fancy grocery trips needed—I promise.
- Perfect for Halloween Parties: These ghosts are the life of the party. They look incredible on a dessert table, they’re naturally gluten-free (which your celiac friends will thank you for), and they’re so light people can eat three without feeling guilty.
- Crowd-Pleaser: I’ve brought these to three different Halloween gatherings now, and every single time, people stop mid-conversation to ask, “Wait, you made these?” Kids love them, adults love them, even that one friend who “doesn’t do sweets” couldn’t resist.
- Unbelievably Delicious: The texture is what gets me every time. That first crack when you bite into the crisp shell, followed by the soft, marshmallow-like center—it’s next-level comfort food disguised as something spooky.
What makes this recipe different from the rest is the technique. I use a slightly lower oven temperature with the door cracked open at the end—a trick I learned from a pastry chef friend who swears by it for achieving that perfect dry-yet-chewy texture. Plus, I’ve figured out exactly how to pipe the ghosts so they hold their shape and don’t deflate into ghost puddles (learned that one the hard way, let me tell you).
This isn’t just another meringue cookie recipe. It’s the kind that makes you feel like a kitchen wizard, even if you’re just someone who loves Halloween and wants to impress your guests without spending all day in the kitchen. Perfect for hosting a crowd, easy to scale up, and guaranteed to steal the table.
What Ingredients You Will Need
This recipe uses simple, pantry-friendly ingredients to create something that looks way more complicated than it actually is. Here’s what you’ll need to gather before you start channeling your inner pastry chef.
For the Ghost Meringues
- 4 large egg whites, at room temperature (this is crucial—cold egg whites won’t whip up as high or as stable)
- 1 cup (200g) granulated white sugar (I prefer Domino brand for its consistent texture, but any fine white sugar works)
- 1/2 teaspoon cream of tartar (this stabilizes the meringue and helps it hold its shape—don’t skip it)
- 1 teaspoon pure vanilla extract (adds warmth and depth to the flavor; use clear vanilla if you want pure white ghosts)
- Pinch of salt (balances the sweetness and helps the egg whites whip up faster)
- Black gel food coloring (for the ghost faces—I use Wilton brand because it’s concentrated and doesn’t thin out the meringue)
Ingredient Selection Tips
For the best results, use eggs that are at least a few days old. Fresh eggs have tighter whites that don’t whip up as well—I know, it sounds backwards, but older egg whites actually create more volume. If you’re not sure about your eggs’ age, try the float test: if they sink in water, they’re fresh; if they stand on end, they’re perfect for meringue.
When it comes to sugar, avoid superfine or powdered sugar here. Regular granulated sugar dissolves better into the egg whites and creates that signature crisp exterior. I’ve tried making these with coconut sugar for a “healthier” version, and honestly? Don’t do it. The texture comes out gritty, and the ghosts turn brown—not exactly spooky.
For the cream of tartar, you can substitute with 1 teaspoon of lemon juice or white vinegar in a pinch, but cream of tartar gives the most reliable results. It’s cheap and lasts forever in your pantry, so it’s worth grabbing a jar.
Substitution Guidance
If you’re making these for someone with dietary restrictions, here are some swaps that actually work:
- Egg-free version: Use aquafaba (the liquid from a can of chickpeas) instead of egg whites. Use 3 tablespoons of aquafaba per egg white, and add an extra 1/4 teaspoon of cream of tartar. The texture will be slightly different—more marshmallow-like—but still delicious.
- Vanilla alternatives: Swap in almond extract, peppermint extract, or even a splash of bourbon vanilla for a more complex flavor. Just be careful with extracts that have color—they might tint your ghosts.
- Natural coloring: If you want to avoid artificial food coloring, use a tiny bit of activated charcoal powder mixed with a drop of water to paint on the faces. It gives a darker, more gothic look that’s actually pretty cool.
Equipment Needed
You don’t need a professional pastry kitchen to make these ghosts, but having the right tools makes a world of difference. Here’s what I use every time:
- Electric stand mixer or hand mixer: You can whip egg whites by hand with a whisk, but I wouldn’t recommend it unless you want a serious arm workout. A stand mixer with the whisk attachment is ideal, but a hand mixer works perfectly too. I use my KitchenAid Artisan for this—it’s worth every penny.
- Large mixing bowl: Make sure it’s completely clean and dry. Any grease or residue will prevent your egg whites from whipping up properly. Glass or metal bowls work best—plastic can hold onto oils even after washing.
- Piping bags: Disposable piping bags are easiest for cleanup, but you can also use a sturdy zip-top bag with a corner snipped off. Just be careful—the bag might split if you squeeze too hard.
- Round piping tip (1/2 inch or 1 cm): For the ghost shape, you want a simple round tip. I use a Wilton 1A tip, but any large round tip will do. If you don’t have piping tips, you can just cut a straight opening in your piping bag—it won’t be as precise, but it still works.
- Baking sheets: Line them with parchment paper or silicone baking mats. Do NOT use greased or wax paper—the meringues will stick and you’ll end up with ghost carnage.
- Small paintbrush or toothpick: For painting on the ghost faces. A fine-tipped paintbrush gives you more control, but a toothpick works in a pinch.
- Cooling rack: Meringues need to cool completely before you store them, and a wire rack helps air circulate so they don’t get soggy.
Budget-friendly tip: If you don’t have a stand mixer, you can absolutely use a hand mixer—it just takes a little longer. And if you don’t have piping bags, a zip-top bag works fine. I’ve made these in a tiny apartment kitchen with minimal tools, and they still turned out great.
Preparation Method
Alright, let’s get spooky. Follow these steps carefully, and you’ll have a tray of adorable ghost meringues that’ll haunt your guests in the best way possible.
- Preheat your oven to 200°F (93°C). Yes, this is very low—that’s the secret. Meringues dry out slowly at a low temperature, which gives them that perfect crisp exterior while keeping the inside soft. Line two baking sheets with parchment paper and set them aside.
- Clean your mixing bowl and whisk attachment thoroughly. I cannot stress this enough—any trace of grease will ruin your meringue. Wipe everything down with a little lemon juice or white vinegar on a paper towel, then dry completely. This is the step I forgot the first time, and my ghosts looked like they’d melted in a heat wave.
- Separate your eggs while they’re cold. Cold eggs separate more easily, and you don’t want any yolk in your whites—even a tiny bit will prevent them from whipping up. Crack each egg into a small bowl first, then transfer the white to your mixing bowl. This way, if one yolk breaks, you haven’t ruined the whole batch. Let the whites come to room temperature for about 30 minutes before whipping—this takes patience, but it makes a huge difference in volume.
- Start whipping the egg whites on medium speed. Once they become foamy (about 1-2 minutes), add the cream of tartar and the pinch of salt. Continue whipping until soft peaks form—this is when the whites hold a shape for a second before flopping over. You’ll know you’re there when you lift the whisk and the peak droops slightly.
- Gradually add the sugar, one tablespoon at a time. This is the most important step. If you dump all the sugar in at once, your meringue will be flat and sad. Keep the mixer running on medium-high speed and add the sugar slowly, letting each addition dissolve before adding the next. This should take about 5-7 minutes. Be patient—I’ve rushed this step before, and my ghosts ended up with a gritty texture.
- Add the vanilla extract. Once all the sugar is incorporated, add the vanilla and continue whipping on high speed until stiff peaks form. You’re looking for glossy, billowy peaks that stand up straight when you lift the whisk. The mixture should feel smooth between your fingers—if it feels grainy, keep whipping. This usually takes another 3-5 minutes.
- Test your meringue. Rub a tiny bit between your thumb and forefinger. If it feels smooth, you’re good. If it feels gritty, the sugar hasn’t fully dissolved, and you need to keep whipping. This test has saved me more times than I can count.
- Prepare your piping bag. Fit your piping bag with the round tip and twist the top to keep the meringue from leaking out while you fill it. Fold the top of the bag over your hand to create a cuff, then spoon the meringue in. Don’t overfill—about halfway is perfect. Unfold the top and twist it closed, pushing the meringue down toward the tip.
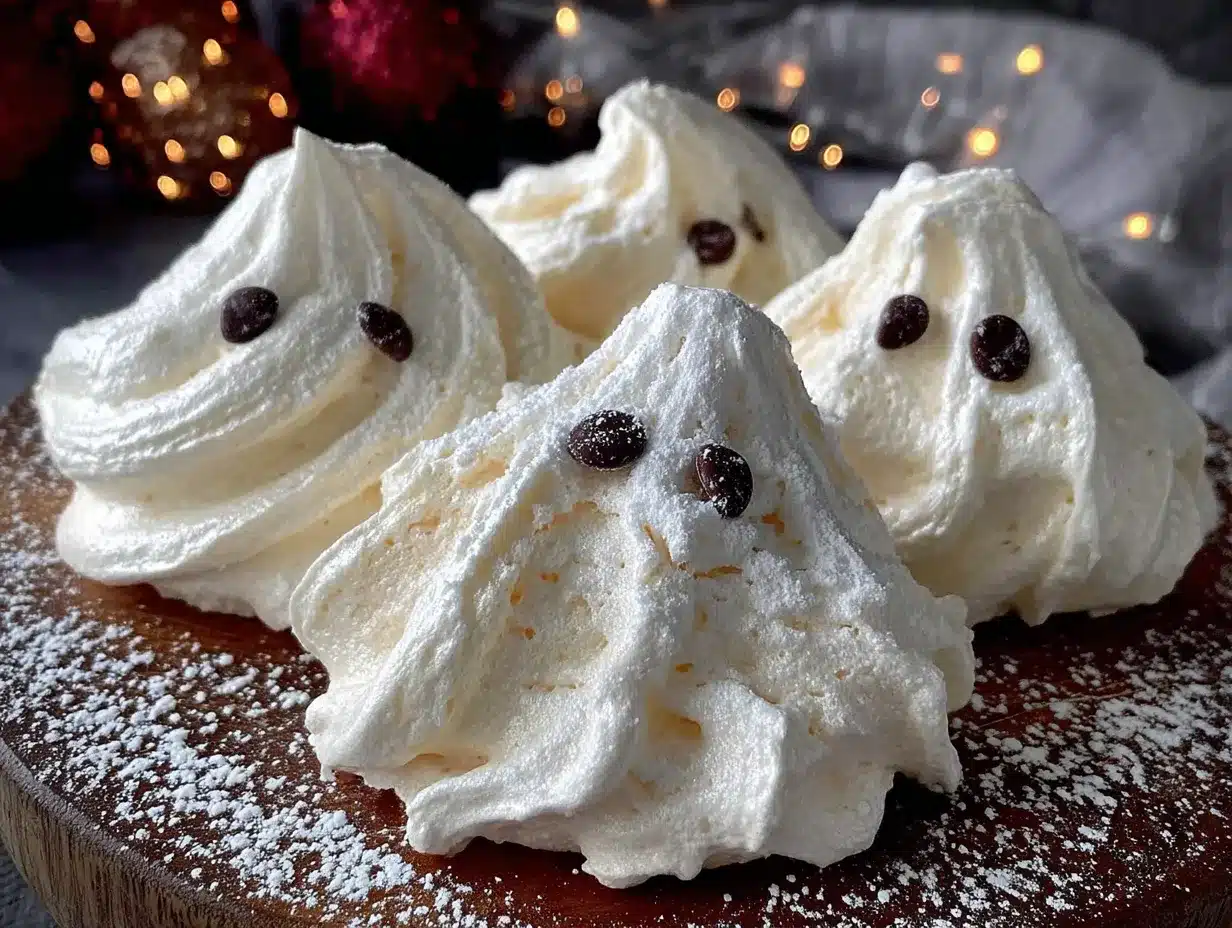
- Pipe the ghosts. Hold the piping bag straight up and down, about 1/2 inch above the baking sheet. Squeeze a generous mound of meringue—about 2 inches wide at the base—then stop squeezing and pull straight up to create a little peak on top. This peak is what makes them look like ghosts! Space them about 1 inch apart—they don’t spread much, but you want air to circulate around them. You should get about 24 ghosts from this batch.
- Create the faces. Dip a clean paintbrush or toothpick into the black gel food coloring. Gently paint two dots for eyes and a little “o” shape for the mouth on each ghost. Don’t press too hard—you want the faces to sit on top of the meringue, not sink into it. Some ghosts can have crooked faces, some can be screaming, some can look surprised. The imperfections make them charming.
- Bake for 60-75 minutes. Place the baking sheets in the preheated oven and bake for 1 hour to 1 hour 15 minutes. The meringues should be dry to the touch and easily lift off the parchment paper. If they stick, give them another 10 minutes.
- Turn off the oven and let them cool inside. This is the trick for that perfect texture. Turn off the oven, crack the door open with a wooden spoon, and let the meringues cool completely inside the oven—about 1-2 hours. This slow cooling prevents cracking and ensures they’re dry all the way through.
Cooking Tips & Techniques
After making these ghosts more times than I can count (and ruining plenty along the way), I’ve picked up some tricks that’ll save you from my mistakes.
The humidity problem: Meringue hates humidity. If you’re making these on a rainy day or in a steamy kitchen, they might not dry out properly. I learned this the hard way when I made a batch during a thunderstorm and ended up with sticky, chewy ghosts instead of crispy ones. If you’re in a humid climate, try running a dehumidifier in your kitchen, or wait for a dry day. Seriously—it makes that much of a difference.
Don’t overmix: Once you reach stiff peaks, stop. If you keep whipping, the meringue will start to look grainy and separate—this is called “weeping,” and it means you’ve gone too far. You’ll see little beads of liquid forming, and at that point, there’s no saving it. Start over with fresh egg whites. I’ve done this exactly once, and the memory still stings.
The wooden spoon trick: When you’re cooling the meringues in the oven, stick a wooden spoon in the door to keep it slightly open. This lets moisture escape and prevents the meringues from getting soggy. I forgot to do this once, and my perfectly crisp ghosts turned into sad, chewy blobs overnight.
Timing and multitasking: While your meringues are baking, you can prep the rest of your Halloween party spread. They need a long time in the oven, but they don’t need your attention. I usually make these in the morning, let them cool in the oven while I run errands, and then store them in an airtight container until party time. They actually taste better the next day—the flavors meld together somehow.
Consistency is key: If you’re making these for a party, do a test batch a few days ahead. Every oven runs slightly differently, and you want to know exactly how yours behaves before you’re counting on these for your dessert table. My first attempt with a new oven took almost 20 minutes longer than expected—good thing I wasn’t on a deadline.
Variations & Adaptations
One of the best things about this recipe is how easy it is to customize. Here are some variations I’ve tried and loved:
Chocolate ghosts: Sift 2 tablespoons of unsweetened cocoa powder into the meringue mixture after you’ve added the sugar. Fold it in gently with a spatula until just combined—don’t overmix or you’ll deflate the meringue. The ghosts come out a pale brown color, which looks surprisingly spooky. I made these for a friend’s gothic Halloween party, and they were a hit.
Peppermint ghosts: Replace the vanilla extract with 1/2 teaspoon of peppermint extract. The ghosts taste like candy canes, and they’re perfect for a winter-themed party or even a Christmas gathering. Just be careful—peppermint extract is strong, so don’t add more than recommended. I learned this lesson when my ghosts tasted like toothpaste.
Vegan aquafaba ghosts: As I mentioned earlier, you can use aquafaba instead of egg whites. The texture is slightly different—more marshmallow-like and less crisp—but they’re still delicious and totally plant-based. Whip the aquafaba with cream of tartar just like you would egg whites, and add an extra 5 minutes of whipping time. The first time I tried this, I was skeptical, but honestly? They disappeared just as fast as the original version.
Colored ghosts: Add a drop or two of gel food coloring to the meringue before piping. Purple ghosts for a magical theme, green ghosts for a monster party, or even rainbow ghosts for a colorful twist. Just remember that gel colors are concentrated—a little goes a long way. Liquid food coloring will thin out your meringue, so stick with gel.
Gluten-free and dairy-free: This recipe is naturally both! Meringues don’t contain any flour or dairy, so they’re safe for most dietary restrictions. Just double-check your vanilla extract to make sure it’s gluten-free (most are, but some brands use alcohol derived from wheat).
Serving & Storage Suggestions
These ghosts are at their absolute best within 24 hours of baking, but they’ll keep for several days if stored properly. Here’s everything you need to know:
Serving temperature and presentation: Serve these at room temperature. Arrange them on a platter with some fake cobwebs, a few plastic spiders, or even some dry ice for a smoky effect (just be careful with the dry ice—use tongs to handle it). I like to scatter a few around a cake or cupcake tower for a haunted look. They’re also adorable sticking out of a bowl of Halloween punch—just make sure they’re on a stick so guests can grab them easily.
Complementary dishes and beverages: These ghosts pair beautifully with hot chocolate, coffee, or even a pumpkin spice latte. For a dessert table, serve them alongside brownies, chocolate truffles, or caramel apples. The lightness of the meringue balances out richer desserts perfectly. I once served them with a dark chocolate fondue, and guests were dipping the ghosts in the chocolate—it was messy but amazing.
Storage instructions: Store the meringues in an airtight container at room temperature. Do NOT refrigerate them—the moisture in the fridge will make them sticky and ruin their texture. Layer them between sheets of parchment paper to prevent them from sticking together. They’ll stay fresh for up to 5 days, though they’ll start to soften slightly after day 3.
Freezer instructions: You can freeze baked meringues for up to 3 months. Place them in a single layer on a baking sheet and freeze until solid (about 2 hours), then transfer to a freezer-safe container or zip-top bag. To thaw, let them sit at room temperature for about 30 minutes. Don’t thaw them in the fridge—again, moisture is the enemy.
Reheating tips: If your meringues have softened (maybe because of humidity or storage issues), you can crisp them up again. Place them on a baking sheet in a 200°F (93°C) oven for 10-15 minutes, then let them cool completely. This trick has saved many a batch for me.
Flavor development over time: Interestingly, the vanilla flavor becomes more pronounced after a day or two. If you can resist eating them all immediately, the ghosts actually taste better on day two. The texture stays crisp, and the sweetness mellows slightly, letting the vanilla shine through.
Nutritional Information & Benefits
Let’s be honest—these are cookies, not health food. But they do have some redeeming qualities that make them a better choice than many Halloween treats.
Estimated nutritional values per ghost (based on 24 cookies):
- Calories: 35
- Total Fat: 0g
- Saturated Fat: 0g
- Cholesterol: 0mg
- Sodium: 10mg
- Total Carbohydrates: 8g
- Dietary Fiber: 0g
- Sugars: 8g
- Protein: 1g
Health benefits of key ingredients: Egg whites are a great source of high-quality protein, and they’re naturally low in calories and fat. They also contain riboflavin and selenium, which support metabolism and immune function. The cream of tartar adds a small amount of potassium, though honestly, you’re not eating these for the nutrients—you’re eating them because they’re delicious and adorable.
Dietary considerations: These ghosts are naturally gluten-free, dairy-free, and nut-free, making them a safe option for many common food allergies. They’re also low in fat and cholesterol-free (since we’re only using the whites). The main concern is the sugar content—they are cookies, after all—so enjoy them in moderation.
Potential allergens: Eggs are the primary allergen here. If you’re making the vegan version with aquafaba, they’re completely egg-free. Always check your vanilla extract for any hidden allergens, though most brands are safe.
My personal wellness perspective: I believe in balance. Halloween comes once a year, and if that means enjoying a few ghost-shaped meringue cookies, so be it. These are lighter than most Halloween treats (no butter, no flour, no heavy creams), and they satisfy that sweet tooth without weighing you down. Plus, the portion control is built in—they’re tiny! I’d rather have three of these than one slice of heavy cake, honestly.
Conclusion
These spooky crispy ghost meringue cookies are everything I want in a Halloween recipe—they’re fun, they’re impressive, and they’re surprisingly easy to make. That late-night kitchen experiment turned into something I genuinely look forward to every October, and I hope they become a tradition in your home too.
What I love most about this recipe is how forgiving it is. Sure, there are a few technical steps, but even your “ugly” ghosts will be adorable. The crooked eyes, the lopsided mouths, the ones that look like they’ve seen a ghost themselves—those are the ones people will fight over. Don’t stress about perfection. Just have fun with it.
I’d love to hear how your ghosts turn out! Did you try any variations? Did your guests love them? Drop a comment below and share your spooky creations—bonus points if you post a photo of your ghost army on the baking sheet. And if you’re looking for more Halloween party ideas, check out my recipe for creepy spiderweb spinach dip or these no-bake pumpkin spice truffles that pair perfectly with these ghosts.
Happy Halloween, and happy baking! May your meringues be crisp, your ghosts be spooky, and your party be unforgettable.
Frequently Asked Questions
Can I make these ghost meringues ahead of time?
Absolutely! In fact, they’re better when made a day or two ahead. Just store them in an airtight container at room temperature, and they’ll stay crisp for up to 5 days. I usually make mine the morning of the party and let them cool in the oven while I prep everything else.
Why did my meringue collapse?
This usually happens for one of three reasons: your bowl or whisk had grease on it, you didn’t whip the egg whites to stiff peaks, or you opened the oven door too early during baking. Make sure everything is squeaky clean, and resist the urge to peek until the baking time is up.
Can I use liquid food coloring instead of gel?
I wouldn’t recommend it. Liquid food coloring adds too much moisture to the meringue, which can make it deflate or become sticky. Gel food coloring is concentrated and doesn’t affect the texture. If liquid is all you have, use just a drop or two and expect slightly softer ghosts.
How do I know when the meringues are fully baked?
They should be dry to the touch and easily lift off the parchment paper without sticking. If they feel soft or stick, give them another 10-15 minutes. The bottoms should be dry, not tacky. When in doubt, go longer—overbaked meringues are still delicious, but underbaked ones will be chewy and sad.
Can I double this recipe?
Yes, but don’t try to whip more than 8 egg whites at once in a standard stand mixer. If you’re doubling, make two separate batches or use a very large mixer. Overcrowding the bowl prevents the egg whites from getting enough air, and you’ll end up with flat ghosts. Trust me on this one—I learned it the hard way when I tried to make 12-egg-white meringue for a party.
Pin This Recipe!
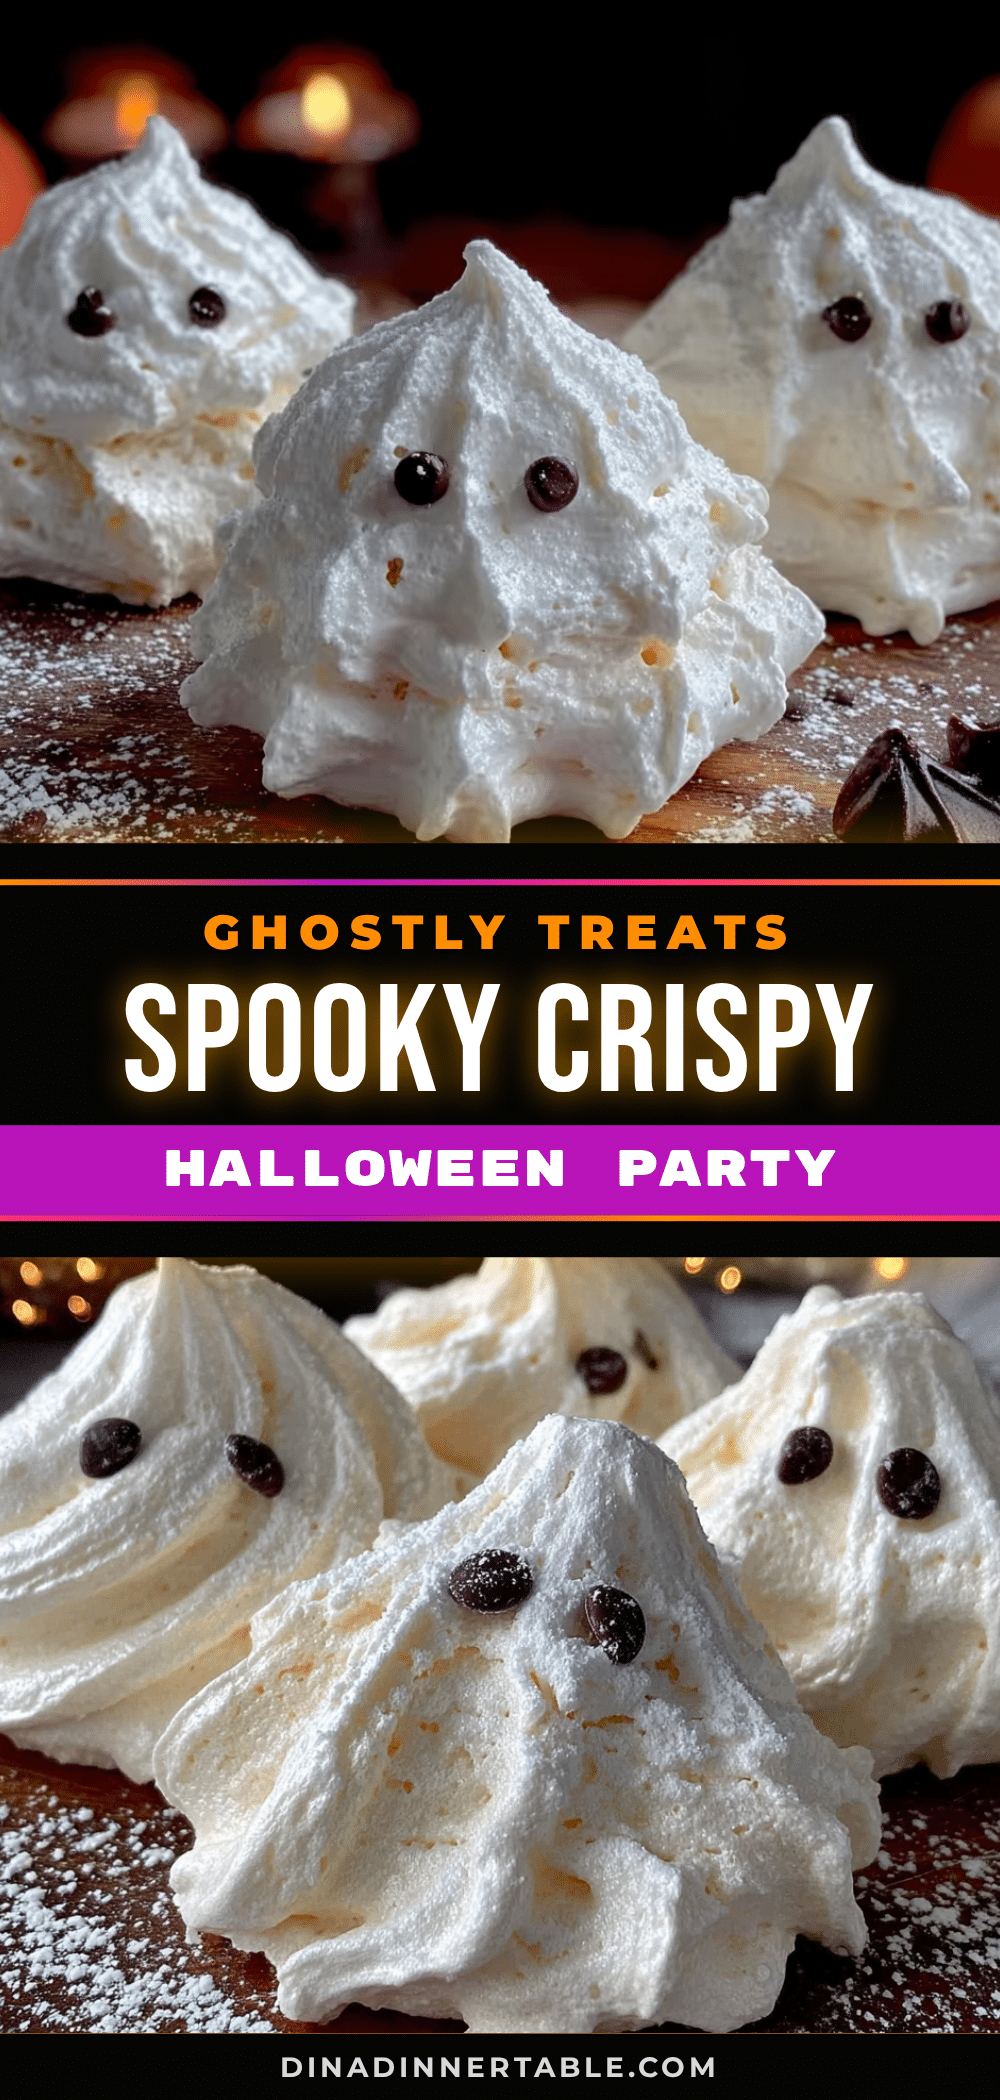
Easy Crispy Ghost Meringue Cookies for a Perfect Halloween Party
These spooky ghost meringue cookies are crisp on the outside, chewy on the inside, and so light they practically float off the plate. Perfect for Halloween parties, they’re naturally gluten-free and made with simple pantry ingredients.
- Prep Time: 30 minutes
- Cook Time: 60-75 minutes
- Total Time: 2-3 hours (including cooling)
- Yield: 24 cookies 1x
- Category: Dessert
- Cuisine: American
Ingredients
- 4 large egg whites, at room temperature
- 1 cup (200g) granulated white sugar
- 1/2 teaspoon cream of tartar
- 1 teaspoon pure vanilla extract
- Pinch of salt
- Black gel food coloring (for ghost faces)
Instructions
- Preheat your oven to 200°F (93°C). Line two baking sheets with parchment paper and set aside.
- Clean your mixing bowl and whisk attachment thoroughly with lemon juice or white vinegar to remove any grease, then dry completely.
- Separate your eggs while cold, ensuring no yolk gets into the whites. Let the whites come to room temperature for about 30 minutes.
- Start whipping the egg whites on medium speed. Once foamy (about 1-2 minutes), add the cream of tartar and salt. Continue whipping until soft peaks form.
- Gradually add the sugar, one tablespoon at a time, with the mixer running on medium-high speed. Let each addition dissolve before adding the next (about 5-7 minutes total).
- Add the vanilla extract and continue whipping on high speed until stiff, glossy peaks form (another 3-5 minutes). The mixture should feel smooth between your fingers.
- Test the meringue by rubbing a tiny bit between your thumb and forefinger. If smooth, it’s ready. If gritty, keep whipping.
- Fit a piping bag with a round tip (1/2 inch or 1 cm). Fold the top over your hand, spoon in the meringue, and twist the top closed.
- Pipe ghosts by holding the bag straight up, about 1/2 inch above the baking sheet. Squeeze a generous mound (about 2 inches wide), stop squeezing, and pull straight up to create a peak. Space about 1 inch apart. You should get about 24 ghosts.
- Dip a clean paintbrush or toothpick into black gel food coloring. Gently paint two dots for eyes and an ‘o’ shape for the mouth on each ghost.
- Bake for 60-75 minutes, until dry to the touch and easily lifting off the parchment paper.
- Turn off the oven, crack the door open with a wooden spoon, and let the meringues cool completely inside the oven (about 1-2 hours).
Notes
Meringue hates humidity—avoid making on rainy days. Use a dehumidifier if needed. For best results, use eggs that are a few days old (older egg whites create more volume). Do not refrigerate meringues; store in an airtight container at room temperature for up to 5 days. To re-crisp, bake at 200°F for 10-15 minutes. For vegan version, use aquafaba (3 tablespoons per egg white) with extra cream of tartar.
Nutrition
- Serving Size: 1 ghost cookie
- Calories: 35
- Sugar: 8
- Sodium: 10
- Carbohydrates: 8
- Protein: 1
Keywords: Halloween cookies, ghost meringue, meringue cookies, gluten-free Halloween dessert, spooky treats, easy Halloween recipe


