It was 10:47 PM on a random Wednesday, and I had a very specific, almost aggressive craving for banana bread. You know that feeling? The one where your brain has already tasted the warm, buttery slice, and nothing else will do. The problem? I was tired. My kitchen was a mess from a rushed dinner, and the last thing I wanted to do was haul out my stand mixer and dirty a million bowls. I didn’t have the energy for a “proper” recipe. But I had three very sad, very brown bananas on my counter, and a stubborn streak a mile wide.
So I did what any reasonable, slightly unhinged person would do at nearly 11 PM. I grabbed a single bowl, a fork, and started mixing. I wasn’t following a plan; I was following a vibe. I figured, how complicated can banana bread actually be? The result was so shockingly good—tender, perfectly sweet, with that crackly top we all fight over—that I actually stood in my dark kitchen eating a slice straight off the knife. It wasn’t pretty, but it was honest work, and it was the best banana bread I’d made in months. This easy one-bowl banana bread (no mixer needed) was born from a moment of pure, tired necessity, and honestly, that’s why I think it works so well. It’s the recipe you turn to when you need a win, fast.
Why You’ll Love This Recipe
Let’s be real for a second. The internet is full of banana bread recipes. Why should you trust this one? Because I’ve made the mistakes so you don’t have to. I’ve ended up with a gummy loaf. I’ve forgotten the baking soda. I’ve had a loaf that took an hour and a half to bake. This recipe is the result of all those little failures, refined into something that works every single time. It’s not just another recipe; it’s the one I keep coming back to.
- Quick & Easy: This comes together in about 10 minutes of active time. From first fork-stab at the banana to a batter ready for the oven, it’s almost embarrassingly fast. Perfect for a weeknight, a baby nap, or a sudden craving.
- Simple Ingredients: You probably have everything in your pantry right now. No buttermilk, no sour cream, no fancy extracts. Just real, basic ingredients that do the job beautifully.
- No Mixer Required: My favorite part. You use a bowl and a whisk (or a fork, if you’re me at 11 PM). Less equipment means less cleanup, and that’s a win in my book.
- Perfect for Busy Weeknights: This isn’t a project. It’s a simple, satisfying bake that fits into a chaotic schedule. You can mix it up while you’re waiting for your coffee to brew or right after you get the kids to bed.
- Unbelievably Delicious: The texture is moist and tender, the flavor is deeply banana-y, and the top has that perfect, slightly crunchy crust. It’s comfort food in its purest, most accessible form.
What makes this one different from the rest is the technique. By mashing the bananas with the sugar first, you’re creating a natural syrup that infuses the entire loaf with flavor. It’s a tiny step, but it makes a world of difference. This isn’t just a “throw it all together” recipe—it’s a “throw it all together in the right order” recipe.
What Ingredients You Will Need
This recipe relies on simple, humble ingredients to create something truly special. The magic is in the method, not the grocery list. Here’s what you’ll need and why each one matters.
- 3 medium ripe bananas, mashed (about 1 ½ cups): The star of the show. The riper, the better. Look for bananas that are heavily speckled with brown spots or even completely black. They are sweeter and easier to mash. If your bananas aren’t ripe enough, you can roast them in their skins at 300°F for 15-20 minutes to soften and sweeten them.
- ½ cup (113g) unsalted butter, melted: Melted butter gives the bread a rich, tender crumb. I use unsalted so I can control the salt level. You can substitute with coconut oil for a dairy-free version, but the flavor will be slightly different.
- ¾ cup (150g) granulated sugar: Provides sweetness and helps create that beautiful, crackly top. You can use brown sugar for a deeper, molasses-like flavor, but the top won’t be as crunchy.
- 2 large eggs, room temperature: Eggs bind the batter and add structure. Room temperature eggs emulsify better into the melted butter, creating a smoother batter. If you forgot to take them out of the fridge, place them in a bowl of warm water for 5 minutes.
- 1 teaspoon vanilla extract: Enhances the overall flavor. Pure vanilla extract is best, but imitation vanilla works in a pinch. I’m a fan of Nielsen-Massey vanilla for its clean, rich flavor.
- 1 ½ cups (190g) all-purpose flour: The foundation. For a whole-wheat version, swap half the all-purpose flour for white whole wheat flour. Do not use 100% whole wheat, or the bread will be too dense.
- 1 teaspoon baking soda: The leavening agent. Make sure it’s fresh! Old baking soda is the number one reason for a flat, dense loaf. To test it, drop a little into vinegar—if it fizzes vigorously, it’s good.
- ½ teaspoon salt: Balances the sweetness and enhances all the other flavors. Don’t skip it.
- Optional: ½ cup (60g) chopped walnuts or chocolate chips: For texture and a little extra indulgence. Fold them in gently at the end. I’m a purist who loves it plain, but my husband demands chocolate chips.
Equipment Needed
You don’t need a fancy kitchen to pull this off. That’s the whole point. Here’s what you’ll need:
- One large mixing bowl: A standard 3-quart or 4-quart bowl is perfect. Make sure it’s big enough to mix everything without splashing.
- A fork or potato masher: For mashing the bananas. A fork works great and means one less tool to wash. A potato masher is faster if you have one.
- A whisk or a wooden spoon: For mixing the wet and dry ingredients. A whisk helps break up any small lumps in the flour. A wooden spoon is great for folding in the final ingredients.
- A 9×5-inch loaf pan: A standard loaf pan. If you use an 8×4-inch pan, your bread will take longer to bake and might have a domed top. If you use a larger pan, it will bake faster and be shorter.
- Parchment paper (optional but recommended): Lining the pan makes for effortless removal and easy cleanup. I love the pre-cut sheets from If You Care.
- Cooling rack: Essential for letting the bread cool evenly so the bottom doesn’t get soggy.
Preparation Method
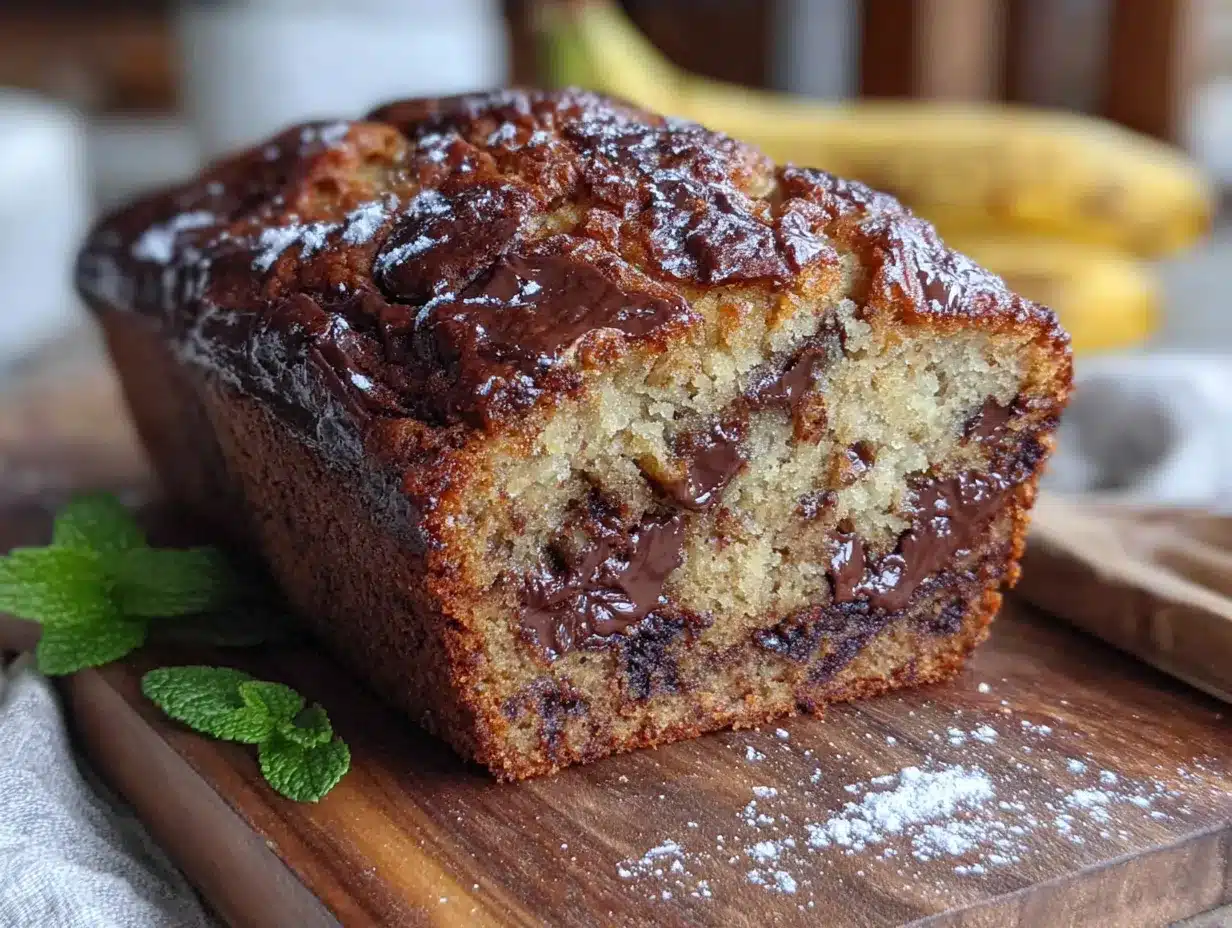
This is where the magic happens. Follow these steps, and you’ll have perfect banana bread every time. Trust the process—especially the order of the ingredients.
- Preheat and Prepare: First things first, preheat your oven to 350°F (175°C). Grease your 9×5-inch loaf pan with butter or non-stick spray. For extra insurance, line it with a piece of parchment paper, leaving some overhang on the long sides. This creates little “handles” you can use to lift the bread out later.
- Mash the Bananas: In your large mixing bowl, add the three ripe bananas. Use your fork or potato masher to mash them until they are mostly smooth with just a few small lumps left. You want some texture, but no large chunks. This should take about a minute.
- Add the Sugar and Fat: Add the ¾ cup of granulated sugar and the ½ cup of melted (but not hot) butter to the bowl with the mashed bananas. Whisk them together vigorously for about 30 seconds until the mixture looks smooth and slightly lighter in color. This step is key—it’s dissolving the sugar and creating a base for a tender crumb.
- Incorporate the Wet Ingredients: Crack the two room-temperature eggs into the bowl. Add the teaspoon of vanilla extract. Whisk everything together until the eggs are fully incorporated and the batter is smooth and uniform. Don’t overmix here, just make sure there are no streaks of egg.
- Add the Dry Ingredients: Measure your 1 ½ cups of all-purpose flour, 1 teaspoon of baking soda, and ½ teaspoon of salt directly on top of the wet ingredients. Yes, right on top. Use your whisk or a spoon to gently stir the dry ingredients into the wet. Mix only until you see the last streak of flour disappear. A few tiny lumps are totally fine. Overmixing at this stage will develop the gluten too much and result in a tough, rubbery loaf.
- Fold in the Extras (Optional): If you’re using walnuts or chocolate chips, now is the time. Use a rubber spatula or a wooden spoon to gently fold them in. Just a few turns until they are evenly distributed. Don’t go crazy.
- Bake: Pour the batter into your prepared loaf pan and spread it into an even layer. Bake on the center rack for 50-60 minutes. The bread is done when a toothpick inserted into the center comes out clean or with just a few moist crumbs attached. If the top is browning too quickly after 40 minutes, tent the pan loosely with a piece of aluminum foil.
- Cool and Serve: Let the bread cool in the pan for about 10 minutes. Then, using your parchment paper handles, lift it out and transfer it to a wire rack to cool completely. I know it’s tempting, but let it cool for at least 20 minutes before slicing. The texture sets as it cools. Slice and enjoy!
Cooking Tips & Techniques
I’ve learned a few things the hard way so you don’t have to. Here are my top tips for banana bread success.
- The “Mash with Sugar” Secret: This is my non-negotiable tip. Mashing the bananas with the sugar before adding anything else helps break down the bananas into a syrup-like consistency. This distributes the banana flavor more evenly and creates a much more tender loaf. Don’t skip this step!
- Don’t Overmix the Batter: This is the most common mistake. Once you add the flour, mix just until it’s combined. Overmixing develops gluten, which makes the bread tough and dense. A few lumps are your friend. They will bake out.
- The Toothpick Test is King: Oven temperatures vary wildly. Your bread might be done at 45 minutes or need a full 65. Rely on the toothpick test, not the clock. Insert a toothpick into the thickest part of the loaf. If it comes out clean, it’s done. If it has wet batter on it, give it another 5 minutes.
- Let It Cool: I know the smell is intoxicating. But slicing into a hot loaf will result in a gummy, crumbly mess. The bread continues to set as it cools. Let it rest for at least 20 minutes on the wire rack. The wait is worth it.
- Use a Kitchen Scale: For the most consistent results, use a kitchen scale to measure your flour. Scooping flour with a measuring cup can lead to packing it in, adding up to 25% more flour than you need. This is a game-changer for baking.
Variations & Adaptations
This recipe is a perfect canvas. Once you’ve mastered the basic loaf, feel free to play around. Here are some of my favorite ways to change it up.
- Chocolate Chip Banana Bread: This is the most popular variation in my house. Fold in ½ cup of semi-sweet or dark chocolate chips. The warm, melted chocolate is a perfect partner for the sweet banana.
- Vegan Banana Bread: You can easily make this vegan. Use ½ cup of melted coconut oil instead of butter. Replace the two eggs with two “flax eggs” (2 tablespoons of ground flaxseed meal mixed with 5 tablespoons of water, let sit for 5 minutes to thicken). The texture will be slightly denser but still delicious.
- Gluten-Free Banana Bread: I’ve had great success using a 1:1 gluten-free all-purpose flour blend, like the one from King Arthur. Make sure the blend contains xanthan gum, which helps mimic the structure of gluten. The result is surprisingly close to the original.
- Spiced Banana Bread: Add 1 teaspoon of ground cinnamon, ½ teaspoon of ground nutmeg, and a pinch of ground cloves to the dry ingredients. It gives the bread a warm, cozy, almost gingerbread-like flavor. Perfect for fall.
- Strawberry Banana Bread: This is a fun, summery twist. Gently fold in ¾ cup of chopped fresh strawberries at the end. Be careful not to overmix, as the strawberries can bleed into the batter and make it pink. Bake as directed, but check for doneness a few minutes earlier, as the fruit adds extra moisture.
Serving & Storage Suggestions
Banana bread is wonderful in its simplicity, but a few thoughtful touches can make it feel extra special.
Serving: This bread is fantastic at room temperature. For a real treat, warm a slice in the microwave for 10-15 seconds. I love serving it with a generous pat of salted butter that melts into the warm crumb. It’s also incredible with a smear of cream cheese or a drizzle of honey. For a breakfast treat, toast a slice until it’s golden and crisp on the edges.
Storage: Store leftover banana bread in an airtight container at room temperature for up to 4 days. The flavor actually improves on the second day! Do not refrigerate it, as the cold air will dry it out.
Freezing: This banana bread freezes beautifully. You can freeze the whole loaf, or slice it first for easy grab-and-go slices. Wrap it tightly in plastic wrap, then a layer of aluminum foil, and place it in a freezer-safe bag. It will keep for up to 3 months. To thaw, just let it sit at room temperature for a few hours, or pop a frozen slice in the toaster.
Make-Ahead: You can also make the batter ahead of time. Prepare the batter, pour it into the prepared pan, cover it tightly, and refrigerate for up to 24 hours. When you’re ready to bake, let it sit on the counter while the oven preheats (about 30 minutes), then bake as directed. You may need to add 5-10 minutes to the baking time.
Nutritional Information & Benefits
Let’s be clear: this is a treat. It’s not health food. But it does have some redeeming qualities, especially when compared to store-bought versions loaded with preservatives and high-fructose corn syrup.
Here is an approximate nutritional breakdown per slice (based on 10 slices, without walnuts or chocolate chips):
- Calories: 280
- Fat: 12g
- Carbohydrates: 40g
- Fiber: 2g
- Sugar: 20g
- Protein: 5g
The star ingredient, bananas, are a great source of potassium and vitamin B6. They also provide fiber and natural sweetness, allowing us to use a reasonable amount of added sugar. The eggs add a nice boost of protein. If you use the whole-wheat flour option, you’ll also get more fiber and nutrients. I feel good about serving this to my family because I know exactly what’s in it. It’s a simple, homemade pleasure that feels a little less guilty than a box of cookies.
Conclusion
This easy one-bowl banana bread (no mixer needed) is more than just a recipe; it’s a solution. It’s for those nights when you need something good to happen in the kitchen without it becoming a whole production. It’s for the days when you have three sad bananas and a craving you can’t ignore. It’s forgiving, it’s fast, and it’s genuinely delicious.
I hope you make this your own. Throw in some chocolate chips if that’s your thing. Add a sprinkle of cinnamon. Eat it for breakfast with a cup of coffee. This is your recipe now. I’d love to hear how it turns out for you. Did you try a fun variation? Did you have to hide it from your family before it cooled down? Drop a comment below and let me know. And if you loved it, please share this post with a friend who needs a little baking win in their life. Happy baking!
Frequently Asked Questions (FAQs)
Can I use frozen bananas for this recipe?
Absolutely! Frozen bananas are perfect for banana bread. Thaw them completely, then drain off any excess liquid that has accumulated. They will be very soft and almost liquidy, which makes them even easier to mash than fresh bananas.
Why is my banana bread dry?
Dry banana bread is usually a result of overbaking or using too much flour. Make sure you’re measuring your flour correctly—ideally with a kitchen scale. Also, start checking for doneness at the 50-minute mark to avoid overbaking.
Can I make this into muffins instead of a loaf?
Yes! This batter makes about 12 standard-sized muffins. Line a muffin tin with paper liners and fill each cup about ¾ full. Bake at 350°F (175°C) for 18-22 minutes, or until a toothpick inserted into the center of a muffin comes out clean.
Can I reduce the sugar in this recipe?
You can reduce the sugar to ½ cup without drastically altering the texture. If you reduce it further, the bread might be a little less moist and tender. The sugar isn’t just for sweetness; it also contributes to the structure and moisture of the loaf.
How do I know when my bananas are ripe enough?
The best bananas for banana bread have a strong, sweet smell and are covered in brown spots. They should feel soft to the touch. If they are still yellow and firm, they aren’t ready. You can speed up the ripening process by placing them in a paper bag with an apple or a ripe tomato overnight.
Pin This Recipe!
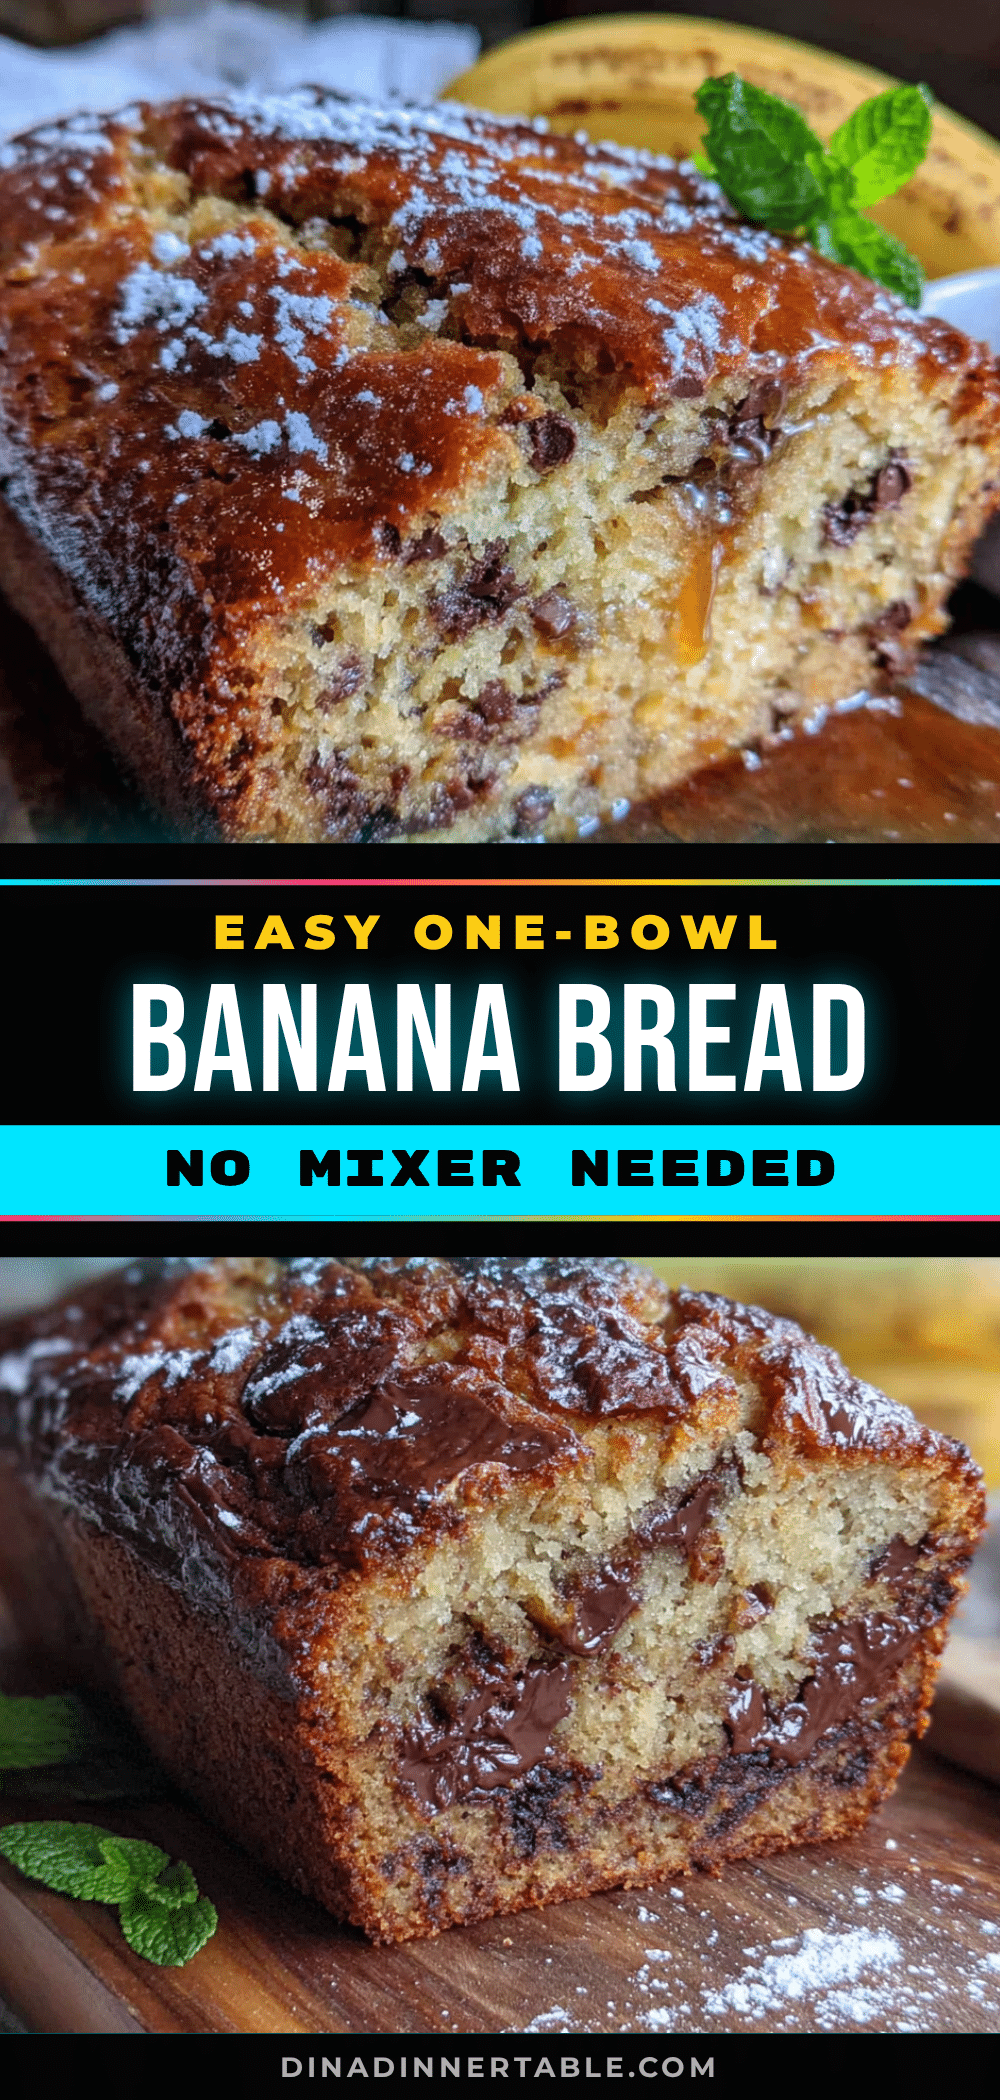
Easy One-Bowl Banana Bread: The Best No-Mixer Recipe
This easy one-bowl banana bread requires no mixer and comes together in about 10 minutes of active time. It’s moist, tender, and deeply banana-flavored with a perfect crackly top.
- Prep Time: 10 minutes
- Cook Time: 55 minutes
- Total Time: 1 hour 5 minutes
- Yield: 10 servings 1x
- Category: Dessert
- Cuisine: American
Ingredients
- 3 medium ripe bananas, mashed (about 1 ½ cups)
- ½ cup (113g) unsalted butter, melted
- ¾ cup (150g) granulated sugar
- 2 large eggs, room temperature
- 1 teaspoon vanilla extract
- 1 ½ cups (190g) all-purpose flour
- 1 teaspoon baking soda
- ½ teaspoon salt
- Optional: ½ cup (60g) chopped walnuts or chocolate chips
Instructions
- Preheat your oven to 350°F (175°C). Grease a 9×5-inch loaf pan with butter or non-stick spray. For extra insurance, line it with parchment paper, leaving overhang on the long sides.
- In a large mixing bowl, mash the bananas with a fork or potato masher until mostly smooth with a few small lumps.
- Add the sugar and melted butter to the bowl with the mashed bananas. Whisk vigorously for about 30 seconds until smooth and slightly lighter in color.
- Add the eggs and vanilla extract. Whisk until fully incorporated and the batter is smooth.
- Add the flour, baking soda, and salt directly on top of the wet ingredients. Gently stir until just combined. A few lumps are fine; do not overmix.
- If using, fold in walnuts or chocolate chips gently.
- Pour the batter into the prepared loaf pan and spread evenly. Bake on the center rack for 50-60 minutes, until a toothpick inserted in the center comes out clean or with a few moist crumbs. If the top browns too quickly, tent with foil after 40 minutes.
- Let the bread cool in the pan for 10 minutes, then lift it out using the parchment handles and transfer to a wire rack. Cool for at least 20 minutes before slicing.
Notes
Mash bananas with sugar first to create a natural syrup. Do not overmix once flour is added. Let bread cool at least 20 minutes before slicing for best texture. For vegan version, use melted coconut oil and flax eggs. For gluten-free, use a 1:1 gluten-free flour blend with xanthan gum.
Nutrition
- Serving Size: 1 slice
- Calories: 280
- Sugar: 20
- Sodium: 220
- Fat: 12
- Saturated Fat: 7
- Carbohydrates: 40
- Fiber: 2
- Protein: 5
Keywords: banana bread, easy banana bread, one-bowl banana bread, no-mixer banana bread, quick banana bread, moist banana bread


