I was at the hardware store, of all places, waiting for a key to be copied, when the man behind the counter—a guy named Jerry who I’d only ever exchanged nods with about paint samples—started talking about apple crisp. Not the weather, not the price of lumber, but apple crisp. He was describing it with this specific, almost reverent detail: the way the topping should be more crumble than crisp, how you want the apples to break down just a little but still hold their shape. I wasn’t expecting baking advice from the hardware guy, but there I was, listening to him explain the perfect ratio of oats to flour while he filed down a brass key.
He told me his wife had been making a big batch of apple crisp for years, but since the kids moved out, it was just too much. “You don’t need a whole 9×13 dish for two people,” he said, handing me my key. “You just need a little one.” That stuck with me. I mean, how many times have we made a full dessert for a household of two and ended up eating it for breakfast for a week? (Not that I’m complaining, but variety is nice.)
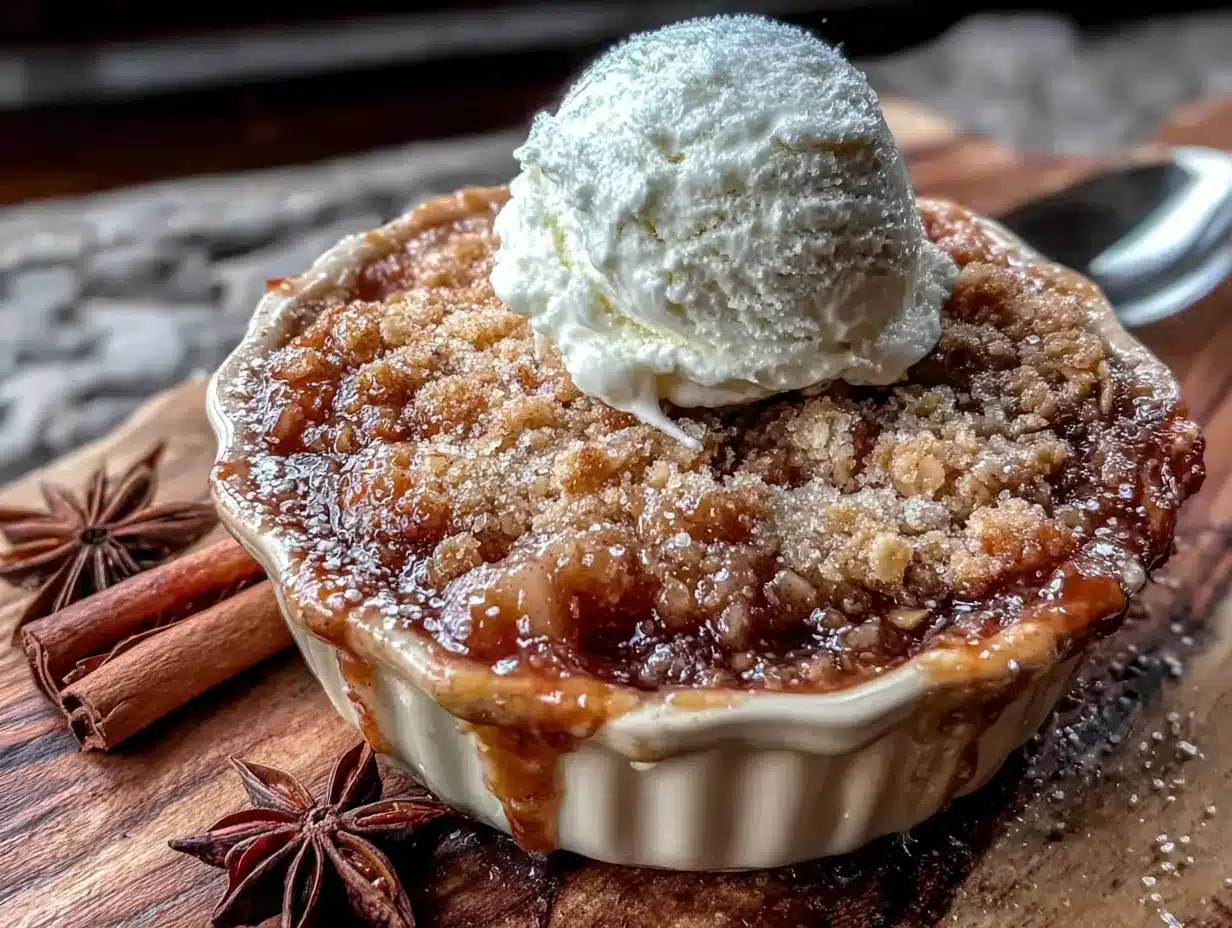
So I went home, grabbed a couple of apples, and started tinkering. The result is this easy small-batch apple crisp for two. It’s the kind of dessert that feels special—golden, bubbly, with that buttery oat topping—but doesn’t leave you with a mountain of leftovers. It’s honest, it’s simple, and it came from the most unlikely source. Honestly, I’ve been making it ever since.
Why You’ll Love This Recipe
This isn’t just another apple crisp recipe. It’s the one you’ll turn to again and again, and here’s why it stands out:
- Perfectly Portioned: No more wrestling with a giant dish or eating leftovers for days. This makes exactly two generous servings—ideal for a date night, a quiet evening, or treating yourself.
- Quick & Easy: From start to table in under 45 minutes. The active prep time is about 10 minutes, so you’re not slaving away in the kitchen.
- Simple Ingredients: You probably have everything in your pantry right now. Oats, flour, butter, brown sugar, and a couple of apples. No trips to a specialty store required.
- Unbelievably Delicious: The topping is that perfect mix of crunchy and tender, and the apples get soft and jammy with a hint of cinnamon. It’s comfort food at its finest.
- Foolproof: Even if you’re not a baker, this comes together without any fuss. There’s no rolling dough, no chilling time, just mix, layer, and bake.
What makes this recipe different from the rest is the texture of the topping. I tested it a dozen times to get that balance—not too sandy, not too cakey, but just right. It’s the kind of dessert that makes you close your eyes after the first bite. It’s wholesome, satisfying, and feels like a warm hug in a bowl.
What Ingredients You Will Need
This recipe uses simple, wholesome ingredients to deliver big flavor without the fuss. Most of these are pantry staples, which makes it an easy last-minute dessert.
For the Apple Filling:
- 2 medium apples, peeled, cored, and sliced (about 2 cups) — I prefer a mix of Granny Smith for tartness and Honeycrisp for sweetness, but any baking apple works
- 2 tablespoons granulated sugar — adds sweetness and helps the apples soften
- 1 tablespoon all-purpose flour — thickens the juices so the filling isn’t watery
- 1/2 teaspoon ground cinnamon — the classic warming spice
- 1/8 teaspoon ground nutmeg — optional, but adds a lovely depth (freshly grated is best)
- 1 teaspoon lemon juice — brightens the flavor and prevents the apples from browning
For the Crisp Topping:
- 1/4 cup old-fashioned rolled oats — gives that classic crumble texture; don’t use instant oats, they get mushy
- 1/4 cup all-purpose flour — the base of the topping
- 1/4 cup packed light brown sugar — adds moisture and a caramel-like flavor
- 1/4 teaspoon ground cinnamon — rounds out the spice profile
- Pinch of salt — balances the sweetness
- 3 tablespoons unsalted butter, cold and cut into small cubes — the key to a crumbly topping; I use salted butter in a pinch and just skip the extra salt
Ingredient Tips: For the best texture, use cold butter straight from the fridge. If you’re out of brown sugar, you can substitute 1/4 cup white sugar mixed with 1 teaspoon molasses. For a gluten-free version, use a 1:1 gluten-free flour blend and certified gluten-free oats. I’ve tried this with coconut sugar instead of brown sugar, and it works, but the topping is slightly less crisp.
Equipment Needed
You don’t need a fancy kitchen for this. Here’s what you’ll need:
- Two 10-ounce ramekins or a small baking dish (about 6×6 inches or a 1-quart dish) — ramekins make for a cute individual presentation, but a small dish works perfectly
- Mixing bowls — one medium, one small
- A sharp knife and cutting board — for prepping the apples
- A pastry cutter or two forks — to cut the butter into the dry ingredients; you can also use your fingertips if you work quickly
- A small baking sheet — place the ramekins on this to catch any bubbly overflow (trust me on this one)
If you don’t have ramekins, a small cast-iron skillet or even a large mug can work. I’ve used a 6-inch skillet before, and it gives the crisp a lovely rustic look. Just adjust the baking time slightly since the dish might be wider.
Preparation Method
- Preheat your oven to 375°F (190°C). Place a small baking sheet on the middle rack to catch any drips later. This saves you from scrubbing a burnt-on mess.
- Prepare the apples. Peel, core, and slice the apples into about 1/4-inch thick pieces. You want them uniform so they cook evenly. In a medium bowl, toss the apple slices with the granulated sugar, 1 tablespoon flour, cinnamon, nutmeg, and lemon juice. Let them sit for a minute while you make the topping — this helps the apples release some of their juices.
- Make the crisp topping. In a separate small bowl, combine the oats, 1/4 cup flour, brown sugar, 1/4 teaspoon cinnamon, and a pinch of salt. Stir with a fork to break up any lumps. Add the cold butter cubes. Using a pastry cutter or two forks, cut the butter into the dry ingredients until the mixture looks like coarse crumbs with some pea-sized butter pieces remaining. Don’t overwork it — you want those little butter chunks for a flaky topping. If the mixture feels too dry, you can add another tablespoon of cold butter.
- Assemble the crisp. Divide the apple mixture evenly between your two ramekins (or spread it in the small baking dish). The apples should be mounded slightly — they’ll settle as they bake. Sprinkle the topping evenly over the apples, covering them completely. Don’t press it down; let it sit loosely for a better crumble texture.
- Bake. Place the ramekins on the preheated baking sheet. Bake for 25 to 30 minutes, or until the topping is golden brown and the filling is bubbly around the edges. If the topping is browning too quickly after 20 minutes, tent loosely with foil. The apples should be tender when pierced with a fork. The smell in your kitchen at this point is absolutely unreal.
- Cool slightly. Let the crisp cool on a wire rack for at least 10 minutes. This lets the filling set up so it’s not too runny. I know it’s hard to wait, but it’s worth it.
- Serve warm. Spoon into bowls or eat straight from the ramekin. A scoop of vanilla ice cream or a dollop of whipped cream is the classic move, but it’s also delicious on its own.
Pro tip: If you’re using a single baking dish instead of ramekins, start checking for doneness at 25 minutes. A wider dish cooks a bit faster since the filling is spread thinner.
Cooking Tips & Techniques
Over the many times I’ve made this small-batch apple crisp, I’ve learned a few things the hard way. Here are my best tips:
- Don’t skip the lemon juice. It might seem like a small detail, but it keeps the apples from turning brown and adds a brightness that balances the sweetness. I forgot it once, and the filling was just flat.
- Use cold butter. This is non-negotiable for a crumbly topping. If the butter warms up, you’ll end up with a dense, pasty layer instead of a crisp crumble. If your kitchen is warm, pop the butter in the freezer for 5 minutes before cutting it in.
- Watch the topping. Every oven runs a little differently. If your topping is browning before the apples are tender, loosely cover with foil for the last 10 minutes. I’ve had to do this with my convection oven, which runs hot.
- Let it rest. I know you want to dig in right away, but letting the crisp sit for 10 minutes allows the juices to thicken. If you serve it immediately, you’ll have a soupy mess. Patience, my friend.
- Double-check your oats. Old-fashioned rolled oats are the way to go. Quick oats turn to mush, and steel-cut oats stay too chewy. Stick with the classic.
One time I was in a rush and used a warm bowl for the topping mixture. The butter melted instantly, and I ended up with a sticky paste. It still tasted okay, but the texture was all wrong. So take the extra minute to keep everything cool.
Variations & Adaptations
This recipe is a great base to play with. Here are some ways to make it your own:
- Gluten-Free: Substitute the all-purpose flour with a 1:1 gluten-free baking flour blend and use certified gluten-free oats. I’ve tested this with Bob’s Red Mill blend, and it works like a charm.
- Vegan: Use cold coconut oil or vegan butter in place of the butter. The topping will be slightly less crisp, but it’s still delicious. Make sure your sugar is vegan-friendly.
- Add Nuts: Stir in 2 tablespoons of chopped pecans or walnuts into the topping for extra crunch. I love pecans with apples—they add a buttery richness.
- Spice It Up: Add a pinch of cardamom or ginger to the apple mixture for a more complex flavor profile. Cardamom and apple is an underrated combo.
- Berry Twist: Swap one of the apples for a handful of fresh or frozen berries (blueberries or raspberries work great). The berries will burst and create a beautiful purple-red filling.
- Caramel Drizzle: After baking, drizzle a little store-bought or homemade caramel sauce over the top. It takes it from simple to decadent in seconds.
I once tried a version with pears instead of apples, and it was lovely—just a bit softer and sweeter. If you go that route, reduce the sugar by a tablespoon since pears are naturally sweeter.
Serving & Storage Suggestions
This small-batch apple crisp is best served warm, fresh from the oven. The contrast between the hot, tender apples and the cold ice cream is pure magic. Here’s how to make the most of it:
- Serving temperature: Serve warm, not piping hot. Let it rest for 10 minutes so the filling sets. A scoop of vanilla bean ice cream or a dollop of lightly sweetened whipped cream is the classic pairing. For a dairy-free option, try coconut milk ice cream.
- Presentation: If you’re feeling fancy, serve the ramekins on small plates with a sprig of mint or a dusting of powdered sugar. It looks like you went to a lot of trouble, but we know the truth.
- Beverage pairings: A cup of hot coffee or a glass of cold milk is perfect. For a grown-up treat, a small glass of bourbon or a dry cider pairs beautifully with the apple and cinnamon flavors.
- Storage: Cover any leftover crisp tightly with foil or plastic wrap and store in the refrigerator for up to 3 days. The topping will soften over time, but it’s still tasty.
- Reheating: To bring back some of the crunch, reheat in a 350°F oven for 10 minutes. The microwave works in a pinch (30 seconds), but the topping won’t be as crisp. I actually like the leftovers cold from the fridge for breakfast—don’t judge me.
The flavors actually meld and deepen overnight, so day-old apple crisp has its own charm. It’s a little softer, a little more jammy, and still completely satisfying.
Nutritional Information & Benefits
This small-batch apple crisp is a treat, but it’s made with real, whole ingredients. Here’s a rough estimate per serving (one ramekin, without ice cream):
| Nutrient | Amount per Serving |
|---|---|
| Calories | ~380 |
| Total Fat | 14g |
| Saturated Fat | 8g |
| Carbohydrates | 62g |
| Fiber | 5g |
| Sugar | 38g |
| Protein | 4g |
Health Benefits: Apples are a great source of fiber and vitamin C, and the oats provide heart-healthy soluble fiber. Cinnamon has anti-inflammatory properties and can help regulate blood sugar. While this is still a dessert, it’s a more wholesome option than many store-bought sweets. It fits perfectly into a balanced lifestyle where you enjoy treats without guilt.
Dietary Considerations: This recipe can easily be made gluten-free or vegan (see variations above). It’s nut-free as written, but check your oats for cross-contamination if you have a severe allergy. The main allergens are wheat (flour) and dairy (butter).
Conclusion
This easy small-batch apple crisp for two is one of those recipes that feels like it was meant to be shared. It’s simple enough for a Tuesday night but special enough for a celebration. The story behind it—from a hardware store conversation to a kitchen staple—reminds me that the best recipes often come from the most unexpected places.
I hope you give it a try. Play with the spices, swap in different fruits, or just make it exactly as written. It’s forgiving and delicious either way. And honestly, there’s something so satisfying about pulling two perfect little ramekins out of the oven, knowing you made something just for the two of you.
If you make this, I’d love to hear about it. Leave a comment below with your favorite variation or tag me in your photos. Happy baking!
Frequently Asked Questions
Can I use a different type of apple?
Absolutely! Granny Smith, Honeycrisp, Fuji, or Braeburn all work well. A mix of tart and sweet apples gives the best flavor. Avoid Red Delicious, as they can become mushy.
Can I make this ahead of time?
You can assemble the crisp (without baking) up to a day in advance. Cover and refrigerate the ramekins. When ready to bake, add about 5 extra minutes to the baking time since the filling will be cold.
Can I double this recipe?
Yes! Simply double all the ingredients and bake in an 8×8-inch dish or a 1.5-quart baking dish. Increase the baking time to 35-40 minutes, or until bubbly and golden.
Why is my topping not crispy?
The most common reason is that the butter was too warm when you mixed it in, or the topping was pressed down too firmly. Make sure your butter is cold and sprinkle the topping loosely over the apples.
Can I freeze leftover apple crisp?
Yes, you can freeze baked and cooled apple crisp for up to 3 months. Wrap it tightly in foil and place in a freezer bag. Thaw in the refrigerator overnight and reheat in a 350°F oven until warmed through.
Pin This Recipe!

Easy Small-Batch Apple Crisp for Two

This easy small-batch apple crisp for two is the perfect dessert for a date night or quiet evening. With a buttery oat topping and tender, cinnamon-spiced apples, it’s ready in under 45 minutes and uses simple pantry ingredients.
- Prep Time: 10 minutes
- Cook Time: 30 minutes
- Total Time: 40 minutes
- Yield: 2 servings 1x
- Category: Dessert
- Cuisine: American
Ingredients
- 2 medium apples, peeled, cored, and sliced (about 2 cups)
- 2 tablespoons granulated sugar
- 1 tablespoon all-purpose flour
- 1/2 teaspoon ground cinnamon
- 1/8 teaspoon ground nutmeg
- 1 teaspoon lemon juice
- 1/4 cup old-fashioned rolled oats
- 1/4 cup all-purpose flour
- 1/4 cup packed light brown sugar
- 1/4 teaspoon ground cinnamon
- Pinch of salt
- 3 tablespoons unsalted butter, cold and cut into small cubes
Instructions
- Preheat your oven to 375°F (190°C). Place a small baking sheet on the middle rack to catch any drips later.
- Prepare the apples: Peel, core, and slice the apples into about 1/4-inch thick pieces. In a medium bowl, toss the apple slices with the granulated sugar, 1 tablespoon flour, cinnamon, nutmeg, and lemon juice. Let them sit for a minute.
- Make the crisp topping: In a separate small bowl, combine the oats, 1/4 cup flour, brown sugar, 1/4 teaspoon cinnamon, and a pinch of salt. Stir with a fork. Add the cold butter cubes. Using a pastry cutter or two forks, cut the butter into the dry ingredients until the mixture looks like coarse crumbs with some pea-sized butter pieces remaining.
- Assemble the crisp: Divide the apple mixture evenly between two 10-ounce ramekins (or spread in a small baking dish). Sprinkle the topping evenly over the apples, covering them completely. Do not press it down.
- Bake: Place the ramekins on the preheated baking sheet. Bake for 25 to 30 minutes, or until the topping is golden brown and the filling is bubbly around the edges. If the topping is browning too quickly after 20 minutes, tent loosely with foil.
- Cool slightly: Let the crisp cool on a wire rack for at least 10 minutes to let the filling set.
- Serve warm: Spoon into bowls or eat straight from the ramekin. Optionally top with vanilla ice cream or whipped cream.
Notes
For best results, use cold butter straight from the fridge. Let the crisp rest for 10 minutes after baking to allow the juices to thicken. If using a single baking dish instead of ramekins, start checking for doneness at 25 minutes. For a gluten-free version, use a 1:1 gluten-free flour blend and certified gluten-free oats. For a vegan version, use cold coconut oil or vegan butter.
Nutrition
- Serving Size: 1 ramekin
- Calories: 380
- Sugar: 38
- Fat: 14
- Saturated Fat: 8
- Carbohydrates: 62
- Fiber: 5
- Protein: 4
Keywords: apple crisp, small batch, for two, easy dessert, apple dessert, fall dessert, quick dessert