My neighbor Karen wasn’t trying to impress anyone when I stopped by to borrow a ladder last September. I’d barely gotten through her screen door when this smell—like brown butter and cinnamon and something almost nutty—hit me square in the face. She was standing at the counter in an old t-shirt, flour dusted on her jeans, shoving a baking dish into a crowd of kids who were circling like tiny sharks. “It’s just apple bars,” she said, waving her hand like it was nothing. “The kids helped.”
Let me tell you, there was nothing “just” about them. I stood there, ladder completely forgotten, watching her pour this silky caramel over the top while three kids argued over who got the corner piece. She handed me a warm square on a paper towel, and I honestly think I made some kind of noise I’m not proud of. The crust was buttery and tender, the apples were soft but not mushy, and that caramel—she’d made it from scratch, she said, like it was the most normal Tuesday activity in the world.
I’ve been making my own version ever since, tweaking it until it felt like mine. These kid-approved apple pie bars with salted caramel drizzle are the result of about fifteen test batches, a few burnt fingers, and one memorable incident involving a broken spatula and a lot of cursing. They’re simpler than a traditional pie but somehow just as satisfying. Maybe you’ve been there—wanting that cozy apple dessert feeling without wrestling with a finicky crust at 9 PM on a school night. These bars are the answer, and honestly, I think about Karen every time I make them.
Why You’ll Love This Recipe
Let’s face it—feeding a family on a budget means every recipe has to earn its spot in your rotation. These apple pie bars with salted caramel drizzle do more than earn their place; they become the thing your kids request for every birthday, potluck, and “just because” Tuesday.
- Budget-Friendly Ingredients: You probably have most of this in your pantry right now. No fancy apple varieties required—I use whatever’s on sale, and it works beautifully.
- Actually Kid-Approved: I tested these on a group of six kids ages 4 to 12. The pan was empty in eleven minutes. The pickiest eater asked for seconds.
- No Pie Crust Stress: A press-in shortbread crust means no rolling, no chilling, no tears. My seven-year-old can make it by himself (with supervision on the oven part).
- Leftovers That Reheat Like Magic: Day-old bars warmed in the microwave for 15 seconds taste just as good as fresh. That’s a game-changer for busy mornings.
- Customizable for Picky Eaters: Leave off the caramel drizzle for little ones who prefer things simple, or double it for the caramel lovers in your house.
- Freezer-Friendly: Make a double batch and freeze one pan for those weeks when you need a dessert win without any effort.
What makes these different from every other apple bar recipe? It’s the texture. The shortbread crust stays crisp even after the apple filling sits on top, and the caramel seeps into the edges just enough to create these little pockets of sticky sweetness. I spent months getting that balance right—crust that doesn’t get soggy, apples that hold their shape, caramel that sets but doesn’t harden into a rock. This is the version that finally made my husband say, “Don’t change a thing.”
These bars are comfort food the way it should be—warm, forgiving, and made for sharing. They’re the dessert you bring to a friend who needs cheering up, or the one you make on a Sunday afternoon just because the house smells good. And honestly, that’s what cooking for a family should feel like.
What Ingredients You Will Need
This recipe keeps things simple with ingredients you’ll find at any grocery store. I’ve tested substitutions where they work, but these specific choices give you the best texture and flavor without breaking the bank.
For the Shortbread Crust
- 2 cups all-purpose flour (I use Gold Medal, but any brand works—just don’t use self-rising flour here)
- 1/2 cup granulated sugar (adds just enough sweetness to balance the tart apples)
- 3/4 cup unsalted butter, cold and cubed (cold butter is key for a flaky texture—if you only have salted butter, reduce the added salt to 1/4 teaspoon)
- 1/4 teaspoon salt (helps the crust taste buttery rather than flat)
For the Apple Filling
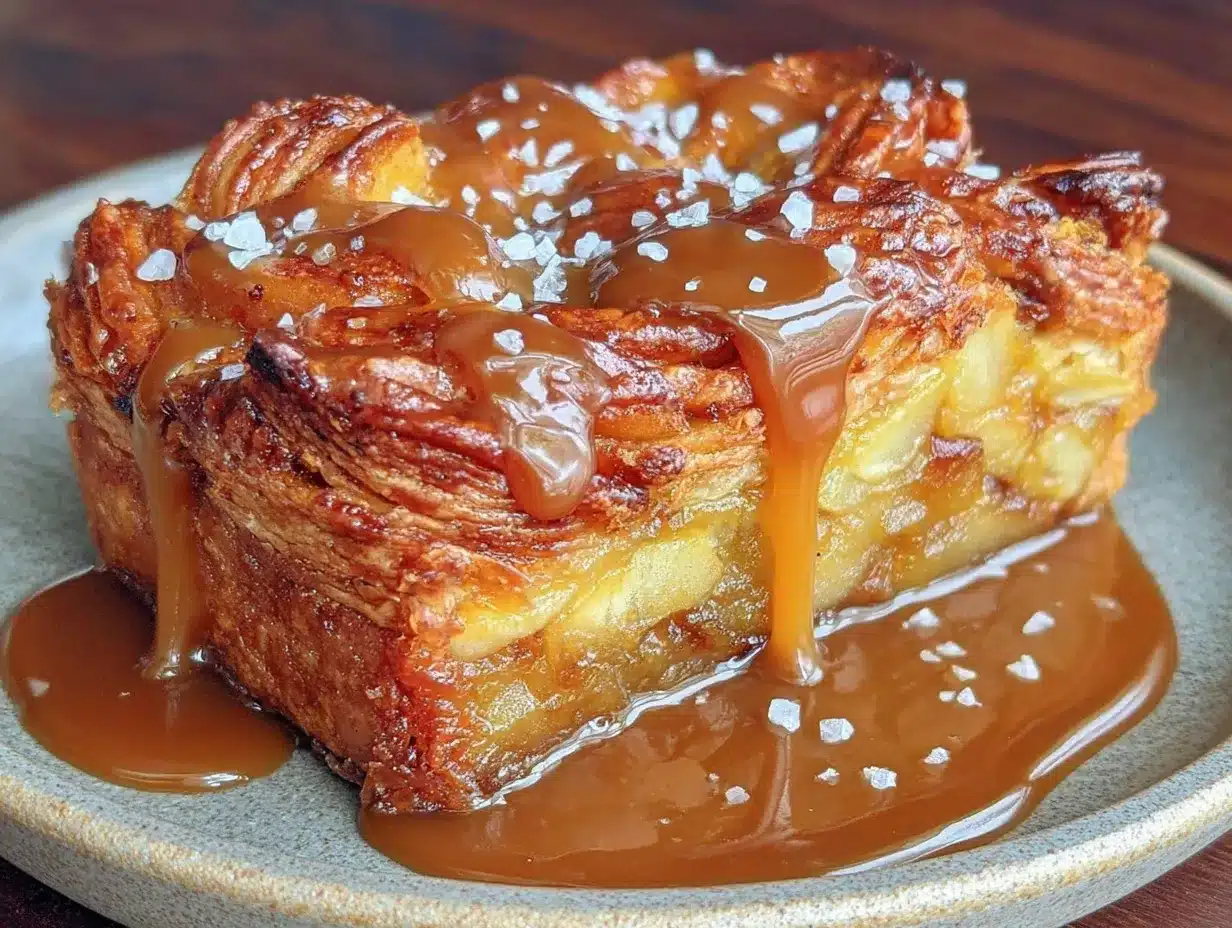
- 6 cups peeled and sliced apples (about 5-6 medium apples—I use Granny Smith for tartness or Honeycrisp for sweetness, whatever’s cheapest that week)
- 1/3 cup granulated sugar (adjust based on your apple sweetness—taste a slice before mixing)
- 2 tablespoons all-purpose flour (thickens the filling without making it gummy)
- 1 tablespoon lemon juice (keeps the apples from browning and brightens the flavor)
- 1 teaspoon ground cinnamon (I prefer McCormick for consistent quality)
- 1/4 teaspoon ground nutmeg (freshly grated is nice, but pre-ground works perfectly)
- 1/4 teaspoon ground allspice (adds that warm, cozy depth)
For the Salted Caramel Drizzle
- 1/2 cup unsalted butter (cuts into cubes for even melting)
- 1 cup packed brown sugar (light or dark both work—dark gives a deeper flavor)
- 1/3 cup heavy cream (half-and-half works in a pinch, but the caramel won’t be as thick)
- 1 teaspoon vanilla extract (pure vanilla makes a difference here, but imitation is fine)
- 1/2 teaspoon flaky sea salt (or 1/4 teaspoon regular salt—Maldon is my favorite for the crunch)
A quick note on apples: you don’t need fancy heirloom varieties for this recipe. I’ve made these bars with everything from Fuji to Gala to whatever was in the discount bin at Aldi. The key is mixing two types if you can—one tart, one sweet—for the most interesting flavor. If you’re in a pinch and only have one type, just adjust the sugar slightly.
For the caramel, please don’t skip the salt. It sounds fancy, but it’s what makes this drizzle unforgettable. My kids call it “the fancy sauce” and ask for it on everything from pancakes to ice cream now.
Equipment Needed
You don’t need a professional kitchen to make these apple pie bars with salted caramel drizzle. Here’s what you’ll actually use:
- 9×13-inch baking pan (a metal pan gives a crisper crust than glass—if you only have glass, reduce the oven temperature by 25 degrees)
- Parchment paper (non-negotiable—it makes lifting the bars out so much easier, and cleanup is a breeze)
- Large mixing bowls (one for the crust, one for the filling)
- Pastry cutter or two forks (for cutting butter into the flour—fingertips work too, but work quickly so the butter stays cold)
- Vegetable peeler and sharp knife (for prepping the apples)
- Medium saucepan (for the caramel—a light-colored pan helps you see the color change)
- Wire whisk (for smooth caramel without lumps)
- Measuring cups and spoons (the usual set)
- Cooling rack (helps the crust stay crisp—you can use a cutting board in a pinch)
If you don’t have a pastry cutter, honestly, two forks work fine. My grandmother used her hands, and her crust was legendary. Just don’t overwork the dough, and you’ll be fine. I bought my 9×13 pan at a thrift store for three dollars, so don’t stress about having fancy equipment.
Preparation Method
Let me walk you through this step by step. I’ve included all the little details I wish someone had told me the first time I made these.
Step 1: Make the Crust
Preheat your oven to 350°F (175°C). Line your 9×13 pan with parchment paper, leaving a couple inches hanging over the long sides—these will be your handles later. In a large bowl, whisk together the flour, sugar, and salt. Add the cold, cubed butter and cut it in using a pastry cutter or two forks until the mixture looks like coarse meal with some pea-sized butter bits remaining. Don’t overdo it—those little butter pockets create flakiness. Press the mixture evenly into the bottom of the pan. Bake for 15-18 minutes until lightly golden around the edges. Set aside to cool slightly while you make the filling.
Step 2: Prepare the Apple Filling
Peel, core, and slice your apples into thin, even slices—about 1/4 inch thick. I know it’s tedious, but uniform slices cook evenly. Toss them in a large bowl with the sugar, flour, lemon juice, cinnamon, nutmeg, and allspice. Use your hands to coat every slice—the flour needs to stick to the apples to thicken properly. Let this sit for 5 minutes while the apples release some juice. Don’t skip this resting time; it’s what prevents a watery filling.
Step 3: Assemble and Bake
Spread the apple mixture evenly over the pre-baked crust. Don’t worry if it looks piled high—it will shrink as it bakes. Bake for 35-40 minutes until the apples are tender when pierced with a fork and the edges are bubbly. The kitchen will smell like heaven right about now. Let the bars cool completely in the pan on a wire rack—this is crucial for clean slices. I know it’s hard to wait, but warm bars fall apart. Trust me on this one.
Step 4: Make the Salted Caramel
While the bars cool, make your caramel. In a medium saucepan over medium heat, melt the butter. Add the brown sugar and cream, whisking constantly until the sugar dissolves. Bring it to a gentle boil, then reduce the heat and let it simmer for 3-4 minutes, whisking occasionally. It should thicken slightly and smell deeply caramelized. Remove from heat, stir in the vanilla and flaky salt. Let it cool for 5 minutes—it will thicken more as it sits.
Step 5: Drizzle and Set
Once the bars are completely cool, drizzle the caramel over the top using a spoon or a squeeze bottle if you’re feeling fancy. I usually do a zigzag pattern because it looks pretty and ensures every bite gets some caramel. Let the bars sit for 15-20 minutes so the caramel sets slightly before cutting. Use the parchment handles to lift the whole slab onto a cutting board, then slice into squares. A sharp knife and a quick wipe between cuts gives you clean edges.
Cooking Tips & Techniques
I’ve made this recipe about twenty times now, and here’s what I’ve learned the hard way so you don’t have to.
Don’t overwork the crust. The first time I made these, I kept pressing and pressing, trying to get it perfectly smooth. The result was a tough, dense crust that nobody wanted to eat. You want it just pressed together enough to hold—some cracks and uneven spots are totally fine. They add character.
Use a sharp peeler. I know this sounds silly, but a dull peeler makes apple prep miserable. I bought a cheap Kuhn Rikon peeler after my third batch, and it cut my prep time in half. Your wrists will thank you.
Watch the caramel carefully. Caramel can go from perfect to burnt in about thirty seconds. The first time I made it, I got distracted by a kid asking for a snack, and suddenly my caramel smelled like a campfire. Keep your eyes on the pan, and if you see it getting too dark, pull it off the heat immediately. You can always add a splash of cream to thin it if needed.
Let them cool completely. I cannot stress this enough. I’ve served warm, gooey bars that collapsed into a pile of apples and crust. They tasted fine, but they looked like a disaster. Patience is the secret ingredient here.
Slice with confidence. Use a long, sharp knife and wipe it clean between cuts. This gives you those beautiful, bakery-style squares that make everyone think you worked harder than you actually did.
Variations & Adaptations
One of the best things about this recipe is how flexible it is. Here are some ways I’ve adapted it for different needs and occasions.
Gluten-Free Version: Swap the all-purpose flour for a 1:1 gluten-free flour blend. I’ve used Bob’s Red Mill with great results. The crust will be slightly more crumbly, so press it firmly into the pan. Add an extra tablespoon of butter to help it hold together.
Dairy-Free Adaptation: Use vegan butter in the crust and caramel, and swap the heavy cream for full-fat coconut cream. The caramel won’t be quite as thick, but it’s still delicious. My sister-in-law is dairy-free, and she says these are better than the “real” version.
Less Sugar Option: Cut the sugar in the filling to 1/4 cup if your apples are naturally sweet. For the caramel, use a sugar-free brown sugar substitute—I’ve had good luck with Swerve. The texture is slightly different, but the flavor is still there.
Add Some Crunch: Sprinkle 1/2 cup of chopped pecans or walnuts over the apples before baking. My husband loves this version, and it makes the bars feel extra special for holidays or company.
Spice It Up: Add 1/4 teaspoon of cardamom or ginger to the apple mixture for a warmer, more complex flavor. I do this in the fall when I’m craving something a little different.
Make It a Breakfast Bar: Okay, this is a stretch, but I’ve totally eaten these for breakfast with a cup of coffee. If you want to feel slightly more virtuous, reduce the caramel drizzle and add a handful of oats to the crust mixture.
Serving & Storage Suggestions
These apple pie bars with salted caramel drizzle are forgiving when it comes to serving and storing, which is exactly what a busy family needs.
Serving: I like these bars at room temperature, but they’re also wonderful warmed for 15 seconds in the microwave. The caramel gets slightly melty, and the apples soften back up. Serve them with a scoop of vanilla ice cream for a truly decadent dessert, or with a dollop of whipped cream for something lighter. My kids eat them plain, straight off the plate, and they disappear faster than I can make them.
Storage: Keep leftovers in an airtight container at room temperature for up to 3 days. If your kitchen is warm, refrigerate them—the caramel can get sticky otherwise. I stack them with parchment paper between layers so they don’t stick together.
Freezing: These freeze beautifully. Bake and cool the bars completely without the caramel drizzle. Wrap the whole slab tightly in plastic wrap, then foil, and freeze for up to 3 months. When you’re ready to serve, thaw in the fridge overnight, then make the caramel fresh and drizzle before serving. The caramel doesn’t freeze well, so always add it fresh.
Reheating: For a single serving, microwave for 15-20 seconds. For a whole pan, warm in a 300°F oven for 10 minutes. The crust stays crisp better in the oven than the microwave.
Flavor Development: Honestly, these bars taste even better the next day. The flavors meld together overnight, and the crust softens just slightly. If you can resist eating them all on day one, you’re in for a treat on day two.
Nutritional Information & Benefits
I’m not going to pretend these are health food, but here’s the breakdown so you can plan accordingly. Per bar (based on 16 servings):
| Nutrient | Amount |
|---|---|
| Calories | 285 |
| Total Fat | 14g |
| Saturated Fat | 9g |
| Carbohydrates | 39g |
| Fiber | 2g |
| Sugar | 26g |
| Protein | 2g |
| Sodium | 180mg |
On the plus side, apples are a good source of fiber and vitamin C, especially if you leave the peels on (though I peel mine for texture). Cinnamon has anti-inflammatory properties, and the butter provides vitamin A. The caramel is mostly sugar and butter, so consider it a treat rather than a daily snack. But honestly? Life is short. Sometimes you need a dessert that makes you close your eyes and smile.
If you’re watching your sugar intake, cut the caramel drizzle in half or skip it entirely—the bars are still delicious on their own. My youngest actually prefers them without caramel, which I think is weird but I respect.
Conclusion
These kid-approved apple pie bars with salted caramel drizzle have become my go-to dessert for everything from school bake sales to Thanksgiving potlucks. They’re the recipe I turn to when I need something that feels special but doesn’t require a culinary degree. The crust is forgiving, the apples are flexible, and that caramel drizzle makes everyone feel like you went all out—even when you didn’t.
I love that my kids can help make these. My daughter presses the crust into the pan, and my son sprinkles the cinnamon over the apples. It’s become our Sunday afternoon ritual in the fall, and those are the memories that stick. Food does that, doesn’t it? It anchors us to moments and people and the way a kitchen smells in September.
Give these bars a try, and don’t be afraid to make them your own. Add more cinnamon, use different apples, double the caramel—whatever makes your family happy. And if you come up with a variation I haven’t tried, please come back and tell me about it in the comments. I’m always looking for new ideas, and honestly, I just love hearing how these recipes show up in other people’s kitchens.
Happy baking, friends. Your family is about to be very, very happy.
Frequently Asked Questions
Can I use pre-made caramel sauce instead of making my own?
Absolutely. If you’re short on time or just don’t feel like making caramel, a good-quality store-bought caramel sauce works fine. Look for one in the ice cream topping aisle—I like the one from Stonewall Kitchen or even the store brand. Just warm it slightly and add a pinch of flaky salt before drizzling. It won’t be exactly the same, but it’ll still be delicious.
Can I make these bars ahead of time for a party?
Yes, and I actually recommend it. These bars taste even better the next day. Bake them, cool completely, and store them in an airtight container at room temperature. Make the caramel fresh on the day you’re serving, drizzle it over, and you’re good to go. The caramel really does taste best within a few hours of making it.
What if my apples release too much liquid during baking?
This happens sometimes, especially with juicier apple varieties like McIntosh or Gala. To prevent a soggy bottom, make sure you toss the apples with the flour mixture and let them sit for 5 minutes before spreading them over the crust. If you still see excess liquid, you can drain off a tablespoon or two before baking. Also, make sure your crust is fully pre-baked—a partially baked crust is more likely to get soggy.
Can I double this recipe for a larger crowd?
You can, but I’d recommend making two separate batches in two 9×13 pans rather than trying to fit everything into one larger pan. The baking time changes significantly with a bigger pan, and you might end up with undercooked crust or overcooked apples. Two pans also means you can freeze one for later, which is always a win.
How do I get clean, neat slices without the bars falling apart?
Patience is the answer. Let the bars cool completely—at least 2 hours at room temperature, or 1 hour in the fridge. Use a long, sharp knife and wipe it clean with a damp paper towel between each cut. Cut straight down, don’t saw back and forth. If the caramel is still too sticky, pop the whole pan in the fridge for 20 minutes before slicing. Cold caramel cuts much cleaner.
Pin This Recipe!
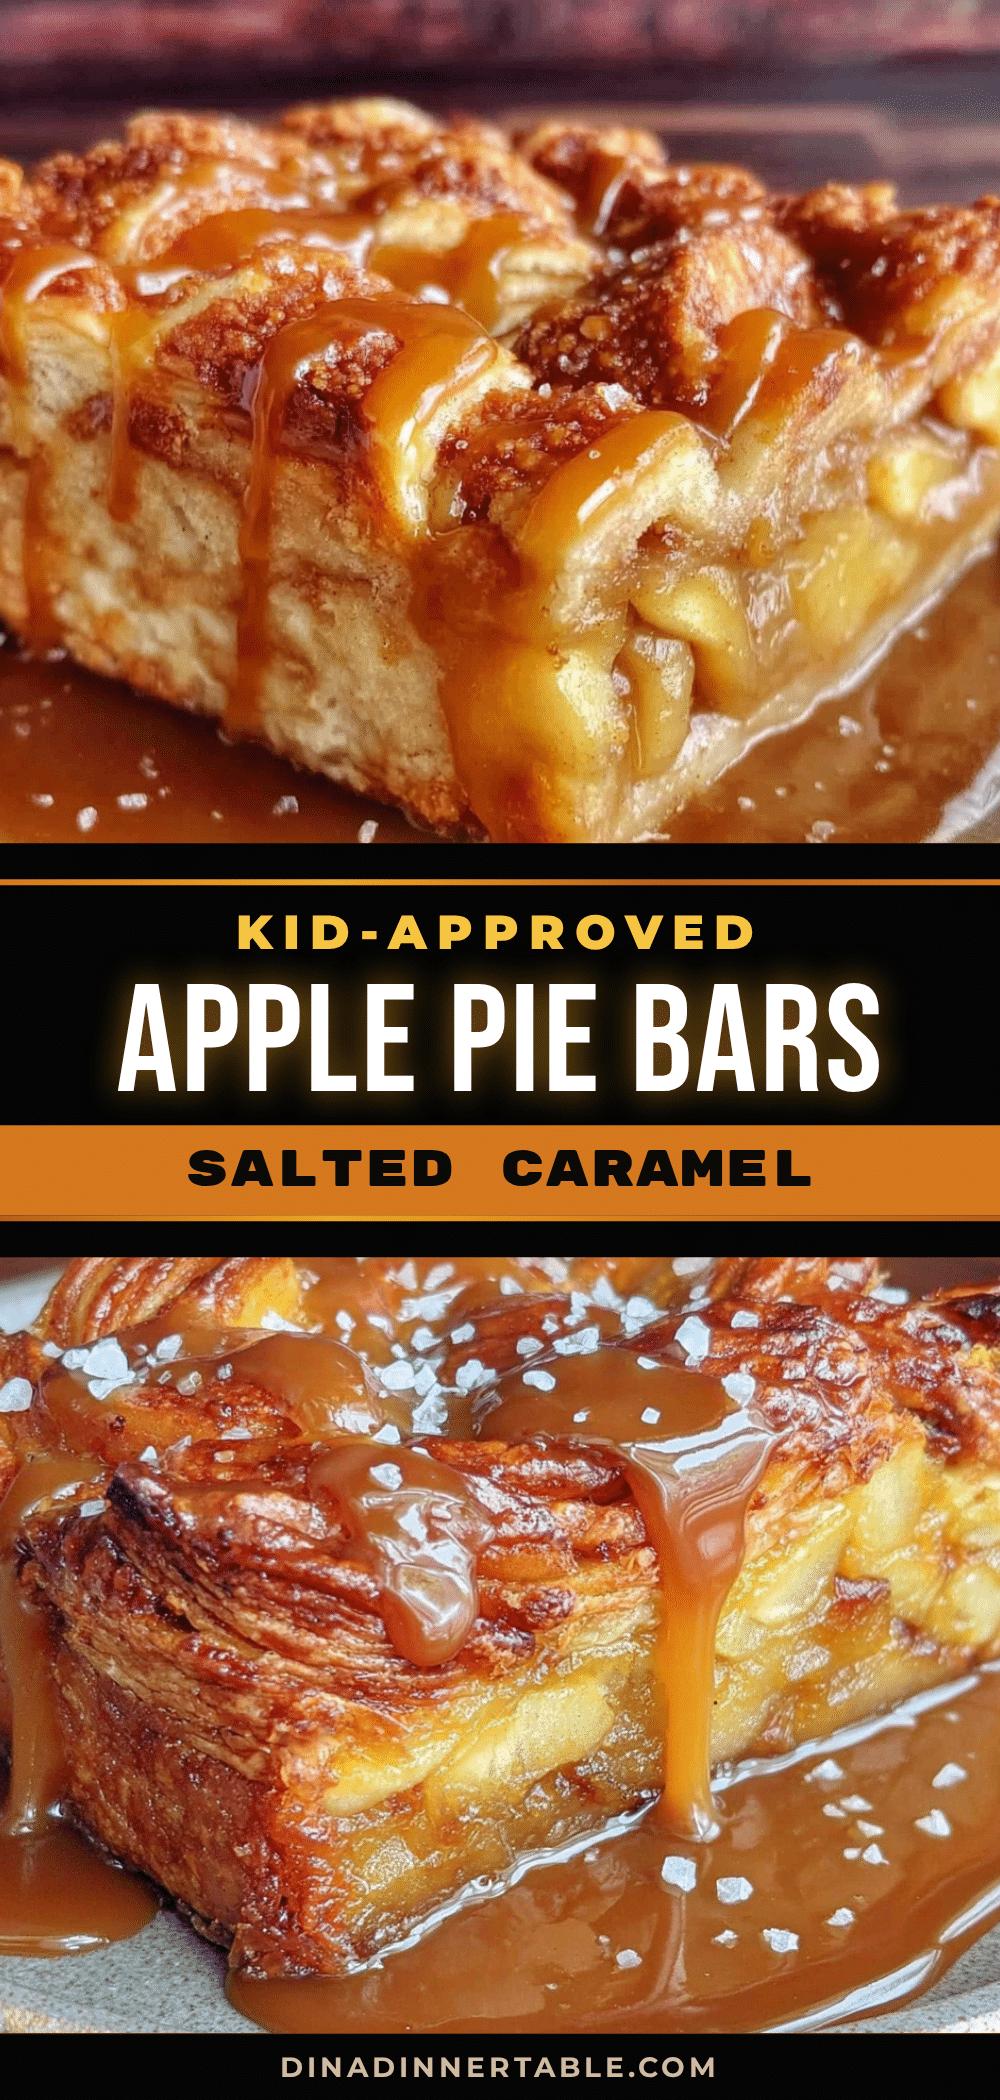
Kid-Approved Apple Pie Bars with Easy Salted Caramel
These kid-approved apple pie bars with salted caramel drizzle are simpler than a traditional pie but just as satisfying. A buttery shortbread crust, tender apple filling, and homemade salted caramel come together for the perfect family dessert.
- Prep Time: 20 minutes
- Cook Time: 55 minutes
- Total Time: 1 hour 15 minutes
- Yield: 16 servings 1x
- Category: Dessert
- Cuisine: American
Ingredients
- 2 cups all-purpose flour
- 1/2 cup granulated sugar
- 3/4 cup unsalted butter, cold and cubed
- 1/4 teaspoon salt
- 6 cups peeled and sliced apples (about 5–6 medium apples)
- 1/3 cup granulated sugar
- 2 tablespoons all-purpose flour
- 1 tablespoon lemon juice
- 1 teaspoon ground cinnamon
- 1/4 teaspoon ground nutmeg
- 1/4 teaspoon ground allspice
- 1/2 cup unsalted butter
- 1 cup packed brown sugar
- 1/3 cup heavy cream
- 1 teaspoon vanilla extract
- 1/2 teaspoon flaky sea salt
Instructions
- Preheat oven to 350°F (175°C). Line a 9×13-inch baking pan with parchment paper, leaving overhang on the long sides.
- Make the crust: In a large bowl, whisk together flour, 1/2 cup sugar, and 1/4 teaspoon salt. Cut in cold cubed butter using a pastry cutter or two forks until mixture resembles coarse meal with some pea-sized butter bits. Press evenly into the prepared pan. Bake for 15-18 minutes until lightly golden around edges. Set aside to cool slightly.
- Prepare the apple filling: Peel, core, and slice apples into thin, even slices (about 1/4 inch thick). Toss in a large bowl with 1/3 cup sugar, 2 tablespoons flour, lemon juice, cinnamon, nutmeg, and allspice. Use hands to coat every slice. Let sit for 5 minutes.
- Assemble and bake: Spread apple mixture evenly over pre-baked crust. Bake for 35-40 minutes until apples are tender and edges are bubbly. Cool completely in the pan on a wire rack.
- Make the salted caramel: In a medium saucepan over medium heat, melt 1/2 cup butter. Add brown sugar and heavy cream, whisking constantly until sugar dissolves. Bring to a gentle boil, then reduce heat and simmer for 3-4 minutes, whisking occasionally. Remove from heat, stir in vanilla and flaky sea salt. Let cool for 5 minutes.
- Drizzle and set: Once bars are completely cool, drizzle caramel over the top in a zigzag pattern. Let sit for 15-20 minutes until caramel sets slightly. Use parchment handles to lift slab onto a cutting board, then slice into squares with a sharp knife.
Notes
Don’t overwork the crust; some cracks are fine. Use a sharp peeler for easier apple prep. Watch caramel carefully as it can burn quickly. Let bars cool completely before slicing for clean cuts. For best results, use a metal pan for a crisper crust. Bars taste even better the next day.
Nutrition
- Serving Size: 1 bar
- Calories: 285
- Sugar: 26
- Sodium: 180
- Fat: 14
- Saturated Fat: 9
- Carbohydrates: 39
- Fiber: 2
- Protein: 2
Keywords: apple pie bars, salted caramel, kid-friendly dessert, apple dessert, shortbread crust, fall baking, easy apple bars


