My nephew, Leo, asked me why I couldn’t just wrap a chunk of apple in bacon and call it a day. I was trying to teach him how to make a proper appetizer, something with a little finesse, you know? I started to explain why that wouldn’t work—the apple would get mushy, the bacon wouldn’t cook right, it needed a glaze for balance. Then I stopped. Honestly, I had no good reason except that I’d never seen it done that way. So I shrugged, grabbed an apple, and let him take the lead. Three minutes later, we had a pile of bacon-wrapped chunks, and I was mentally preparing a backup snack for the party that night.
That first batch came out of the oven looking like a mess—some bacon was crisp, some was chewy, and the apples were swimming in their own juice. But Leo grabbed one, blew on it, and took a bite. His eyes got wide, and he said, “Auntie, this is the best thing you’ve ever made.” I mean, the kid has a way with words. I tweaked the method the next time, added a simple maple glaze, and suddenly these little bites became the thing everyone asks me to bring. Maybe you’ve been there—you spend hours on a complicated dish, and the crowd goes wild for the thing you threw together in ten minutes. That’s this recipe, except it’s actually genius.
I keep making them because they’re the rare snack that makes everyone happy. The sweet-tart apple, the salty bacon, that sticky maple finish—it’s a combination that works on a level I can’t quite explain. And every time I pull a tray out of the oven, I think about Leo standing on a step stool, telling me I was overthinking it. He was right. Sometimes the simplest idea is the one you should just trust.
Why You’ll Love This Recipe
These bacon-wrapped apple bites with maple glaze aren’t just another appetizer. They’re the kind of snack that disappears before you can put the tray down. I’ve tested this recipe at family dinners, birthday parties, and casual get-togethers, and it never fails. Here’s why you’ll come back to it again and again:
- Quick & Easy: From start to finish, you’re looking at about 25 minutes. No marinating, no complicated steps—just wrap, bake, and glaze.
- Simple Ingredients: You need apples, bacon, maple syrup, and a few pantry staples. No fancy grocery trips required.
- Perfect for Family Meals: These bites work as a snack, a side dish, or even a fun appetizer for game day. Kids love them, adults love them—everyone wins.
- Crowd-Pleaser: I’ve brought these to potlucks and watched people hover around the tray. They’re sweet, salty, and utterly addictive.
- Unbelievably Delicious: The texture is what gets me—crisp bacon wrapped around tender apple, all coated in a glossy maple glaze. It’s comfort food in one bite.
What makes this recipe different from the rest? It’s the balance. Most bacon-wrapped apple recipes either burn the bacon or leave the apple raw. This method uses a quick pre-cook for the bacon and a precise baking time that softens the apple just enough without turning it to mush. The maple glaze isn’t just a drizzle—it’s brushed on halfway through, so it caramelizes into a sticky, golden coating that clings to every bite. This isn’t just another version of bacon-wrapped fruit. It’s the one that actually works.
I’m not going to tell you this recipe will change your life. But I will tell you that the first time you make it, you’ll probably eat four of them standing at the counter. And then you’ll make them again the next week. That’s just how it goes.
What Ingredients You Will Need
This recipe relies on simple, everyday ingredients that come together to create something surprisingly special. Most of these are probably in your kitchen right now, which makes these bites perfect for last-minute cravings or unexpected guests.
- Apples (2 large, firm variety): I recommend Honeycrisp or Granny Smith. Honeycrisp adds natural sweetness; Granny Smith gives a tart contrast to the salty bacon. Avoid soft apples like Red Delicious—they’ll turn to mush in the oven.
- Bacon (12 slices, standard cut): Don’t use thick-cut bacon here. It takes too long to crisp up, and the apple will overcook before the bacon is done. Standard-cut bacon wraps neatly and cooks at the same pace as the apple. I prefer Wright Brand or Oscar Mayer for consistent results.
- Maple syrup (¼ cup, pure): Real maple syrup makes a difference. The fake stuff is too thin and won’t caramelize properly. Look for Grade A Amber for that rich, woodsy sweetness. If you only have pancake syrup, it’ll work in a pinch, but the flavor won’t be as deep.
- Butter (1 tablespoon, unsalted): This helps the glaze thicken and adds a silky richness. Salted butter works too—just skip the extra salt in the recipe.
- Brown sugar (1 tablespoon, packed): Light or dark brown sugar both work. Dark brown sugar adds a deeper molasses note that pairs beautifully with the maple.
- Cinnamon (½ teaspoon): A warm spice that bridges the apple and maple flavors. Fresh cinnamon is best, but the jarred stuff is fine.
- Salt (¼ teaspoon, flaky): A pinch of flaky sea salt at the end balances the sweetness. Don’t skip this—it’s what makes the bites taste professional.
- Toothpicks (12, wooden): You’ll need these to secure the bacon. Soak them in water for 10 minutes before using to prevent burning.
That’s it. Seven ingredients plus toothpicks. The beauty of this recipe is that it doesn’t ask you to hunt down obscure items or spend a fortune. Everything here is a pantry staple or a quick grab from the grocery store. If you want to switch things up, try using turkey bacon for a lighter version, or swap the maple syrup with honey for a different sweetness profile. Just keep in mind that turkey bacon cooks faster and won’t get as crispy, so adjust your baking time accordingly.
Equipment Needed
You don’t need a fancy kitchen to make these bites. Here’s what you’ll need:
- Baking sheet: A standard half-sheet pan works perfectly. Line it with parchment paper or aluminum foil for easy cleanup. I’ve made these on a rimmed cookie sheet and a flat baking stone—both work fine.
- Wire rack: This is optional but helpful. Placing a wire rack on the baking sheet allows air to circulate around the bites, making the bacon crispier on all sides. If you don’t have one, just flip the bites halfway through baking.
- Small saucepan: For making the maple glaze. Any small pot will do—just make sure it has a heavy bottom to prevent scorching.
- Chef’s knife and cutting board: You’ll need these to cut the apples and bacon. A sharp knife makes clean cuts, which helps the bites hold together.
- Pastry brush: For brushing the glaze onto the bacon. A silicone brush is ideal because it doesn’t shed bristles. If you don’t have one, use a spoon to drizzle the glaze carefully.
- Tongs: For flipping the bites and removing them from the baking sheet. Metal tongs give you better control than spatulas.
I’ve made these bites with just a knife, a baking sheet, and a spoon. The wire rack and pastry brush are nice to have, but they’re not essential. If you’re on a budget, skip the rack and just flip the bites halfway through. The glaze can be brushed on with the back of a spoon if you don’t have a pastry brush. Don’t let missing equipment stop you from making these.
Preparation Method
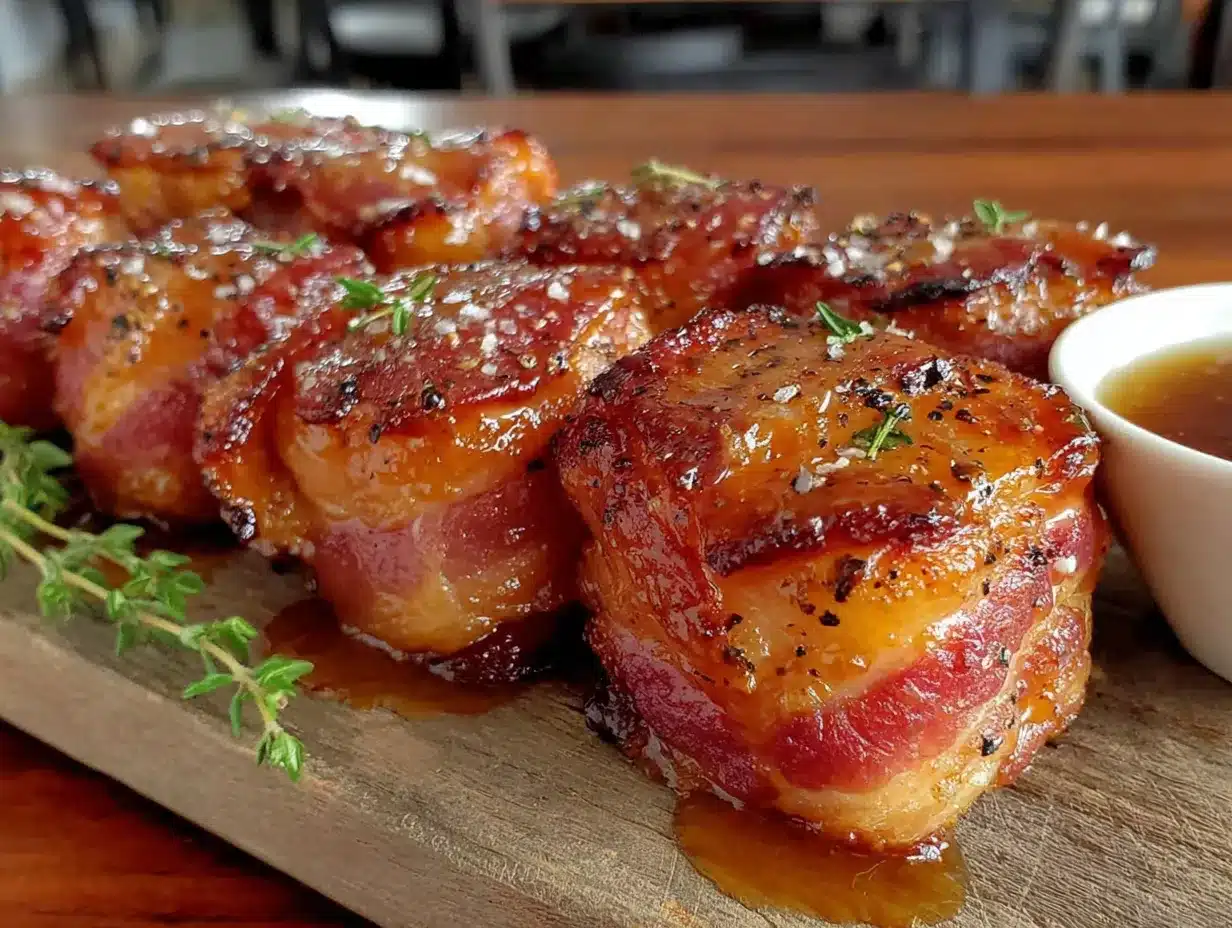
Let me walk you through this step by step. I’ve made these bites dozens of times, so I’ve learned where things can go wrong and how to fix them. Follow these steps, and you’ll get perfect results every time.
- Preheat your oven to 400°F (200°C). Line a baking sheet with parchment paper or aluminum foil. If you have a wire rack, place it on the baking sheet now. This helps the bacon crisp up evenly.
- Prepare the apples. Wash and core your apples. Cut them into 1-inch cubes—you want pieces that are big enough to hold their shape but small enough to wrap easily. Aim for about 12 cubes total from two large apples. Don’t peel the apples; the skin helps them hold together during baking. Place the cubes in a bowl and toss them with a squeeze of lemon juice if you’re worried about browning. (I usually skip this step because the apples don’t sit long enough to oxidize.)
- Partially cook the bacon. This is the trick that makes the recipe work. Place the bacon slices on a microwave-safe plate lined with paper towels. Microwave on high for 2-3 minutes, until the bacon is just starting to render fat but is still pliable. You want it cooked about halfway—it should look translucent in spots but not crispy. This step prevents the bacon from releasing too much grease during baking, which would steam the apples instead of crisping the bacon. If you don’t have a microwave, you can do this in a skillet over medium heat for about 2 minutes per side.
- Cut the bacon. Once the bacon is cool enough to handle, cut each slice in half crosswise. You’ll now have 24 half-slices. Each apple cube gets wrapped with one half-slice of bacon.
- Wrap the apple cubes. Take one apple cube and wrap a half-slice of bacon around it, overlapping the ends slightly. Secure with a toothpick that you’ve soaked in water for 10 minutes. Repeat with all the apple cubes. Place each wrapped bite on the prepared baking sheet, leaving about 1 inch of space between them. Don’t crowd the pan—crowding traps steam and prevents the bacon from getting crispy.
- Bake for 10 minutes. Place the baking sheet in the preheated oven and bake for 10 minutes. The bacon should be starting to brown and crisp around the edges. If you’re not using a wire rack, flip each bite with tongs halfway through this first bake.
- Make the maple glaze while the bites bake. In a small saucepan, combine the maple syrup, butter, brown sugar, and cinnamon. Heat over medium-low heat, stirring constantly, until the butter melts and the sugar dissolves. This takes about 2-3 minutes. Don’t let it boil—you want it to thicken gently. Once it’s smooth and glossy, remove it from the heat.
- Brush the glaze onto the bites. After the first 10 minutes of baking, remove the sheet from the oven. Using a pastry brush, generously brush each bite with the maple glaze. Don’t be shy—the glaze is what makes these bites special. Return the sheet to the oven.
- Bake for another 5-7 minutes. The glaze will bubble and caramelize, creating a sticky, golden coating. The bacon should be crisp and dark brown around the edges. Watch closely during this stage—the sugar in the glaze can burn quickly. If you see dark spots forming, pull them out immediately.
- Finish with salt. Remove the bites from the oven and let them cool on the baking sheet for 2 minutes. Sprinkle with flaky sea salt while they’re still warm. The salt cuts through the sweetness and makes the flavors pop.
- Serve warm. Transfer the bites to a serving platter and serve immediately. The bacon is crispiest right out of the oven, and the apples are perfectly tender. These are best eaten within 15 minutes of baking.
A few things I’ve learned the hard way: Don’t skip the partial bacon cook. I tried it once with raw bacon, and the apples turned to mush before the bacon was done. Also, don’t use thick-cut bacon—it takes too long to crisp, and you’ll end up with overcooked apples. And please, for the love of good food, don’t forget the salt at the end. It’s a small step that makes a huge difference.
Cooking Tips & Techniques
I’ve made these bites enough times to know exactly where things can go sideways. Here are the tips that will save you from my early mistakes.
Choose the right apple. I learned this one the hard way. The first time I made these, I used Fuji apples because that’s what I had in the fridge. They were too soft, and the cubes fell apart during baking. Stick with Honeycrisp or Granny Smith—they hold their shape and provide the right texture contrast to the crispy bacon. If you want a sweeter bite, go with Honeycrisp. If you prefer a tangy contrast, Granny Smith is your apple.
Don’t overbake. The line between perfectly caramelized and burnt is thin when sugar is involved. Set a timer for 5 minutes after you add the glaze, and check the bites at the 5-minute mark. If the glaze is bubbling and the bacon is dark brown, they’re done. If they need more time, check every minute after that. I’ve burned a batch by walking away for “just one more minute.” Trust me—watch them closely.
Multitask strategically. While the bites are in their first 10-minute bake, make the glaze. While the glaze simmers, soak your toothpicks if you haven’t already. This recipe moves fast, so having everything ready before you start makes the process smooth. I learned this after frantically searching for a pastry brush while the bites cooled on the counter.
Use room-temperature ingredients. Cold apples wrapped in cold bacon take longer to cook, which can throw off your timing. Let the apples sit on the counter for 15 minutes before you start. The bacon should be cold from the fridge, but letting it sit for 5 minutes after the partial cook helps it wrap more easily.
Double the recipe if you’re feeding a crowd. These bites disappear fast. I made 12 for a family of four last week, and they were gone in five minutes. If you’re bringing these to a party, make at least 24. Trust me on this one.
Variations & Adaptations
This recipe is flexible, and I’ve tried several variations over the years. Here are my favorites:
Spicy Maple Bites: Add ¼ teaspoon of cayenne pepper to the maple glaze. The heat sneaks up on you and balances the sweetness beautifully. My brother-in-law, who loves spicy food, requests these every time I visit. Just be careful—a little cayenne goes a long way.
Cheesy Bacon Apple Bites: Before wrapping the apple cubes, cut a small cube of sharp cheddar cheese and press it into the center of the apple. The cheese melts as the bites bake, creating a gooey center. This version is a little messier but absolutely worth it. Use a firm cheese like cheddar or Gouda—soft cheeses will leak out during baking.
Honey Glaze Variation: Swap the maple syrup for honey. The flavor is lighter and floral, which pairs well with Granny Smith apples. Reduce the brown sugar to 1 teaspoon since honey is sweeter than maple syrup. I made this version for a brunch gathering, and it was a hit with the kids.
Air Fryer Method: If you have an air fryer, these bites cook beautifully in it. Preheat the air fryer to 375°F (190°C). Place the wrapped bites in a single layer in the basket, leaving space between each one. Cook for 8 minutes, brush with glaze, then cook for another 3-4 minutes. The air fryer makes the bacon extra crispy without drying out the apples. Just don’t overcrowd the basket—work in batches if needed.
Gluten-Free Option: This recipe is naturally gluten-free as written. Just make sure your bacon doesn’t contain any gluten-based additives. Most standard bacon brands are gluten-free, but it’s worth checking the label if you’re cooking for someone with celiac disease.
Serving & Storage Suggestions
These bites are best served warm, straight from the oven. The bacon is at its crispiest, and the apples are tender but not mushy. I like to arrange them on a wooden board or a simple white platter, sprinkled with the flaky salt. A small bowl of extra maple glaze on the side is always a nice touch for dipping.
For a complete meal, serve these alongside a simple green salad with a tangy vinaigrette. The acidity of the dressing cuts through the richness of the bacon and glaze. They also pair beautifully with roasted vegetables—think Brussels sprouts or asparagus. If you’re serving them as an appetizer, set them out with toothpicks and watch them disappear.
As for drinks, these bites love a crisp cider or a light beer. For the kids, apple juice or sparkling water with a lemon wedge works perfectly. I’ve also served them with mulled wine at holiday parties, and the combination is fantastic.
Storage: If you have leftovers (which is rare, but it happens), store them in an airtight container in the refrigerator for up to 3 days. The texture will change—the bacon softens and the apples release some moisture—but they’re still delicious. To reheat, place them on a baking sheet in a 350°F (175°C) oven for 5-7 minutes. This crisps the bacon back up without drying out the apples. Avoid the microwave—it makes the bacon rubbery and the apples mushy.
I’ve also frozen these successfully. Place the cooled bites on a baking sheet and freeze until solid, then transfer to a freezer bag. They’ll keep for up to 2 months. Reheat from frozen in a 375°F (190°C) oven for 10-12 minutes. The texture won’t be quite as good as fresh, but they’re still a solid option for last-minute snacks.
Nutritional Information & Benefits
Here’s the approximate nutritional breakdown for one serving (2 bites):
| Nutrient | Amount |
|---|---|
| Calories | 180 |
| Total Fat | 10g |
| Saturated Fat | 4g |
| Cholesterol | 25mg |
| Sodium | 380mg |
| Total Carbohydrates | 18g |
| Dietary Fiber | 2g |
| Sugars | 14g |
| Protein | 6g |
These numbers are estimates and will vary based on the specific brands you use. The apples provide a good source of fiber and vitamin C, while the bacon adds protein and a satisfying richness. The maple syrup and brown sugar contribute to the sugar content, but remember—these are meant to be an occasional treat, not an everyday snack.
If you’re watching your sodium intake, you can use low-sodium bacon or turkey bacon. The glaze can also be made with a sugar-free maple syrup alternative, though the texture won’t be as thick. For a lower-carb version, skip the brown sugar and use a sugar-free maple syrup—just know that the glaze won’t caramelize the same way.
Conclusion
These kid-approved bacon-wrapped apple bites with maple glaze are the kind of recipe that feels like a secret weapon. They’re simple enough to make on a Tuesday night but impressive enough to serve at a holiday party. The combination of sweet, salty, and sticky is practically irresistible, and the fact that they come together in under 30 minutes makes them a lifesaver for busy families.
I love this recipe because it reminds me that the best food doesn’t have to be complicated. It started with a kid’s simple question—why not just wrap apple in bacon?—and turned into something I make again and again. That’s the beauty of cooking, you know? Sometimes the most obvious ideas are the ones we overlook.
I’d love to hear how these turn out for you. Did you try a variation? Did your kids love them as much as Leo did? Drop a comment below and let me know. And if you made them for a party, tell me how fast they disappeared—I have a bet with myself that it’s under 10 minutes. Happy cooking, friends!
Frequently Asked Questions
Can I make these ahead of time?
You can prep the bites up to the point of baking. Wrap the apple cubes in bacon, secure with toothpicks, and store them in the refrigerator for up to 24 hours. When you’re ready to serve, bake as directed, adding the glaze during the last 5-7 minutes. The glaze should be made fresh for the best texture.
What if I don’t have maple syrup?
Honey works beautifully as a substitute. Use the same amount—¼ cup—and reduce the brown sugar to 1 teaspoon since honey is sweeter. You can also use agave nectar or a store-bought pancake syrup, though the flavor will be less complex. Just don’t use artificial sweeteners—they won’t caramelize properly.
Can I use a different type of apple?
Absolutely, but stick with firm varieties. Honeycrisp, Granny Smith, Fuji, and Pink Lady all work well. Avoid Red Delicious, McIntosh, or Gala—they’re too soft and will turn to mush during baking. If you only have soft apples, cut them into larger cubes (1.5 inches) to help them hold their shape better.
How do I prevent the toothpicks from burning?
Soak the toothpicks in water for at least 10 minutes before using them. This prevents them from catching fire in the oven. If you forget to soak them, you can use metal skewers cut to size, or simply skip the toothpicks and press the bacon ends into the apple cubes—they’ll stay in place as they cook.
Can I make these in an air fryer instead of an oven?
Yes! Preheat your air fryer to 375°F (190°C). Place the wrapped bites in a single layer in the basket, leaving space between each one. Cook for 8 minutes, brush with glaze, then cook for another 3-4 minutes until the bacon is crispy and the glaze is bubbly. Work in batches if needed to avoid overcrowding.
Pin This Recipe!
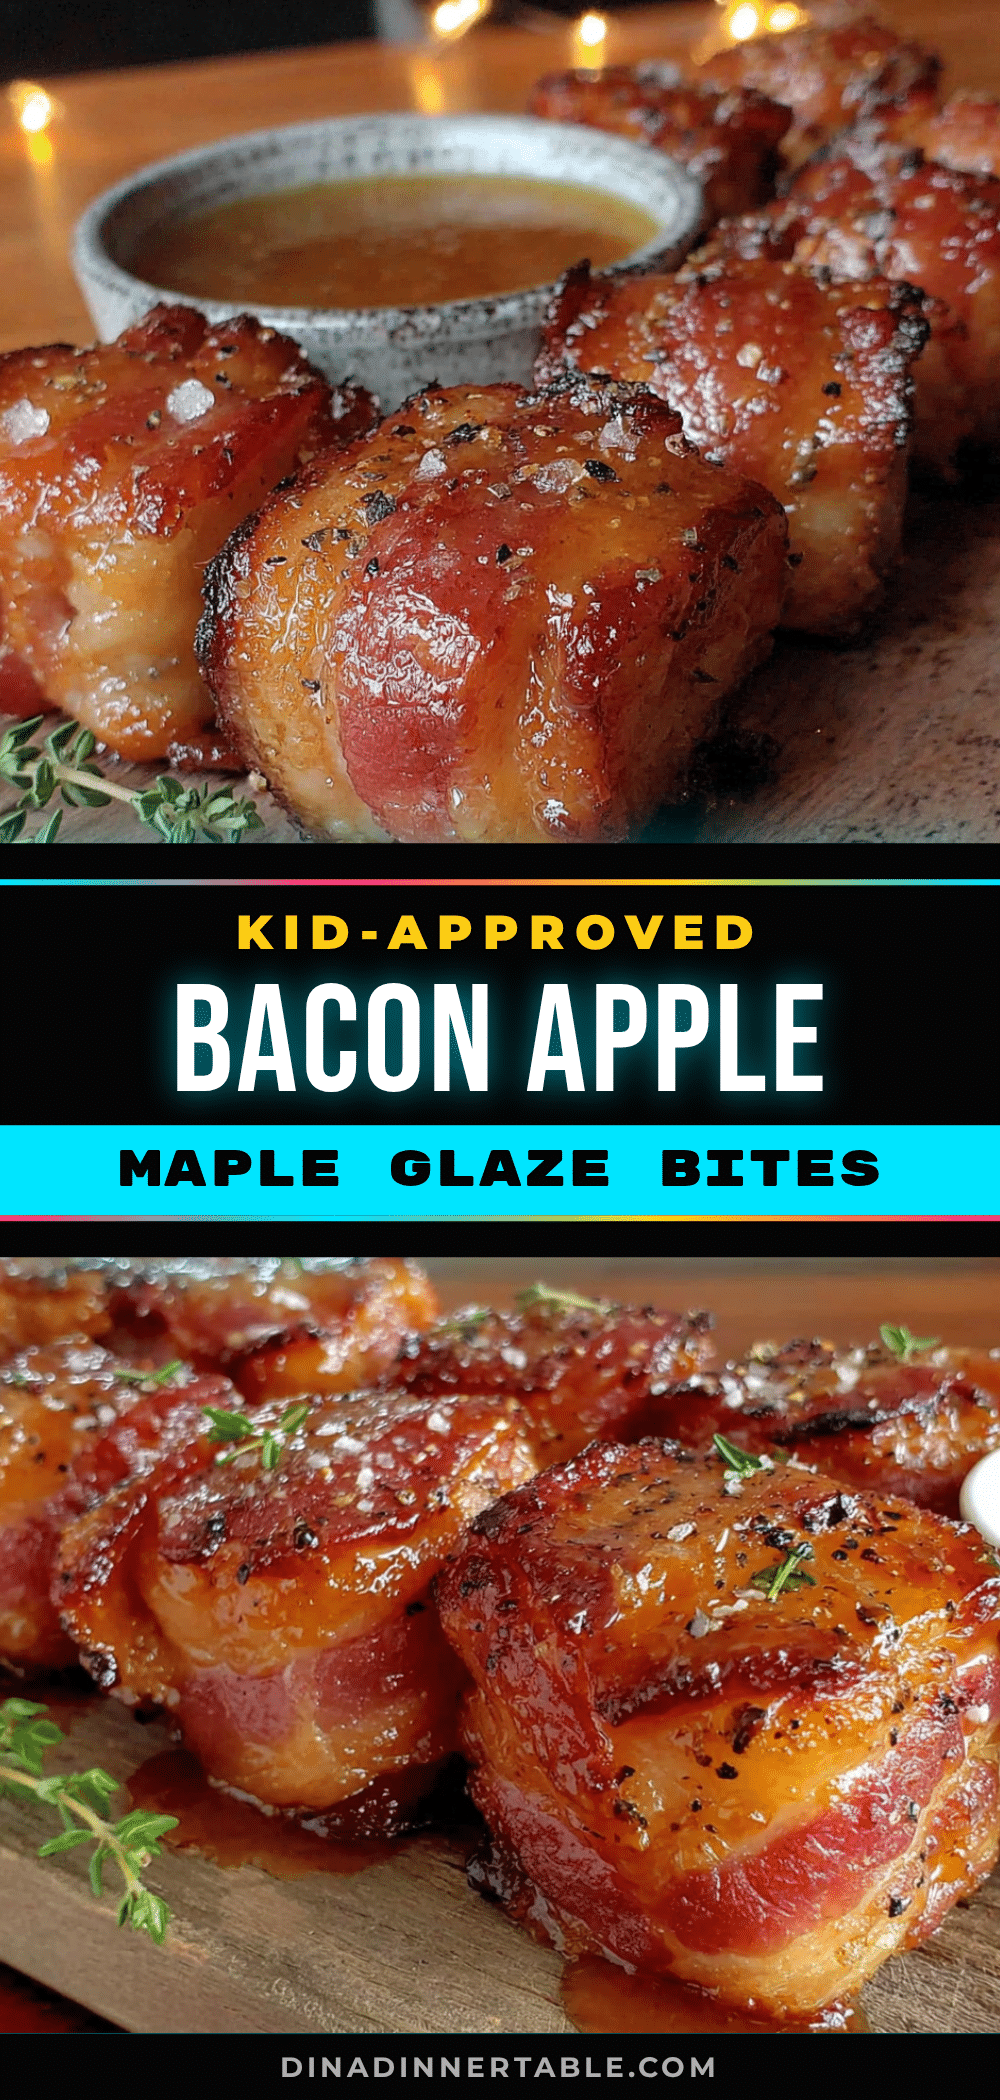
Kid-Approved Bacon-Wrapped Apple Bites with Easy Maple Glaze

These bacon-wrapped apple bites with a sticky maple glaze are the perfect sweet and salty appetizer. Quick to make with simple ingredients, they’re a crowd-pleaser that disappears fast.
- Prep Time: 10 minutes
- Cook Time: 15 minutes
- Total Time: 25 minutes
- Yield: 12 bites (6 servings of 2 bites each) 1x
- Category: Appetizer
- Cuisine: American
Ingredients
- 2 large firm apples (Honeycrisp or Granny Smith)
- 12 slices standard-cut bacon
- ¼ cup pure maple syrup
- 1 tablespoon unsalted butter
- 1 tablespoon packed brown sugar
- ½ teaspoon cinnamon
- ¼ teaspoon flaky sea salt
- 12 wooden toothpicks, soaked in water for 10 minutes
Instructions
- Preheat oven to 400°F (200°C). Line a baking sheet with parchment paper or foil. Place a wire rack on the sheet if available.
- Wash and core apples. Cut into 1-inch cubes (about 12 cubes total). Toss with lemon juice if desired to prevent browning.
- Partially cook bacon: place slices on a microwave-safe plate lined with paper towels. Microwave on high for 2-3 minutes until bacon is starting to render fat but still pliable. Alternatively, cook in a skillet over medium heat for 2 minutes per side.
- Cut each bacon slice in half crosswise to make 24 half-slices.
- Wrap each apple cube with a half-slice of bacon, overlapping ends. Secure with a soaked toothpick. Place on prepared baking sheet, spacing 1 inch apart.
- Bake for 10 minutes. If not using a wire rack, flip bites halfway through.
- While bites bake, make glaze: in a small saucepan, combine maple syrup, butter, brown sugar, and cinnamon. Heat over medium-low, stirring constantly, until butter melts and sugar dissolves (2-3 minutes). Do not boil. Remove from heat.
- After 10 minutes, remove sheet from oven. Brush each bite generously with maple glaze.
- Return to oven and bake for another 5-7 minutes, until glaze is bubbly and caramelized and bacon is crisp. Watch closely to prevent burning.
- Remove from oven and let cool on sheet for 2 minutes. Sprinkle with flaky sea salt while warm.
- Serve warm. Best eaten within 15 minutes of baking.
Notes
Don’t skip the partial bacon cook—it prevents the apples from turning mushy. Use standard-cut bacon, not thick-cut. Watch the bites closely after adding the glaze to avoid burning. The salt at the end is essential for balancing sweetness.
Nutrition
- Serving Size: 2 bites
- Calories: 180
- Sugar: 14
- Sodium: 380
- Fat: 10
- Saturated Fat: 4
- Carbohydrates: 18
- Fiber: 2
- Protein: 6
Keywords: bacon wrapped apple bites, maple glaze, easy appetizer, kid-friendly, sweet and salty, party snack


