I was standing in the community garden last October, staring at a pumpkin that looked more like a sad, lopsided balloon than anything you’d find on a Thanksgiving table. My neighbor, an older woman named Clara who grows enough squash to feed a small army, watched me trying to figure out how to haul it home without dropping it on my foot. She didn’t say anything at first. Then she just laughed, walked over, and handed me a kitchen knife she’d pulled from her apron pocket. “Cut it in half right now,” she said. “Trust me, it’s easier to carry.”
So there I was, in the middle of a garden path, splitting a pumpkin open with a borrowed knife while Clara talked about her grandmother’s approach to dessert. She told me that in her family, pumpkin was never just for pie. It was for little things, she said. Bite-sized things. Things you could eat with your fingers while standing in the kitchen, hiding from the chaos of a full house. I nodded along, honestly not sure where she was going with this. But when she described a mini cheesecake her grandmother used to make, using canned milk and a single block of cream cheese stretched across a whole batch, I felt something click. That was it. That was the recipe I didn’t know I needed.
I went home that afternoon with half a pumpkin in my bag and a new mission. I wanted to create something my kids would actually eat, something that wouldn’t make me wince at the grocery receipt, and something I could pull together on a Tuesday night without losing my mind. Let me tell you, these mini pumpkin cheesecake bites were born from that exact moment. They’re small enough for little hands, cheap enough for a tight week, and good enough that you’ll probably eat three before anyone notices. Maybe you’ve been there, standing in your kitchen wondering if you can make something special without making yourself crazy. I get it. This recipe stayed with me because it solved that problem.
Why You’ll Love This Recipe
I’ve tested this recipe more times than I care to admit, and let me just say, my family has been very willing taste-testers. There’s something about these little bites that makes everyone happy, from my picky five-year-old to my husband who claims he doesn’t like pumpkin desserts. Here’s why I keep coming back to them:
- Quick & Easy: From start to finish, these come together in about 30 minutes of active time. The oven does the rest. Perfect for those afternoons when you promised your kids a treat but forgot to plan ahead.
- Simple Ingredients: You probably have most of this stuff in your kitchen right now. One can of pumpkin puree, one block of cream cheese, some basic pantry staples. No fancy trips to specialty stores required.
- Perfect for Family Meals: These work for after-school snacks, weekend brunches, or even a low-key Thanksgiving dessert. They’re small enough that nobody feels obligated to finish a huge slice.
- Crowd-Pleaser: I’ve brought these to playdates, potlucks, and family dinners. Kids love the size, adults love the flavor, and everyone asks for the recipe.
- Unbelievably Delicious: The texture is what gets me every time. Creamy, slightly tangy cheesecake filling meets warm, spiced pumpkin, all sitting on a buttery crust that stays crisp. It’s comfort food in two bites.
What makes this recipe different from all the other pumpkin cheesecake recipes out there? It’s the ratio. I spent a good amount of time figuring out how to get the pumpkin and cheesecake flavors to balance without one overpowering the other. The secret is a little bit of sour cream in the filling, which keeps everything smooth and prevents that heavy, dense texture that some mini cheesecakes get. Plus, the crust isn’t just filler. It’s actually good, like real shortbread, because we’re using crushed graham crackers mixed with melted butter and a pinch of cinnamon. No shortcuts, just smart cooking.
This recipe is the kind that makes you close your eyes after the first bite. It’s comfort food reimagined, healthier than a full slice of cheesecake but with the same soul-soothing satisfaction. Perfect for impressing guests without stress, or turning a simple Tuesday into something memorable.
What Ingredients You Will Need
This recipe uses simple, wholesome ingredients that work together to create something special without requiring a trip to a gourmet grocery store. Most of these are pantry staples, which is exactly what I look for when I’m cooking for my family on a budget.
- For the Crust:
- 1 ½ cups graham cracker crumbs (about 12 full sheets, crushed finely)
- ¼ cup granulated sugar
- ½ teaspoon ground cinnamon
- 6 tablespoons unsalted butter, melted (I prefer Land O’Lakes for consistent results)
- For the Pumpkin Cheesecake Filling:
- 8 ounces cream cheese, softened to room temperature (Philadelphia brand works best for that silky texture)
- ½ cup granulated sugar
- 1 large egg, room temperature
- ½ cup pumpkin puree (not pumpkin pie filling, just pure pumpkin)
- ¼ cup sour cream (full-fat gives the best texture, but low-fat works in a pinch)
- 1 teaspoon vanilla extract
- ½ teaspoon ground cinnamon
- ¼ teaspoon ground nutmeg
- ¼ teaspoon ground ginger
- ⅛ teaspoon ground cloves
- Pinch of salt
- For the Topping (optional but recommended):
- ½ cup whipped cream or whipped topping
- Ground cinnamon for dusting
A few notes on ingredient selection. For the graham cracker crumbs, I’ve tried both store-bought crumbs and crushing my own, and honestly, homemade crumbs give a better texture. Just toss the crackers in a zip-top bag and crush them with a rolling pin. It takes two minutes and makes a noticeable difference. For the pumpkin puree, I always use Libby’s because it’s consistently thick and not watery. If you’re using a different brand, just check that it’s pure pumpkin and not pumpkin pie filling, which has added sugar and spices that will throw off the balance.
For substitutions, you can use dairy-free cream cheese and sour cream if needed, though the texture will be slightly less creamy. I’ve tried it with Tofutti brand and it worked surprisingly well. If you’re gluten-free, swap the graham crackers for gluten-free graham crackers or crushed gluten-free cookies. The rest of the recipe is naturally gluten-free.
Equipment Needed
You don’t need a fancy kitchen to make these mini cheesecake bites. Here’s what you’ll actually use:
- 12-cup mini muffin tin (standard size, not the tiny ones)
- Mixing bowls (one medium, one small)
- Hand mixer or stand mixer (a whisk works too, but your arm will get a workout)
- Measuring cups and spoons
- Rolling pin or food processor for crushing graham crackers
- Rubber spatula
- Cooling rack
If you don’t have a mini muffin tin, you can use a regular 12-cup muffin tin and just make slightly larger bites. The baking time will increase by about 5-7 minutes. I’ve also used silicone mini muffin pans, which work great because the cheesecakes pop right out without sticking. If you’re using a metal pan, just make sure to line the cups with paper liners or grease them well. I learned that lesson the hard way, trust me.
For budget-friendly options, check your local thrift store for mini muffin tins. I found mine for two dollars and it’s still going strong after five years. A food processor is nice for crushing graham crackers, but a zip-top bag and a rolling pin work just as well and save you counter space.
Preparation Method
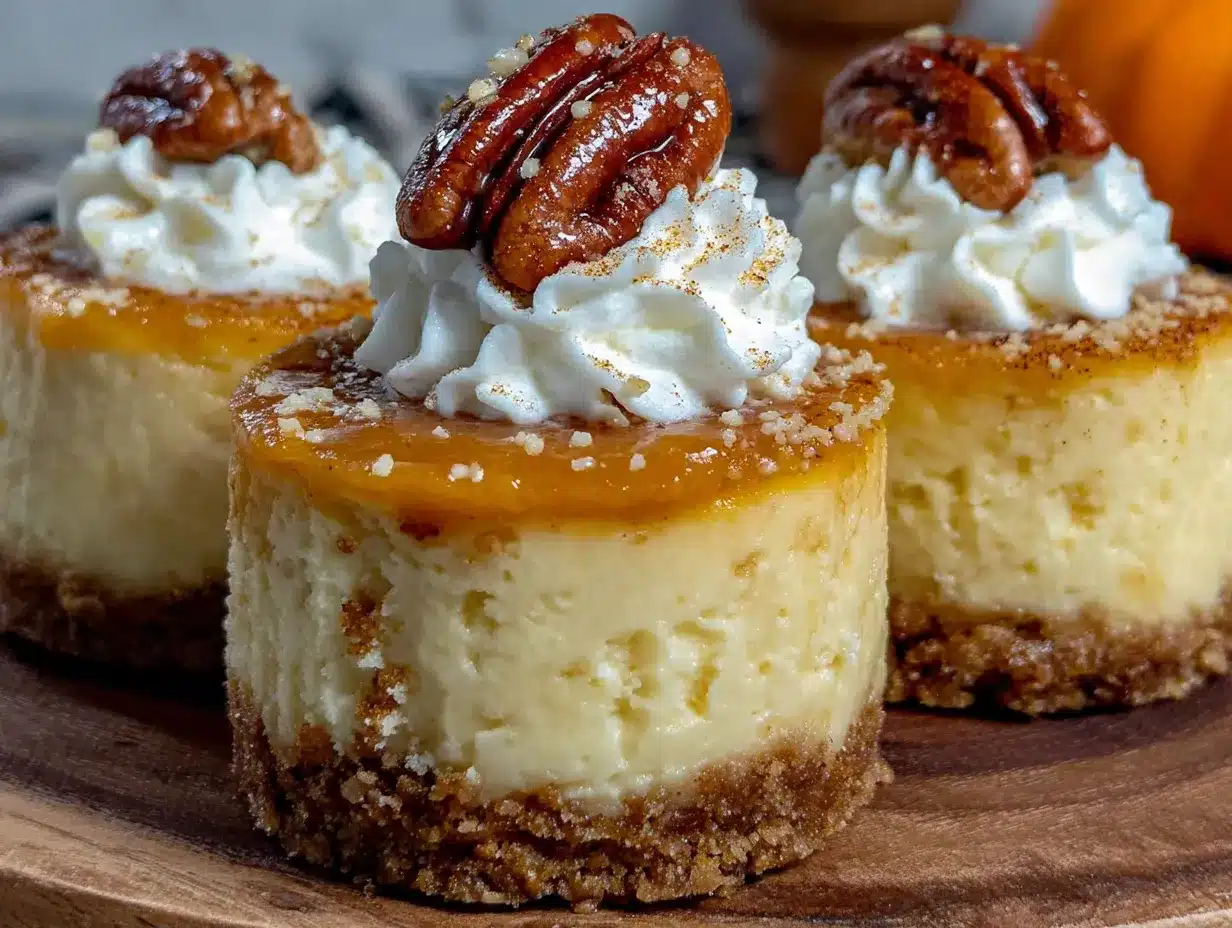
Let me walk you through this step by step. I’ve made these so many times that I could do it in my sleep, but I’ll share all the little tricks I’ve picked up along the way.
- Preheat your oven to 350°F (175°C). Line your mini muffin tin with paper liners or grease each cup well. I prefer paper liners because they make cleanup easier and the cheesecakes come out looking neat.
- Make the crust. In a medium bowl, combine the graham cracker crumbs, ¼ cup sugar, and ½ teaspoon cinnamon. Pour in the melted butter and stir with a fork until everything is evenly moistened. It should look like wet sand. If it’s too dry, add another tablespoon of melted butter. If it’s too wet, add a tablespoon more crumbs.
- Press the crust into the muffin cups. Drop about 1 tablespoon of the crust mixture into each cup. Use the bottom of a small glass or a measuring spoon to press it down firmly. You want it compact so it holds together after baking. Don’t skip this pressing step, it really matters.
- Bake the crusts for 5 minutes. This is called a pre-bake, and it keeps the crust from getting soggy when you add the filling. Let them cool on the counter while you make the filling.
- Make the cheesecake filling. In a medium bowl, beat the softened cream cheese with ½ cup sugar until smooth and creamy. This takes about 2 minutes with a hand mixer. Scrape down the sides of the bowl with your spatula. Add the egg, pumpkin puree, sour cream, and vanilla extract. Beat until just combined, don’t overmix or the filling will get too airy.
- Add the spices. Sprinkle in the cinnamon, nutmeg, ginger, cloves, and salt. Beat on low speed until everything is evenly distributed. Taste the filling if you want, just make sure you don’t eat it all before it goes into the oven.
- Fill the cups. Spoon about 1 tablespoon of the cheesecake filling into each pre-baked crust. The cups should be almost full but not overflowing. A cookie scoop works great for this if you have one.
- Bake for 15-18 minutes. The edges should look set and the centers should still jiggle slightly when you gently shake the pan. Don’t overbake them, or they’ll be dry. I start checking at 15 minutes.
- Cool completely. Let the pan cool on a wire rack for 15 minutes, then carefully remove the cheesecakes from the pan and let them cool completely on the rack. This is important, because if you try to move them while they’re hot, they’ll fall apart.
- Chill for at least 2 hours. Transfer the cooled cheesecake bites to the refrigerator and let them chill for at least 2 hours. Overnight is even better. The texture improves as they set.
A few things I’ve learned the hard way: Make sure your cream cheese is truly at room temperature. Cold cream cheese creates lumps that won’t go away no matter how much you beat it. Also, don’t skip the sour cream. It sounds weird, but it keeps the cheesecake from cracking and gives it that smooth, velvety texture. And if you’re wondering why I use paper liners, it’s because mini cheesecakes are fragile and the liners help them hold their shape while they set.
Cooking Tips & Techniques
I’ve messed up this recipe more times than I’d like to admit, so let me save you the trouble. Here are the things I wish someone had told me before I started making mini cheesecakes.
Don’t overmix the filling. I know it’s tempting to keep beating until everything is perfectly smooth, but overmixing incorporates too much air into the batter. That extra air expands in the oven and then collapses, leaving you with sunken, cracked cheesecakes. Mix just until the ingredients come together, then stop. Seriously, put the mixer down.
Room temperature ingredients matter. I’ve tried making these with cold cream cheese straight from the fridge, and the filling was lumpy no matter how long I beat it. Take the cream cheese out about 30 minutes before you start. The egg should also be at room temperature. If you forgot to plan ahead, place the egg in a bowl of warm water for 5 minutes.
Watch the baking time closely. Every oven is different, and mini cheesecakes can go from perfectly set to overbaked in about two minutes. The first time I made these, I walked away to fold laundry and came back to dry, cracked tops. Now I set a timer for 14 minutes and check every minute after that. The centers should jiggle like Jell-O when you shake the pan.
Let them cool gradually. After baking, turn off the oven and crack the door open for 5 minutes before taking the pan out. This gradual cooling helps prevent the tops from cracking. I know it sounds fussy, but it works.
Use a water bath if you’re feeling fancy. Place the mini muffin tin inside a larger baking pan and pour hot water into the larger pan until it comes about halfway up the sides of the muffin tin. The steam keeps the cheesecakes moist and prevents cracking. I don’t always do this, but when I’m making these for a special occasion, it’s worth the extra step.
Variations & Adaptations
One of the best things about this recipe is how easy it is to change it up. I’ve tried several variations over the years, and here are my favorites:
- Gluten-Free Version: Swap the graham crackers for gluten-free graham crackers or crushed gluten-free vanilla cookies. Everything else in the recipe is naturally gluten-free, so this is an easy switch. I’ve used Schär brand graham crackers and they worked perfectly.
- Dairy-Free Version: Use dairy-free cream cheese and dairy-free sour cream. I’ve had good results with Kite Hill cream cheese and Tofutti sour cream. The texture is slightly less creamy, but the flavor is still fantastic. Use a dairy-free butter substitute for the crust.
- Pumpkin Spice Lover’s Version: Add an extra ½ teaspoon of pumpkin pie spice to the filling and sprinkle a little extra on top before baking. This is for those of us who believe there’s no such thing as too much pumpkin spice.
- Chocolate Crust Version: Replace the graham crackers with crushed chocolate wafer cookies or Oreos (filling removed). The chocolate pairs beautifully with the pumpkin and cream cheese. I made these for Halloween one year and they disappeared in minutes.
- Mini Pumpkin Cheesecake Bites with Caramel: Drizzle store-bought caramel sauce over the top after they’ve chilled. It adds a sweet, buttery finish that feels extra special without extra work.
I also tried a version using a gluten-free oat flour crust once, and while it was good, it didn’t hold together as well as the graham cracker version. Stick with the original crust for the best texture, unless you’re specifically avoiding gluten.
Serving & Storage Suggestions
These mini cheesecake bites are best served cold, straight from the refrigerator. I like to take them out about 10 minutes before serving so they soften slightly, but that’s personal preference. For presentation, arrange them on a platter and top each one with a small dollop of whipped cream and a light dusting of cinnamon. It looks impressive but takes about 30 seconds.
They pair beautifully with a cup of hot coffee or a glass of cold milk. If you’re serving them for a fall gathering, a mug of spiced apple cider is the perfect companion. For a fun twist, serve them alongside a bowl of warm caramel sauce for dipping. Kids especially love this.
For storage, keep the cheesecake bites in an airtight container in the refrigerator. They’ll stay fresh for up to 5 days, though honestly, they never last that long in my house. The flavors actually develop and deepen over the first 24 hours, so they taste even better on day two. If you’re making them for a party, I recommend making them the day before.
These also freeze beautifully. Place the cooled, chilled cheesecake bites in a single layer on a baking sheet and freeze for 1 hour. Then transfer them to a freezer-safe container or zip-top bag, separating layers with wax paper. They’ll keep for up to 3 months. To thaw, transfer them to the refrigerator overnight. Don’t try to thaw them at room temperature, or they’ll get soggy.
For reheating, I actually prefer them cold, but if you want a warm dessert, pop them in a 300°F oven for about 5 minutes. The crust will crisp up slightly and the filling will become soft and almost pudding-like. It’s a different experience, but a good one.
Nutritional Information & Benefits
Here’s the approximate nutritional breakdown for one mini cheesecake bite, based on a recipe that yields 12 bites:
| Nutrient | Amount per serving |
|---|---|
| Calories | 185 |
| Total Fat | 11g |
| Saturated Fat | 6g |
| Cholesterol | 45mg |
| Sodium | 150mg |
| Total Carbohydrates | 20g |
| Dietary Fiber | 1g |
| Sugars | 14g |
| Protein | 3g |
Pumpkin is packed with vitamin A, which is great for eye health and immune function. It’s also a good source of fiber, which helps keep everyone full and satisfied. The cream cheese adds calcium and protein, making these a more balanced treat than your average cookie or brownie. Plus, because they’re mini, portion control is built right in. I love that my kids can enjoy a sweet treat without overdoing it on sugar or calories.
If you’re watching your sugar intake, you can reduce the sugar in the filling to ⅓ cup without sacrificing too much sweetness. The pumpkin and spices provide plenty of flavor on their own. For a lower-fat option, use reduced-fat cream cheese and light sour cream. The texture will be slightly less creamy, but still delicious.
These mini cheesecake bites are naturally vegetarian and can be made gluten-free and dairy-free with the substitutions I mentioned earlier. They’re not suitable for a vegan diet unless you use vegan cream cheese and an egg substitute, which I haven’t tested personally.
Conclusion
I’ve made these mini pumpkin cheesecake bites for birthday parties, Thanksgiving dinners, lazy Sunday afternoons, and everything in between. Every single time, someone asks for the recipe. That’s how I know this one is a keeper. It’s simple enough for a weeknight, special enough for a celebration, and budget-friendly enough that you don’t have to feel guilty about making them just because.
What I love most about this recipe is how adaptable it is. You can make it your own by switching up the crust, adding a topping, or experimenting with different spice combinations. Don’t be afraid to play around with it. Cooking should be fun, not stressful. If you forget an ingredient or burn a batch, just laugh it off and try again. That’s what I do.
I’d love to hear how these turn out for you. Did your kids love them? Did you try a variation that worked especially well? Drop a comment below and let me know. And if you’re looking for more family-friendly dessert ideas, check out my easy pumpkin desserts for kids or my no-bake cheesecake recipes for even more inspiration. Happy baking, friends. You’ve got this.
Frequently Asked Questions
Can I use canned pumpkin pie filling instead of pumpkin puree?
I wouldn’t recommend it. Pumpkin pie filling has added sugar and spices, which will throw off the balance of the recipe. Stick with pure pumpkin puree for the best results. If you only have pumpkin pie filling on hand, reduce the sugar in the recipe by half and skip the added spices, but the texture might still be off.
Why did my mini cheesecakes crack on top?
Cracks usually happen from overbaking or sudden temperature changes. Make sure you take the cheesecakes out of the oven when the centers are still slightly jiggly. Also, let them cool gradually by turning off the oven and cracking the door open for a few minutes before removing them. A water bath can also help prevent cracking.
Can I make these ahead of time for a party?
Absolutely. In fact, I recommend it. These mini cheesecake bites taste even better the next day after the flavors have had time to meld. Make them up to 2 days in advance and keep them refrigerated in an airtight container. Add the whipped cream topping just before serving.
How do I get the cheesecakes out of the mini muffin tin without breaking them?
Paper liners are your best friend here. If you didn’t use liners, let the cheesecakes cool completely in the pan, then run a thin knife around the edges before gently lifting them out. You can also place the pan in the freezer for 10 minutes to firm them up, which makes them easier to remove.
Can I double this recipe?
Yes, this recipe doubles beautifully. Just make sure you have two mini muffin tins or bake in batches. The baking time stays the same. If you’re baking in batches, let the batter sit at room temperature while the first batch bakes. Don’t refrigerate it, or the cream cheese will firm up and become difficult to work with.
Pin This Recipe!
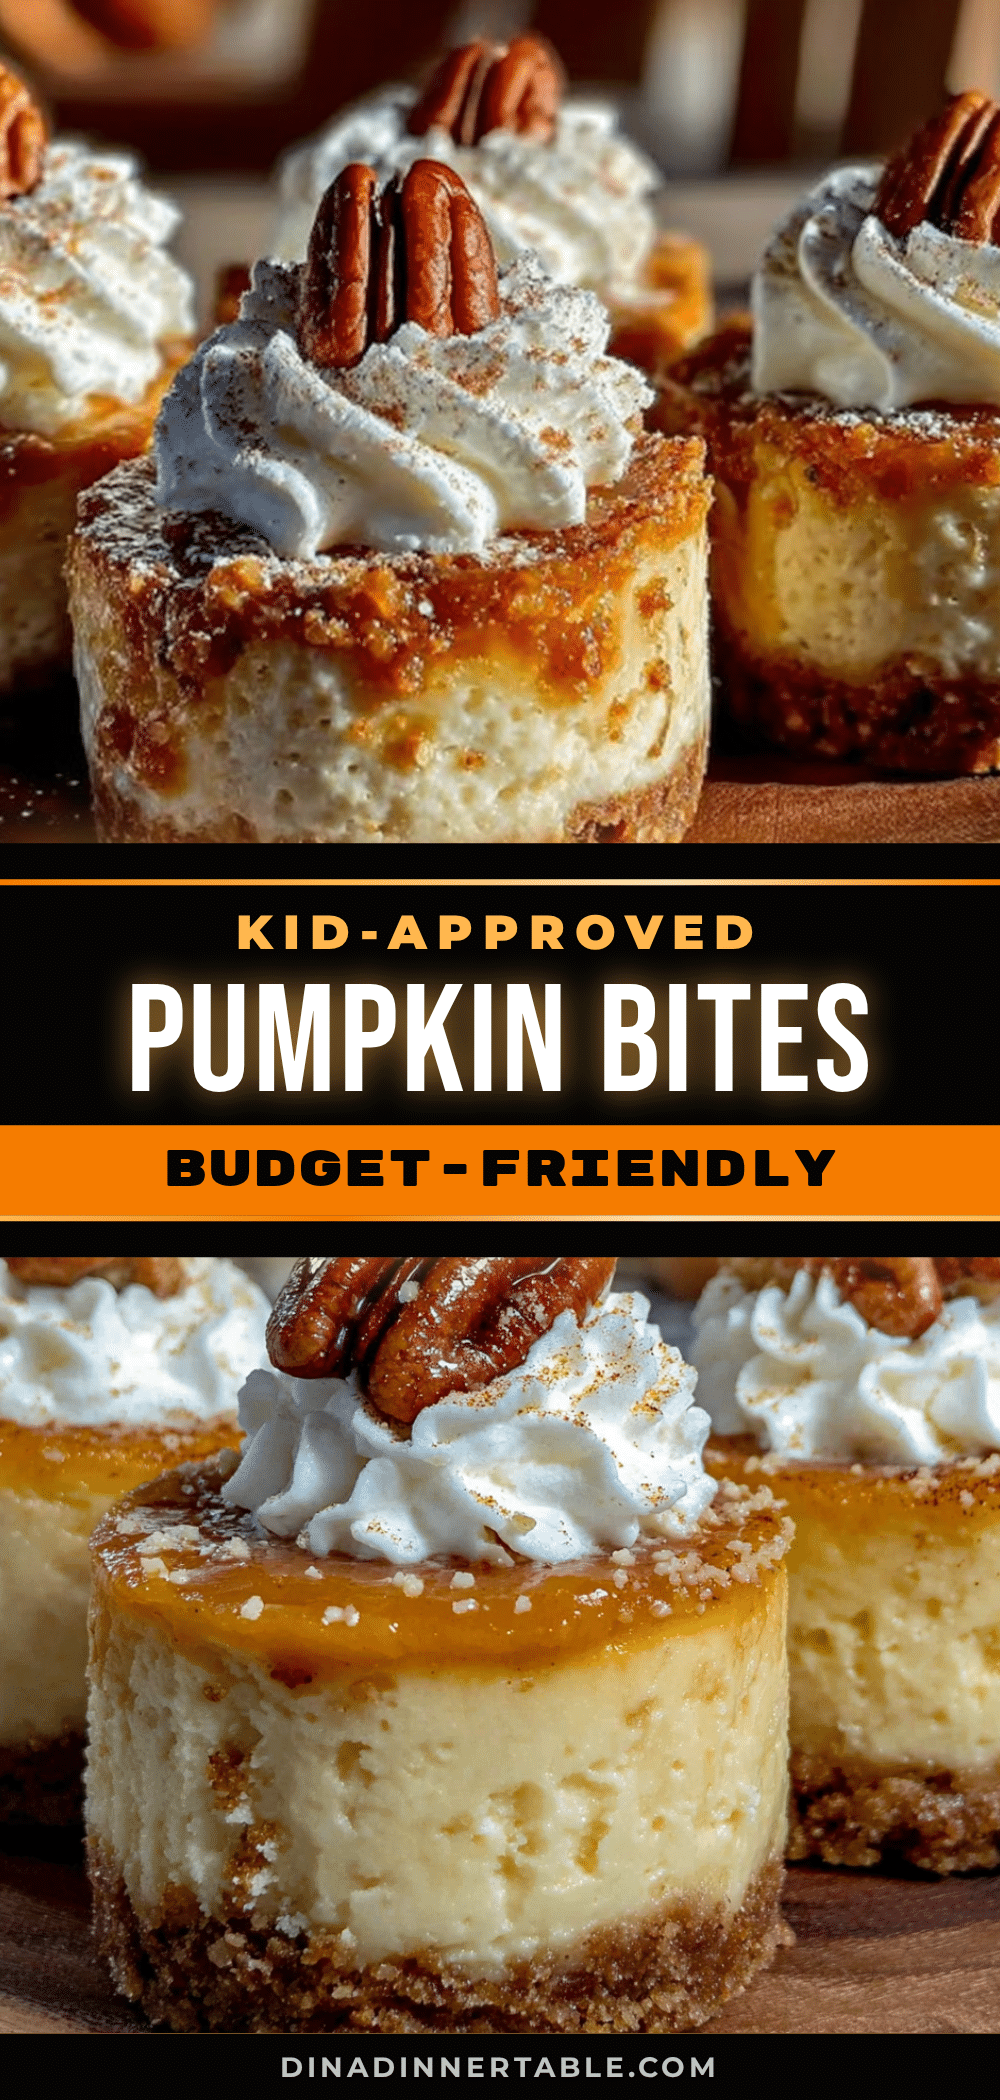
Kid-Approved Mini Pumpkin Cheesecake Bites (Best Easy Recipe)
These mini pumpkin cheesecake bites are small enough for little hands, cheap enough for a tight week, and good enough that you’ll probably eat three before anyone notices. They’re creamy, slightly tangy, and perfectly spiced, all sitting on a buttery graham cracker crust.
- Prep Time: 30 minutes
- Cook Time: 18 minutes
- Total Time: 2 hours 48 minutes (includes chilling time)
- Yield: 12 servings 1x
- Category: Dessert
- Cuisine: American
Ingredients
- 1 ½ cups graham cracker crumbs (about 12 full sheets, crushed finely)
- ¼ cup granulated sugar
- ½ teaspoon ground cinnamon
- 6 tablespoons unsalted butter, melted
- 8 ounces cream cheese, softened to room temperature
- ½ cup granulated sugar
- 1 large egg, room temperature
- ½ cup pumpkin puree (not pumpkin pie filling)
- ¼ cup sour cream (full-fat recommended)
- 1 teaspoon vanilla extract
- ½ teaspoon ground cinnamon
- ¼ teaspoon ground nutmeg
- ¼ teaspoon ground ginger
- ⅛ teaspoon ground cloves
- Pinch of salt
- ½ cup whipped cream or whipped topping (optional)
- Ground cinnamon for dusting (optional)
Instructions
- Preheat your oven to 350°F (175°C). Line a 12-cup mini muffin tin with paper liners or grease each cup well.
- Make the crust: In a medium bowl, combine graham cracker crumbs, ¼ cup sugar, and ½ teaspoon cinnamon. Pour in melted butter and stir with a fork until evenly moistened (like wet sand).
- Press about 1 tablespoon of crust mixture into each muffin cup. Use the bottom of a small glass or measuring spoon to press it down firmly.
- Bake the crusts for 5 minutes (pre-bake). Let them cool on the counter while you make the filling.
- Make the cheesecake filling: In a medium bowl, beat softened cream cheese with ½ cup sugar until smooth and creamy (about 2 minutes with a hand mixer). Scrape down sides.
- Add egg, pumpkin puree, sour cream, and vanilla extract. Beat until just combined—do not overmix.
- Sprinkle in cinnamon, nutmeg, ginger, cloves, and salt. Beat on low speed until evenly distributed.
- Spoon about 1 tablespoon of cheesecake filling into each pre-baked crust. Cups should be almost full but not overflowing.
- Bake for 15-18 minutes. Edges should look set, centers should still jiggle slightly when shaken. Start checking at 15 minutes.
- Cool completely: Let pan cool on a wire rack for 15 minutes, then carefully remove cheesecakes from pan and cool completely on rack.
- Chill for at least 2 hours (overnight is better) in the refrigerator. Texture improves as they set.
- Optional: Top with whipped cream and a dusting of cinnamon before serving.
Notes
Make sure cream cheese is at room temperature to avoid lumps. Don’t overmix the filling to prevent cracking. For best texture, chill overnight. Can be frozen for up to 3 months. For gluten-free, use gluten-free graham crackers. For dairy-free, use dairy-free cream cheese and sour cream.
Nutrition
- Serving Size: 1 mini cheesecake bi
- Calories: 185
- Sugar: 14
- Sodium: 150
- Fat: 11
- Saturated Fat: 6
- Carbohydrates: 20
- Fiber: 1
- Protein: 3
Keywords: mini pumpkin cheesecake bites, pumpkin cheesecake, mini cheesecake, pumpkin dessert, fall dessert, kid-friendly dessert, easy cheesecake recipe