My coworker Priya watched me stare at a sad veggie platter at the office Halloween party two years ago. She didn’t say anything at first. Then she reached into her bag and pulled out a small container of something that looked way too good for a plastic Tupperware. “Try this,” she said, pushing it toward me. “It’s my mom’s taco dip, but I messed with it.”
That first bite was honestly a revelation. It had all the creamy, tangy, spicy goodness of a classic taco dip, but it didn’t leave me feeling like I needed a nap afterward. Priya laughed and told me she’d swapped out half the sour cream for Greek yogurt and used a lighter cream cheese. “My mom would kill me if she knew,” she whispered. I asked her for the recipe right there, standing over the break room table with a broken tortilla chip in my hand.
I’ve made this dip so many times since then, and every time, I tweak it just a little more. The spider web design came about because I wanted something fun for my own Halloween party, and honestly, I was just doodling with a squeeze bottle of sour cream. It looked so good I actually squeaked. Now, this Lightened-Up Spooky Spider Web Taco Dip is my go-to for any fall gathering. It’s the kind of recipe that makes you look like you tried way harder than you actually did, and isn’t that the best kind of recipe?
Maybe you’ve been there—stuck between wanting to eat something indulgent and not wanting to feel terrible afterward. This dip is for you. It’s for the person who wants to bring a showstopper to the party but still wants to feel good about what they’re eating. Let me tell you, it works. I’ve brought it to three different events this fall alone, and every single time, someone asks for the recipe. It’s become my signature thing, and I owe it all to Priya and her rebellious yogurt swap.
Why You’ll Love This Recipe
This isn’t just another taco dip. I’ve tested this version more times than I can count, tweaking the ratios until it hit that perfect balance between creamy, tangy, and fresh. Here’s why it stands out:
- Quick & Easy: Comes together in under 15 minutes with zero cooking required. Perfect for last-minute party invites or when you just need a satisfying snack.
- Simple Ingredients: Everything you need is probably in your fridge or pantry right now. No weird specialty items or expensive gourmet cheeses.
- Perfect for Halloween & Fall Gatherings: The spider web design makes it a natural fit for spooky season, but honestly, it works for game days, potlucks, or any casual get-together.
- Crowd-Pleaser: I’ve watched people who swear they “don’t like healthy food” go back for thirds. It’s that good.
- Unbelievably Delicious: The texture is ultra-creamy, the seasoning is perfectly balanced, and the fresh toppings add that satisfying crunch. It’s comfort food you can feel good about.
What makes this different from every other taco dip recipe out there? It’s the ratio of Greek yogurt to sour cream, plus a sneaky little trick with the cream cheese that keeps everything light without sacrificing richness. I’ve had nutritionist friends look over the ingredient list and give it their stamp of approval. It’s family-approved, party-approved, and honestly, it’s the dip I make when I want to impress people without stressing myself out.
This recipe isn’t just good—it’s the kind that makes you close your eyes after the first bite. It’s comfort food reimagined: healthier, faster, but with the same soul-soothing satisfaction. Perfect for impressing guests without stress, or turning a simple snack into something memorable.
What Ingredients You Will Need
This recipe uses simple, wholesome ingredients to deliver that bold, creamy flavor without the heavy feeling. Most of these are pantry staples you probably already have, and the swaps are easy to make if you need them.
For the Creamy Base
- 8 oz reduced-fat cream cheese, softened (I prefer Philadelphia for the smoothest texture, but any brand works)
- 1 cup plain Greek yogurt (I use 2% Fage—it’s thick enough to mimic sour cream without being watery)
- 1/2 cup light sour cream (adds that classic tang without all the fat)
- 1 packet taco seasoning (or 3 tablespoons homemade blend—I’ll share my mix below)
For the Layers & Toppings

- 1 can (15 oz) black beans, drained and rinsed (rinsing is key—it reduces the sodium and prevents that metallic can taste)
- 1 cup salsa (use your favorite—I like a medium-heat chunky salsa for texture)
- 1 cup shredded lettuce (iceberg gives the best crunch, but romaine works too)
- 1 cup cherry tomatoes, diced (look for firm, bright red ones for the best flavor)
- 1/2 cup shredded reduced-fat cheddar cheese (sharp cheddar gives more flavor with less cheese)
- 1/4 cup sliced black olives (optional, but I love the briny pop they add)
- 2 green onions, sliced (for that fresh, mild onion kick)
For the Spider Web Design
- 1/4 cup light sour cream (for the web drizzles)
- 1 small plastic squeeze bottle (or a ziplock bag with the tip snipped off)
- 1 small plastic spider ring (for garnish—completely optional but so fun)
Ingredient Substitution Notes: If you’re dairy-sensitive, use dairy-free cream cheese and yogurt alternatives. I’ve tried Kite Hill’s plain unsweetened yogurt with good results. For a gluten-free option, just check your taco seasoning label—most are gluten-free, but some brands add flour. You can also swap the black beans for pinto beans or refried beans if you prefer a different texture.
I recommend grabbing taco seasoning from a brand like Simply Organic or making your own. My homemade blend is just chili powder, cumin, garlic powder, onion powder, paprika, oregano, salt, and pepper. It takes two minutes and tastes way fresher than the packet stuff.
Equipment Needed
You don’t need anything fancy for this recipe, which is part of why I love it. Here’s what you’ll need:
- A 9-inch pie dish or round serving platter—Something with a slight lip works best to hold all those layers. I use a glass pie dish because I like seeing the layers through the sides.
- A hand mixer or stand mixer—You can mix the base by hand if your cream cheese is really soft, but a mixer makes it silky smooth in under a minute.
- A small squeeze bottle—For the spider web design. If you don’t have one, a ziplock bag with a tiny corner snipped off works perfectly. I learned that the hard way after trying to use a spoon and making a mess.
- A rubber spatula—For scraping every last bit of that creamy base out of the bowl. Waste not, want not.
- A sharp knife and cutting board—For dicing tomatoes and slicing green onions. A dull knife will just squish those cherry tomatoes everywhere.
Budget-friendly tip: You don’t need a fancy squeeze bottle. I bought a pack of six at the dollar store, and they’ve lasted me years. Just wash them out well after each use.
Preparation Method
This dip comes together so fast, you’ll barely believe it. Here’s exactly how to do it:
- Soften the cream cheese: Take your 8 oz of reduced-fat cream cheese out of the fridge about 30 minutes before you start. If you forgot (I do this all the time), microwave it in 10-second bursts until it’s soft but not melted. You want it to give when you press it, not turn into soup.
- Make the creamy base: In a medium mixing bowl, combine the softened cream cheese, 1 cup Greek yogurt, and 1/2 cup light sour cream. Beat with a hand mixer on medium speed until completely smooth and fluffy—about 1 to 2 minutes. Scrape down the sides with a rubber spatula halfway through. It should look like thick, luscious frosting.
- Add the taco seasoning: Sprinkle in the entire packet (or 3 tablespoons of your homemade blend). Beat again on low speed until fully incorporated. Taste it—yes, I know it’s raw, but trust me. It should be well-seasoned and a little tangy. If it tastes flat, add a pinch more salt or another dash of chili powder.
- Layer the beans: Spread the drained and rinsed black beans evenly across the bottom of your pie dish. Press them down gently with the back of a spoon so they form an even layer. This gives the dip a nice sturdy base that won’t slide around when you scoop.
- Spread the creamy layer: Dollop the cream cheese mixture over the beans, then spread it gently with a spatula to cover the entire surface. Don’t press too hard—you want to keep the bean layer intact. Smooth the top as evenly as you can.
- Add the salsa: Spoon the salsa over the creamy layer and spread it gently. Leave about a 1/2-inch border around the edge so you can see the creamy layer peeking through. This makes the final presentation look more intentional and pretty.
- Top with cheese and veggies: Sprinkle the shredded cheddar cheese evenly over the salsa. Then add the shredded lettuce, diced tomatoes, sliced olives (if using), and green onions. Don’t pile everything in the center—distribute it evenly so every bite has a little of everything.
- Create the spider web: Fill your squeeze bottle with the 1/4 cup light sour cream. Starting from the center of the dip, squeeze out a small circle. Then squeeze a larger circle around it, and a third circle around that one. You should have three concentric circles. Take a toothpick or the tip of a knife and drag it from the center outward through all three circles. Repeat this 6 to 8 times around the dip, spacing the lines evenly. You’ll see the web pattern appear instantly. It’s honestly magic.
- Place the spider: Gently press the plastic spider ring onto the center of the web. If you don’t have a spider ring, you can use a whole black olive with a little sour cream “web” trailing off it. I’ve done both, and the kids always love the spider ring.
- Chill before serving: Cover the dip loosely with plastic wrap and refrigerate for at least 30 minutes before serving. This helps the flavors meld together and makes the dip easier to scoop without everything sliding around. You can make it up to 24 hours ahead—just add the lettuce, tomatoes, and green onions right before serving so they stay crisp.
Sensory Cue: When you drag the toothpick through the sour cream circles, you should feel a slight resistance as it moves through the thicker cream cheese layer underneath. The lines should stay clean and defined. If they blur together, your sour cream was too thin—next time, let it sit out for 5 minutes to thicken up slightly.
Cooking Tips & Techniques
I’ve made this dip so many times that I’ve learned a few things the hard way. Here are my best tips for perfect results every time:
Temperature matters: Make sure your cream cheese is truly softened. Cold cream cheese will leave lumps in your base, and nobody wants a lumpy dip. I’ve made that mistake exactly once, and it took forever to get the lumps out. Now I always set it out ahead of time, or I microwave it in 10-second bursts, checking after each one.
Don’t overmix the base: Once the seasoning is incorporated, stop mixing. Overmixing can make the Greek yogurt separate and turn watery. You want it smooth, not aerated. Trust me on this—I once got distracted and overbeat it, and the texture was weirdly fluffy and thin at the same time. Not great.
Layer with intention: The order of layers matters more than you think. Beans on the bottom create a sturdy base. The creamy layer acts as a barrier so the salsa doesn’t make everything soggy. Cheese on top of the salsa helps it stick. I learned this after making a version where the salsa was on the bottom, and it turned into a soupy mess within an hour.
Make the web pattern ahead: You can do the spider web design up to 4 hours before serving. Just cover it loosely and keep it chilled. The sour cream lines will hold their shape beautifully. I’ve even done it the night before for a party, and it still looked perfect.
Timing tip: If you’re bringing this to a party, assemble everything except the lettuce, tomatoes, and green onions at home. Transport it carefully, then add those fresh toppings at the destination. This keeps the veggies from getting soggy and the lettuce from wilting.
Consistency trick: If your dip seems too thick after mixing, add a tablespoon of milk or water and beat again. If it seems too thin, add a little more cream cheese. The perfect consistency should be thick enough to hold its shape when scooped but soft enough to spread easily.
Variations & Adaptations
This recipe is endlessly adaptable. Here are some of my favorite ways to change it up:
Dietary Variations
- Vegan version: Use dairy-free cream cheese, plain coconut yogurt, and dairy-free sour cream. I’ve tried this with Kite Hill products, and it works surprisingly well. The texture is slightly less thick, but the flavor is still great.
- Gluten-free: This recipe is naturally gluten-free if you use a gluten-free taco seasoning. Most major brands are fine, but always double-check the label.
- Lower fat: Use nonfat Greek yogurt and fat-free cream cheese. The texture will be a little less creamy, but it still tastes fantastic. I’ve done this for a health-conscious friend’s party, and nobody noticed the difference.
Flavor Twists
- Spicy version: Add a diced jalapeño to the topping layer, or mix a teaspoon of chipotle powder into the creamy base. I love the smoky heat this adds.
- Mexican street corn style: Add a layer of corn (fresh or frozen and thawed) between the beans and creamy layer, and top with a sprinkle of cotija cheese and chili powder. It’s like elote meets taco dip.
- Breakfast version: Skip the taco seasoning and add crumbled cooked turkey sausage and scrambled eggs on top. Serve with tortilla chips for a fun brunch twist.
Seasonal Adaptations
- Summer: Use fresh corn cut off the cob and diced heirloom tomatoes. The sweetness of summer produce makes this dip sing.
- Fall: Add a layer of roasted butternut squash puree mixed with a little cumin. It sounds weird, but it’s incredible with the creamy base.
- Winter: Use fire-roasted tomatoes in the salsa layer for a deeper, smokier flavor that cuts through the cold weather.
I once made a version with leftover taco meat from dinner, and it was amazing. Just layer it on top of the beans before adding the creamy layer. It adds protein and makes it even more satisfying.
Serving & Storage Suggestions
This dip is best served cold or at room temperature, straight from the fridge. I like to take it out about 15 minutes before serving to take the chill off—it lets the flavors open up a bit more.
What to serve with it: Tortilla chips are the classic choice, but I also love it with cucumber rounds, bell pepper strips, or jicama sticks for a lower-carb option. For a party, set out a mix of chips and veggies so everyone can choose. I’ve also used it as a topping for taco salads or spread it on wraps for lunch the next day.
Presentation tip: Put the dip on a nice platter or in a clear glass dish so people can see the layers. The spider web design is the star of the show, so don’t hide it. I sometimes add a few extra plastic spiders around the platter for fun.
Storage: Leftover dip keeps in an airtight container in the fridge for up to 3 days. The lettuce and tomatoes will get a little soft, but the flavor is still great. I actually think it tastes better the next day after the flavors have had time to meld together. Just give it a stir before serving.
Reheating: This is a cold dip, so no reheating needed. If you want to serve it warm (which is also delicious), assemble it without the lettuce and tomatoes, then pop it in a 350°F oven for 10 minutes until warmed through. Add the fresh toppings after baking.
Freezer note: I don’t recommend freezing this dip. The dairy-based layers will separate and become grainy when thawed. It’s best made fresh or up to a day ahead.
Nutritional Information & Benefits
Here’s the estimated nutritional breakdown per serving (based on 8 servings):
| Nutrient | Amount per Serving |
|---|---|
| Calories | 185 |
| Total Fat | 9g |
| Saturated Fat | 5g |
| Cholesterol | 30mg |
| Sodium | 520mg |
| Total Carbohydrates | 16g |
| Dietary Fiber | 4g |
| Sugars | 5g |
| Protein | 10g |
Health highlights: This dip is packed with protein from the Greek yogurt and black beans, which helps keep you full and satisfied. The black beans also provide a good dose of fiber, which is great for digestion. The Greek yogurt adds probiotics for gut health, and the tomatoes provide lycopene, a powerful antioxidant. Compared to a traditional taco dip, this version has about 40% less fat and 30% fewer calories, but you’d never know it from the taste.
Dietary considerations: This recipe is vegetarian and can easily be made gluten-free and vegan with the substitutions mentioned above. It contains dairy, so it’s not suitable for those with dairy allergies unless you use the vegan alternatives. The sodium is moderate, but you can reduce it by using low-sodium beans and making your own taco seasoning without added salt.
Frequently Asked Questions
Can I make this dip ahead of time?
Absolutely! You can assemble the entire dip up to 24 hours in advance, but I recommend adding the lettuce, tomatoes, and green onions just before serving to keep them fresh and crisp. The base layers actually taste better after sitting overnight as the flavors meld together.
How do I make the spider web pattern if I don’t have a squeeze bottle?
No problem! Just spoon the sour cream into a small ziplock bag, seal it, and snip off a tiny corner. Squeeze gently to create the circles. It works just as well, and you can throw the bag away when you’re done—no cleanup needed.
Can I use full-fat ingredients instead of reduced-fat?
Of course! If you’re not worried about the calorie count, feel free to use regular cream cheese, full-fat sour cream, and regular Greek yogurt. The texture will be even richer and creamier. The flavor will be slightly different—a bit more indulgent—but still delicious.
What’s the best way to transport this dip to a party?
Assemble everything except the fresh toppings at home. Cover the dish tightly with plastic wrap and transport it in a cooler bag if the drive is long. Once you arrive, add the lettuce, tomatoes, green onions, and the spider web design. This keeps everything looking fresh and prevents the dip from getting jostled around.
Can I use homemade taco seasoning instead of a packet?
Yes, and I actually prefer it! Mix together 1 tablespoon chili powder, 1 teaspoon cumin, 1/2 teaspoon garlic powder, 1/2 teaspoon onion powder, 1/2 teaspoon paprika, 1/4 teaspoon oregano, and salt and pepper to taste. This makes about 3 tablespoons, which is the perfect amount for this recipe.
Final Thoughts
This Lightened-Up Spooky Spider Web Taco Dip has become my absolute favorite thing to bring to fall gatherings. It’s fun, it’s festive, and it tastes so good that nobody ever believes it’s the lighter version. I love how it brings people together—everyone gathers around it, oohing and aahing over the spider web, then goes back for seconds and thirds.
The best part? You can make it your own. Add more spice, swap in different beans, or go wild with the toppings. It’s forgiving, it’s flexible, and it always delivers. Whether you’re hosting a Halloween party, watching the big game, or just want a satisfying snack that won’t weigh you down, this dip is the answer.
I’d love to hear how yours turns out! Drop a comment below and let me know what variations you tried, or tag me in your photos if you share them online. Don’t forget to pin this recipe for later—trust me, you’ll want to make it again. Happy dipping, friends!
Pin This Recipe!
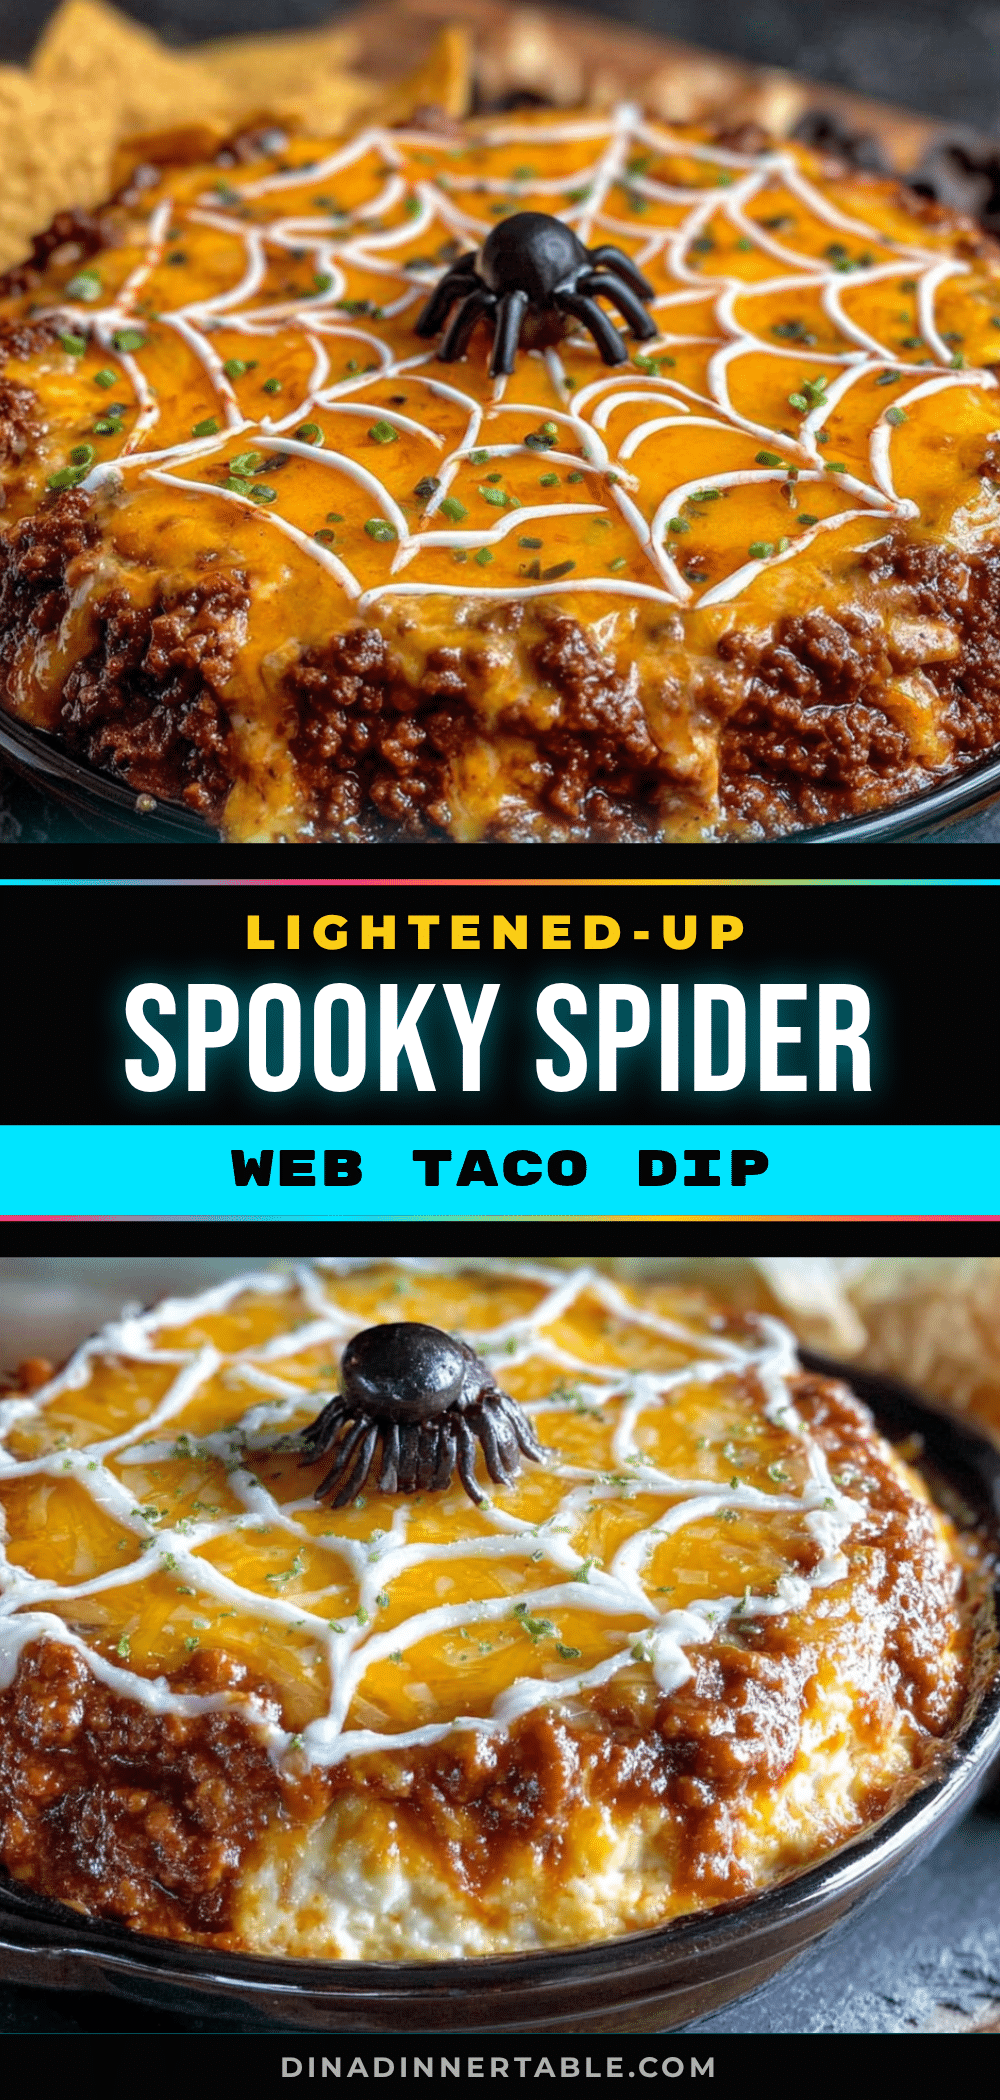
Lightened-Up Spooky Spider Web Taco Dip

A creamy, tangy, and spicy taco dip that’s lightened up with Greek yogurt and reduced-fat cream cheese, topped with a fun spider web design perfect for Halloween and fall gatherings.
- Prep Time: 15 minutes
- Cook Time: 0 minutes
- Total Time: 45 minutes (including chilling time)
- Yield: 8 servings 1x
- Category: Appetizer
- Cuisine: Mexican-American
Ingredients
- 8 oz reduced-fat cream cheese, softened
- 1 cup plain Greek yogurt (2% recommended)
- 1/2 cup light sour cream
- 1 packet taco seasoning (or 3 tablespoons homemade blend)
- 1 can (15 oz) black beans, drained and rinsed
- 1 cup salsa (medium-heat chunky preferred)
- 1 cup shredded lettuce (iceberg or romaine)
- 1 cup cherry tomatoes, diced
- 1/2 cup shredded reduced-fat cheddar cheese
- 1/4 cup sliced black olives (optional)
- 2 green onions, sliced
- 1/4 cup light sour cream (for spider web)
- 1 small plastic squeeze bottle (or ziplock bag)
- 1 small plastic spider ring (optional, for garnish)
Instructions
- Soften the cream cheese: Take the 8 oz of reduced-fat cream cheese out of the fridge about 30 minutes before starting. If forgotten, microwave in 10-second bursts until soft but not melted.
- Make the creamy base: In a medium mixing bowl, combine the softened cream cheese, 1 cup Greek yogurt, and 1/2 cup light sour cream. Beat with a hand mixer on medium speed until completely smooth and fluffy, about 1 to 2 minutes. Scrape down the sides with a rubber spatula halfway through.
- Add the taco seasoning: Sprinkle in the entire packet (or 3 tablespoons of homemade blend). Beat again on low speed until fully incorporated. Taste and adjust seasoning if needed.
- Layer the beans: Spread the drained and rinsed black beans evenly across the bottom of a 9-inch pie dish or round serving platter. Press them down gently with the back of a spoon to form an even layer.
- Spread the creamy layer: Dollop the cream cheese mixture over the beans, then spread gently with a spatula to cover the entire surface. Smooth the top evenly.
- Add the salsa: Spoon the salsa over the creamy layer and spread gently, leaving about a 1/2-inch border around the edge.
- Top with cheese and veggies: Sprinkle the shredded cheddar cheese evenly over the salsa. Then add the shredded lettuce, diced tomatoes, sliced olives (if using), and green onions. Distribute evenly.
- Create the spider web: Fill a squeeze bottle with the 1/4 cup light sour cream. Starting from the center, squeeze a small circle, then a larger circle around it, and a third circle around that one. Using a toothpick or knife tip, drag from the center outward through all three circles. Repeat 6 to 8 times around the dip, spacing the lines evenly.
- Place the spider: Gently press the plastic spider ring onto the center of the web. Alternatively, use a whole black olive with a little sour cream trailing off it.
- Chill before serving: Cover the dip loosely with plastic wrap and refrigerate for at least 30 minutes before serving. Can be made up to 24 hours ahead; add lettuce, tomatoes, and green onions just before serving.
Notes
For best results, ensure cream cheese is fully softened to avoid lumps. The spider web design can be made up to 4 hours ahead. If transporting, assemble without fresh toppings and add them at the destination. For a gluten-free version, check taco seasoning label. For vegan, use dairy-free alternatives.
Nutrition
- Serving Size: 1 serving (based on
- Calories: 185
- Sugar: 5
- Sodium: 520
- Fat: 9
- Saturated Fat: 5
- Carbohydrates: 16
- Fiber: 4
- Protein: 10
Keywords: taco dip, Halloween dip, spider web dip, lightened-up dip, healthy taco dip, Greek yogurt dip, party appetizer, fall recipe


