This was supposed to be a classic New York-style cheesecake. I had the cream cheese softening on the counter, the springform pan greased, and my grandmother’s recipe card propped up against the salt shaker. But somewhere between answering a text from my sister and realizing I was out of graham crackers, the whole plan went sideways. I grabbed a box of chocolate wafer cookies instead, and when I opened the fridge, the strawberries I’d bought for snacking were staring at me with that “use me or lose me” look. The oven was already preheating, the dog was whining for a walk, and I was already running late for a dinner party I was supposed to bring dessert to. What came out of that chaos was nothing like the plan — and honestly, way better.
Let me tell you, I almost threw the whole thing in the trash when I realized the crust was crumbling instead of pressing together nicely. I stood there, spatula in hand, thinking about how much easier it would be to just stop by the grocery store bakery. But I hate wasting food, and I was already committed. So I added an extra splash of vanilla to the filling, chopped those strawberries into tiny pieces, and decided to just go with it. The result was this lighter, fresher, completely accidental chocolate-covered strawberry cheesecake that my friends inhaled before I could even sit down.
Maybe you’ve been there — the moment when a recipe goes rogue and you have to decide whether to panic or pivot. This is what happens when you choose to pivot. It’s creamy without being heavy, sweet without being cloying, and that chocolate-strawberry combo hits every single time. I’ve made it at least a dozen times since that first disaster, and I keep coming back because it tastes like a splurge without actually being one. That’s the kind of kitchen magic worth sharing.
Why You’ll Love This Recipe
I’ve tested this recipe more times than I care to admit, tweaking the ratios and swapping ingredients until it hit that sweet spot between indulgent and sensible. Here’s why it earned a permanent spot in my rotation:
- Quick & Easy : Comes together in about 30 minutes of active prep, with no water bath required. Perfect for when you need a showstopper without the stress.
- Simple Ingredients : No fancy grocery trips needed. Cream cheese, Greek yogurt, strawberries, chocolate — all things you probably have or can grab easily.
- Perfect for Date Night : It’s romantic enough for Valentine’s Day but easy enough for a random Tuesday when you just want something special.
- Crowd-Pleaser : I’ve served this at potlucks, birthday dinners, and casual get-togethers. It never fails to get that “wait, you made this?” reaction.
- Unbelievably Delicious : The texture is this perfect middle ground — creamy but not dense, rich but not heavy. The chocolate coating on the strawberries adds that little crunch that makes every bite interesting.
What makes this recipe different from the dozens of other cheesecake recipes out there is the Greek yogurt swap. Most lighter cheesecakes taste… well, light. Like they’re apologizing for not being the real thing. But by blending part-skim ricotta with Greek yogurt, you get that tangy, creamy richness without the heavy cream and extra eggs. It’s not just another version — it’s the version I’d serve to anyone, even the ones who swear they don’t like “healthy” desserts.
This is the kind of dessert that makes you close your eyes after the first bite. It’s comfort food reimagined — lighter, faster, but with the same soul-soothing satisfaction. Perfect for impressing someone special without breaking a sweat, or turning a simple evening into something memorable.
What Ingredients You Will Need
This recipe uses simple, wholesome ingredients to deliver that classic cheesecake experience without the heavy aftermath. Most of these are pantry staples or easy to find at any grocery store.
For the Crust:
- 1 ½ cups chocolate wafer crumbs (about 25 wafers, or use chocolate graham crackers) — (adds that deep cocoa base without being too sweet)
- 3 tablespoons unsalted butter, melted
- 1 tablespoon granulated sugar
- Pinch of salt
For the Cheesecake Filling:
- 16 oz (450g) reduced-fat cream cheese, softened — (I prefer Philadelphia for its consistent texture, but store brands work too — just make sure it’s truly softened)
- ½ cup (100g) granulated sugar
- 2 large eggs, room temperature
- 1 teaspoon vanilla extract
- ½ teaspoon almond extract — (this is my secret weapon — it makes the strawberries taste even more vibrant)
- ¾ cup (170g) plain Greek yogurt (full-fat or 2% works best) — (Fage or Chobani are my go-tos for thickness)
- ¼ cup (60ml) fresh lemon juice — (brightens everything and cuts the richness)
- 2 tablespoons all-purpose flour (or cornstarch for gluten-free)
For the Strawberry Topping:
- 1 lb (450g) fresh strawberries, hulled and sliced
- 2 tablespoons honey or maple syrup — (adds natural sweetness without refined sugar)
- 1 tablespoon lemon juice
- 1 teaspoon vanilla extract
For the Chocolate Coating:
- 4 oz (115g) dark chocolate (60-70% cocoa), chopped — (I use Ghirardelli or Lindt for that smooth melt)
- 1 tablespoon coconut oil or unsalted butter — (helps the chocolate set with a nice shine)
Substitution Guidance: Use dairy-free cream cheese and coconut yogurt for a vegan option, though the texture will be slightly softer. For a gluten-free version, simply use gluten-free chocolate cookies for the crust and cornstarch instead of flour. If strawberries aren’t in season, frozen berries work — just thaw and drain them first so the topping isn’t watery.
Equipment Needed
You don’t need a professional kitchen to pull this off, but a few key tools make the process smoother:
- 9-inch springform pan — Non-negotiable for easy release. I’ve used a regular cake pan lined with parchment in a pinch, but the springform is worth the investment.
- Electric mixer — Handheld or stand mixer both work. I’ve made this with a whisk before (don’t recommend it unless you want a workout).
- Food processor — For crushing the chocolate wafers. A zip-top bag and rolling pin work too, but you’ll get more even crumbs with a processor.
- Double boiler or microwave-safe bowl — For melting the chocolate coating. If you’re impatient like me, use the microwave in 20-second bursts, stirring between each.
- Parchment paper — Cut a circle for the bottom of the pan to guarantee clean slices.
- Large roasting pan — Only if you’re doing a water bath (optional, but helps prevent cracking).
I found my springform pan at a thrift store for three dollars, and it’s still going strong five years later. You don’t need fancy equipment — just things that work.
Preparation Method
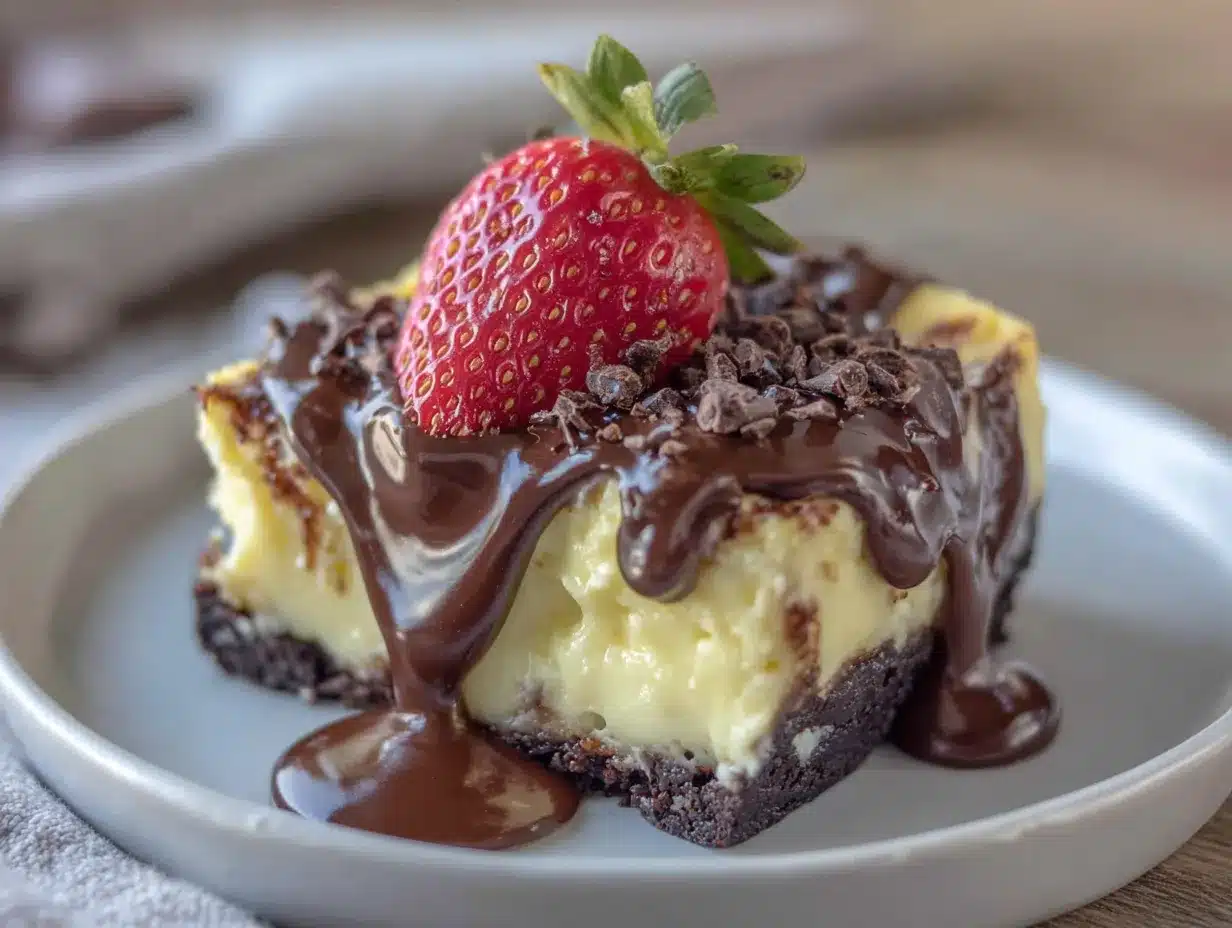
- Preheat and Prep (10 minutes) : Preheat your oven to 325°F (160°C). Wrap the outside of your springform pan with a double layer of aluminum foil to prevent any water from seeping in if you’re using a water bath. Lightly grease the inside with butter or cooking spray.
- Make the Crust (10 minutes) : Pulse the chocolate wafer crumbs in a food processor until they’re fine and uniform. Add the melted butter, sugar, and salt, then pulse again until the mixture looks like wet sand. Press this firmly into the bottom of your prepared pan — use the bottom of a measuring cup to really pack it down. Bake for 8 minutes, then set aside to cool while you make the filling.
- Prepare the Strawberry Topping (15 minutes) : While the crust cools, combine the sliced strawberries, honey, lemon juice, and vanilla in a small saucepan over medium heat. Let it simmer gently for 8-10 minutes, stirring occasionally, until the strawberries soften and release their juices. The mixture should thicken slightly — it will continue to set as it cools. Remove from heat and let it cool completely.
- Make the Cheesecake Filling (15 minutes) : In a large bowl, beat the softened cream cheese with an electric mixer until smooth and fluffy — about 2 minutes. Scrape down the sides of the bowl. Add the sugar and beat for another minute. Add the eggs one at a time, mixing on low speed after each addition until just combined. Don’t overmix here, or the cheesecake can crack. Add the vanilla, almond extract, Greek yogurt, lemon juice, and flour, mixing on low until everything is smooth and uniform. The batter should be thick but pourable — if it looks curdled, your cream cheese wasn’t soft enough, but don’t panic; it will still bake up fine.
- Assemble and Bake (50-60 minutes) : Pour the cheesecake filling over the cooled crust and spread it evenly. Drop spoonfuls of the cooled strawberry topping over the filling, then use a knife to gently swirl it into the batter — just a few figure-eight motions, don’t overdo it. Place the springform pan in a larger roasting pan and pour hot water into the roasting pan until it reaches about halfway up the sides of the springform. Bake for 50-60 minutes, until the edges are set but the center still jiggles slightly when you gently shake the pan. The top should be pale golden and might have a few tiny cracks — that’s normal.
- Cool Gradually (2 hours) : Turn off the oven, crack the door open, and let the cheesecake cool inside for 1 hour. This slow cooling prevents the dreaded center crack. Remove from the water bath, take off the foil, and let it cool completely on a wire rack for another hour. Then refrigerate for at least 4 hours, but overnight is best — the texture really develops as it chills.
- Make the Chocolate Coating (10 minutes) : Once the cheesecake is fully chilled and set, melt the dark chocolate and coconut oil together in a double boiler or microwave. Let it cool slightly until it’s still liquid but not hot. Dip each whole strawberry (reserve a few for garnish) into the chocolate, letting the excess drip off, and place them on a parchment-lined baking sheet. Refrigerate for 15 minutes to set.
- Final Assembly (5 minutes) : Run a knife around the edge of the pan, release the springform, and transfer the cheesecake to a serving plate. Arrange the chocolate-covered strawberries on top in whatever pattern makes you happy. Slice with a warm, dry knife for clean cuts — wipe the blade between slices.
Cooking Tips & Techniques
I learned most of these the hard way, so you don’t have to. The first time I made this, I skipped the water bath and ended up with a cheesecake that looked like the surface of the moon. Here’s what actually works:
Room temperature ingredients are non-negotiable. Cold cream cheese creates lumps that no amount of mixing can fix. Leave everything out on the counter for at least 30 minutes before starting. I’ve made the mistake of microwaving cream cheese to speed things up, and it created a grainy texture that never smoothed out.
Don’t overmix the filling. Once the eggs go in, you’re just combining, not aerating. Too much air creates bubbles that expand in the oven and then collapse, leaving you with cracks. Mix on low speed and stop as soon as everything looks uniform.
The water bath is your friend. I know it’s fussy, but it creates that gentle, even heat that keeps the cheesecake creamy instead of dry. If you’re worried about water seeping in, use a slow-drip approach — pour the water into the roasting pan after it’s in the oven, not before. And don’t skip the foil wrapping.
Patience with cooling. I once tried to speed-cool a cheesecake in the freezer, and the center was still cold while the edges were frozen solid. The gradual cool-down in the turned-off oven is what prevents that dramatic crack down the middle. Trust the process.
For the chocolate coating, a tiny bit of coconut oil makes the chocolate set with a beautiful shine instead of that dull, matte finish. If your chocolate seizes (gets grainy and stiff), you overheated it — start over with fresh chocolate and go slower next time.
Variations & Adaptations
One of the best things about this recipe is how flexible it is. Here are a few versions I’ve tried and loved:
Vegan Version: Swap the cream cheese for a high-quality vegan cream cheese (Miyoko’s works beautifully), use coconut yogurt instead of Greek yogurt, and replace the eggs with ¼ cup of cornstarch mixed with ¼ cup of water. The texture is slightly less firm, but the flavor is still spot-on. I made this for a friend with dairy allergies, and she asked for the recipe twice.
Gluten-Free Option: Use gluten-free chocolate cookies for the crust and cornstarch instead of flour in the filling. I’ve tried this with almond flour crust too, and while it’s a different texture, it adds a nice nuttiness that pairs well with the chocolate.
Seasonal Berry Swap: In summer, use fresh raspberries or blueberries instead of strawberries. In fall, try roasted sliced pears with a drizzle of caramel. The cheesecake base is neutral enough to handle almost any fruit topping.
No-Bake Version: For hot days when you don’t want to turn on the oven, use a no-bake cheesecake filling (cream cheese, Greek yogurt, and powdered sugar, thickened with gelatin) and skip the water bath entirely. Chill for at least 6 hours before topping.
Individual Mini Cheesecakes: Press the crust into a muffin tin lined with paper liners, fill with the cheesecake mixture, and bake for 18-20 minutes. Perfect for portion control and parties. Just adjust the baking time and skip the water bath for these little guys.
Serving & Storage Suggestions
This cheesecake is best served chilled, straight from the fridge. Let it sit at room temperature for about 10 minutes before slicing — it takes the edge off the cold and lets the flavors open up. I like to serve it on a simple white plate with a few extra fresh strawberries on the side and maybe a light dusting of powdered sugar if I’m feeling fancy.
What to drink with it: A cup of black coffee or espresso balances the sweetness perfectly. For a dessert wine, try a late-harvest Riesling or a ruby port. If you’re going non-alcoholic, a sparkling water with a splash of lemon works surprisingly well.
Storage: Cover the cheesecake loosely with plastic wrap or foil and refrigerate for up to 5 days. The flavors actually get better on day two — the strawberry and chocolate meld together in a way that’s hard to describe. Do not freeze the assembled cheesecake with the chocolate-covered strawberries on top, as the berries will get watery and the chocolate will bloom (get white streaks). Instead, freeze the plain cheesecake for up to 2 months, then thaw overnight in the fridge and add fresh toppings before serving.
Reheating: This is a cold dessert, so no reheating needed. But if you have leftover chocolate-covered strawberries, they’ll keep in the fridge for 2 days — just know the chocolate might soften slightly.
Nutritional Information & Benefits
Per slice (based on 12 servings), here’s the approximate breakdown:
- Calories: 285
- Fat: 16g (9g saturated)
- Carbohydrates: 28g (19g sugar)
- Protein: 8g
- Fiber: 2g
- Sodium: 210mg
The Greek yogurt and reduced-fat cream cheese cut about 40% of the fat compared to a traditional cheesecake, while adding protein and probiotics. Strawberries are packed with vitamin C and antioxidants — one serving gives you about 70% of your daily vitamin C needs. Dark chocolate (60% or higher) contains flavonoids that support heart health, so you’re getting a little wellness boost with every bite.
This recipe is naturally vegetarian and can be made gluten-free with simple swaps. If you’re watching your sugar intake, you can reduce the honey in the topping or use a sugar substitute in the filling, though the texture will be slightly different.
I love that I can serve this at a dinner party without anyone feeling like they’re “being healthy.” It’s just good food that happens to be a little lighter — the way dessert should be.
Conclusion
This lighter chocolate-covered strawberry cheesecake started as a happy accident, but it’s become one of those recipes I genuinely look forward to making. It’s proof that you don’t need a kitchen full of fancy ingredients or hours of free time to create something that feels truly special. The creamy filling, the crunchy chocolate crust, the burst of fresh strawberries — every bite hits that perfect balance of indulgence and lightness.
I hope you give this recipe a try, and I hope you make it your own. Maybe swap in raspberries if that’s what you have, or skip the chocolate coating if you’re in a hurry. The beauty of this cheesecake is that it’s forgiving — it wants to work with you, not against you. And honestly, that’s my favorite kind of recipe to share.
If you make it, I’d love to hear how it turns out. Drop a comment below, tag me in your photos, or tell me what happy accident led you to your own kitchen creation. Until next time, happy baking!
Frequently Asked Questions
Can I make this cheesecake without a water bath?
Yes, you can. The cheesecake might crack slightly on top, but the flavor will still be delicious. Place a pan of hot water on the lower oven rack to create steam, which helps prevent cracking. Or just embrace the cracks and cover them with the strawberry topping — nobody will know.
How do I know when the cheesecake is done baking?
The edges should be set and slightly puffed, but the center should still jiggle when you gently shake the pan. It will continue to set as it cools. If the center looks liquid, give it another 5-10 minutes. If the top is browning too fast, tent it loosely with foil.
Can I use frozen strawberries instead of fresh?
Absolutely. Thaw the frozen strawberries first and drain off any excess liquid before cooking them down. Frozen berries are often sweeter and more flavorful than out-of-season fresh ones, so this can actually work in your favor.
How far in advance can I make this cheesecake?
You can make the cheesecake (without the chocolate-covered strawberries) up to 2 days ahead. Keep it covered in the fridge. Add the chocolate-covered strawberries on the day you plan to serve it for the best texture and appearance.
Can I use milk chocolate instead of dark chocolate for the coating?
Yes, milk chocolate works fine, but it’s sweeter and softer at room temperature. If you use milk chocolate, skip the coconut oil, as it’s already soft enough. Dark chocolate gives a nicer contrast to the sweet cheesecake, but use what you love.
Pin This Recipe!
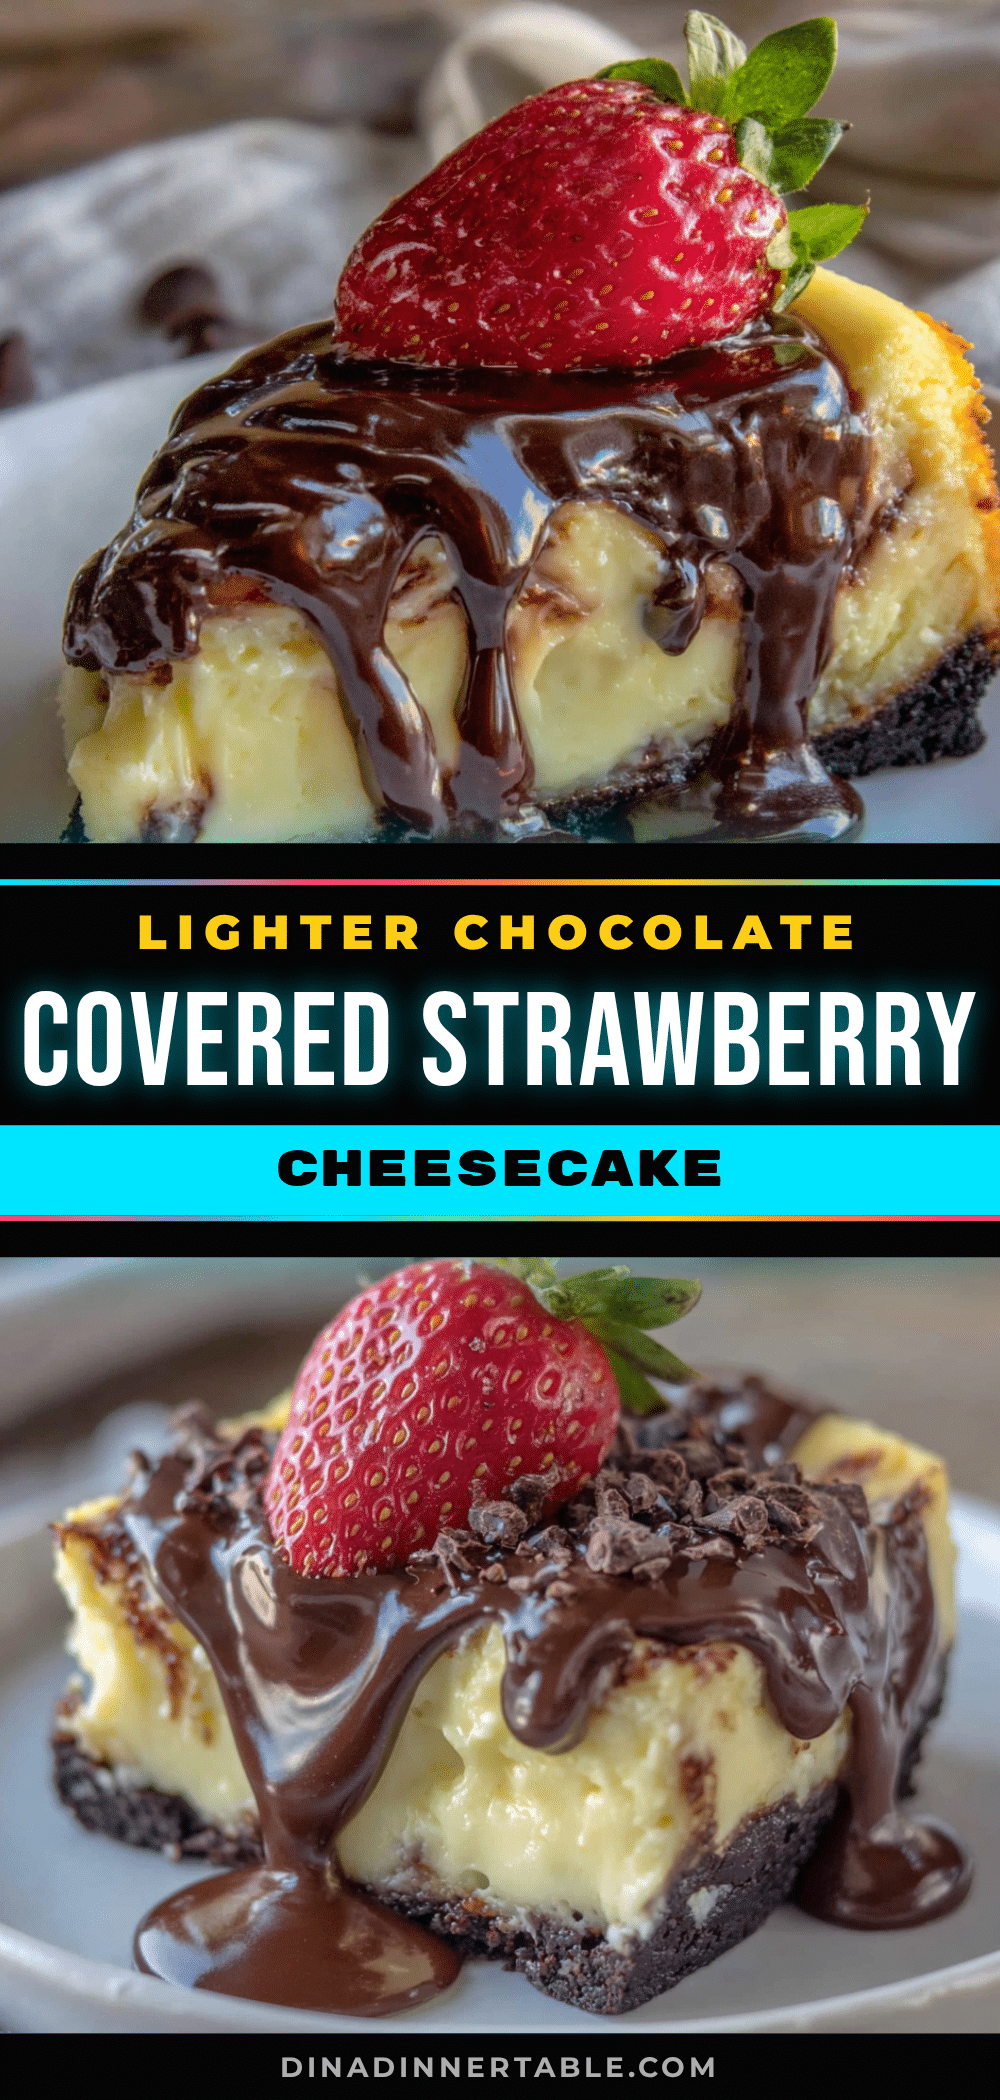
Lighter Chocolate Covered Strawberry Cheesecake (Easy Recipe)
A lighter, fresher chocolate-covered strawberry cheesecake that’s creamy without being heavy, sweet without being cloying. Made with Greek yogurt and reduced-fat cream cheese, this easy recipe comes together in about 30 minutes of active prep with no water bath required.
- Prep Time: 30 minutes
- Cook Time: 50-60 minutes
- Total Time: 1 hour 20 minutes (plus cooling and chilling time)
- Yield: 12 servings 1x
- Category: Dessert
- Cuisine: American
Ingredients
- 1 ½ cups chocolate wafer crumbs (about 25 wafers, or use chocolate graham crackers)
- 3 tablespoons unsalted butter, melted
- 1 tablespoon granulated sugar
- Pinch of salt
- 16 oz (450g) reduced-fat cream cheese, softened
- ½ cup (100g) granulated sugar
- 2 large eggs, room temperature
- 1 teaspoon vanilla extract
- ½ teaspoon almond extract
- ¾ cup (170g) plain Greek yogurt (full-fat or 2% works best)
- ¼ cup (60ml) fresh lemon juice
- 2 tablespoons all-purpose flour (or cornstarch for gluten-free)
- 1 lb (450g) fresh strawberries, hulled and sliced
- 2 tablespoons honey or maple syrup
- 1 tablespoon lemon juice
- 1 teaspoon vanilla extract
- 4 oz (115g) dark chocolate (60-70% cocoa), chopped
- 1 tablespoon coconut oil or unsalted butter
Instructions
- Preheat and Prep (10 minutes): Preheat your oven to 325°F (160°C). Wrap the outside of your springform pan with a double layer of aluminum foil to prevent any water from seeping in if you’re using a water bath. Lightly grease the inside with butter or cooking spray.
- Make the Crust (10 minutes): Pulse the chocolate wafer crumbs in a food processor until they’re fine and uniform. Add the melted butter, sugar, and salt, then pulse again until the mixture looks like wet sand. Press this firmly into the bottom of your prepared pan — use the bottom of a measuring cup to really pack it down. Bake for 8 minutes, then set aside to cool while you make the filling.
- Prepare the Strawberry Topping (15 minutes): While the crust cools, combine the sliced strawberries, honey, lemon juice, and vanilla in a small saucepan over medium heat. Let it simmer gently for 8-10 minutes, stirring occasionally, until the strawberries soften and release their juices. The mixture should thicken slightly — it will continue to set as it cools. Remove from heat and let it cool completely.
- Make the Cheesecake Filling (15 minutes): In a large bowl, beat the softened cream cheese with an electric mixer until smooth and fluffy — about 2 minutes. Scrape down the sides of the bowl. Add the sugar and beat for another minute. Add the eggs one at a time, mixing on low speed after each addition until just combined. Don’t overmix here, or the cheesecake can crack. Add the vanilla, almond extract, Greek yogurt, lemon juice, and flour, mixing on low until everything is smooth and uniform. The…
- Assemble and Bake (50-60 minutes): Pour the cheesecake filling over the cooled crust and spread it evenly. Drop spoonfuls of the cooled strawberry topping over the filling, then use a knife to gently swirl it into the batter — just a few figure-eight motions, don’t overdo it. Place the springform pan in a larger roasting pan and pour hot water into the roasting pan until it reaches about halfway up the sides of the springform. Bake for 50-60 minutes, until the edges are set but the center still …
- Cool Gradually (2 hours): Turn off the oven, crack the door open, and let the cheesecake cool inside for 1 hour. This slow cooling prevents the dreaded center crack. Remove from the water bath, take off the foil, and let it cool completely on a wire rack for another hour. Then refrigerate for at least 4 hours, but overnight is best — the texture really develops as it chills.
- Make the Chocolate Coating (10 minutes): Once the cheesecake is fully chilled and set, melt the dark chocolate and coconut oil together in a double boiler or microwave. Let it cool slightly until it’s still liquid but not hot. Dip each whole strawberry (reserve a few for garnish) into the chocolate, letting the excess drip off, and place them on a parchment-lined baking sheet. Refrigerate for 15 minutes to set.
- Final Assembly (5 minutes): Run a knife around the edge of the pan, release the springform, and transfer the cheesecake to a serving plate. Arrange the chocolate-covered strawberries on top in whatever pattern makes you happy. Slice with a warm, dry knife for clean cuts — wipe the blade between slices.
Notes
Room temperature ingredients are non-negotiable. Don’t overmix the filling. The water bath is your friend. Patience with cooling. For the chocolate coating, a tiny bit of coconut oil makes the chocolate set with a beautiful shine. If your chocolate seizes, start over with fresh chocolate and go slower next time.
Nutrition
- Serving Size: 1 slice
- Calories: 285
- Sugar: 19
- Sodium: 210
- Fat: 16
- Saturated Fat: 9
- Carbohydrates: 28
- Fiber: 2
- Protein: 8
Keywords: lighter cheesecake, chocolate covered strawberry cheesecake, easy cheesecake recipe, Greek yogurt cheesecake, reduced fat cheesecake, strawberry cheesecake, chocolate strawberry dessert


