My neighbor Jen asked me why I couldn’t just use Greek yogurt instead of cream cheese in the cheesecake layer. I started to explain why that wouldn’t work — then stopped. She had this hopeful look, holding a tub of plain yogurt she’d just pulled from my fridge. Honestly, I was about to launch into a whole speech about fat content and texture science. But something made me pause. Maybe it was the way she was already picturing it working. So I shrugged and said, “Let’s find out.”
That was three Decembers ago, during my annual holiday baking marathon. I had a batch of gingerbread cookie dough chilling in the fridge and a block of cream cheese softening on the counter. The plan was classic cheesecake bars — rich, dense, the kind that leave you in a food coma. But Jen’s question stuck with me. What if I lightened the filling just a bit? Not enough to lose that signature tang, but enough so you didn’t feel like you’d swallowed a brick. I swapped half the cream cheese for Greek yogurt and crossed my fingers. The first batch came out of the oven looking perfect — golden edges, a slight crack in the center that I’d learned to love. But the real test was the taste. You know that feeling when you take a bite of something and it’s better than you expected? That was this.
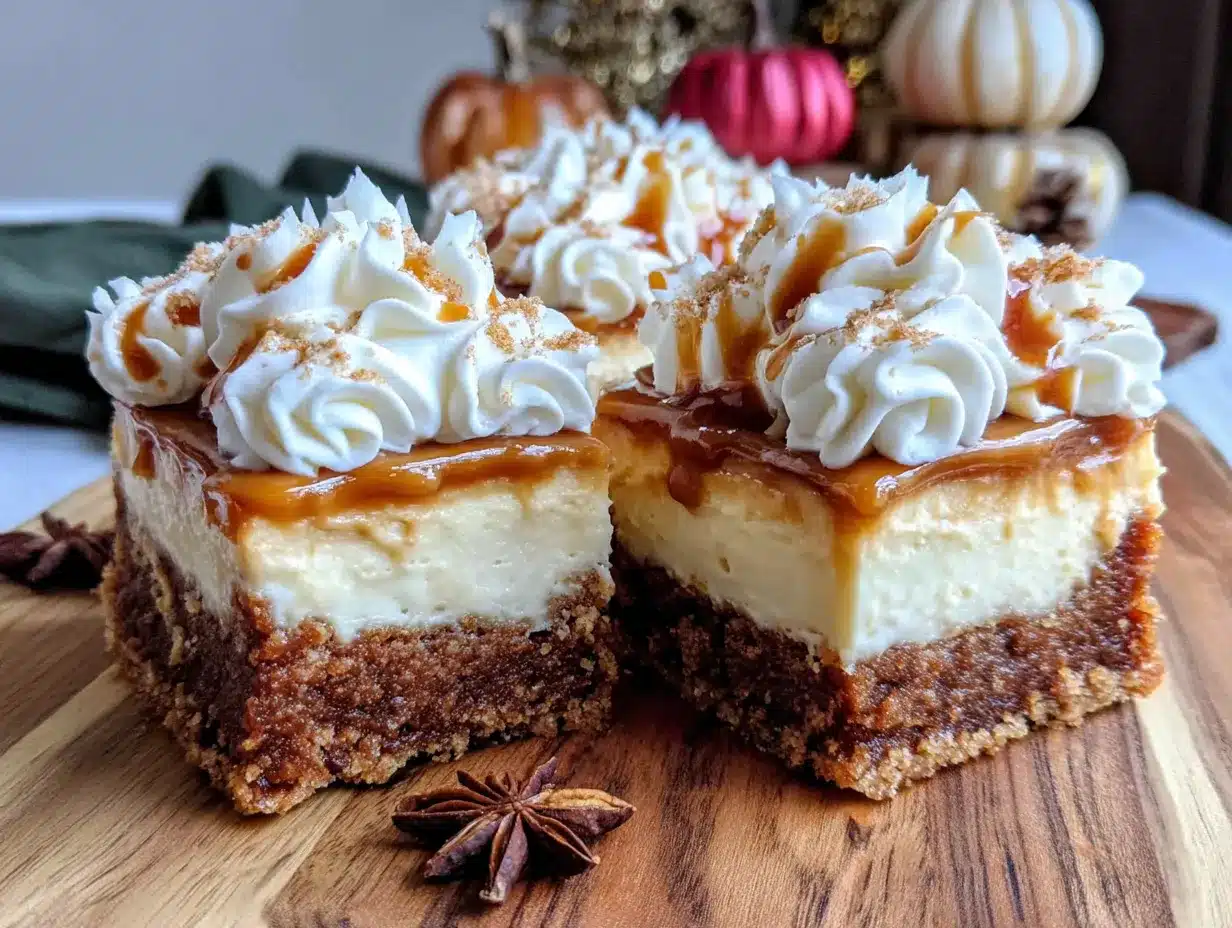
I’m not supposed to play favorites with holiday recipes, but these Lighter Gingerbread Cheesecake Bars with Cream Cheese Frosting have earned a permanent spot in my rotation. They’re the dessert that makes people ask, “Wait, these are lighter?” and then go back for seconds. The gingerbread base is chewy and spiced just right — molasses, ginger, cinnamon, a whisper of cloves. The cheesecake layer is creamy but not heavy, with that subtle tang from the yogurt that somehow makes the whole thing taste more indulgent, not less. And then there’s the cream cheese frosting on top. Because even lighter needs a little decadence, right? I’ve made these for cookie swaps, Thanksgiving dinner, and random Tuesday nights when I needed something warm and spiced. They always disappear. Maybe you’ve been there — wanting a holiday treat that feels festive but doesn’t leave you regretting it. These bars are that. Honestly, I keep making them because they prove you can have your gingerbread and eat it too.
Why You’ll Love This Recipe
Let me tell you, these bars have been through the wringer in my kitchen. I’ve tested them with full-fat cream cheese, reduced-fat, even a weird plant-based version that I’m still not ready to talk about. This version — the one with Greek yogurt — is the winner. It’s the one I bring to holiday parties and the one my family requests for Christmas morning. Here’s why I think you’ll love it too:
- Quick & Easy : The whole thing comes together in about 40 minutes of active time. The oven does the rest. Perfect for when you’re already juggling a turkey or wrapping presents.
- Simple Ingredients : You probably have most of this in your pantry right now. Molasses, spices, flour, eggs, cream cheese. No trips to a specialty store.
- Perfect for the Holidays : These bars are great for cookie exchanges, dessert tables, or just snacking while you watch Home Alone for the fifth time.
- Crowd-Pleaser : I’ve served these to kids, adults, and my aunt who “doesn’t like gingerbread.” She ate three.
- Unbelievably Delicious : The texture is what gets me — a chewy, spiced base, a smooth and tangy cheesecake layer, and a creamy frosting on top. It’s comfort food that doesn’t weigh you down.
What makes this recipe different from all the other gingerbread cheesecake bars out there? It’s the Greek yogurt swap. I know, I know — it sounds like one of those “healthy” tricks that ruins everything. But it doesn’t. The yogurt keeps the cheesecake layer silky without making it dense. It adds a slight tang that plays beautifully with the warm gingerbread spices. And it cuts the richness just enough so you can actually enjoy a full square without needing a nap. This isn’t just another version — it’s my best version, tested and tweaked until it was just right.
These bars are the kind of dessert that makes you close your eyes after the first bite. They’re comfort food reimagined — lighter, faster, but with the same soul-soothing satisfaction. Perfect for impressing guests without stress, or turning a simple December evening into something memorable.
What Ingredients You Will Need
This recipe uses simple, wholesome ingredients to deliver bold flavor and satisfying texture without the fuss. Most of these are pantry staples, especially if you do any kind of holiday baking. I’ve included some notes on what I’ve found works best, because let’s be honest — not all molasses is created equal.
For the Gingerbread Base
- All-purpose flour — 1 ½ cups (180g). I use King Arthur Flour for consistent results, but any brand works.
- Ground ginger — 1 ½ teaspoons. Freshly ground if you can, but jarred is fine.
- Ground cinnamon — 1 teaspoon. The good stuff makes a difference here.
- Ground cloves — ¼ teaspoon. A little goes a long way.
- Baking soda — ½ teaspoon.
- Salt — ¼ teaspoon.
- Unsalted butter, melted — ¼ cup (56g). I prefer unsalted so I can control the salt level.
- Molasses — ½ cup (170g). Use unsulphured molasses — not blackstrap, which is too bitter. Grandma’s or Brer Rabbit are my go-tos.
- Brown sugar, packed — ½ cup (100g). Light or dark works. Dark gives a deeper flavor.
- Large egg — 1, at room temperature.
- Vanilla extract — 1 teaspoon. Pure, not imitation, if you have it.
For the Cheesecake Layer
- Reduced-fat cream cheese — 8 ounces (226g), softened. I’ve used full-fat too, and it works, but the lighter version is surprisingly just as creamy. Philadelphia is my trusted brand for consistent texture.
- Plain Greek yogurt — ½ cup (120g). Full-fat or 2% works best. Don’t use non-fat — it gets too watery. I prefer Fage or Chobani.
- Granulated sugar — ¼ cup (50g).
- Large egg — 1, at room temperature.
- Vanilla extract — 1 teaspoon.
- Lemon juice — 1 teaspoon, fresh-squeezed. This brightens the whole thing.
For the Cream Cheese Frosting
- Reduced-fat cream cheese — 4 ounces (113g), softened.
- Unsalted butter — 2 tablespoons (28g), softened.
- Powdered sugar — 1 cup (120g), sifted if you’re feeling fancy (I rarely am).
- Vanilla extract — ½ teaspoon.
- Milk — 1-2 tablespoons, as needed for consistency. Any milk works — dairy, almond, oat.
Ingredient Selection Tips: For the molasses, look for a jar that says “unsulphured” on the label. Sulphured molasses has a chemical aftertaste that can ruin the gingerbread. And for the Greek yogurt, make sure it’s thick and not watery — I sometimes drain it through a paper towel-lined sieve for 10 minutes if it looks loose. If you’re in a pinch, you can substitute the Greek yogurt with sour cream. It won’t be quite as light, but it’ll still be delicious.
Equipment Needed
You don’t need a fancy kitchen to make these bars. Here’s what I use:
- 8×8-inch baking pan — Metal or glass works. I prefer metal for even browning. If you use glass, reduce the oven temperature by 25°F.
- Parchment paper — For lining the pan. Makes lifting the bars out so much easier. I’m a big fan of the pre-cut sheets.
- Mixing bowls — One medium, one small. Nothing fancy.
- Electric hand mixer or stand mixer — You can do this by hand if you’re patient, but a mixer makes the cheesecake layer silky smooth. I’ve used a whisk and some elbow grease before — it works, but your arm will be tired.
- Spatula — For scraping every last bit of batter. A rubber spatula is your friend here.
- Measuring cups and spoons — For accuracy. I’ve eyeballed the spices before and regretted it.
- Wire cooling rack — Essential for cooling the bars evenly. If you don’t have one, you can use the stovetop grates (just make sure they’re clean).
- Offset spatula — For spreading the frosting. A butter knife works in a pinch, but the offset spatula gives that beautiful swoop.
Budget-Friendly Options: Don’t have an 8×8 pan? A 9×9 works too — your bars will just be slightly thinner and bake a few minutes faster. No hand mixer? You can whisk the cheesecake layer by hand; just make sure the cream cheese is really soft so you don’t get lumps. And if you don’t have parchment paper, you can grease the pan well with butter and dust it with flour. It’s not as neat, but it gets the job done.
Preparation Method
Alright, let’s make these bars. I’ve broken this down step by step, with all the little notes I’ve picked up from making these about twenty times. Trust the process — especially the cooling part. I know it’s tempting to rush.
Step 1: Prep the Pan and Oven
Preheat your oven to 350°F (175°C). Line an 8×8-inch baking pan with parchment paper, leaving a 2-inch overhang on two opposite sides. This creates handles for lifting the bars out later. Lightly grease the parchment with cooking spray or a smear of butter.
Step 2: Make the Gingerbread Base
In a medium bowl, whisk together the flour, ginger, cinnamon, cloves, baking soda, and salt. Set aside. In a separate bowl, whisk together the melted butter, molasses, brown sugar, egg, and vanilla until smooth. The mixture will be thick and smell amazing — like Christmas in a bowl. Pour the wet ingredients into the dry and stir with a spatula until just combined. Don’t overmix, or the base will be tough. A few streaks of flour are fine. Press the dough evenly into the prepared pan. I use my hands for this — it’s the easiest way. Make sure it reaches the corners. Bake for 10 minutes. It won’t look fully set, and that’s okay. Remove from the oven and set aside while you make the cheesecake layer.
Step 3: Make the Cheesecake Layer
In a medium bowl, beat the softened cream cheese with an electric mixer until smooth and fluffy — about 2 minutes. Scrape down the sides. Add the Greek yogurt, sugar, egg, vanilla, and lemon juice. Beat on medium speed until combined and silky. Don’t overbeat once the egg is in — you don’t want to incorporate too much air, which can cause cracks. The mixture should be smooth and pourable. Pour it over the par-baked gingerbread base. Gently spread it to the edges with a spatula.
Step 4: Bake the Bars
Bake for 25-30 minutes, or until the edges are set and the center jiggles slightly when you gently shake the pan. It will look a bit puffed and the surface might have a few tiny cracks — that’s normal. Don’t overbake, or the cheesecake will be dry. The internal temperature should read about 150°F (65°C) if you’re using a thermometer. Let the bars cool in the pan on a wire rack for 1 hour. Then transfer the pan to the refrigerator and chill for at least 3 hours, or overnight. This is crucial — the bars need to be fully cold before you add the frosting, or it will melt into a puddle. I learned this the hard way.
Step 5: Make the Cream Cheese Frosting
In a small bowl, beat the softened cream cheese and butter together until smooth and creamy. Add the powdered sugar and vanilla, and beat until combined. Add milk, 1 tablespoon at a time, until the frosting is spreadable but not runny. You want it thick enough to hold its shape. Spread the frosting over the chilled cheesecake layer. Use an offset spatula or the back of a spoon to create swoops and swirls. Return to the refrigerator for 30 minutes to set the frosting.
Step 6: Slice and Serve
Lift the bars out of the pan using the parchment overhang. Place on a cutting board. Use a sharp knife to slice into 16 squares. For clean cuts, wipe the knife clean between each slice. I sometimes run the knife under hot water and dry it off — it makes the cuts look professional. Serve cold or at room temperature.
Cooking Tips & Techniques
I’ve made these bars enough times to have a few disasters under my belt. Here’s what I’ve learned so you don’t have to repeat my mistakes.
Don’t Overmix the Cheesecake Layer — I once got distracted and beat the cheesecake filling for way too long. The bars came out of the oven looking like the surface of the moon — huge cracks everywhere. Overmixing incorporates air, which expands in the oven and then collapses, causing cracks. Mix just until smooth and stop.
Room Temperature Ingredients Matter — Cold cream cheese and cold eggs create a lumpy, uneven cheesecake layer. I’ve been there — you beat and beat and it’s still not smooth. Take the cream cheese and eggs out of the fridge 30 minutes before you start. If you forget (which I do, constantly), you can microwave the cream cheese in 10-second bursts until it’s soft but not warm.
The Chill is Non-Negotiable — I know it’s hard to wait. But if you try to frost warm cheesecake, the frosting will slide right off. I speak from experience — I once had a beautiful batch of bars that turned into a creamy mess because I was impatient. Chill for the full 3 hours minimum. Overnight is even better.
Watch the Bake Time — Every oven runs a little different. My old oven ran hot, and these bars would be done in 22 minutes. My current oven takes the full 30. Start checking at 22 minutes — the edges should be set and the center should have a slight wobble. If it’s still soupy, give it 3 more minutes.
Use Parchment Paper — I tried making these without parchment once, thinking I’d just grease the pan well. The bars stuck, I had to dig them out with a spatula, and they looked like a crime scene. Parchment paper with overhangs makes life so much easier.
Variations & Adaptations
One of the things I love about this recipe is how flexible it is. Here are a few ways I’ve switched it up over the years.
Gluten-Free Version — Substitute the all-purpose flour with a 1:1 gluten-free baking flour blend. I’ve used Bob’s Red Mill 1-to-1 with great results. The texture is slightly more crumbly, but the flavor is spot on.
Dairy-Free Adaptation — Use dairy-free cream cheese (Kite Hill is my favorite) and a plant-based Greek-style yogurt. For the frosting, use vegan butter and dairy-free cream cheese. The texture will be a bit softer, so chill the bars extra long before slicing.
Spice It Up — If you like a kick, add ¼ teaspoon of black pepper to the gingerbread base. It sounds weird, but black pepper actually enhances the ginger flavor. I learned this from an old cookbook and it works.
Pumpkin Cheesecake Bars — In the fall, I sometimes swap the gingerbread base for a shortbread crust and add ¼ cup of pumpkin puree to the cheesecake layer. Reduce the Greek yogurt to ¼ cup. It’s a whole different dessert, but equally delicious.
Mini Version — Line a muffin tin with paper liners and press a tablespoon of the gingerbread dough into each. Top with the cheesecake mixture and bake for 12-15 minutes. These are perfect for parties — no slicing required.
Chocolate Twist — Add ¼ cup of mini chocolate chips to the gingerbread base before pressing it into the pan. The chocolate melts into little pockets of richness. I did this on a whim one night and it was a hit.
Serving & Storage Suggestions
These bars are versatile — they work for so many occasions. Here’s how I serve and store them.
Serving Temperature: I prefer these bars cold, straight from the fridge. The cheesecake layer is firm and the frosting is perfectly set. But they’re also lovely at room temperature — the gingerbread base becomes a bit more tender. Try both and see which you like.
Presentation Ideas: For a holiday party, I cut the bars into small squares and arrange them on a white platter. A sprinkle of cinnamon or a dusting of powdered sugar on top makes them look extra festive. Sometimes I add a tiny gingerbread cookie on top of each bar for a cute touch.
Complementary Dishes: These bars pair beautifully with a cup of hot coffee or spiced chai. For a dessert spread, serve them alongside peppermint bark and chocolate truffles. They also work as a brunch item — I’ve brought them to Christmas morning breakfast and they disappeared.
Storage Instructions: Store the bars in an airtight container in the refrigerator for up to 5 days. Place a sheet of parchment paper between layers if you’re stacking them. The flavors actually deepen after a day or two — the gingerbread gets more aromatic and the cheesecake becomes even creamier.
Freezing Tips: These bars freeze beautifully. Freeze them unfrosted for up to 3 months. Wrap the entire slab tightly in plastic wrap, then aluminum foil. When you’re ready to serve, thaw in the refrigerator overnight, then make the frosting and spread it on. I’ve also frozen frosted bars — just place them on a baking sheet in the freezer for 1 hour until the frosting is hard, then wrap individually. Thaw in the fridge.
Reheating: I don’t recommend reheating these — they’re meant to be served cold or at room temperature. But if you want a warm gingerbread experience, you can microwave a single bar for 10 seconds. The frosting will soften, but the base will be warm and spiced.
Nutritional Information & Benefits
I’m not a nutritionist, but I’ve done my best to estimate the values for these bars. Keep in mind that these are approximate and will vary based on the exact ingredients you use.
| Nutritional Value | Per Bar (1 of 16) |
|---|---|
| Calories | 185 |
| Total Fat | 9g |
| Saturated Fat | 5g |
| Cholesterol | 40mg |
| Sodium | 160mg |
| Total Carbohydrates | 24g |
| Dietary Fiber | 0.5g |
| Sugars | 16g |
| Protein | 4g |
Using Greek yogurt instead of extra cream cheese cuts the fat and calories without sacrificing texture. Greek yogurt is also a good source of protein and probiotics, which support gut health. The ginger in the base has anti-inflammatory properties, and cinnamon may help with blood sugar regulation. So while these are still a treat — let’s not pretend otherwise — they’re a treat that has a few redeeming qualities.
Dietary Considerations: This recipe is vegetarian. For a gluten-free option, use a 1:1 gluten-free flour blend. For a lower-sugar version, you can reduce the sugar in the cheesecake layer to 2 tablespoons and use a sugar substitute in the frosting. The texture will be slightly different, but still delicious.
Potential Allergens: This recipe contains wheat (gluten), dairy, and eggs. See the variations section for adaptations.
Conclusion
These Lighter Gingerbread Cheesecake Bars with Cream Cheese Frosting have become my go-to holiday dessert for a reason. They’re everything I want in a seasonal treat — warm spices, creamy tang, a touch of sweetness — without the heavy feeling that often comes with holiday baking. The Greek yogurt trick was a happy accident, one I never would have tried if my neighbor hadn’t asked that simple question. Now I can’t imagine making them any other way.
I hope you give these bars a try. Don’t be afraid to make them your own — add more ginger if you like a kick, swap in gluten-free flour, or double the recipe because one pan is never enough. That’s the beauty of baking. It’s forgiving, it’s personal, and it always tastes better when you share it.
If you make these, I’d love to hear about it. Leave a comment below and let me know how they turned out. Did you try a variation? Did your family fight over the last piece? Tell me everything. And if you’re looking for more holiday treats, check out my gingerbread cookie recipe for a classic version of the base, or my pumpkin cheesecake bars for another lighter twist on a favorite. Happy baking, friends!
Frequently Asked Questions
Can I use full-fat cream cheese instead of reduced-fat?
Absolutely. The bars will be richer and slightly denser, but still delicious. If you use full-fat, you might want to reduce the Greek yogurt to ⅓ cup to keep the texture balanced.
Can I skip the cream cheese frosting?
You can, but I wouldn’t recommend it. The frosting adds a creamy contrast to the spiced gingerbread base. If you want to lighten things further, try a dusting of powdered sugar instead.
Why did my cheesecake layer crack?
Cracks usually happen from overmixing or overbaking. Mix the cheesecake ingredients just until smooth, and pull the bars out of the oven when the center still has a slight jiggle. Cooling slowly also helps — don’t put hot bars directly in the fridge.
Can I make these bars ahead of time?
Yes! They actually taste better after a day or two. You can make the entire recipe up to 3 days in advance and store them in the refrigerator. Or freeze the unfrosted bars for up to 3 months.
How do I get clean slices?
Use a sharp knife and wipe it clean between each cut. For extra clean slices, run the knife under hot water and dry it off before cutting. Chilling the bars well before slicing also helps.
Pin This Recipe!
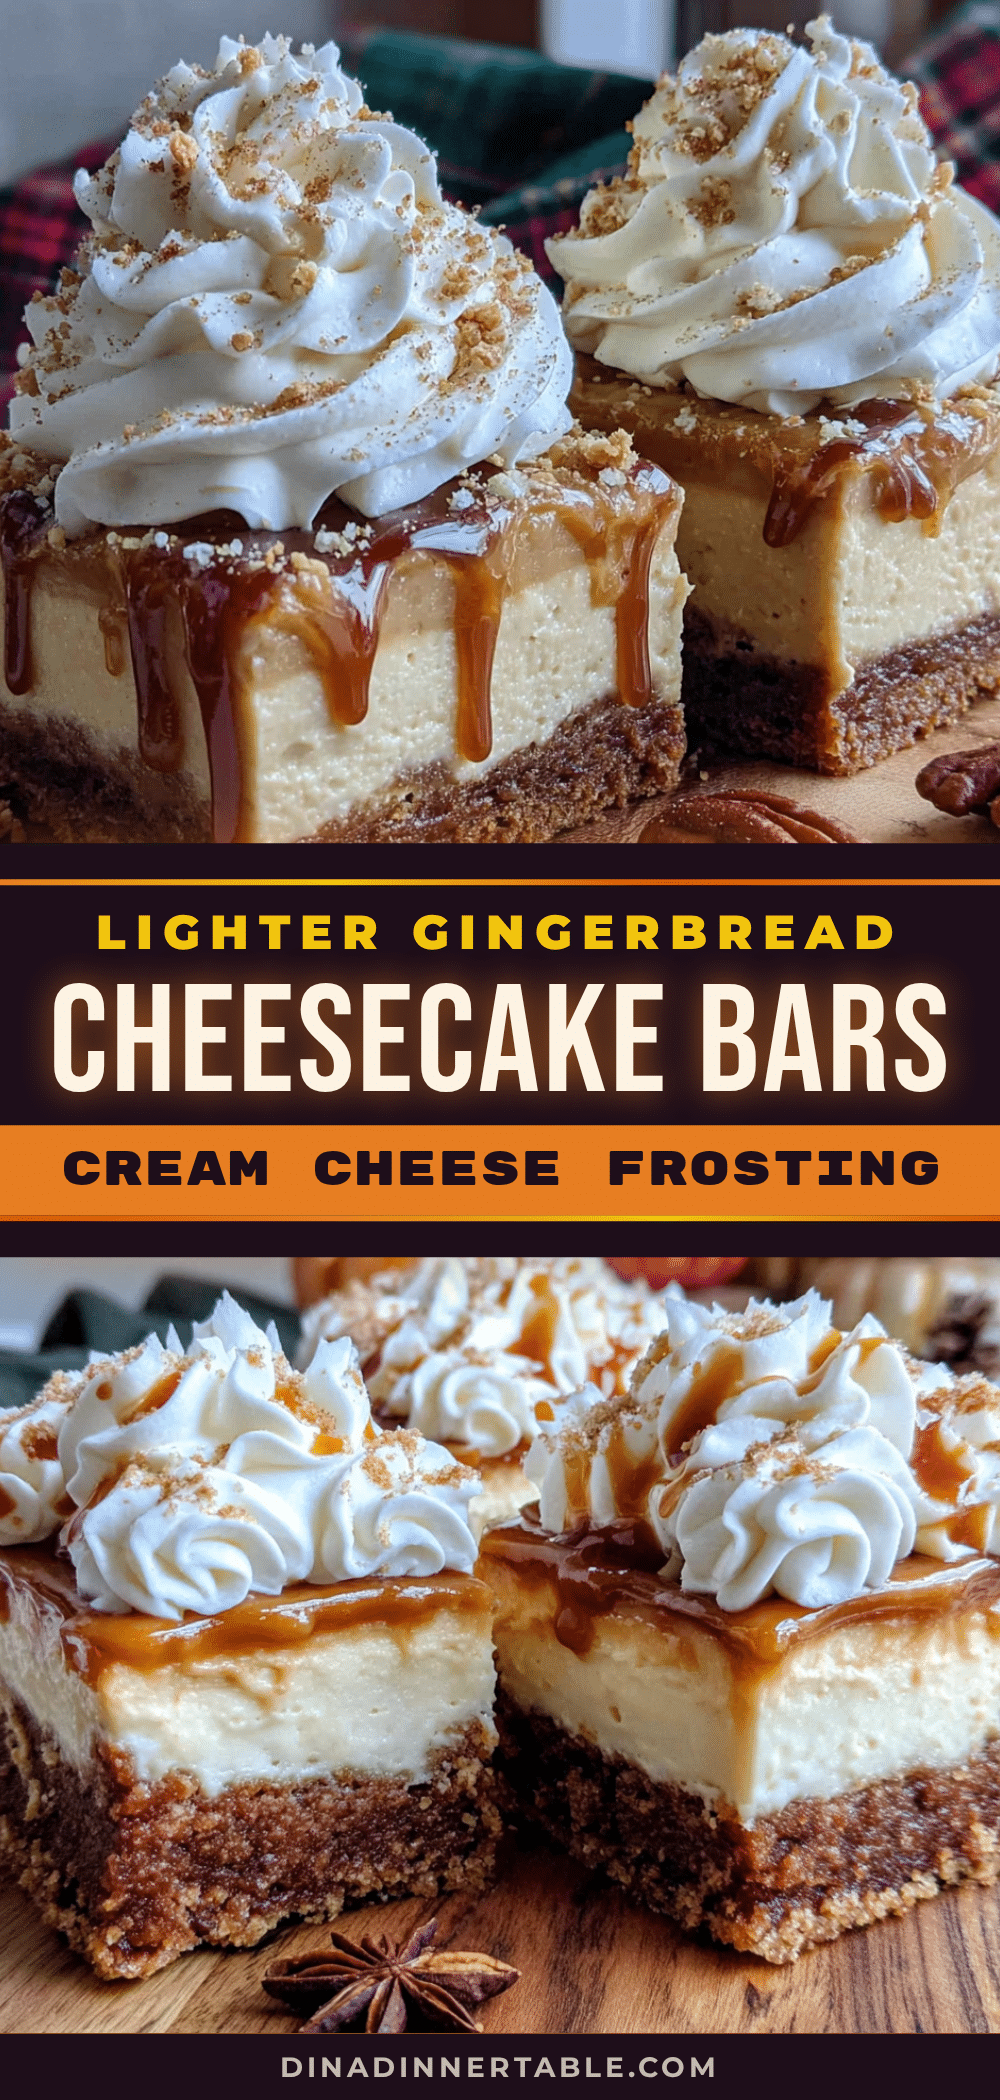
Lighter Gingerbread Cheesecake Bars with Cream Cheese Frosting
These lighter gingerbread cheesecake bars feature a chewy, spiced gingerbread base, a creamy Greek yogurt cheesecake layer, and a rich cream cheese frosting. They’re a holiday favorite that feels indulgent but is surprisingly light.
- Prep Time: 40 minutes
- Cook Time: 30 minutes
- Total Time: 4 hours 10 minutes (includes chilling)
- Yield: 16 servings 1x
- Category: Dessert
- Cuisine: American
Ingredients
- 1 ½ cups (180g) all-purpose flour
- 1 ½ teaspoons ground ginger
- 1 teaspoon ground cinnamon
- ¼ teaspoon ground cloves
- ½ teaspoon baking soda
- ¼ teaspoon salt
- ¼ cup (56g) unsalted butter, melted
- ½ cup (170g) unsulphured molasses
- ½ cup (100g) packed brown sugar
- 1 large egg, at room temperature
- 1 teaspoon vanilla extract
- 8 ounces (226g) reduced-fat cream cheese, softened
- ½ cup (120g) plain Greek yogurt (full-fat or 2%)
- ¼ cup (50g) granulated sugar
- 1 large egg, at room temperature
- 1 teaspoon vanilla extract
- 1 teaspoon fresh lemon juice
- 4 ounces (113g) reduced-fat cream cheese, softened
- 2 tablespoons (28g) unsalted butter, softened
- 1 cup (120g) powdered sugar, sifted if desired
- ½ teaspoon vanilla extract
- 1–2 tablespoons milk (any kind)
Instructions
- Preheat oven to 350°F (175°C). Line an 8×8-inch baking pan with parchment paper, leaving a 2-inch overhang on two opposite sides. Lightly grease the parchment.
- Make the gingerbread base: In a medium bowl, whisk together flour, ginger, cinnamon, cloves, baking soda, and salt. In a separate bowl, whisk together melted butter, molasses, brown sugar, egg, and vanilla until smooth. Pour wet ingredients into dry and stir with a spatula until just combined. Press dough evenly into prepared pan. Bake for 10 minutes. Remove from oven and set aside.
- Make the cheesecake layer: In a medium bowl, beat softened cream cheese with an electric mixer until smooth and fluffy, about 2 minutes. Add Greek yogurt, granulated sugar, egg, vanilla, and lemon juice. Beat on medium speed until combined and silky. Pour over par-baked gingerbread base and spread to edges.
- Bake for 25-30 minutes, until edges are set and center jiggles slightly. Cool in pan on a wire rack for 1 hour, then refrigerate for at least 3 hours or overnight.
- Make the cream cheese frosting: In a small bowl, beat softened cream cheese and butter until smooth. Add powdered sugar and vanilla, beat until combined. Add milk 1 tablespoon at a time until spreadable. Spread over chilled cheesecake layer. Refrigerate for 30 minutes to set.
- Lift bars out of pan using parchment overhang. Slice into 16 squares with a sharp knife, wiping clean between cuts. Serve cold or at room temperature.
Notes
Don’t overmix the cheesecake layer to avoid cracks. Use room temperature ingredients for a smooth filling. Chill the bars completely before frosting. For gluten-free, use a 1:1 gluten-free flour blend. For dairy-free, use dairy-free cream cheese and plant-based yogurt.
Nutrition
- Serving Size: 1 bar
- Calories: 185
- Sugar: 16
- Sodium: 160
- Fat: 9
- Saturated Fat: 5
- Carbohydrates: 24
- Fiber: 0.5
- Protein: 4
Keywords: gingerbread cheesecake bars, lighter cheesecake, Greek yogurt cheesecake, holiday dessert, cream cheese frosting


