My neighbor Sarah asked why I couldn’t just use a mini muffin tin instead of a springform pan for individual cheesecakes. I started to explain why that wouldn’t work — then stopped. Honestly, I had no good reason. I’d just never tried it. The whole conversation started because her four-year-old wanted to help make something for Thanksgiving, and my usual recipe was way too complicated for little hands.
So I gave it a shot. I mean, what was the worst that could happen? A few smashed crusts? A lopsided cheesecake? Let me tell you — I was wrong. So wrong. Those tiny cheesecakes came out perfect. Better than perfect, actually. The edges got this lovely golden-brown crust that big cheesecakes never get, and the centers stayed creamy and smooth. Sarah’s kid beamed like she’d won a baking trophy.
That was three autumns ago, and these mini pumpkin cheesecake bites have become our go-to for every fall gathering. Maybe you’ve been there — wanting a seasonal dessert that feels special but doesn’t require a culinary degree to pull off. These little guys are exactly that. They’re forgiving, they’re fun to make, and they disappear faster than anything else on the dessert table. I keep coming back to them because they remind me that sometimes the best ideas come from someone who doesn’t know the “right” way to do things.
Why You’ll Love This Recipe
These mini pumpkin cheesecake bites aren’t just another fall dessert — they’re the kind of recipe that makes you look like a hero with almost no effort. I’ve tested this version at least a dozen times, tweaking the spice ratio and the baking time until everything clicked. Here’s why they work so well:
- Quick & Easy: From start to finish, you’re looking at about 35 minutes of active time. The oven does the rest.
- Simple Ingredients: Nothing weird here. Cream cheese, pumpkin puree, graham crackers — all stuff you probably already have.
- Perfect for Family Gatherings: Thanksgiving, Halloween parties, or just a random Tuesday in October. They fit any occasion.
- Crowd-Pleaser: Kids love the bite-size format, and adults appreciate the portion control. Everyone wins.
- Unbelievably Delicious: The texture is this perfect combo of crunchy crust, creamy filling, and that warm pumpkin spice flavor that just feels like a hug.
What makes this version different from all the other pumpkin cheesecake recipes out there? It’s the ratio. I spent a long time figuring out the right balance of pumpkin to cream cheese so the filling stays light but still tastes rich. Plus, the mini format means you don’t have to stress about cracks on top — nobody notices on a two-bite dessert. These are the kind of treats that make you close your eyes after the first bite and forget about all the other stuff on your to-do list.
What Ingredients You Will Need
This recipe uses simple, pantry-friendly ingredients to deliver bold fall flavor without any fuss. Most of these are probably already in your kitchen or easy to grab at the store.
For the Crust
- 1 ½ cups graham cracker crumbs (about 12 full sheets, crushed fine)
- ¼ cup granulated sugar
- 6 tablespoons unsalted butter, melted (adds richness and helps the crust hold together)
- ¼ teaspoon salt (balances the sweetness)
For the Filling
- 16 ounces cream cheese, softened to room temperature (I recommend Philadelphia for the smoothest texture)
- ¾ cup granulated sugar
- 1 cup pumpkin puree (not pumpkin pie filling — make sure it’s 100% pure pumpkin)
- 2 large eggs, room temperature
- 1 teaspoon vanilla extract
- 1 ½ teaspoons pumpkin pie spice (or make your own with cinnamon, nutmeg, ginger, and cloves)
- ½ teaspoon ground cinnamon
- Pinch of salt
For the Topping (Optional but Recommended)
- ½ cup sour cream
- 2 tablespoons powdered sugar
- ¼ teaspoon vanilla extract
- Whipped cream and a sprinkle of cinnamon for garnish
A few notes on ingredients: Make sure your cream cheese is truly softened — not cold, not melted. Cold cream cheese creates lumps that are nearly impossible to smooth out. If you’re dairy-free, you can use a plant-based cream cheese alternative, but the texture will be slightly less creamy. For the pumpkin puree, I’ve tried several brands and Libby’s gives the most consistent results. In a pinch, you can substitute the graham crackers with crushed digestive biscuits or even vanilla wafers for a different flavor profile.
Equipment Needed
You don’t need a fancy kitchen to pull these off. Here’s what you’ll need:
- Mini muffin tin (24-cup size works best; if you only have a 12-cup, just bake in batches)
- Mixing bowls (one medium, one large)
- Electric hand mixer or stand mixer (a whisk and strong arm work too, but the mixer makes it smoother)
- Measuring cups and spoons
- Spatula (preferably silicone for scraping every last bit of filling)
- Piping bag or zip-top bag (for filling the cups neatly — trust me on this one)
- Small offset spatula or butter knife (for smoothing tops)
If you don’t have a mini muffin tin, you can use regular muffin tins with paper liners — just increase the baking time by 5-7 minutes. I’ve also made these in silicone mini muffin molds, which work great and don’t require greasing. My first attempt used a regular muffin tin and the cheesecakes came out a bit flat, but they still tasted amazing. Don’t let missing equipment stop you.
Preparation Method
Let’s get baking. I’ll walk you through every step so you feel confident.
- Preheat your oven to 325°F (163°C). Line your mini muffin tin with paper liners or grease the cups well with butter or non-stick spray. I prefer paper liners because they make cleanup so much easier and the cheesecakes pop right out.
- Make the crust. In a medium bowl, combine the graham cracker crumbs, sugar, and salt. Pour in the melted butter and stir with a fork until every crumb is moistened. The mixture should look like wet sand and hold together when you squeeze it.
- Press the crust into the muffin cups. Drop about 1 tablespoon of the crust mixture into each cup. Use the bottom of a small shot glass or a measuring spoon to press it down firmly and evenly. Don’t skip this pressing step — a loose crust will crumble apart when you try to eat the cheesecakes. Set the tin aside.
- Bake the crusts. Pop the tin into the oven for 5 minutes. This pre-bake step keeps the crust from getting soggy once you add the filling. Let them cool on a wire rack while you make the filling.
- Beat the cream cheese. In a large bowl, beat the softened cream cheese with an electric mixer on medium speed until smooth and fluffy — about 2 minutes. Scrape down the sides and bottom of the bowl with a spatula. This step is crucial for avoiding lumps.
- Add the sugar and pumpkin. Beat in the sugar until combined, then add the pumpkin puree and mix until smooth. The mixture will look a bit loose at this point — that’s normal.
- Add the eggs and flavorings. Beat in the eggs one at a time, mixing on low speed just until each one is incorporated. Overbeating at this stage adds too much air and can cause cracks. Add the vanilla, pumpkin pie spice, cinnamon, and salt, and mix on low until just combined.
- Fill the cups. Transfer the filling to a piping bag or a zip-top bag with the corner snipped off. Pipe the filling into each cup, filling almost to the top — leave about ⅛ inch of space. The filling will puff up slightly but won’t overflow if you leave that tiny gap.
- Bake the cheesecakes. Bake at 325°F (163°C) for 12-15 minutes. The edges should look set and slightly puffed, but the centers will still jiggle when you gently shake the pan. That jiggle is your friend — it means they’ll be creamy, not dry. If you see the tops starting to brown, pull them out immediately.
- Cool completely. Let the cheesecakes cool in the tin on a wire rack for 30 minutes. Then transfer the tin to the refrigerator and chill for at least 2 hours. This is the hardest part — waiting — but it’s essential for the right texture.
- Make the topping (optional). While the cheesecakes chill, whisk together the sour cream, powdered sugar, and vanilla. Spread a tiny dollop on each chilled cheesecake before serving, or just top with whipped cream and a dusting of cinnamon.
Cooking Tips & Techniques
After making these mini pumpkin cheesecake bites more times than I can count, I’ve learned a few things the hard way. Let me save you some trouble.
Room temperature ingredients matter. I know it’s annoying to wait, but cold cream cheese and eggs create a lumpy filling that never quite smooths out. Take them out of the fridge about 45 minutes before you start. If you’re in a rush, cut the cream cheese into cubes and let it sit for 15 minutes — that helps it soften faster.
Don’t overmix the filling. This was my biggest mistake early on. I’d beat the filling until it was perfectly smooth, which added too much air. The cheesecakes would puff up beautifully in the oven, then collapse and crack as they cooled. Mix on low speed once the eggs go in, and stop as soon as everything looks combined.
Watch the baking time like a hawk. Every oven runs a little differently. My first batch came out dry because I left them in for 18 minutes, thinking they needed more time. They didn’t. Start checking at 12 minutes. The edges should be set and the centers should jiggle like Jell-O when you shake the pan. If they look completely firm in the middle, they’re overbaked.
Use a water bath shortcut. Traditional cheesecake recipes call for a water bath to prevent cracking. For mini cheesecakes, you can skip it — but if you want extra insurance, place a small pan of hot water on the lower rack of the oven while they bake. The steam keeps the oven humid and reduces the chance of cracks.
Chill overnight if you can. Two hours is the minimum, but these are genuinely better the next day. The flavors meld together and the texture gets even creamier. I often make them the day before a party and just add the toppings right before serving.
Variations & Adaptations
One of the best things about this recipe is how easy it is to tweak. Here are some variations I’ve tried and loved:
- Gluten-Free Version: Swap the graham crackers for gluten-free graham crackers or crushed gluten-free shortbread cookies. The rest of the recipe is naturally gluten-free, so this is an easy switch.
- Dairy-Free Adaptation: Use a high-quality dairy-free cream cheese alternative and coconut oil instead of butter in the crust. The texture will be slightly less dense, but still delicious. I’ve done this for a friend with dairy allergies and it worked beautifully.
- Chocolate-Pumpkin Swirl: Melt ¼ cup of semi-sweet chocolate chips and swirl it into the filling before baking. Drop spoonfuls of the melted chocolate on top of the filling and use a toothpick to create swirls. The chocolate-pumpkin combo is absolutely killer.
- Gingersnap Crust: Replace the graham crackers with crushed gingersnap cookies for a spicier, more intense fall flavor. This is my personal favorite variation — the ginger and molasses notes pair perfectly with the pumpkin.
- Maple Pecan Topping: Skip the sour cream topping and instead drizzle with maple syrup and sprinkle with chopped toasted pecans. It adds a lovely crunch and a touch of sweetness that feels extra special.
I once made a batch with a gingersnap crust and maple pecan topping for a Friendsgiving gathering, and people literally asked for the recipe before they finished eating. Don’t be afraid to experiment — these cheesecakes are forgiving enough to handle creative twists.
Serving & Storage Suggestions
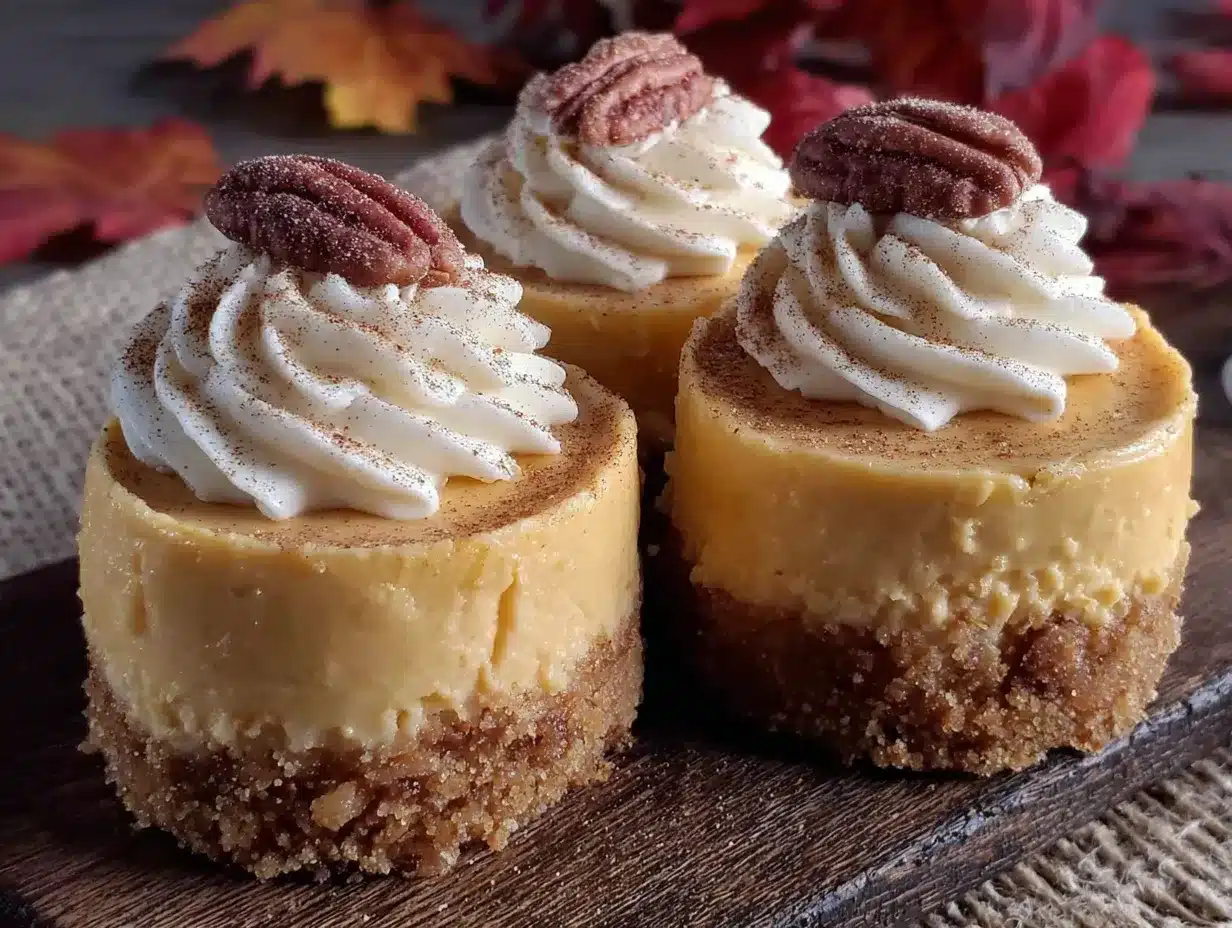
These mini pumpkin cheesecake bites are best served cold, straight from the fridge. The texture is perfect at that temperature — firm enough to hold their shape but creamy when you bite into them. I like to arrange them on a platter with a few cinnamon sticks and star anise for a pretty fall presentation.
For toppings, you have options. A dollop of whipped cream and a sprinkle of cinnamon is classic. The sour cream topping I mentioned earlier adds a tangy contrast that balances the sweetness. If you’re feeling fancy, drizzle with caramel sauce and top with a candied pecan.
These pair beautifully with a warm cup of coffee, spiced apple cider, or even a glass of cold milk — especially if you’re serving them to kids. For a dessert spread, I like to serve them alongside other bite-sized treats like chocolate truffles or mini fruit tarts.
Storage: Keep the cheesecakes in an airtight container in the refrigerator for up to 5 days. They actually get better after a day or two as the flavors meld. I do not recommend leaving them at room temperature for more than 2 hours, especially if you’re serving them at a party.
Freezing: These freeze beautifully. Place the cooled, un-topped cheesecakes on a baking sheet and freeze until solid, then transfer to a freezer-safe container or bag. They’ll keep for up to 3 months. When you’re ready to serve, thaw them in the refrigerator overnight and add toppings just before serving. I always keep a batch in the freezer for unexpected guests or last-minute dessert cravings.
Nutritional Information & Benefits
Here’s the approximate nutritional breakdown for one mini cheesecake bite (based on 24 servings, without optional toppings):
- Calories: 145
- Total Fat: 9g
- Saturated Fat: 5g
- Cholesterol: 38mg
- Sodium: 125mg
- Total Carbohydrates: 14g
- Dietary Fiber: 1g
- Sugars: 10g
- Protein: 3g
Pumpkin is the real star here nutritionally. It’s packed with vitamin A (great for eye health), fiber, and antioxidants. The cream cheese adds calcium and protein, so these aren’t just empty calories — they’ve got some redeeming qualities. Plus, the mini size makes portion control easy. You can enjoy one or two without derailing your whole day.
For those with dietary concerns: this recipe contains dairy, gluten (from the graham crackers), and eggs. See the variations section for gluten-free and dairy-free options. These are not low-carb or keto-friendly as written, but you could experiment with a nut flour crust and sugar substitute if needed.
Conclusion
These mini pumpkin cheesecake bites are everything I want in a fall dessert — easy, delicious, and just a little bit special. They’ve become a staple in my kitchen because they deliver that warm, spiced pumpkin flavor without the stress of a full-sized cheesecake. Plus, they’re genuinely fun to make. There’s something satisfying about piping the filling into those tiny cups and watching them transform into perfect little treats.
I hope you give them a try, and I hope you make them your own. Add a pinch of extra cinnamon, swap the crust, pile on the whipped cream — whatever feels right. That’s the beauty of a forgiving recipe like this one.
If you do make these, I’d love to hear about it. Drop a comment below and let me know how they turned out, or share your own twist on the recipe. And if you’re looking for more easy fall desserts, check out our pumpkin spice cookies or apple cider donuts — both are family favorites around here. Happy baking, friends!
Frequently Asked Questions
Can I use pumpkin pie filling instead of pumpkin puree?
No, I wouldn’t recommend it. Pumpkin pie filling is already sweetened and spiced, so it would throw off the balance of the recipe. The filling would be too sweet and the texture might be off. Stick with 100% pure pumpkin puree for the best results.
Why did my cheesecake bites crack on top?
Cracks usually happen from overbaking or overmixing. Make sure you pull them out when the centers still jiggle slightly. Also, try not to overbeat the filling once the eggs go in — that adds too much air. If they do crack, don’t worry. A dollop of whipped cream or the sour cream topping covers it perfectly.
Can I make these in advance for a party?
Absolutely. In fact, I recommend it. You can make them up to 2 days ahead and keep them in the refrigerator. Add any toppings just before serving. They also freeze well for up to 3 months — just thaw overnight in the fridge.
How do I get the cheesecakes out of the mini muffin tin cleanly?
If you used paper liners, they should pop right out. If you greased the tin directly, run a thin knife or offset spatula around the edge of each cheesecake before lifting them out. Chilling them thoroughly first makes this much easier.
Can I double this recipe?
Yes, this recipe doubles beautifully. Just make sure you have two mini muffin tins, or bake in batches. The baking time stays the same. I often double the batch for holiday parties and freeze the extras — they disappear fast.
Pin This Recipe!
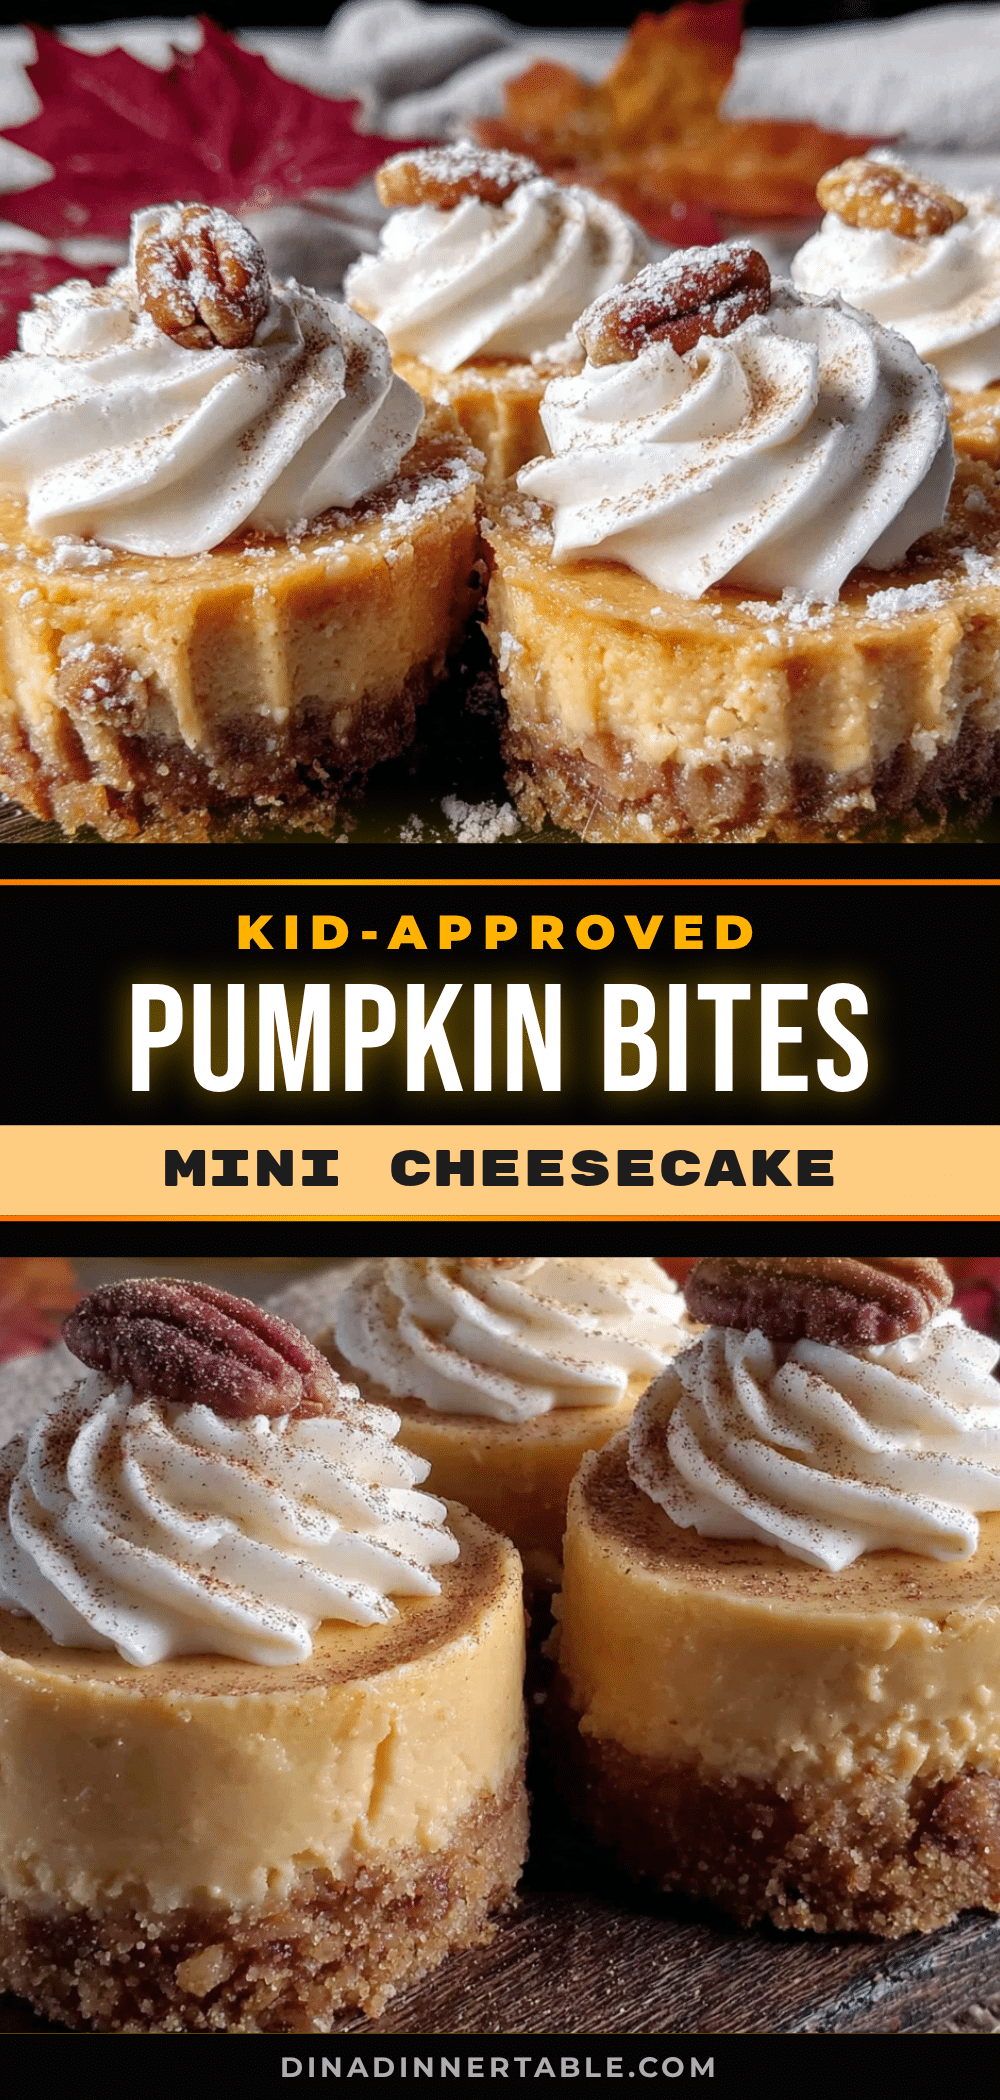
Mini Pumpkin Cheesecake Bites: Easy & Kid-Approved Treat
These mini pumpkin cheesecake bites are a perfect fall dessert that’s quick, easy, and kid-friendly. With a crunchy graham cracker crust, creamy pumpkin filling, and optional sour cream topping, they’re ideal for Thanksgiving, Halloween, or any autumn gathering.
- Prep Time: 35 minutes
- Cook Time: 15 minutes
- Total Time: 2 hours 50 minutes (includes chilling)
- Yield: 24 servings 1x
- Category: Dessert
- Cuisine: American
Ingredients
- 1 ½ cups graham cracker crumbs (about 12 full sheets, crushed fine)
- ¼ cup granulated sugar
- 6 tablespoons unsalted butter, melted
- ¼ teaspoon salt
- 16 ounces cream cheese, softened to room temperature
- ¾ cup granulated sugar
- 1 cup pumpkin puree (not pumpkin pie filling)
- 2 large eggs, room temperature
- 1 teaspoon vanilla extract
- 1 ½ teaspoons pumpkin pie spice
- ½ teaspoon ground cinnamon
- Pinch of salt
- ½ cup sour cream (for topping, optional)
- 2 tablespoons powdered sugar (for topping, optional)
- ¼ teaspoon vanilla extract (for topping, optional)
- Whipped cream and cinnamon for garnish (optional)
Instructions
- Preheat your oven to 325°F (163°C). Line a mini muffin tin with paper liners or grease the cups well.
- Make the crust: In a medium bowl, combine graham cracker crumbs, ¼ cup sugar, and ¼ teaspoon salt. Pour in melted butter and stir until moistened like wet sand.
- Press about 1 tablespoon of crust mixture into each muffin cup. Use the bottom of a small glass or measuring spoon to press firmly.
- Bake the crusts for 5 minutes. Let cool on a wire rack.
- Beat the softened cream cheese with an electric mixer on medium speed until smooth and fluffy, about 2 minutes. Scrape down the bowl.
- Beat in ¾ cup sugar until combined, then add pumpkin puree and mix until smooth.
- Beat in eggs one at a time on low speed just until incorporated. Add vanilla, pumpkin pie spice, cinnamon, and a pinch of salt; mix on low until just combined.
- Transfer filling to a piping bag or zip-top bag with the corner snipped off. Pipe filling into each cup, filling almost to the top (leave about ⅛ inch space).
- Bake at 325°F (163°C) for 12-15 minutes. Edges should be set, centers should jiggle slightly.
- Cool in the tin on a wire rack for 30 minutes, then refrigerate for at least 2 hours (or overnight).
- Optional topping: Whisk together sour cream, powdered sugar, and ¼ teaspoon vanilla. Spread a small dollop on each chilled cheesecake before serving, or top with whipped cream and cinnamon.
Notes
Room temperature ingredients are crucial for a smooth filling. Don’t overmix once eggs are added to prevent cracks. Start checking for doneness at 12 minutes; centers should jiggle. For extra insurance against cracking, place a small pan of hot water on the lower oven rack. Chilling overnight improves flavor and texture. These freeze well for up to 3 months.
Nutrition
- Serving Size: 1 mini cheesecake bi
- Calories: 145
- Sugar: 10
- Sodium: 125
- Fat: 9
- Saturated Fat: 5
- Carbohydrates: 14
- Fiber: 1
- Protein: 3
Keywords: mini pumpkin cheesecake bites, pumpkin cheesecake, fall dessert, Thanksgiving dessert, easy cheesecake, kid-friendly dessert, bite-size cheesecake