I was standing in my own kitchen last Tuesday, staring at a half-empty jar of minced garlic and a sad-looking pack of chicken thighs, when the smell hit me. Not a real smell, you know—a memory smell. It was the scent of garlic butter melting in a hot pan, mixed with the earthy aroma of rice toasting before it gets a bath of broth. And suddenly I was seven years old, standing on a step stool in my Aunt Rita’s tiny apartment kitchen, watching her make what she called “emergency dinner.” She wasn’t a fancy cook by any stretch, but she had this way of making one pan feel like a full embrace. I remember the way the butter sizzled and popped, and how she’d let me sprinkle the rice in, grain by grain, even though I was taking forever. She passed away a few years back, and honestly, I haven’t thought about those Tuesday night dinners in ages. But there I was, holding that garlic jar like it was a time machine. I grabbed the chicken, found some long-grain rice in the back of the pantry, and decided to chase that feeling. This one-pan garlic butter chicken and rice isn’t her exact recipe—I’ve tweaked it, added a little more garlic (because, let’s face it, you can never have too much), and made it a little more forgiving for busy weeknights. But the soul of it? That’s all her. It’s the kind of dish that makes you slow down for a second, take a deep breath, and remember something good.
Why You’ll Love This Recipe
This isn’t just another chicken and rice dinner. This is the one you’ll come back to again and again, especially when the days get shorter and all you want is something warm and satisfying without a sink full of dishes. I’ve tested this recipe more times than I can count, tweaking the liquid ratio, the heat level, and the garlic amount until it was just right. Here’s why it works:
- One-Pan Wonder: Everything cooks in a single skillet or Dutch oven. Less cleanup means more time to actually enjoy your evening.
- Simple Ingredients: You probably have most of these in your kitchen right now. No fancy trips to a specialty store required.
- Perfect for Cozy Nights: This is the ultimate comfort food for fall and winter. It’s hearty, warming, and fills your whole house with an incredible smell.
- Crowd-Pleaser: I’ve made this for picky eaters and foodie friends alike, and the pan is always scraped clean. The garlic butter sauce is just that good.
- Unbelievably Flavorful: The secret is browning the chicken first and toasting the rice in that garlic butter. It builds layers of flavor you just can’t get from a dump-and-bake recipe.
What makes this version different from the rest? It’s the technique. We’re not just boiling rice with chicken on top. We’re searing the chicken to get that golden, crispy skin, then using the same pan to toast the rice in the garlic butter before adding the broth. This little step makes the rice nutty and flavorful, not bland and mushy. It’s comfort food that actually tastes like you spent hours on it, even though it comes together in about 45 minutes. You close your eyes after that first bite, and it just feels right.
What Ingredients You Will Need
This recipe uses simple, wholesome ingredients to deliver bold flavor and satisfying texture without the fuss. Most are pantry staples, making it a perfect last-minute dinner idea when you’re staring into the fridge wondering what to make.
- For the Chicken:
- 4 bone-in, skin-on chicken thighs (about 1.5 lbs total) — I prefer thighs for their juicy, forgiving nature, but you can use boneless thighs or breasts if you adjust the cooking time. I often use Bell & Evans or just whatever looks freshest at the market.
- 1 teaspoon salt
- 1/2 teaspoon black pepper
- 1/2 teaspoon paprika (adds a nice color and subtle warmth)
- For the Garlic Butter Base:
- 3 tablespoons unsalted butter — salted butter works too, just reduce the added salt slightly.
- 5 cloves garlic, minced — yes, five. Don’t skimp here. This is the star of the show.
- 1 small yellow onion, finely diced (about 1/2 cup)
- For the Rice:
- 1 cup long-grain white rice — basmati or jasmine work beautifully. Do not use minute rice or parboiled rice, as the texture will be off. Rinse the rice in a fine-mesh strainer until the water runs clear to remove excess starch.
- 1 1/2 cups low-sodium chicken broth — I like Swanson or Kitchen Basics for consistent flavor. You can also use water plus a bouillon cube in a pinch.
- 1/2 cup water
- For the Finishing Touch:
- 2 tablespoons fresh parsley, chopped — for color and freshness. Optional but highly recommended.
- Lemon wedges, for serving — a squeeze of lemon at the end brightens everything up.
Equipment Needed
The beauty of this recipe is that it’s truly one-pan. You don’t need a lot of fancy gadgets to pull it off. Here’s what you’ll need:
- A large, heavy-bottomed skillet or Dutch oven: A 12-inch skillet with a tight-fitting lid is ideal. Cast iron works great, as does a good-quality stainless steel or non-stick pan. I use my trusty 12-inch cast iron skillet for this—it holds heat beautifully and gives the chicken an amazing crust. If you don’t have a lid for your skillet, a piece of aluminum foil works perfectly.
- Measuring cups and spoons: For accuracy, especially with the liquid-to-rice ratio.
- A sharp knife and cutting board: For mincing garlic and dicing the onion.
- Tongs: For flipping the chicken without piercing the skin and losing those precious juices.
- A fine-mesh strainer: For rinsing the rice. This is a small step that makes a big difference in the final texture.
Preparation Method
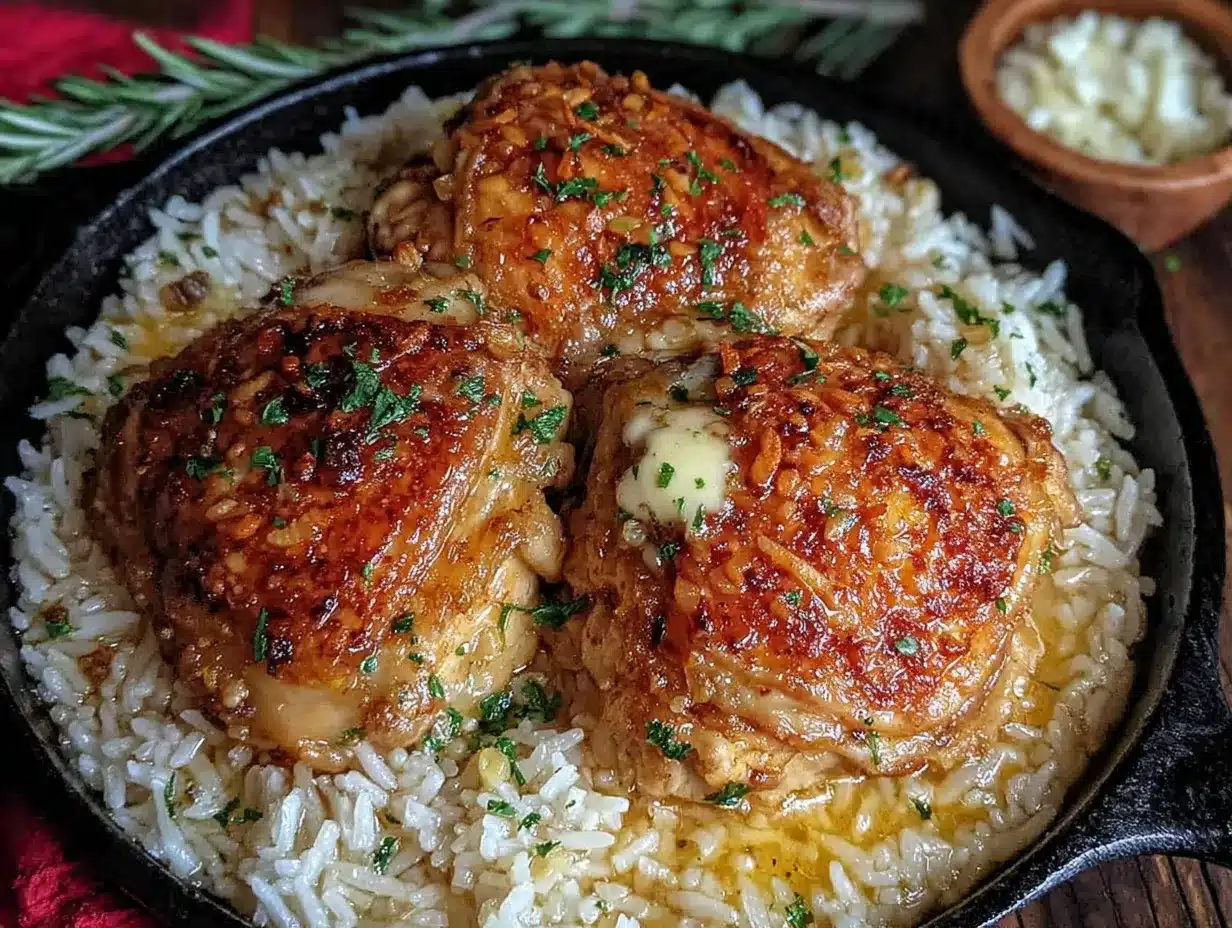
Let’s get cooking. This comes together in about 45 minutes, and most of that is hands-off simmering time.
- Prep the Chicken (5 minutes): Pat the chicken thighs dry with paper towels. This is crucial for getting a good sear. Season them generously on both sides with the salt, pepper, and paprika. Let them sit while you get the pan ready.
- Sear the Chicken (10 minutes): Place your skillet over medium-high heat and add 1 tablespoon of the butter. Once it’s melted and shimmering, carefully place the chicken thighs skin-side down. Don’t crowd the pan—if your skillet is smaller, do this in two batches. Let them cook undisturbed for 5-7 minutes, until the skin is deep golden brown and crispy. Flip and cook for another 3-4 minutes. The chicken won’t be fully cooked through yet, and that’s fine. Transfer the chicken to a plate and set aside.
- Build the Base (5 minutes): Reduce the heat to medium. Add the remaining 2 tablespoons of butter to the pan. Once it melts, add the diced onion and cook for 2-3 minutes, until softened and translucent. Add the minced garlic and cook for just 30 seconds, stirring constantly, until fragrant. Be careful not to burn the garlic—it turns bitter fast.
- Toast the Rice (3 minutes): Add the rinsed and drained rice to the pan. Stir it around in the garlic butter and onions for about 2 minutes. You’ll notice the rice starts to turn slightly translucent at the edges and gives off a nutty aroma. This step is non-negotiable for the best flavor.
- Add the Liquid (2 minutes): Pour in the chicken broth and water. Stir everything together, scraping up any browned bits from the bottom of the pan. Those bits are pure flavor. Bring the liquid to a gentle simmer.
- Return the Chicken (1 minute): Nestle the seared chicken thighs back into the pan, skin-side up, on top of the rice. They should be sitting partially above the liquid, not submerged. This keeps the skin crispy.
- Simmer and Steam (20-25 minutes): Cover the skillet with a tight-fitting lid. Reduce the heat to low and let it simmer gently. Do not lift the lid during this time—you need the steam to cook the rice evenly. Set a timer for 20 minutes.
- Check and Rest (5 minutes): After 20 minutes, turn off the heat. Let the pan sit, still covered, for another 5 minutes. This allows the rice to finish absorbing any remaining liquid. After the rest, remove the lid. The rice should be tender and fluffy, and the chicken should be cooked through (internal temperature of 165°F). If the rice is still a little firm, add a splash more broth, cover, and let it sit on low heat for another 5 minutes.
- Finish and Serve (2 minutes): Fluff the rice gently with a fork. Sprinkle with fresh parsley and serve with lemon wedges on the side.
Cooking Tips & Techniques
I’ve made this recipe about a dozen times now, and I’ve definitely learned a few things the hard way. Here are my best tips to get it perfect every time.
Don’t skip drying the chicken. I know it’s an extra step, but moisture is the enemy of a good sear. Pat those thighs dry, and you’ll be rewarded with that gorgeous golden crust. I once forgot this step and ended up with pale, steamed chicken skin. It still tasted good, but it wasn’t the same.
Watch your heat. When you add the rice to the garlic butter, keep the heat at medium. If it’s too high, the garlic will burn before the rice even starts to toast. Burnt garlic tastes bitter and will ruin the whole dish. If you see the garlic getting too dark too fast, just pull the pan off the heat for a minute.
The lid is your best friend. That tight seal is what creates the steam that cooks the rice perfectly. If your lid isn’t snug, you can lay a piece of foil over the pan before putting the lid on. And seriously, don’t peek! Every time you lift that lid, you let out precious steam, and your rice might end up crunchy.
Let it rest. That 5-minute rest off the heat at the end is not optional. It allows the rice to finish absorbing the liquid and the steam to redistribute. It’s the difference between fluffy rice and sticky, gummy rice.
If you’re using boneless chicken, adjust the timing. Boneless, skinless thighs will cook faster (about 15-18 minutes of simmering). Boneless, skinless breasts will cook even faster (12-15 minutes). Just make sure the internal temperature hits 165°F.
Variations & Adaptations
This recipe is wonderfully flexible. Here are a few ways to make it your own.
- Add Veggies: Toss in a cup of frozen peas and carrots during the last 5 minutes of cooking. Or add a handful of fresh spinach right at the end and let it wilt into the rice. Sliced mushrooms sautéed with the onion are also fantastic.
- Make it Spicy: Add 1/2 teaspoon of red pepper flakes along with the garlic. Or serve it with a drizzle of sriracha or chili crisp on top. The garlic butter and heat is a match made in heaven.
- Herb it Up: Swap the parsley for fresh thyme or rosemary. Add a couple of sprigs to the pan when you add the broth, then remove them before serving. Dill is also lovely with the lemon.
- Dairy-Free Version: Use a good quality vegan butter or olive oil in place of the butter. The flavor will be slightly different, but still delicious. I’ve used extra virgin olive oil before and it adds a lovely fruity note.
- Try Different Grains: You can use brown rice, but you’ll need to increase the liquid to 2 cups and simmer for about 45-50 minutes. Quinoa works too—use 1 cup quinoa to 1 3/4 cups broth and simmer for 15 minutes.
Serving & Storage Suggestions
This dish is a complete meal in itself, but it pairs beautifully with a simple side. Serve it hot, straight from the pan, with lemon wedges for squeezing over the top. That little hit of acid cuts through the richness of the butter and makes everything sing.
For a complete dinner, try it with a crisp green salad dressed with a light vinaigrette, or some steamed green beans or roasted broccoli. The simplicity of the sides lets the main dish shine.
Storage: Leftovers keep well in an airtight container in the refrigerator for up to 4 days. The rice will absorb some of the liquid as it sits, so it might be a little less fluffy the next day, but the flavor will be even better.
Reheating: The best way to reheat this is in a skillet over medium-low heat with a splash of chicken broth or water. Cover and let it steam for 5-7 minutes, stirring occasionally. You can also use the microwave, but the rice tends to dry out. If using the microwave, cover the bowl with a damp paper towel to add moisture.
Freezing: This freezes well for up to 3 months. Let it cool completely, then transfer to a freezer-safe container. Thaw overnight in the refrigerator before reheating.
Nutritional Information & Benefits
While I’m not a nutritionist, I can give you a rough estimate for one serving (one chicken thigh with about a cup of rice).
Per serving (approximate): 520 calories, 28g fat, 38g carbohydrates, 2g fiber, 32g protein.
This dish offers a good balance of protein from the chicken and energy from the rice. Garlic is known for its immune-supporting properties, and using bone-in, skin-on chicken thighs provides a good dose of healthy fats and iron. It’s a satisfying, well-rounded meal that will keep you full and happy. If you’re watching your sodium, use low-sodium broth and adjust the added salt accordingly.
Conclusion
This one-pan garlic butter chicken and rice is the kind of recipe that becomes a staple. It’s simple enough for a random Tuesday night, but special enough to serve when you have company. It’s forgiving, adaptable, and packed with flavor that tastes like you put in way more effort than you actually did. That’s the magic of a good one-pan meal.
I hope you give this a try and make it your own. Maybe you add a little more garlic (I won’t judge), or throw in some leftover veggies from the fridge. That’s the beauty of cooking—you get to make it yours. If you do make it, I’d love to hear how it turned out. Drop a comment below and let me know if it brought back any good memories for you, or if you just enjoyed a really good dinner. Happy cooking, and don’t forget the lemon!
Frequently Asked Questions
Can I use chicken breasts instead of thighs?
Yes, you can. Boneless, skinless chicken breasts will work, but they cook faster and can dry out more easily. I recommend using bone-in, skin-on chicken breasts for best results, and check the internal temperature at 15 minutes of simmering to avoid overcooking.
Why is my rice mushy?
Mushy rice usually means too much liquid or the heat was too high. Make sure you’re using a heavy-bottomed pan that distributes heat evenly, and keep the heat on low once you add the lid. Also, be sure to rinse your rice well before cooking to remove excess starch.
Can I make this in a slow cooker or Instant Pot?
I haven’t tested this exact recipe in a slow cooker, but for an Instant Pot, you can sear the chicken using the sauté function, then add the rice, broth, and garlic butter mixture. Pressure cook on high for 5 minutes, then let the pressure release naturally for 10 minutes. You may need to adjust the liquid slightly.
Can I use frozen chicken?
I don’t recommend it for this recipe. Frozen chicken releases too much water as it thaws, which will prevent you from getting a good sear and can make the rice watery. Always thaw chicken completely in the refrigerator before cooking.
What if I don’t have a lid for my skillet?
No problem! You can cover the skillet tightly with a double layer of aluminum foil. Make sure it’s sealed well around the edges to trap the steam. This works just as well as a lid.
Pin This Recipe!

One-Pan Garlic Butter Chicken and Rice

A comforting one-pan meal featuring juicy seared chicken thighs and nutty rice cooked in a rich garlic butter sauce. This easy weeknight dinner comes together in about 45 minutes with minimal cleanup.
- Prep Time: 15 minutes
- Cook Time: 30 minutes
- Total Time: 45 minutes
- Yield: 4 servings 1x
- Category: Main Course
- Cuisine: American
Ingredients
- 4 bone-in, skin-on chicken thighs (about 1.5 lbs total)
- 1 teaspoon salt
- 1/2 teaspoon black pepper
- 1/2 teaspoon paprika
- 3 tablespoons unsalted butter
- 5 cloves garlic, minced
- 1 small yellow onion, finely diced (about 1/2 cup)
- 1 cup long-grain white rice (basmati or jasmine), rinsed
- 1 1/2 cups low-sodium chicken broth
- 1/2 cup water
- 2 tablespoons fresh parsley, chopped
- Lemon wedges, for serving
Instructions
- Pat the chicken thighs dry with paper towels. Season generously on both sides with salt, pepper, and paprika. Let sit while preparing the pan.
- Place a large skillet or Dutch oven over medium-high heat and add 1 tablespoon of butter. Once melted and shimmering, place chicken thighs skin-side down. Cook undisturbed for 5-7 minutes until skin is deep golden brown and crispy. Flip and cook for another 3-4 minutes. Transfer chicken to a plate and set aside.
- Reduce heat to medium. Add remaining 2 tablespoons of butter. Once melted, add diced onion and cook for 2-3 minutes until softened. Add minced garlic and cook for 30 seconds, stirring constantly, until fragrant.
- Add rinsed and drained rice to the pan. Stir for about 2 minutes until rice turns slightly translucent and gives off a nutty aroma.
- Pour in chicken broth and water. Stir together, scraping up any browned bits from the bottom of the pan. Bring to a gentle simmer.
- Nestle the seared chicken thighs back into the pan, skin-side up, on top of the rice.
- Cover the skillet with a tight-fitting lid. Reduce heat to low and let simmer gently for 20 minutes. Do not lift the lid during this time.
- After 20 minutes, turn off the heat. Let the pan sit, still covered, for another 5 minutes.
- Remove the lid. Fluff the rice gently with a fork. Sprinkle with fresh parsley and serve with lemon wedges on the side.
Notes
Don’t skip drying the chicken for a good sear. Keep heat at medium when toasting rice to avoid burning garlic. Do not lift the lid during simmering. Let rest for 5 minutes off heat before serving. For boneless chicken, adjust simmering time: boneless thighs 15-18 minutes, boneless breasts 12-15 minutes. Internal temperature should reach 165°F.
Nutrition
- Serving Size: 1 chicken thigh with
- Calories: 520
- Fat: 28
- Carbohydrates: 38
- Fiber: 2
- Protein: 32
Keywords: one-pan chicken and rice, garlic butter chicken, easy weeknight dinner, comfort food, one skillet meal