There used to be this little deli on the corner of Elm and 5th called Millie’s that made the most incredible dried beef cheese ball. When they closed up shop back in 2019, I honestly felt a little lost. That cheese ball was my go-to for every potluck, every holiday gathering, every time I needed to show up with something that looked like I tried way harder than I actually did. After maybe six or seven attempts—some that were crumbly disasters, one that was way too salty—I finally got it. And honestly? This version might be even better than the original.
The thing about a good cheese ball is it feels fancy without being fussy. You roll it in everything seasoning, and suddenly people think you spent hours in the kitchen. Let me tell you, the secret is all in how you handle the dried beef. I learned that the hard way after my first attempt came out tasting like a salt lick. You’ve got to give the beef a quick rinse and pat it dry, otherwise it dominates everything. That little extra step makes all the difference between a good cheese ball and a great one.
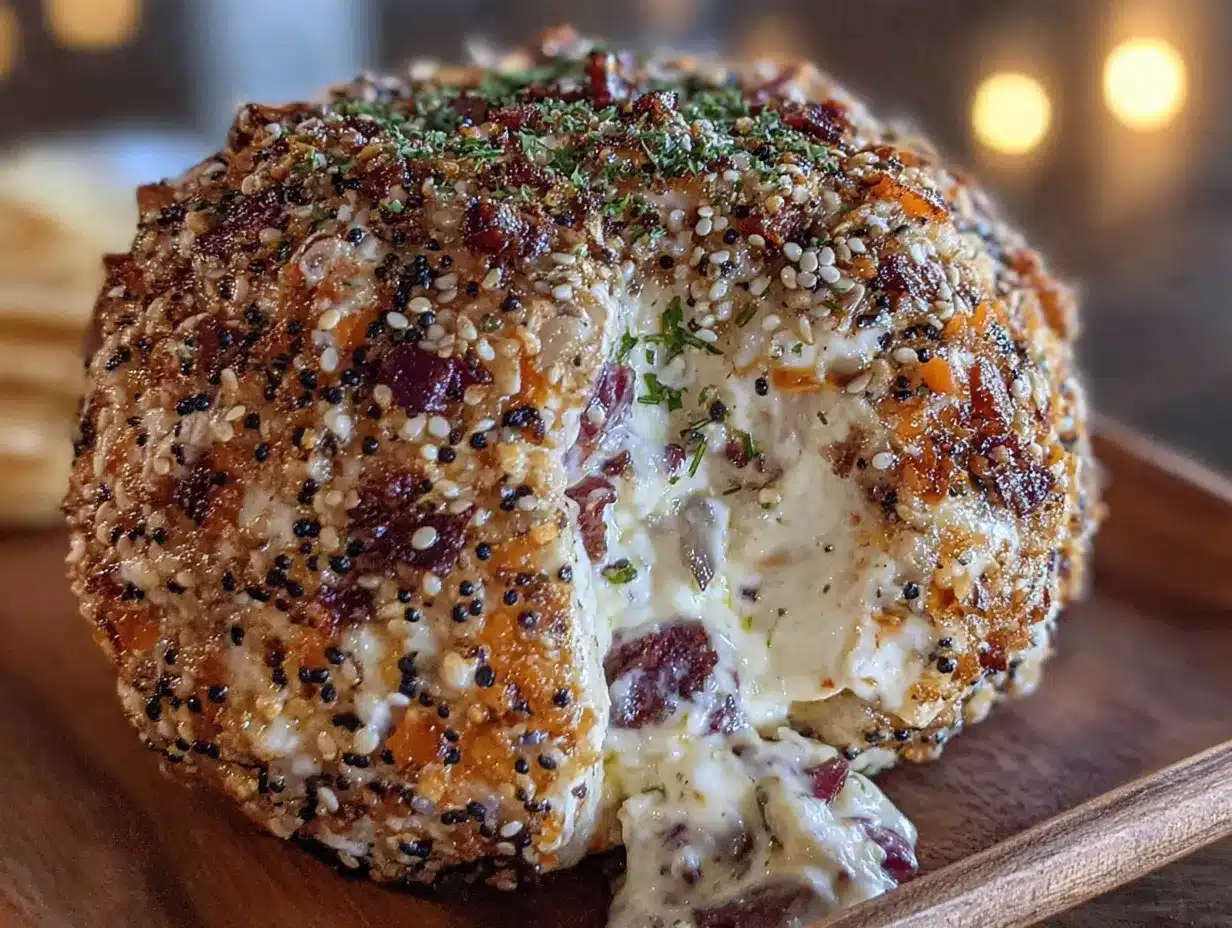
I remember the Tuesday night I finally nailed it. I was standing in my kitchen, crackers in hand, and I just knew. The texture was perfect—creamy but with those little chewy bits of beef throughout. The everything seasoning on the outside gave it that nice crunch. I actually texted my sister a photo, which is basically my version of a victory lap. If you’ve ever had a recipe haunt you from a restaurant that no longer exists, you know that feeling when you finally crack the code. This is that recipe for me, and now it can be yours too.
Why You’ll Love This Recipe
Let me be straight with you—this dried beef cheese ball is the kind of recipe that saves you on a busy weeknight when you’ve got ten minutes to throw something together for a gathering. It’s quick, it’s easy, and it tastes like you actually put in effort. Here’s why it works so well:
- Quick and Easy: From start to finish, you’re looking at about 15 minutes of active work. Toss everything in a bowl, mix it up, shape it, and roll it in seasoning. That’s it.
- Simple Ingredients: Cream cheese, dried beef, green onions, Worcestershire sauce, and everything bagel seasoning. Chances are you’ve got most of these in your fridge and pantry right now.
- Perfect for Last-Minute Gatherings: Someone texts you at 4 PM asking if you can bring something to a party at 6? This is your answer. No question.
- Crowd-Pleaser: I’ve brought this to everything from Super Bowl parties to book club meetings, and it always disappears first. People hover around it.
- Make-Ahead Friendly: You can prep this the night before and just roll it in the seasoning right before serving. It actually tastes better after it sits in the fridge for a few hours.
What makes this version different from all the other cheese ball recipes out there? It’s the balance. The dried beef adds this savory, almost smoky depth, but the cream cheese keeps it smooth and mild. The green onions give it a fresh bite, and that everything seasoning on the outside? Pure genius. It’s not just another cheese ball—it’s the one people will ask you for the recipe. And honestly, I love that it feels special without requiring any real culinary skills. You don’t need to be a chef to pull this off. You just need a mixing bowl and a good attitude.
What Ingredients You Will Need
This recipe uses simple, everyday ingredients that come together to create something way more impressive than the sum of its parts. Most of these are pantry or fridge staples, which is exactly what you want when you’re in a pinch.
- Cream Cheese: 16 ounces (two 8-ounce blocks), softened to room temperature. This is non-negotiable—cold cream cheese will give you lumpy results. I usually let mine sit on the counter for about 30 minutes before I start. I prefer Philadelphia brand for the creamiest texture, but any full-fat block cream cheese works well.
- Dried Beef: 4 ounces, finely chopped. Look for it near the canned meats or in the deli section. I like the Armour brand, but store brands work fine too. Here’s a tip: give it a quick rinse under cold water and pat it dry before chopping. This cuts down on the saltiness and gives you a more balanced flavor.
- Green Onions: 3 to 4, thinly sliced (both white and green parts). They add a mild onion flavor and a nice pop of color. If you’re in a rush, you can use a tablespoon of dried chives instead, but fresh really is better here.
- Worcestershire Sauce: 1 teaspoon. This adds that umami depth that makes people wonder what’s in it. Don’t skip it—it’s a small amount but it does a lot of work.
- Garlic Powder: 1/2 teaspoon. Not garlic salt—garlic powder. You want the flavor without the extra sodium.
- Onion Powder: 1/2 teaspoon. Same deal here. These two powders work together to build a savory backbone.
- Black Pepper: 1/4 teaspoon, freshly ground if you’ve got it. You won’t need salt because the dried beef and everything seasoning bring plenty.
- Everything Bagel Seasoning: 3 to 4 tablespoons, for rolling. You can buy this pre-made or make your own with sesame seeds, poppy seeds, dried garlic, dried onion, and salt. I’ve used both Trader Joe’s and store-brand versions, and they all work great.
For serving, grab a box of good crackers—I like buttery Ritz or sturdy wheat crackers. You could also serve it with sliced baguette, pretzel crisps, or fresh veggie sticks if you’re keeping it low-carb. The cheese ball itself is naturally gluten-free, so just watch what you serve it with.
Equipment Needed
You don’t need a fancy kitchen to make this cheese ball. Here’s what you’ll actually use:
- Mixing Bowl: A medium-sized bowl works perfectly. I use my grandmother’s old ceramic one, but any bowl will do.
- Hand Mixer or Stand Mixer: A hand mixer makes quick work of softening the cream cheese and getting everything smooth. If you don’t have one, a sturdy wooden spoon and some elbow grease will get the job done—just make sure your cream cheese is really soft.
- Rubber Spatula: For scraping down the sides of the bowl and getting every last bit of that creamy goodness.
- Plastic Wrap: You’ll wrap the cheese ball in this before it goes in the fridge. It keeps it from picking up any weird fridge smells.
- Cutting Board and Knife: For chopping the dried beef and slicing the green onions. A sharp knife makes this go faster.
- Small Plate or Shallow Dish: For spreading out the everything seasoning so you can roll the cheese ball in it.
If you’re on a budget, skip the hand mixer and just mash everything together with a fork. It takes a couple extra minutes, but it works. I’ve done it both ways, and honestly? The texture is pretty much the same. The key is letting that cream cheese soften properly—nothing ruins the vibe like cold, lumpy cream cheese.
Preparation Method
Alright, let’s get into it. This comes together fast, so have everything ready before you start.
- Soften the cream cheese: Take your two blocks of cream cheese out of the fridge about 30 minutes before you start. You want them soft enough that a finger pressed into the top leaves an indent. If you’re short on time, unwrap the blocks and microwave them on low power for 15 to 20 seconds. Just be careful—you want them soft, not melted.
- Prepare the dried beef: While the cream cheese softens, take the dried beef out of its package. Give it a quick rinse under cool running water to remove some of the salt. Pat it dry with paper towels. Then finely chop it into small pieces—think pea-sized or smaller. You don’t want big chunks of beef in your cheese ball, just little bits throughout.
- Slice the green onions: Rinse your green onions and pat them dry. Trim off the root ends and any wilted tops. Slice them thinly, going all the way from the white part up into the green. Set aside about a tablespoon of the green tops for garnish if you’re feeling fancy.
- Mix the base: Put the softened cream cheese in your mixing bowl. Add the Worcestershire sauce, garlic powder, onion powder, and black pepper. Beat with your hand mixer on medium speed until it’s smooth and fluffy—about 2 minutes. Scrape down the sides of the bowl with your spatula halfway through.
- Add the mix-ins: Add the chopped dried beef and sliced green onions to the cream cheese mixture. Stir them in with your spatula until everything is evenly distributed. Take a taste—it should be savory and creamy with little bursts of beef and onion. Adjust the pepper if you want more kick.
- Shape the cheese ball: Lay out a large piece of plastic wrap on your counter. Scoop the cheese mixture onto the center of the plastic wrap. Use your hands (I know, it’s messy) to gather it into a ball shape. Pull the plastic wrap up around it and twist the top to help form a nice round shape. Don’t worry if it’s not perfect—you’ll fix it later.
- Chill it: Put the wrapped cheese ball in the refrigerator for at least 2 hours. Overnight is even better. This step is crucial—it firms up the cheese so you can roll it in the seasoning without it falling apart. Trust me, I’ve tried skipping this step and ended up with a seasoned mess.
- Roll in seasoning: When you’re ready to serve, spread the everything bagel seasoning on a small plate. Unwrap the chilled cheese ball and roll it gently in the seasoning, pressing lightly so it sticks. Use your hands to pat on any extra seasoning on any bare spots.
- Garnish and serve: If you saved some green onion tops, sprinkle them over the top for a pop of color. Place the cheese ball on a serving plate surrounded by your crackers of choice. Let it sit at room temperature for about 15 minutes before serving—it spreads better when it’s not straight out of the fridge.
Cooking Tips & Techniques
After making this cheese ball more times than I care to count, I’ve picked up a few tricks that make the process smoother and the results better. Let me share what I’ve learned the hard way.
Don’t skip rinsing the dried beef. I made this mistake exactly once. The dried beef is packed in salt, and if you don’t rinse it, your cheese ball will taste like a salt lick. A quick rinse under cold water and a good pat dry makes all the difference. Trust me on this one.
Let the cream cheese really soften. I know I’ve said this already, but it’s worth repeating. Cold cream cheese doesn’t mix well, and you’ll end up with little white lumps throughout your cheese ball. If you forget to take it out of the fridge ahead of time, cut it into smaller cubes and let those sit for 15 minutes. They soften faster that way.
Chill time is non-negotiable. I get it—you’re in a rush. But if you try to roll a warm cheese ball in everything seasoning, you’ll end up with a sticky, seasoned mess on your hands and a sad-looking cheese ball. Give it those 2 hours in the fridge. Your future self will thank you.
Use a light hand with the seasoning. The everything bagel seasoning has salt in it, so you don’t need to go crazy. Just a nice even coating on the outside is enough. You can always add more, but you can’t take it away.
Make it ahead for better flavor. This cheese ball actually improves overnight. The flavors meld together, and the dried beef softens slightly, creating a more cohesive texture. I often make mine the day before a party, and it’s always the best version.
Variations & Adaptations
One of the best things about this recipe is how easy it is to tweak. Here are some variations I’ve tried and loved:
Spicy Kick: Add 1/4 teaspoon of cayenne pepper or a dash of hot sauce to the cream cheese mixture. I did this for a Super Bowl party, and it was a hit. The heat plays nicely with the savory dried beef.
Herb Garden: Swap the green onions for 2 tablespoons of fresh chopped chives, parsley, or dill. I made this version for Easter brunch, and it felt a little more elegant. The fresh herbs brighten up the whole thing.
Bacon Lover’s: Cook 4 strips of bacon until crispy, crumble them up, and mix them in along with the dried beef. Yes, it’s extra. Yes, it’s worth it. I did this once for a guys’ night gathering, and the cheese ball was gone in 20 minutes.
Nutty Crunch: Instead of everything seasoning, roll the cheese ball in toasted chopped pecans or walnuts. The nutty crunch is a nice contrast to the creamy cheese. This works especially well during the holidays.
Low-Carb Friendly: Serve the cheese ball with cucumber rounds, celery sticks, or bell pepper strips instead of crackers. The cheese ball itself is naturally low-carb, so this is an easy swap.
Dairy-Free Option: Use plant-based cream cheese. I’ve tried this with Kite Hill brand, and it works surprisingly well. Just make sure it’s softened properly, as dairy-free cream cheese can be a bit firmer.
Serving & Storage Suggestions
This cheese ball is versatile, so let’s talk about how to serve it and keep it fresh.
Serving Temperature: Take the cheese ball out of the fridge about 15 to 20 minutes before serving. It spreads much more easily when it’s slightly softened. If it’s too cold, it’ll tear your crackers apart. Too warm, and it gets a bit messy. That sweet spot is worth waiting for.
What to Serve With It: Classic buttery crackers are my go-to, but this cheese ball is also amazing with pretzel crisps, sliced baguette, pita chips, or fresh veggies like cucumber rounds, carrot sticks, and bell pepper strips. For a party, I like to put out a variety so everyone can find something they like.
Storage: Leftover cheese ball? Wrap it tightly in plastic wrap and store it in the fridge for up to 5 days. The everything seasoning might get a little soft on the outside, but the flavor is still great. You can even re-roll it in fresh seasoning before serving leftovers.
Freezing: You can freeze the unseasoned cheese ball for up to 2 months. Wrap it well in plastic wrap and then foil. When you’re ready to use it, thaw it overnight in the fridge, then roll it in fresh everything seasoning. I’ve done this for holiday prep, and it works like a charm.
Flavor Development: Here’s something interesting—the cheese ball actually tastes better on day two. The flavors have time to meld, and the dried beef softens just a bit. So don’t worry if you’re making it ahead. It’s actually the smart move.
Nutritional Information & Benefits
Let’s be real—this is a treat, not a health food. But here’s what you’re looking at per serving (about 2 tablespoons, assuming 16 servings):
- Calories: Approximately 150
- Fat: 13g (mostly from the cream cheese)
- Protein: 6g (thanks to the dried beef)
- Carbohydrates: 3g
- Sodium: 320mg
The cream cheese provides calcium and a bit of vitamin A, while the dried beef adds protein and iron. The green onions offer a small dose of vitamin K and antioxidants. Is this going to replace your salad? No. But as an occasional appetizer, it fits into a balanced diet just fine.
If you’re watching your sodium, remember to rinse the dried beef well and go easy on the everything seasoning. You can also use reduced-fat cream cheese, though the texture will be slightly less creamy. I’ve tried it both ways, and I personally prefer the full-fat version for special occasions. It just tastes more indulgent.
This recipe is naturally gluten-free, which makes it a great option for guests with celiac disease or gluten sensitivity. Just be sure to serve it with gluten-free crackers or veggies. It’s also low-carb and keto-friendly as long as you skip the crackers.
Conclusion
This quick dried beef cheese ball with everything seasoning is the appetizer that keeps on giving. It’s fast enough for a last-minute gathering but impressive enough to be the star of the snack table. After all those attempts to recreate Millie’s version, I can honestly say this one is better—and I don’t say that lightly.
What I love most about this recipe is how forgiving it is. You can tweak the seasonings, swap the mix-ins, change up the coating, and it still comes out delicious. It’s the kind of recipe that builds your confidence in the kitchen because it’s so hard to mess up. And on a busy weeknight when you’re running on fumes, that’s exactly what you need.
I’d love to hear how yours turns out. Did you add bacon? Try it with fresh herbs? Serve it with something unexpected? Drop a comment below and let me know. And if you’re looking for another quick appetizer that saves the day, check out this quick spinach artichoke dip that comes together in about the same time. Happy snacking, friends!
Frequently Asked Questions
Can I make this cheese ball without a hand mixer?
Absolutely. Just make sure your cream cheese is really soft, and use a sturdy spoon or fork to mash everything together. It’ll take a couple extra minutes, but the texture will be just fine. I’ve done it both ways plenty of times.
How far ahead can I make this cheese ball?
You can make it up to 5 days in advance if you keep it wrapped tightly in the fridge. Just wait to roll it in the everything seasoning until right before serving so the coating stays crunchy. The flavor actually gets better after a day or two.
Can I use low-fat cream cheese?
You can, but the texture won’t be as creamy and rich. Low-fat cream cheese has more water content, which can make the cheese ball a bit softer and harder to shape. If you’re watching calories, it’s a fine swap, just know the results will be slightly different.
What can I use instead of everything bagel seasoning?
Toasted sesame seeds, poppy seeds, chopped nuts, or fresh herbs all work great as coatings. You can also just leave it plain—the cheese ball is delicious on its own. I’ve rolled it in crushed pretzels before too, and that was a fun twist.
How do I keep the cheese ball from sticking to my hands when shaping it?
Lightly wet your hands with cold water before shaping. The water creates a barrier between the cheese and your skin, making it much easier to form a nice ball. You can also use the plastic wrap method I described in the recipe—it’s less messy and works perfectly.
Pin This Recipe!
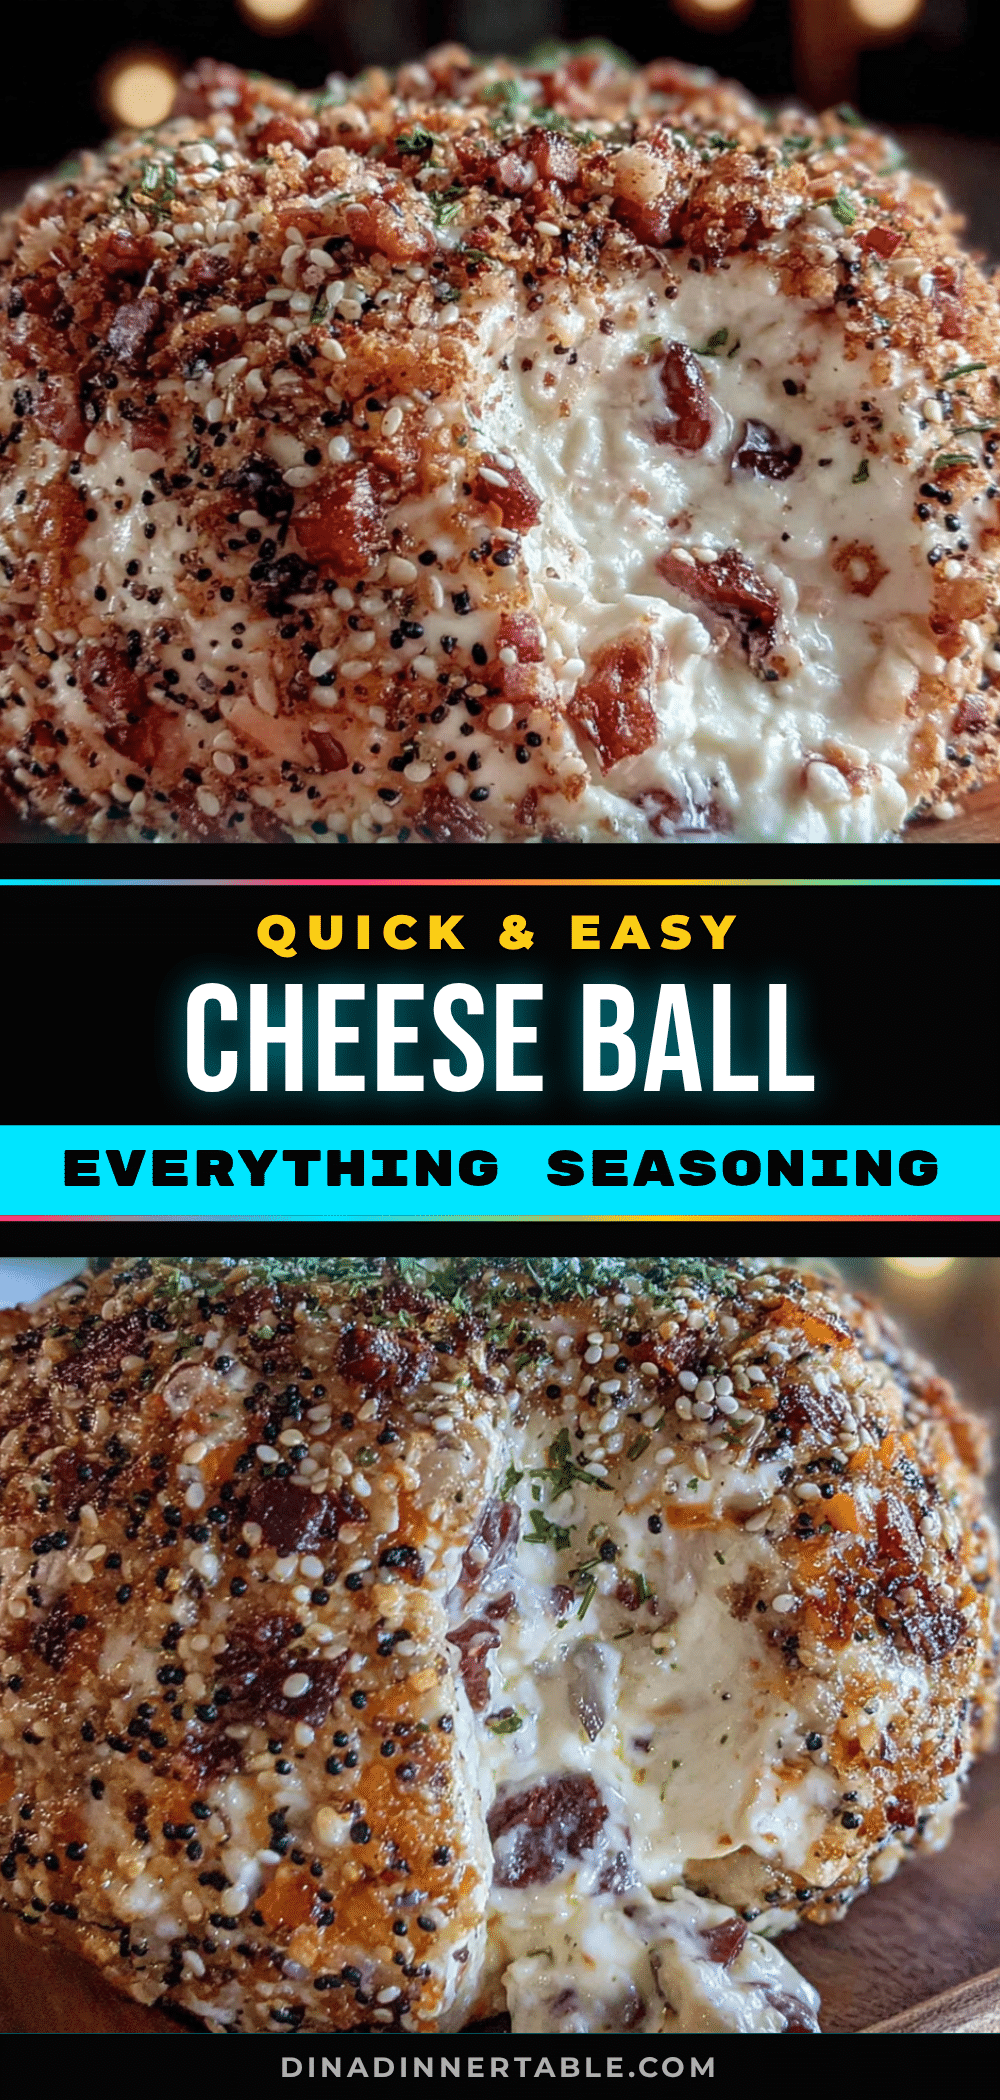
Quick Dried Beef Cheese Ball with Everything Seasoning

A creamy, savory cheese ball loaded with dried beef and green onions, rolled in everything bagel seasoning. Perfect for last-minute gatherings and always a crowd-pleaser.
- Prep Time: 15 minutes
- Cook Time: 0 minutes
- Total Time: 2 hours 15 minutes (includes chilling)
- Yield: 16 servings 1x
- Category: Appetizer
- Cuisine: American
Ingredients
- 16 ounces cream cheese, softened to room temperature
- 4 ounces dried beef, finely chopped
- 3 to 4 green onions, thinly sliced
- 1 teaspoon Worcestershire sauce
- 1/2 teaspoon garlic powder
- 1/2 teaspoon onion powder
- 1/4 teaspoon black pepper, freshly ground
- 3 to 4 tablespoons everything bagel seasoning
Instructions
- Soften the cream cheese: Take the cream cheese out of the fridge about 30 minutes before starting. It should be soft enough that a finger pressed into the top leaves an indent. If short on time, microwave on low power for 15 to 20 seconds.
- Prepare the dried beef: Rinse the dried beef under cool running water to remove some salt. Pat dry with paper towels. Finely chop into small pieces (pea-sized or smaller).
- Slice the green onions: Rinse and pat dry. Trim off root ends and wilted tops. Slice thinly from white to green parts. Set aside about 1 tablespoon of green tops for garnish if desired.
- Mix the base: In a mixing bowl, combine softened cream cheese, Worcestershire sauce, garlic powder, onion powder, and black pepper. Beat with a hand mixer on medium speed until smooth and fluffy, about 2 minutes. Scrape down sides halfway through.
- Add the mix-ins: Fold in chopped dried beef and sliced green onions with a rubber spatula until evenly distributed. Taste and adjust pepper if needed.
- Shape the cheese ball: Lay a large piece of plastic wrap on the counter. Scoop the cheese mixture onto the center. Use your hands to gather it into a ball shape. Pull the plastic wrap up around it and twist the top to help form a round shape.
- Chill it: Refrigerate the wrapped cheese ball for at least 2 hours, or overnight for best results.
- Roll in seasoning: When ready to serve, spread everything bagel seasoning on a small plate. Unwrap the chilled cheese ball and roll gently in the seasoning, pressing lightly to adhere. Pat on extra seasoning to cover bare spots.
- Garnish and serve: Sprinkle reserved green onion tops over the top if desired. Place on a serving plate surrounded by crackers. Let sit at room temperature for 15 minutes before serving for easier spreading.
Notes
Rinse the dried beef to reduce saltiness. Let cream cheese soften fully for a smooth texture. Chilling is essential for easy rolling. The cheese ball tastes even better after a day in the fridge. For a dairy-free option, use plant-based cream cheese.
Nutrition
- Serving Size: 2 tablespoons
- Calories: 150
- Sugar: 1
- Sodium: 320
- Fat: 13
- Saturated Fat: 8
- Carbohydrates: 3
- Protein: 6
Keywords: dried beef cheese ball, everything seasoning cheese ball, quick appetizer, party appetizer, no-bake appetizer, gluten-free appetizer